Page is loading ...

Contents Page:
Preface and General Safety Information
Part 1: Operating Instructions Cl. 743-221
1. Product Description
. . . . . . . . . . . . . . . . . . . . . . . . . . . . . . . . . . . . . . . . . 3
1.1 Proper Use . . . . . . . . . . . . . . . . . . . . . . . . . . . . . . . . . . . . . . . . . . . . . . . 3
1.2 Short Description . . . . . . . . . . . . . . . . . . . . . . . . . . . . . . . . . . . . . . . . . . . . 4
1.3 Technical Data . . . . . . . . . . . . . . . . . . . . . . . . . . . . . . . . . . . . . . . . . . . . . 4
1.4 Optional Equipment . . . . . . . . . . . . . . . . . . . . . . . . . . . . . . . . . . . . . . . . . . 5
2. Operating the Sewing Unit
. . . . . . . . . . . . . . . . . . . . . . . . . . . . . . . . . . . . . 5
2.1 Tilting the Machine Head Up . . . . . . . . . . . . . . . . . . . . . . . . . . . . . . . . . . . . . 5
2.2 Turning On - Quick Stop - Restarting . . . . . . . . . . . . . . . . . . . . . . . . . . . . . . . . . 6
2.3 Threading the Needle Thread . . . . . . . . . . . . . . . . . . . . . . . . . . . . . . . . . . . . . 7
2.4 Setting the Needle Thread Tension . . . . . . . . . . . . . . . . . . . . . . . . . . . . . . . . . . 7
2.5 Thread Monitor for the Needle Thread . . . . . . . . . . . . . . . . . . . . . . . . . . . . . . . . 8
2.6 Setting the Thread Regulator . . . . . . . . . . . . . . . . . . . . . . . . . . . . . . . . . . . . . 9
2.7 Winding the Underthread . . . . . . . . . . . . . . . . . . . . . . . . . . . . . . . . . . . . . . . 10
2.8 Changing the Bobbin . . . . . . . . . . . . . . . . . . . . . . . . . . . . . . . . . . . . . . . . . 11
2.8.1 Counter for the Control of the Underthread Reserve . . . . . . . . . . . . . . . . . . . . . . . . 12
2.9 Remaining Thread Monitor . . . . . . . . . . . . . . . . . . . . . . . . . . . . . . . . . . . . . . 13
2.10 Setting the Underthread Tension . . . . . . . . . . . . . . . . . . . . . . . . . . . . . . . . . . . 14
2.11 Changing the Needle . . . . . . . . . . . . . . . . . . . . . . . . . . . . . . . . . . . . . . . . . 15
2.12 Changing the Form Set . . . . . . . . . . . . . . . . . . . . . . . . . . . . . . . . . . . . . . . . 16
2.13 Work Area, Angle and Length . . . . . . . . . . . . . . . . . . . . . . . . . . . . . . . . . . . . . 18
2.14 Setting the Insertion Depth of the Folding Table . . . . . . . . . . . . . . . . . . . . . . . . . . 19
3. Setting the Controls
. . . . . . . . . . . . . . . . . . . . . . . . . . . . . . . . . . . . . . . . . 20
4. Sewing
. . . . . . . . . . . . . . . . . . . . . . . . . . . . . . . . . . . . . . . . . . . . . . . . . 22
5. Maintenance
. . . . . . . . . . . . . . . . . . . . . . . . . . . . . . . . . . . . . . . . . . . . . . 23
5.1 Cleaning . . . . . . . . . . . . . . . . . . . . . . . . . . . . . . . . . . . . . . . . . . . . . . . . 23
5.2 Oil Lubrication . . . . . . . . . . . . . . . . . . . . . . . . . . . . . . . . . . . . . . . . . . . . . 24
Home


1. Product Description
1.1 Proper Use
The
743-221
is a sewing unit which can properly be used for the
sewing of light to medium weight material.
Such material is, as a rule, material made up of textile fibers or of
leather. These materials are used in the garment, furniture and
automobile upholstry industries. Further, it may also be possible to
execute so-called technical seams with this sewing unit. Here,
however, the operator must in any case (Dürkopp Adler will be glad to
help) make an evaluation of the possible dangers since such
applications are, on the one hand, relatively seldom and, on the other,
the variety is immense. Dependent on the results of this evaluation, it
may be necessary to take suitable safety precautions.
Generally, only dry material may be worked with this sewing unit. The
material may not be thicker than 3 mm. The material may contain no
hard objects.
The seam is generally made with textile fibers of dimensions up to
40/NeB (cotton yarns), 65/2 (synthetic yarns) or 65/2 Nm (covering
twists). Those wanting to use other threads must first evaluate the
dangers arising therefrom and, if necessary, take appropriate safety
measures.
This sewing unit may only be installed and operated in dry and clean
premises. If the sewing unit is used on other premises which are not
dry and clean, further measures, which are to be agreed upon, may be
necessary (see EN 60204-3-1:1990).
We, as a manufacturer of industrial sewing machines, assume that at
least semi-skilled operating personnel will be working on our products
so that all normal operations and, where applicable, their dangers are
presumed to be known.
Noise Level Value Lc
Workstation-specific emmission value to DIN 45635-48-B-1
Number of stitches: 4.800 min
-1
Stitch length: 2,2 mm
Seam length: 70 mm
Sewing cycle: 2,5 s ON and 1,0 s OFF
Material: G1 DIN 23328 2-play
Measuring point to DIN 4895 Part 1
X = 0 mm Y = -400 mm Z = 300 mm
Lc = 82 dB (A)
3

1.2 Short Description
The
DÜRKOPP 743-221
is a sewing unit for the automated sewing
single-point darts
with straight or curved seam form and for the
sewing of
pleats
.
•
The unit is equipped with a machine head in lockstitch execution.
•
A form set appropriate to the seam form holds and guides the
material.
•
The seam length control occurs, as desired, via a light barrier or
through programming.
•
Seam securing at the seam beginning and seam end through bar
tacking or stitch condensation in the material
•
Thread trimmming system: Controlled chain shears
•
Transport carriage drive via step motor.
•
The complete control of the sewing unit occurs via a
microcomputer. It assumes the control functions, monitors the
sewing process and signals operating errors and malfunctions.
•
Electronic thread monitor prevents a restarting of the sewing
sequence by thread breakage or used-up threads.
1.3 Technical Data
Machine head: Class 935 - 271 - 710
Needle system: 134 Serv 7
Needle thickness: 80 - 100
Yarns: 40 NeB, 65/2 Nm
Stitch type: Single-needle lockstitch
Number of stitches: Sewing: 3.800; 3.900; 4.000 - 4.800 / min
Bar tacking: 1 000 - 3 000 / min
Advance: 3 000 - 4 000 / min
Thread chain: 1 000 / min
Stitch length: Advance: 1,9; 2,2; 2,5; 2,8 mm
Normal seam: 1,9 - 2,8 mm
Seam tacking: 2,2 mm
Stitch condensation:0,5; 0,8; 1,1; a. 1,4 mm
Sewing length: 45 - 150 mm
Folding table: 0 - 10°, adjustable
Operating pressure: 6 bar
Air consumption approx. 2 NL no blow cycle
per work cycle: approx. 12 NL with short blow cycle
Nominal voltage:
9880 743002
3 ~ 380 - 400 V + N, 50 Hz
9880 743003
3 ~ 220 - 240 V, 50 Hz
9880 743004
3 ~ 220 - 240 V, 60 Hz
The sewing unit is delivered with
one
of
the listed
voltage sets
appropriate to the
nominal voltage.
4

1.4 Optional Equipment
0794 013222
Bundle clamp with slewing arm and holding pipe.
0794 000091
Placement table (small).
(only in conjunction with the bundle clamp)
0794 000332
Smoother device for smoothing the blown-out
sewing pieces.
(only in conjunction with the bundle clamp)
0794 013333
Blower pipe from above or from the right.
0794 013444
Placement table
(when using in-house bundle clamp carriages)
0797 003031
Compressed air connection hose, coupling plug,
coupling socket and hose nozzle.
2. Operating the Sewing Unit
2.1 Tilting the Machine Head Up
The machine head can be tilted up for maintenance work.
Caution Risk of Injury !
Turn the main switch off.
Tilt the machine head up only with the sewing unit turned off.
–
Swing the placement table 1, bundle clamp and smoother to the
side.
–
Bring the form set 3 into the left end position.
–
Carefully tilt the machine head up at the lever 2.
The machine head is held in this position through the location of
the center of gravity.
2
3
1
5

2.2 Turning On - Quick Stop - Restarting
Caution Risk of Injury !
Do not reach into the area of moving machine parts.
Turning on
–
Turn the main switch 2 on.
The controls are initialized.
The sewing unit requests a reference run.
–
Press the "
Σ
" key.
The reference run is conducted.
The sewing unit is operational.
Turning off
–
Turn the main switch 2 off.
The sewing unit is separated from the power supply.
It is
not
operational.
Quick stop
To immediately stop the sewing unit by operating errors, needle
breakage, thread breakage, etc. the "
STOP
" key on the controls 1
must be pressed.
–
Press the "
STOP
" key.
All running procedures of the sewing unit are immediately stopped!
The sewing unit is returned to the same status which it is in after
being turned on.
Restarting
ATTENTION !
The restarting of the sewing unit after a quick stop may only occur
after the corresponding malfunction has been corrected.
–
Turn main switch 2 off.
–
Correct the malfunction.
–
Turn main switch 2 on.
The sewing unit is ready to start again.
12
6

2.3 Threading the Needle Thread
Caution Risk of Injury !
Turn the main switch off.
Thread the needle thread only with the sewing unit turned off.
–
Thread the needle thread as shown in the illustration.
2.4 Setting the Needle Thread Tension
Pre-tensioning 1
If the sewing unit is on, than the maintension is open. For the save
function of the needle thread monitor a residual tension of the needle
thread is necessary.
–
Set pre-tensioning 1.
If the needle thread is fixed by the thread trimmer than the thread
clamp 3 should be hold in its highest position by the pre-tensioning.
Maintension 2
The recommended needle thread tension ( app. 60 - 80 g) is the result
of pre-tensioning 1 and maintension 2.
–
Turn knurled nut 1 appropriately.
Increase tension = Turn knurled nut 1 clockwise
Decrease tension = Turn knurled nut 1 counterclockwise
1
2
3
7

2.5 Thread Monitor for the Needle Thread
The switch
b14
monitors the needle thread.
Function
–
After a breaking of the needle thread the thread guide 1 drops
down.
The switch
b14
remains unoperated.
–
The machine head positions in position 2 (needle up).
The display of the control unit shows the symbol "
-x-
" (needle
thread break).
Caution Risk of Injury !
Before threading the needle thread turn the main switch off.
Renewed starting is only possible after turning the main switch off and
on again.
–
Thread the needle thread again and lead it through the thread
clamp.
–
Turn the main switch on.
–
Start a new sewing sequence.
b14
1
8

2.6 Setting the Thread Regulator
The needle thread quantity required for stitch formation is regulated
with the thread regulator 2.
Only a precisely set thread regulator guarantees an optimal sewing
result.
The setting of the thread regulator is dependent on the following
factors:
–
Stitch length
–
Material thickness
–
Characteristics of the sewing yarn used
With a correct setting, the needle thread loop 6 should glide over the
hook without excess and with a little tension.
Caution Risk of Injury !
Turn the main switch off.
Set the thread regulator only with the sewing unit turned off.
–
Loosen screw 5.
–
Set thread regulator 2.
The vertical wire 3 in conjunction with scale 4 serves as a setting
aid (Guideline value: 2.5).
–
Tighten screw 5.
Setting note:
With a correct setting of the thread regulator the following must apply:
–
When the thread loop 6 passes the maximum girth of the hook, the
thread controller spring 1 must be pulled approx. 1 mm downward
out of its upper end position.
The 1 mm dimension is a guideline. Dependent on the tension of
the thread controller spring, it can be greater or smaller.
6
1 2 3 4 5
2
9

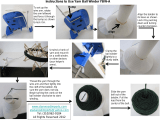
2.7 Winding the Underthread
Caution Risk of Injury !
Turn the main switch off.
Thread the underthread for winding only with the sewing unit
turned off.
–
For a secure functioning of the remaining thread monitor remove
thread residue from the bobbin hub before winding.
–
Thread the underthread as shown in the illustrations.
–
Wind the underthread clockwise in the reserve groove 6 of the
bobbin hub.
–
Place the bobbin on the bobbin winder shaft 2.
–
Pull the thread end through the cutting clamp 3 and cut off.
–
Swing the bobbin winder flap 4 against the bobbin.
–
Set the bobbin thread tension 1.
The underthread should be wound with the least possible tension.
–
Turn the main switch on.
–
Start the sewing sequence.
–
The bobbin winder turns itself off after reaching the set bobbin fill
capacity.
For setting the bobbin fill capacity see the Service Instructions.
1 2 3
4
10

2.8 Changing the Bobbin
Caution Risk of Injury !
Turn the main switch off.
Change the underthread bobbin only with the sewing unit turned off.
Removing the empty bobbin
–
Lift bobbin case flap 1.
–
Take out the bobbin case top 7 with bobbin.
–
Remove empty bobbin from the bobbin case top 7.
Inserting a full bobbin
–
Insert the full bobbin in the bobbin case top 7.
–
Pull the underthread through slit 6 under the tension spring 3 until
in the drilled hole 4.
–
Pull the underthread approx. 5 cm out of the bobbin case top 7.
The bobbin 5 must turn in the direction of the arrow when the
thread is pulled off.
–
Insert the bobbin case top 7 again.
–
Close the bobbin case flap 1.
–
Turn the main switch on.
–
Start a new sewing sequence.
ATTENTION !
For a sure functioning of the remaining thread monitor clean the
lenses of the reflecting light barrier 2 with a
soft
cloth at every bobbin
change.
12
5 6 7
34
11

2.8.1 Counter for Control of the Underthread Reserve
The decrementer, which can be preset in program
P41,
monitors the
underthread reserve.
It is decreased by the value 1 after every 10 stitches.
The height of the initial value to be selected depends
–
on the thickness of the underthread used
–
on the amount of thread wound onto the bobbin.
Example:
With an 100/2 underthread 18 000 stitches can be sewn with one
bobbin filling.
The initial value to be set thus results from:
18 000 stitches : 10 = 1 800 stitches
The exact initial value to be set can best be arrived at during operation:
–
Insert a full bobbin.
–
Preset the initial value in program
P41
.
See Short Description Microcontrol.
ATTENTION !
The underthread monitoring through the counter is turned off by
setting the initial value to
0000
.
–
Start the sewing sequence.
–
If, when the counter reaches
0000,
there is still a large quantity of
thread remaining on the the bobbin, then the set initial value can
be increased.
–
When the counter reaches
0000
the already begun seam is still
securely sewn to the end.
The display shows the symbol (bobbin empty).
The sewing unit can not be started.
–
Turn the main switch off.
Caution Risk of Injury !
Turn the main switch off.
Change the bobbin only with the sewing unit turned off.
In order to start a new sewing sequence after a bobbin change, it is
essential that the main switch be turned off.
–
Change the bobbin.
–
Turn the main switch on.
When the unit is turned on the initial value of the counter is
automatically loaded.
Display of the counter for the underthread reserve
The monitoring of the underthread counter is turned on or off by
program 44.
12

2.9 Remaining Thread Monitor
The remaining thread monitor monitors the thread reserve on the the
underthread bobbin with the infrared reflecting light barrier 1.
Function
–
After a certain number of seams the underthread reserve on the
bobbin is used up.
–
The light beam transmitted from light barrier 1 is reflected by the
exposed reflecting surface 2 on the bobbin hub.
–
The display of the controls shows the message " Bobbin Empty ".
–
The seam is securely ended with the thread reserve found in the
reserve groove.
Caution Risk of Injury !
Turn the main switch off.
Change the underthread bobbin only with the sewing unit turned off.
–
Turn the main switch off.
–
Change the bobbin.
–
At every bobbin change clean the lenses of the light barrier with a
soft
cloth.
–
Turn the main switch on.
–
Start a new sewing sequence.
1
2 3
13

2.10 Setting the Underthread Tension
The necessary underthread tension should be created by the tension
spring 1.
Caution Risk of Injury !
Turn the main switch off.
Set the brake spring 1 and the tension spring 3 only with the sewing
unit turned off.
–
Place the bobbin in bobbin case top 1 and thread the underthread.
–
Set the tension spring 1 at adjusting screw 2.
The underthread tension should be 20 - 30g.
The bobbin case 6 should slowly lower under its own weight (see
right illustration).
1 2
3
14

2.11 Changing the Needle
Caution Risk of Injury !
Turn the main switch off.
Change the needle only with the sewing unit turned off.
–
Loosen screw 1 and remove the needle.
–
Push the new needle into the drilled hole of the needle bar 2 up to
the stop.
Attention!
Viewed from the operator side of the sewing unit the furrow 3 of
the needle must show to the right, that is, to the hook point (see
sketch).
–
Tighten screw 1.
ATTENTION !
After a change to another needle thickness the clearance of the hook
to the needle must be corrected (see Service Instructions).
The non-observance of the above correction can lead to following
faults:
–
Change to a thinner needle: - Missing stitches
- Damage to the thread
–
Change to a thicker needle: - Damage to the hook point
- Damage to the needle
3
1
2
15

2.12 Changing the Form Set
A form set corresponding to the desired seam form must be inserted.
Form set 0793 078001 = Straight seam
Form set 0793 078002 = Curved seam
Form set 0793 078034 = Curved seam for pleats
Form set 0793 078xxx = Customer-specific version
Caution Risk of Injury !
Turn the main switch off.
The form set may only be changed with the sewing unit turned off.
Taking the form set out
–
Turn the handwheel until the needle lies in the 2nd position
(OT)
.
–
Push the form set into the left end position.
–
Turn handle 1 approx. 90° counterclockwise.
–
Lift the form set 2 on the left side and carefully loosen from the
transport carriage.
–
Remove the form set.
Inserting the form set
–
Turn the handwheel until the needle lies in the 2nd position
(OT)
.
–
Push the transport carriage into the left end position.
–
Carefully place the right side of form set 2 onto the transport
carriage.
–
Turn handle 1 approx. 90° counterclockwise and place the form set
completely on the the transport carriage.
–
Turn handle 1 back.
The form set is locked and sits firmly on the transport carriage.
–
Position the press-on cylinder 4 with the guide roller on the guide
curve 3.
–
Push the form set to the right stop.
12
34
16

Work Area for Darts
Example for form set 0793 078001
1
Dart depth max. 2.1 cm at 10°, length 9.5 cm
3
Form set 0793 078001
2
Dart depth max. 0.4 cm at 0°, length 8.5 cm
4
Form set 0793 078002
Work Area for Pleats
Example for form set 0793 078034
1
Pleat depth max. 3.2 cm at 5°, length 5 cm
3
Form set 0793 078034
2
Pleat depth max. 2.5 cm at 0°, length 6 cm
dart length
Angle adjustment area
Area of shapes
Angle adjustment area
Parallel adjustment area
Area of shapes
17

2.13 Work Area, Angle and Length
The
dart depth
is dependent on:
–
the form set used
–
the dart length
–
the setting of the folding table
The folding table is continuously adjustable between 0 - 10°.
The dart depths for other angles and lengths can be found in the
diagrams.
The curve for the form set
0793 078002
is also listed.
Caution Risk of Injury !
Turn the main switch off.
The angle may only be set with the sewing unit turned off.
Setting the angle
–
Press handle 2 together and set the folding table according to the
scale 1.
–
Release the handle.
The angle is set.
Setting the length
Maximum
dart length
150 mm.
–
The seam length control occurs via programming
(keys L1, L2, L3 ) or via the light barrier.
The programmed seam length control is recommended for
diaphanous material.
1
2
18

2.14 Setting the Insertion Depth of the Folding Table
The first stitch of the needle into the material should occur as close as
possible to the front edge.
In order to achieve a uniformly slim dart point with differing material
thicknesses, the machine is equipped with a fine adjustment.
7 different insertion depths can be set with the stops 4.
Caution Risk of Injury !
Turn the main switch off.
The insertion depth may only be set or changed with the sewing unit
turned off.
Setting the insertion depth
–
Release lever 3.
–
Push the folding table a bit forward on the guide.
–
Set one adjusting screw 4 ( 7-off ) to the desired insertion depth.
–
Turn setting knob 2 to the desired insertion depth ( stop ).
–
Push the folding table to the back on the guide again.
The adjusting screw 4 must firmly touch the stop 1.
–
Tighten lever 3 again.
Changing the insertion depth
–
Release lever 3.
–
Push the folding table a bit forward on the guide.
–
Turn setting knob 2 to the desired insertion depth ( stop ).
–
Push the folding table to the back on the guide again.
The adjusting screw 4 must firmly touch the stop 1.
–
Tighten lever 3 again.
3
4
1
2
19

3. Setting the Controls
The setting of the controls is explained in detail in Part 4:
Short Description Microcontrol !
Here only those settings required for the sewing sequence are listed.
Caution Risk of Injury !
Turn the main switch on !
The programming of the controls occurs with the main switch turned
on!
The machine should not be started unintentionally.
–
Set the
" Program "
switch to 10 to 29.
The sewing program is selected.
10 - 29
= Sewing program for darts and pleats
–
–
Press the
" STOP "
key.
The sewing program is activated.
The sewing unit requests a reference run.
–
Press the "
Σ
" key.
The reference run is conducted.
–
Only for program writing or program alteration !
Press the "
P
" key for 3 seconds.
The controls change to the
programming mode
.
Previously set values can be overwritten.
A comprehensive description is to be found in Part 4:
Short Description Microcontrol.
Press the "
P
" key.
The programming mode is exited; the sewing unit is operational.
–
Setting the seam length.
Press the
" L1 "
or
" L2 "
or
" L3 " key
.
Set the desired value with the
" + "
or
" - "
keys.
Establishing the seam length via the transmitted light barrier.
Press the key.
–
Press the "
Σ
" key.
The piece counter is reset to
0000
.
P10 L3 = 102
<--- REF --->
20
/