18
• [Optimal] - The best performance for most
movies and TV series.
• [Documentary] - Ideal for nature and scenery.
• [Animation] - Ideal for animations or cartoons.
• [Internet video] - Ideal for videos obtained
from the Internet.
• [No optimisation] - Switch off all
improvements.
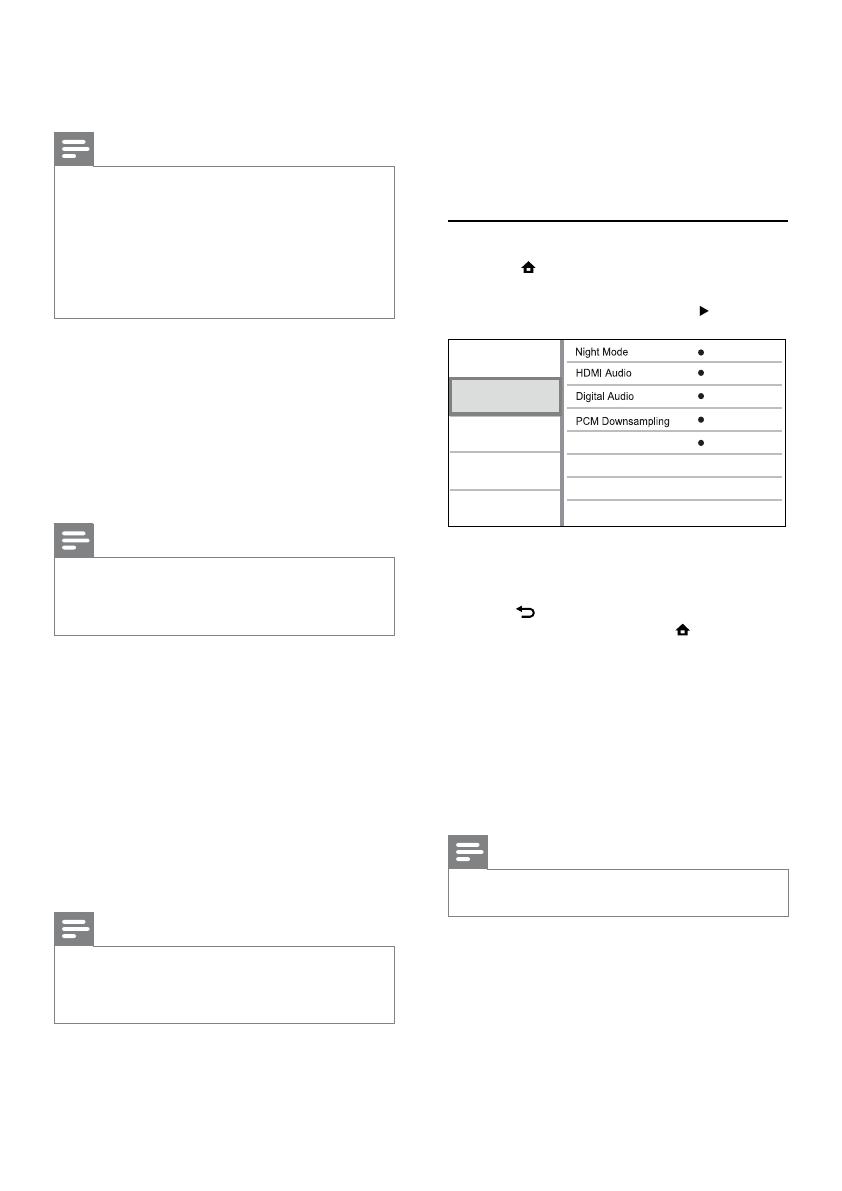
Audio Setup
1 Press .
2 Select [Settings], then press OK.
3 Select [Audio Setup], then press .
4 Select an option, then press OK.
5 Select a setting, then press OK.
To return to the previous menu, press •
BACK.
To exit the menu, press • .
[Night Mode]
Increase a soft sound level such as dialogue to
make it easier to hear at a low volume, while
simultaneously decreasing a loud sound level.
• [Auto] - Detect and select a best sound level
at a low volume. Applicable to tracks with
Dolby TrueHD audio only.
• [On] – For quiet viewing at night.
• [Off] – For surround sound with a full dynamic
range.
Note
Applicable only to Dolby encoded DVD-video or BD- •
video.
[HDMI Audio]
Select an HDMI audio output when you connect
this product and the TV/audio device with an HDMI
cable.
• [Bitstream] – Select the best original HD
audio experience (only via an HD audio
compatible receiver).
• [Auto] – Detect and select the best supported
audio format automatically.
Video Setup
Advanced Setup
Audio Setup
Preference Setup
EasyLink Setup
Off
Auto
Auto
On
Speaker Setup
• [Cinema 21:9] – For wide-screen TV of display
ratio 21:9, remove black bars at the bottom
and top of the screen.
Note
If • [4:3 Panscan] you have selected is not supported
by the disc, the screen displays in the [4:3 Letterbox]
format.
Help text display is available in all modes, except
•
[Cinema 21:9].
Subtitle Shift function is enabled only in
• [Cinema 21:9]
mode.
For optimum viewing with Philips Cinema 21:9 TV, refer
•
to the TV’s user manual.
[HDMI Video]
Select a HDMI video output resolution that is
compatible with your TV display capability.
• [Auto] - Detect and select the best supported
video resolution automatically.
• [Native] - Set to original video resolution.
• [480i/576i], [480p/576p], [720p], [1080i],
[1080p], [1080p/24Hz] - Select a video
resolution setting that best is supported by the
TV. See the TV manual for details.
Note
If the setting is not compatible with your TV, a blank •
screen appears. Wait for 10 seconds for auto recovery,
or press repeatedly the HDMI button until the picture
appears.
[HDMI Deep Color]
This feature is available only when the display
device is connected by an HDMI cable, and when it
supports deep color feature.
• [Auto] - Enjoy vivid images in over a billion
colors on Deep Color enabled TV.
• [Off] - Output standard 8 bit color.
[Component Video]
Select a component video output resolution that is
compatible with the TV display capability.
• [480i/576i], [480p/576p], [720p], [1080i] -
Select a video resolution setting that is best
supported by the TV. See the TV manual for
details.
Note
If the setting is not compatible with the TV, a blank •
screen appears. Wait for 10 seconds for auto recovery.
Copy protected DVDs can only output 480p/576p or
•
480i/576i resolution.
[Picture Settings]
Select a predefined set of picture color settings.
EN


