Page is loading ...

Installation Guide
Part # TBG114032, 033, 034, 059
Trails by Grimmspeed | Installation Guide for Part # TBG114035 1
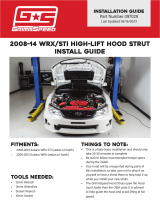
Subaru Lift Kit Install Instructions
2019+ Ascent, 2018+ Crosstrek, 2019+ Forester, 2020+ Outback
Included Items
Tools Required
• Lifting mechanism: jack / jack
stands, lift, etc.
• Metric sockets / ratchets
from 10mm – 19mm
• Impact Wrench recommended
(not required)
• Spring Compressor
• Allen / Hex Keys
o 5mm (at least 3” long)
o 6mm (at least 3” long)
o 2mm
• Pass-through socket set, 17mm,
14mm
• Hammer / Mallet
• Torque Wrenches (both in-lbs
and ft-lbs)
NOTES
This install is a medium difficulty and
completed in 3-4 hours depending on
experience.
Follow safety procedures when working
underneath vehicle including the use of
jack stands.
It is VERY important to use
recommended torque specs and thread
locker where required.
An Alignment IS REQUIRED after
completion.
2 Front Springs
2 Rear Springs
Strut Extensions
4 M4 Set Screws and
Thread Locker
2 Front (M12)
2 Rear (M10)
2 End Link Brackets
(Ascent, Crosstrek, Forester Only)
2 M12 Bolt, Washer, Lock Nut
(Ascent, Crosstrek, Forester Only)
4 Bump Stops
2 Sway Bar Spacers, 4 M8 Bolts
(Ascent Only)

Installation Guide
Part # TBG114032, 033, 034, 059
Trails by Grimmspeed | Installation Guide for Part # TBG114035 2
Step 1: Break loose lug nuts if desired and raise vehicle,
then remove all wheels.
STEP 2: Remove front strut components by disconnecting
ABS clip, 12mm brake line bolt, and 17mm end link nut.
Using a 6mm hex key on end link shaft may be required.
STEP 3: Remove both strut lower bolts with 19mm, then
guide front knuckle assembly down out of the strut.
STEP 4: Remove the top hat nuts with 14mm and pull strut
out of vehicle.
FRONT INSTALLATION

Installation Guide
Part # TBG114032, 033, 034, 059
Trails by Grimmspeed | Installation Guide for Part # TBG114035 3
STEP 5: Add spring compressors to stock spring.
STEP 6: Remove top hat nut with 17mm. Optional: Use
impact wrench to break the nut loose, but finish
unthreading with hand tools only to prevent damage to
strut internals.
STEP 7: Remove top hat, spring, dust boot, and bump
stop. Optional, clean strut.
STEP 8: After making sure strut threads are clean, add
small bead of thread locker to threads.

Installation Guide
Part # TBG114032, 033, 034, 059
Trails by Grimmspeed | Installation Guide for Part # TBG114035 4
STEP 9: Thread FRONT strut extension on strut. Use
6mm hex and 19mm wrench and torque to 40 ft-lbs.
STEP 10: Add drop of thread locker to M4 set screw and
install inside of the strut extension. Tighten to 15 in-lbs
(not ft-lbs).
STEP 11: Add bump stop on top of strut extension. Top
of bump stop should be even with top of hex section.
Install dust boot on top of bump stop.
STEP 12: Compress Trails by Grimmspeed spring and
install on strut (logo facing up) with the bottom end of coil
ending at the lip of the spring seat.
Optional – Remove OEM spring silencers and install on
Trails by Grimmspeed Springs in the same location.

Installation Guide
Part # TBG114032, 033, 034, 059
Trails by Grimmspeed | Installation Guide for Part # TBG114035 5
STEP 13: Add top hat and top hat nut. As you’re tightening
the nut, make sure that the top hat is centered on the top
section of the strut extension and contact is made on the
top face of the HEX section.
STEP 14: Use 6mm hex key and pass-through socket to
torque the nut to 40 ft-lbs.
STEP 15: ASCENT, CROSSTREK, AND FORESTER
MODELS ONLY!
Install end link bracket against flat side of OEM mount with
the smaller tab around bottom of OEM mount and longer
tab against the strut. Insert M12 bolt from the bracket side
and thread washer and nut from the OEM mount side.
Torque nut to 40 ft-lbs.
STEP 16: Install strut back in vehicle.
• Top hat bolts 15ft-lbs
• Lower mount bolts 115ft-lbs
• Brake line bolt
• End link nut 34 ft-lbs

Installation Guide
Part # TBG114032, 033, 034, 059
Trails by Grimmspeed | Installation Guide for Part # TBG114035 6
STEP 17: Repeat on opposite side.
STEP 1: Remove cargo mat / trunk floor of vehicle,
followed by the small side trim plastics to gain access to
strut top nuts.
(ASCENT – Trim plastics are accessible at the sides while
sitting in the 3
rd
row seats)
STEP 2: Remove strut top nuts using 14mm
(ASCENT – Use long extensions and extendable magnet,
being careful to not lose the nut below the seat)
REAR INSTALLATION

Installation Guide
Part # TBG114032, 033, 034, 059
Trails by Grimmspeed | Installation Guide for Part # TBG114035 7
e
STEP 3: Moving below the vehicle, remove the lower strut
nut and bolt followed by outer control arm nut and bolt.
STEP 4: Pull control arm down to remove the rear strut.
STEP 5: Add spring compressors to stock spring.
STEP 6: Remove top hat nut with 14mm. Optional: Use
impact wrench to break the nut loose, but finish
unthreading with hand tools only to prevent damage to
strut internals.

Installation Guide
Part # TBG114032, 033, 034, 059
Trails by Grimmspeed | Installation Guide for Part # TBG114035 8
STEP 7: Remove top hat, spring, dust boot, and bump
stop. Optional, clean strut.
STEP 8: After making sure strut threads are clean, add
small bead of thread locker to threads.
STEP 9: Thread REAR strut extension on strut. Use 5mm
hex and 17mm wrench and torque to 25 ft-lbs.
STEP 10: Add drop of thread locker to M4 set screw and
install inside of strut extension. Tighten to 15 in-lbs (not
ft-lbs).

Installation Guide
Part # TBG114032, 033, 034, 059
Trails by Grimmspeed | Installation Guide for Part # TBG114035 9
STEP 11: Add bump stop on top of strut extension. Top of
bump stop should be even with top of hex section.
STEP 12: Install dust boot on top of bump stop.
STEP 13: Compress Trails by Grimmspeed spring and
install on strut (logo facing up) with the bottom end of coil
ending at the lip of the spring seat.
Optional – Remove OEM spring silencers and install on
Trails by Grimmspeed Springs in the same location.
STEP 14: Add top hat and top hat nut.

Installation Guide
Part # TBG114032, 033, 034, 059
Trails by Grimmspeed | Installation Guide for Part # TBG114035 10
STEP 15: Use 5mm hex key and pass-through socket to
torque the nut to 18.4 ft-lbs.
STEP 16: ASCENT MODELS ONLY!
Remove sway bar mounting brackets one at a time and
install spacers between the bushing and mount, using the
longer bolts to reinstall the bracket. Torque to 22 ft-lbs.
STEP 17: Install strut back in vehicle with the lower bolt in
the control arm (bolt is inserted from the front towards the
rear of the vehicle) and upper mount in the chassis. Don’t
install outer control arm bolt yet. Hand thread nuts.
STEP 18: Since the strut is now longer, it needs to be
partially compressed for the control arm to connect to the
knuckle. The easiest method is to lower the vehicle almost
to the ground, then put a jack under the lower control arm
(with strut installed) and compress it to bring the control
arm closer to the knuckle. You can
pull the jack handle
toward the front of the vehicle to align the control arm after
it’s compressed. Then pull the knuckle down to line up the
bushing and insert the bolt from the front and thread nut.

Installation Guide
Part # TBG114032, 033, 034, 059
Trails by Grimmspeed | Installation Guide for Part # TBG114035 11
STEP 19: Torque rear bolts
• Top Hat Nuts – 22 ft-lbs
• Lower Strut Nut – 62 ft-lbs
• Outer Control Arm – 59 ft-lbs
STEP 20: Repeat on opposite side. Install wheels, drop
vehicle, and torque lug nuts. An alignment is now required
to prevent handling issues and excess tire wear.
/