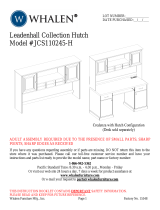
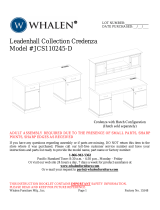
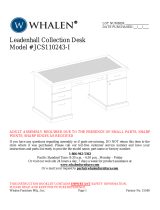
Assembly Instructions
FANTOL
Desk
VERSION 1.1

ASSEMBLY INSTRUCTIONS
Read these instructions carefully and keep for future
reference. Refer to parts inventory for guidance, and
ensure you have all pieces before starting.
When assembling, place all parts on a soft, clean, and flat
surface such as a carpet to prevent scratches.
If you’re having diculty, our friendly Customer Care
team is always here to help. Call us at 1.888.746.3455
during business hours, email service@article.com or chat
live at article.com.
FANTOL Desk Page 2 of 12
45 min
2
TIME # OF PEOPLE DIFFICULTY
REQUIRED TOOL
ANTI-TIP
Installation Required
ANTI-TIP KIT INVENTORY
ID DESCRIPTION QTY
BRACKET 4
M8 × 51MM PLUG 4
M6 × 70MM SCREW 4
M4 × 20MM SCREW 4
WASHER 4
PARTS INVENTORY
ID DESCRIPTION QTY
LEFT SIDE FRAME 1
RIGHT SIDE FRAME 1
TOP SHELF 1
SECOND SHELF 1
DESK TOP WITH DRAWERS 1
CAM LOCK SCREW 24
WOOD DOWEL 14
CAM LOCK NUT 24
ALLEN KEY 1
Hardware (K/L) to attach brackets to wall is
designed for drywall. To attach this unit to another
type of wall, consult with your local hardware store.

Page 3 of 12
ASSEMBLED UNIT
FANTOL Desk

Page 4 of 12
1
× 24
FANTOL Desk

Page 5 of 12
2
Insert 3 wood dowels
for desk top.
Insert 2 wood dowels
for top 2 shelves.
!
!
× 4 × 3
FANTOL Desk

Page 6 of 12
3
FANTOL Desk
Cam lock nut starting position : arrow pointing
downwards, towards screw head.
Cam lock nut end position: arrow facing upwards.
Insert cam lock nuts (H) and turn with
allen key (I) to secure.
Ensure cam lock nuts are also secured
on the backs of each shelf.
!
!
× 12

Page 7 of 12
4
× 4 × 3
Insert 3 wood dowels (I)
into desk top (E).
Insert 2 wood dowels
into top 2 shelves (C/D).
!
!
FANTOL Desk

Page 8 of 12
5
FANTOL Desk
× 12
Insert cam lock nuts (H) and turn with
allen key (I) to secure.
Ensure cam lock nuts are also secured
on the backs of each shelf.
!

Page 9 of 12
FANTOL Desk
Press to open drawers in the
center of drawer fronts.
!

Page 10 of 12
WARNING!
ANTI-TIP RESTRAINT INSTALLATION
Serious or fatal crushing injuries can occur from furniture
tip-over. To help prevent tip-over:
• Install tip-over restraint provided.
• Do not set heavy objects on top of this product,
unless the product is specifically designed to
accomodate them.
• Never allow children to climb or hang on mirrors,
shelves, consoles, or cabinets with doors and/or
drawers.
Use of tip-over restraints may only reduce but not
eliminate, the risk of tip-over.
20 min
3
TIME
REQUIRED TOOL
# OF PEOPLE DIFFICULTY
REQUIRED TOOL
8MM / 5/16" DRILL BIT
1
× 2
FANTOL Desk
Place unit in desired location and mark on
wall where holes should be drilled.

Page 11 of 12
2
3
× 2 × 2× 2
Drill holes into drywall, insert wall plugs (K),
and attach brackets to wall with screws (L).
Move shelf up against wall and attach
brackets to top shelf from above.
FANTOL Desk
× 2
Hardware (K/L) to attach brackets to wall is designed for drywall. To attach
this unit to another type of wall, consult with your local hardware store.

Page 12 of 12
4A
4B
× 2 × 2× 2
Attach brackets to drawer shelf from below.
FANTOL Desk
× 2
Drill holes into drywall below drawer shelf (E) and attach
brackets (J) to wall with wall plugs (K) and screws (L).
1/12