Page is loading ...

1
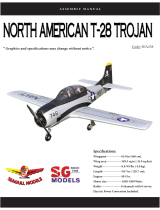
Specications:
Wingspan--------------- 87 in--------------------- 221 cm.
Wing area--------------- 2562.5 sq.ins---------- 165 sq.dm.
Weight------------------- 30.9 lbs----------------- 14 kg.
Length------------------- 66.9 in------------------ 170 cm.
Engine------------------- 60cc.
Motor-------------------- 360/6000watt/ESC 200A/Lipo 12s.
Radio--------------------- 12 channels with 12 servos.
ASSEMBLY MANUAL
Code : SEA361

Giant Scale F4U Goodyear FG-1D 60cc ARF 87” Limited Edition. Instruction Manual.
2
ank you for choosing the Giant Scale F4U Goodyear FG-1D 60cc ARF 87” Limited Edition ARTF
by SG MODELS . e Giant Scale F4U Goodyear FG-1D 60cc ARF 87” Limited Edition was de-
signed with the intermediate/advanced sport yer in mind. It is a semi scale airplane which
is easy to y and quick to assemble. e airframe is conventionally built using balsa, ply-
wood to make it stronger than the average ARTF, yet the design allows the aeroplane to be
kept light. You will nd that most of the work has been done for you already. e motor
mount has been tted and the hinges are pre-installed. Flying the Giant Scale F4U Goodyear
FG-1D 60cc ARF 87” Limited Edition is simply a joy.
is instruction manual is designed to help you build a great ying aeroplane. Please read
this manual throughly before starting assembly of your Giant Scale F4U Goodyear FG-1D 60cc
ARF 87” Limited Edition Use the parts listing below to indentify all parts.
Please be aware that this aeroplane is not a toy and if assembled or used incorrectly it is ca-
pable of causing injury to people or property. WHEN YOU FLY THIS AEROPLANE YOU
ASSUME ALL RISK & REPONSIBILITY.
If you are inexperienced with basic R/C ight we strongly recommend you contact your R/C
supplier and join your local R/C model Flying Club. R/C Model Flying Clubs oer a variety
of training procedures designed to help the new pilot on his way to successful R/C ight.
ey will also be able to advise on any insurance and safety regulations that may apply.
INTRODUCTION
WARNING
KIT CONTENTS
22
2
1
3
4
6
5
8
9
11
710

3
KIT CONTENTS
SEA361 Giant Scale F4U Goodyear
FG-1D 60cc ARF 87” Limited Edition.
1. Fuselage
2. Wing set (3 pcs)
3. Tail set (2 pcs)
4. Canopy
5. Cowling
6. Wing tube
7. Fuel tank
8. Pushrod set
9. Rocket Set With Deluxe Model
10. Drop Tanks/Bomb W/Deluxe Model
11. Cockpit
ADDITIONAL ITEMS REQUIRED
TOOLS & SUPPLIES NEEDED
in cyanoacrylate glue.
Medium cyanoacrylate glue.
30 minute epoxy.
5 minute epoxy.
Hand or electric drill.
Assorted drill bits.
Modelling knife.
Straight edge ruler.
2mm ball driver.
Phillips head screwdriver.
220 grit sandpaper.
90° square or builder’s triangle.
Wire cutters.
Masking tape & T-pins.
read-lock.
Paper towels.
� 60cc gasoline engine.
� Computer radio 12 channel with
12 servos.
� Glow plug to suit engine.
� Propeller to suit engine.
� Protective foam rubber for radio
system.
WING TIP BULBS
Please see below pictures.
2.
1.
3.
e Blue light for right wing tip, and
the red light for le wing tip. ey are
designed to operate on voltages 12 volts.
Connect lights into switch circuit so that
optional the dierent ashes mode.

Giant Scale F4U Goodyear FG-1D 60cc ARF 87” Limited Edition. Instruction Manual.
4
INSTALL THE AILERONS
CONTROL HORN
Fiberglass control horn
8.
9.
10.
1.
4.
5.
6.
7.
Epoxy
C/A glue

5
Ailerons control horn
Epoxy
Epoxy
INSTALLING THE AILERON SERVOS
Recommended Servo Spec Torque.
378 oz-in (27.3 kg-cm) @ 6.0V
467 oz-in (33.7 kg-cm) @ 7.4V
Because the size of servos dier, you
may need to adjust the size of the precut
opening in the mount. e notch in the
sides of the mount allow the servo lead to
pass through.
Place the servo between the mounting
blocks and space it from the hatch. Use a
pencil to mark the mounting hole loca-
tions on the blocks.
2.6.
1.
3.
4.
5.

Giant Scale F4U Goodyear FG-1D 60cc ARF 87” Limited Edition. Instruction Manual.
6
Use dental oss or heat shrink tubing
to secure the connection between the
servo and extension wire so they cannot
become unplugged accidentally.
Use drill bit in a pin vise to drill the
mouting holes in the blocks.
Apply 2-3 drops of thin C/A to each of
the mounting holes. Allow the C/A to
cure without using accelerator.
1.5mm
2.5.
6.
7.
3.
4.
Secure the servo to the aileron hatch
using a proper driver and the screws
provided with the servo.
Apply 2-3 drops of thin C/A to each of
the mounting aileron hatch mounting
tabs in the wing. ***Allow the C/A to cure
without using accelerator.***
Remove the string from the wing at the
servo location and use the tape to attach it
to the servo extension lead. Pull the lead
through the wing and remove the string.
C/A glue
C/A glue

7
8.12.
1.
2.
3.
9.
10.
11.
Set the aileron hatch in place and use a
Phillips screw driver to install it with four
wood screws.
AILERON PUSHROD INSTALLATION
Please see pictures below.
80mm
M3 clevis M3 lock nut
M3x10mm

Giant Scale F4U Goodyear FG-1D 60cc ARF 87” Limited Edition. Instruction Manual.
8
Attach the ap servo to the ap servo
cover. Center the ap servo (or set the
values to 0 for both up and down) and in-
stall the servo arm perpendicular to the
servo centerline. e clevis will attach to
the arm 13/16 inches (21mm) from the
center of the arm.
Attach the ap linkage to the control
horn. Slide the clevis retainer over the
forks of the clevis.
1.5.
6.
7.
2.
3.
4.
120mm
Use a pin vise and 3/32-inch (2mm)
drill bit to clear the paint from the ap
control horn.
Route the servo lead for the ap servo
out at the root of the wing. Connect the
ap servo to the radio system. With the
radio system on, place the ap servo into
position.
Attach the clevis to the ap servo arm.
Please see pictures below.
INSTALLING THE FLAP PUSHROD
M3 clevis
M3 lock nut

9
8.11.
12.
1.
9.
10.
Adjust the linkage so the ap is in the
mid-ap position. It may take a few tries
to properly adjust the linkage.
Once adjusted, make sure all clevis re-
tainers are in position. Apply a drop of
threadlock near the clevis, then tighten
the nut against the clevis to keep the
linkage from changing length inside the
wing.
M3x10mm
Set the ap control at the transmitter to
the down ap position. Adjust the ap
travel at the transmitter until it matches
the control throws listed in this manual.
INSTALL FLAP BETWEEN WINGS
Please study images below.

Giant Scale F4U Goodyear FG-1D 60cc ARF 87” Limited Edition. Instruction Manual.
10
10.
2.7.
3.8.
6.
9.
4.
5.
75mm
M3 clevis
M3 lock nut

11
4.
1.
5.
2.
3.
18mm
6.
8.
7.
100mm
Install the gear door, please see the
picture below.

Giant Scale F4U Goodyear FG-1D 60cc ARF 87” Limited Edition. Instruction Manual.
12
9.
10.
Install the gear door servo into the wing
cover as shown below in these illustrated
steps.
13.
12.
11.
15.
14.

13
Install aluminum pedestal, please see
the picture below.
2.
3.
4.
5.
7.
6.
Install Main Retractable Landing Gear.
M4x15mm
1.
INSTALLING ROBART
LANDING GEAR
Retractable landing gear are not included.
Please study images below for proper instal-
lation. You may install electric or pneumatic
gear. Fuselage has accommodations for both.
Robart 150E MAIN GEAR 150ESP

Giant Scale F4U Goodyear FG-1D 60cc ARF 87” Limited Edition. Instruction Manual.
14
8.
9.
10.
11.
12.
Install aluminum pieces into the landing
gear struts as shown below.
M4x12mm
M3x6mm
13.
14.
15.
Install the fork cover.

15
16.
19.23.
20.
18.22.
17.21.
1.5mm
M2x10mm
M2x10mm
1.5mm

Giant Scale F4U Goodyear FG-1D 60cc ARF 87” Limited Edition. Instruction Manual.
16
27.
28.
24.
26.
25.
2x6mm
31.
30.
29.

17
35.39.
36.32.
34.38.
33.37.
Epoxy
M3x10mm

Giant Scale F4U Goodyear FG-1D 60cc ARF 87” Limited Edition. Instruction Manual.
18
43.
44.40.
42.
41.
47.
46.
45.
Main Wheel installation.

19
51.
52.48.
50.
49.
- Locate items necessary to install Sprin
Landing Gear.
You use this fork set JP ER-150 100
Retracts Rotating 90
INSTALLING RETRACTABLE
LANDING GEAR
1.
2.

Giant Scale F4U Goodyear FG-1D 60cc ARF 87” Limited Edition. Instruction Manual.
20
3.
6.
7.
5.
4.
M4x15mm
10.
9.
8.
M4x12mm
/