Page is loading ...

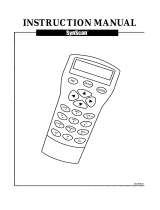
MANUAL


INTRODUCTION .........................................................................5
Warning.................................................................................5
What’s in the Box .........................................................................5
SYSTEM REQUIREMENTS ...............................................................6
Telescope Compatibility ...................................................................6
Optical Tube Compatibility .................................................................7
ASSEMBLY .............................................................................8
Attaching the StarSense Camera to Your Telescope ...........................................8
Changing Brackets .......................................................................9
Using with a Finder .......................................................................10
Connecting StarSense Hand Control to Your Telescope ........................................10
QUICK START: ALIGNING STARSENSE ...................................................11
First Time Setup: Calibrate Center ..........................................................12
StarSense Manual Align ...................................................................13
StarSense User Auto Align.................................................................13
Improving Pointing Accuracy with StarSense..................................................14
Solar System Align........................................................................14
Warning.................................................................................14
Tips for Using Solar System Align . . . . . . . . . . . . . . . . . . . . . . . . . . . . . . . . . . . . . . . . . . . . . . . . . . . . . . . . . . . 15
Other ALIGN Functions ...................................................................15
Sync....................................................................................16
Polar Align...............................................................................16
STARSENSE OVERVIEW .................................................................17
StarSense Camera .......................................................................17
StarSense Hand Control...................................................................17
Object Catalog...........................................................................18
Slewing to an Object......................................................................19
Sky Tour Button ..........................................................................19
Identify Button............................................................................19
Direction Button ..........................................................................19
Motor Speed Button ......................................................................20
Help Button..............................................................................20
Menu Button .............................................................................20
Database Setup ..........................................................................21
Telescope ...............................................................................21
Time and Location ........................................................................24
View / GoTo Position ......................................................................24
Hand Control ............................................................................24
SPECIFICATIONS ............................................................. . . . . . . . . . . 25
MENU TREE .................................................................. . . . . . . . . . . 26
TABLE OF CONTENTS


I 5
StarSense™ is patented technology that allows your telescope to determine its position and
align itself with the night sky automatically. StarSense AutoAlign’s internal camera captures an
image of the sky, and then analyzes it to identify the stars in the image. Based on this information,
StarSense can determine the coordinates of the center of the image. After repeating this
process a few times, the system can create an accurate model of the night sky. Once alignment
is complete, you can select any celestial object in the hand control’s database, and StarSense
will automatically center the object in your eyepiece.
WARNING
• Never look directly at the Sun with the naked eye or with a telescope (unless you have the proper solar
filter). Permanent and irreversible eye damage may result.
• Never use your telescope to project an image of the Sun onto any surface. Internal heat build-up can
damage the telescope and any accessories attached to it.
• Never use an eyepiece solar filter or a Herschel Wedge. Internal heat build-up inside the telescope can
cause these devices to crack or break, allowing unfiltered sunlight to pass through to the eye.
• Do not leave the telescope unsupervised, especially when adults are unfamiliar with your telescope
or children are present.
WHAT’S IN THE BOX
INTRODUCTION
StarSense Hand ControlStarSense Camera
Large Camera Bracket
& Large Bracket Base
(pre-installed on camera in box)
Camera to
Auxiliary
Port Cable
Small Camera Bracket 2 Thumbscrews
for Large Camera
Bracket
4mm Allen
Wrench

6 I
COMPATIBLE NOT COMPATIBLE
NexStar SE Series NexStar i Series
CPC, CPC DX Ultima 2000
NexStar GT (with Aux. splitter) Early generation GoTo mounts (such as Compustar)
CGE Pro NexStar GPS
Advanced VX Series
CG-5 Computerized (with Aux. splitter)
CGEM, CGEM DX
CGE
NexStar SLT
LCM (with Aux. splitter)
SYSTEM REQUIREMENTS
When setting up StarSense for the first time, a
wide-angle/low power eyepiece and high power
eyepiece are recommended. Start with the
wide-angle/low power eyepiece.
StarSense AutoAlign works with most computerized
Celestron telescopes and several different optical
tubes. Refer to the compatibility charts below.
TELESCOPE COMPATIBILITY
Mounts with only one port for the hand control, such as the CG-5 Computerized Mount, require an Auxiliary
Port Splitter, item #93919, available from Celestron.

I 7
LARGE BRACKET SMALL BRACKET
All Celestron Schmidt-Cassegrains Celestron 6” f/8.3 Refractor
All Celestron EdgeHDs NexStar 102SLT Refractor
NexStar 4SE Maksutov-Cassegrain NexStar 127SLT Maksutov-Cassegrain
NexStar 130SLT Reflector
All Celestron Reflectors and Refractors Packaged with the
Advanced VX Mount
All Celestron Reflectors and Refractors Packaged with the
Advanced CG-5 Mount
All NexStar GT optical tube assemblies
Several other optical tubes from other manufacturers which use
a similar finder dovetail base.
OPTICAL TUBE COMPATIBILITY
The StarSense camera replaces the finderscope on your telescope. Use one of the two included camera
brackets to attach the camera, the large bracket (already installed), or the small bracket. Refer to the chart
below to determine which bracket fits your optical tube.
Large Bracket
(pre-installed on camera in box)
Small Camera Bracket

8 I
ATTACHING THE STARSENSE CAMERA TO
YOUR TELESCOPE
1. Remove the fi nderscope and bracket from your
telescope tube.
Note: Some optical tubes, like the NexStar SE, may have
a small plastic rail which secures the Star Pointer.
Remove this rail with a Phillips head screwdriver.
2. Using the Optical Tube Compatibility Chart on
page 7, identify whether your telescope accepts
the small or large camera base.
Using a Phillips head
screwdriver, install the
appropriate base on your telescope.
3. Slide the StarSense camera onto the camera
base and secure it with the thumbscrew(s). The
camera slides on the large base front to back,
and slides on the small base back to front.
ASSEMBLY
Remove StarPointer
Large Base
Installing base with Phillips screwdriver
Installing large base (front to back)
Installing small base (back to front)
Small Base

I 9
4. Plug the included auxiliary cable into the back
of the StarSense Camera on one end, and your
mount’s auxiliary port on the other end.
Note: If your telescope does not have an auxiliary port,
the Auxiliary Port Splitter, (item #93919 available
from Celestron), is required. First, plug the splitter
into the auxiliary port. Then, plug the hand control
into one port and the cable into the other.
CHANGING BRACKETS
To change from the pre-installed Large Camera
Bracket to the Small Camera Bracket:
1. Slightly loosen the socket head screw using the
included 4mm Allen wrench. Do not remove the
screw entirely.
2. Remove the lens shroud by unthreading it.
3. Slide the bracket off the front of the camera. Be
careful not to lose the two orange rings.
4. Slide the new bracket onto the camera and screw
the lens shroud back on. One orange ring should
be in front of and behind the bracket as shown.

10 I
USING WITH A FINDER
Although StarSense replaces the need for a
finderscope, you may still wish to use a finder for
quick reference, or to assist with the one-time center
calibration of the StarSense camera and telescope.
Some optical tubes, like Schmidt-Cassegrains and
EdgeHDs have threaded holes to accept finder-
scope brackets in multiple locations.
The large accessory dovetail bar that is used for
guide scopes on Celestron 8” Schmidt-Cassegrains
and EdgeHD telescopes will obstruct the Star-
Sense’s Large Camera Bracket. The CPC 800 fork
arm also obstructs with the StarSense camera. To fit
the camera in this configuration, attach the base and
Large Camera Bracket backwards as shown.
CONNECTING STARSENSE HAND
CONTROL TO YOUR TELESCOPE
The StarSense Hand Control replaces your NexStar
Hand Control and retains the computerized GoTo
functionality, but with added StarSense features
such as auto align, multi-star calibration, and a
graphical 4-line LCD. The StarSense Hand Control
must be used. The NexStar Hand Control does not
communicate with the camera.
1. Remove the NexStar Hand Control from
your mount.
2. Plug the phone jack type connector on the Star-
Sense Hand Control into “Hand Control” outlet
on your mount.
Tip: If you are plugging the hand control into a NexStar SE
inside of the fork arm, remember that the connector
tab on the cable faces outward.
Finder and StarSense installed on CPC 800
NexStar Hand Control replaced with StarSense Hand Control
Base and bracket installed backwards

I 11
Set up your telescope in a relatively unobstructed
area that shows most of the sky. If you have
obstructions like buildings or trees, StarSense will
skip them during the auto alignment procedure.
Note: If your sky is heavily obstructed, please see
“StarSense Manual Align”.
Connect the StarSense Hand Control and camera
to your telescope as described in Assembly.
Remove the camera’s dust cap.
1. Set your telescope up with an eyepiece and
position the telescope in its home position or index
marks. Equatorial mounts should be roughly
polar aligned, but precise polar alignment is not
required. Alt-Az mounts should have the altitude
aligned to its index marks with the tube level to
the ground.
2. Turn your telescope on. The StarSense Hand
Control and Camera will boot up. In about 30
seconds, the Hand Control will display
“StarSense Ready.”
3. Press ALIGN, then select STARSENSE AUTO
and press ENTER.
4. Press BACK to accept the time, date and location
information. Press ENTER to edit the information.
5. Press ENTER to select Location by City. Choose
your country and city by scrolling through the
menus provided. Alternatively, you can enter your
longitude and latitude by pressing the OPTION
button on the lower left of your hand control’s
keypad. Press ENTER to move the
underline cursor over to the
next value.
Once the location is entered, StarSense will check
your telescope for information it may already have,
such as GPS or site information saved from a Real
Time Clock (RTC). If none of this information is
available, StarSense will prompt you for time and
date (this is primarily needed for locating Solar
System Objects and establishing the horizons on
EQ mounts). You only need to enter this information
once for a given observing location.
6. When prompted with the Select Time Source
screen, select the time source available for your
telescope. StarSense will choose the best source
found. A checkmark indicates which time source
is selected. Press ENTER to continue.
7. Enter or confirm your local time and date. Press ENTER
to move the cursor through the time and date fields.
Time is in 24-hour HH:MM:SS format. For example,
9:30 PM would be 21:30:00
Date is in MM/DD/YYYY format. For example June
14th, 2012 would be entered as 06/14/2012
Press ENTER to move the underline cursor over to
the next value. To enter the time zone and to toggle
DST (Daylight Savings) YES/NO, scroll UP/
DOWN (also 6 and 9 keys) to make the selection,
then press ENTER.
8. Confirm your telescope is positioned in its home
position or index marks. Press ENTER when you
see the “Set Align Start” screen.
StarSense will begin the alignment procedure. The
telescope will begin moving to different areas of
the sky automatically. The hand control will display
“Acquiring Position,” followed by “Acquiring Image,”
followed by “Sensing”. Once sensing is
complete, the number of stars found will be displayed.
If no stars are found, a message “Too Few Stars” will
display and StarSense will move the telescope to
another region of sky.
Once StarSense has begun its alignment process,
it is important not to touch or move the telescope
in any way. Also, while imaging the sky, do not
obstruct, cover or shine light into the camera lens.
After a successful automatic alignment, StarSense
will display “Alignment Complete.”
9. Press ENTER to continue.
QUICK START: ALIGNING STARSENSE
OPTION Button

12 I
FIRST TIME SETUP: CALIBRATE CENTER
The first time you use StarSense AutoAlign,
StarSense needs to know the center of the
telescope’s field of view in relation to its camera. This
one-time calibration process takes place inside the
camera and will not require you to
physically adjust the camera or your telescope. After
you complete the calibration, you’ll need to perform
the StarSense Auto alignment again.
Before calibrating the center position of your
telescope, a StarSense Auto (as outlined previous-
ly) or StarSense Manual alignment must first be
performed. This allows your telescope to establish
tracking and rough GoTo accuracy.
1. Press STARS. The first option shown is Named
for named stars. Press ENTER to proceed.
2. Choose a named star from the list. For best results,
choose a star that is at least magnitude 2 or less.
Look at the bottom of the LCD for Mag and a val-
ue, such as Mag : 1.8. Use the SCROLL up/down
buttons (also the 6 and 9 keys) to page through
the list of named stars. Press ENTER to slew to
the star. You do not need to know where the star
is located. StarSense will slew the telescope to
the star for you. It will be the brightest star in that
region of sky.
3. Attach your widest angle/lowest power eyepiece
to the telescope. Look through the eyepiece to see
if the star is there. If you do not see the star in your
eyepiece, proceed to step 4. If you can see the
star, skip to step 5.
The hand control is now in coarse centering mode,
which has a rapid slew rate.
4. Using the arrow keys on the hand control,
move the telescope until the star appears in the
eyepiece’s field of view. Instead of looking through
the eyepiece, try positioning your eye so that you
create a line of sight down the barrel of the exterior
of the telescope tube. Using this line of sight,
point the telescope roughly at the star, then make
fine adjustments by looking through the
eyepiece. Use the lowest power/widest-angle
eyepiece available.
5. Press ENTER, once the star is in the field of view
of your eyepiece.
The hand control is now in fine centering mode,
which has a slow slew rate.
6. Switch to a higher power eyepiece if available.
Center the star in the field of view. Make the final
centering movements UP and RIGHT. A small
checkmark will appear on the upper right screen
when this is done. (This corrects any errors due
to mechanical backlash in your mount.)
7. Press ALIGN.
StarSense will acquire a new image and note the
offset of the star in the camera. A message will
appear: Solution Found with a new center position
displayed in coordinates on the camera.
8. Press ENTER to accept the new center reference.
From this point forward, StarSense knows where
the center of your telescope’s field of view is in
relation to the camera.
Do not move the StarSense camera after the center
reference is established. As long as the camera does
not get bumped, jarred, or rotated, you can remove
the StarSense AutoAlign from your telescope and
reattach it without recalibrating.
After this step is complete, a message will appear
Realignment Required.
You can start a new alignment in the telescope’s
current position. There is no need to reset the
telescope to its home position.
9. Now, perform another StarSense Auto alignment.
When alignment is complete, your telescope is
ready to view objects and StarSense will accurately
locate them in your eyepiece’s field of view.

I 13
STARSENSE MANUAL ALIGN
StarSense Manual alignment allows you to point the
telescope in the part of the sky you wish to use for
taking alignment images. This is particularly useful
in locations where the horizon is obstructed or you
have limited visibility. Manual StarSense Alignment
is not as accurate as automatic alignment. However,
it provides good pointing accuracy throughout the
region of the sky that was used for the alignment.
To use StarSense Manual alignment:
1. With the telescope powered on, press the
ALIGN button.
2. Use the UP/DOWN scroll keys to select
StarSense Manual option and press ENTER.
3. Move the telescope to its home position or
switch position. Alt-Az mounts should have the
telescope pointing at the horizon. Equatorial
mounts should be positioned to the index marks.
Telescopes with switch postions will automatically
move to the home switch positions.
4. Use the direction buttons to aim the telescope
at a clear part of sky and press ENTER. When
moving the telescope, remember to always finish
slewing using the UP and RIGHT direction
buttons on the hand control. A small checkmark
will display at the right of the hand control display
when this is done. (This corrects any errors due
to mechanical backlash in your mount.)
StarSense will then begin taking the first image and
will display “Acquiring Image” on the hand control display.
5. Once the image is captured and processed, the
display will ask you to select the next alignment
point. Use the direction buttons to slew the
telescope to another clear portion of sky. Once
again, use the UP and RIGHT direction buttons
to finish slewing the telescope. Press ENTER.
6. Once the second image is captured and
processed, use the direction buttons to slew
the telescope to a final clear portion of sky as
far away as possible from the first alignment
position. Press ENTER.
Once the third image is processed, StarSense is
aligned and ready for use.
STARSENSE USER AUTO ALIGN
User Auto Align allows you to customize where
StarSense points the telescope during alignment.
This is useful if there are large portions of the sky
that are obstructed or inaccessible. To setup the
User Auto Align, you must first perform a StarSense
Manual Align.
1. Perform a StarSense Manual Align as outlined in
this manual. Select unobstructed areas of the sky
that are at least 20 degrees apart.
2. Press MENU and use the UP/DOWN scroll
keys to select STARSENSE. Scroll again to
select USER AUTO ALIGN and press ENTER.
3. Press ENTER to save your StarSense Manual
Align. This saves the areas of sky you selected
so all subsequent StarSense User Auto Aligns
will point to the same area.
Now you can use StarSense User Auto Align, and
the telescope will automatically slew to the areas of
sky you selected during the Manual Align.

14 I
IMPROVING POINTING ACCURACY
WITH STARSENSE
Once your alignment is complete, StarSense can
further enhance the pointing accuracy of your
telescope by adding multiple alignment references.
You can add up to 10 alignment reference points
for extremely precise GoTo accuracy.
1. Press the BACK button until you see
“StarSense Ready” on the display.
2. Press ALIGN. Add Align Ref will appear, then
press ENTER.
3. Using the arrow keys, move the telescope several
degrees away from its last alignment point.
Remember to finish movement with the UP
and RIGHT direction buttons. A checkmark will
appear on the display to confirm this.
If you only intend to add one additional calibration
reference point, then position the telescope in the
area you are going to observe or image in.
4. Press ENTER and StarSense will acquire a new
image and add the align reference point for a
total of 10 reference points.
You can repeat this process up to 9 additional times
in different regions of the sky. Adding calibration
reference points improves the GoTo mount modeling,
which accounts for flexure and other mechanical
inaccuracies to provide the best possible
pointing accuracy.
SOLAR SYSTEM ALIGN
Solar System Align provides good tracking and
GoTo performance by using solar system objects
(the Sun, Moon and planets) to align the telescope
with the sky. Solar System Align is a great way to
align your telescope for daytime viewing as well as
a quick way to align the telescope for night time
observing. Since the StarSense camera cannot
detect celestial objects during the day, Solar System
Align is done using the eyepiece.
WARNING
• Place cap over the camera lens! Since
you may wish to use the Sun for your
alignment, remember to place the cap over the
camera lens to protect the imaging sensor.
• Never look directly at the Sun with the naked eye
or with a telescope (unless you have the
proper solar filter). Permanent and irreversible
eye damage may occur.
1. Press the ALIGN button.
2. Use the UP/DOWN scroll keys to select Solar
System Align from the alignment options and
press ENTER.
3. Move the telescope to its home position or switch
position. Alt-Az mounts should have the telescope
pointing at the horizon. Equatorial mounts should
be positioned to the index marks. Telescopes
with switch postions will automatically move to
the home switch positions.
4. Use the UP/DOWN scroll keys to select the
Solar System object you wish to align and
press ENTER.
The hand control will only display the solar system
objects that are above the horizon for the day and
time selected.
5. Following the prompts on the hand control, center
the object in your eyepiece. Use the direction
arrow buttons to slew the telescope to the
alignment object. A finderscope or Star Pointer
will help locate the object.
6. Press ENTER when the object is in the
eyepiece’s field of view. Then, center the
object in the eyepiece and press ALIGN.
Once in position, StarSense will model the sky
based on this information and display Alignment
Complete.

I 15
Tips for Using Solar System Align
Once the telescope is aligned using Solar System
Align, you have the option of adding additional
alignment objects (either other planets or stars
from the Named Star Catalog) to improve pointing
accuracy. To add an alignment object:
1. Select the desired object from the Named Star
or Solar System database and slew to it.
2. Press the ALIGN button on the hand control.
3. The display will ask if you want to add an
alignment object or replace the existing one.
4. Select ADD to add the additional alignment
object. If an additional object has already been
added, then you have the option of replacing one
of the existing objects with the new object.
5. Carefully center the object in the eyepiece. Start
with coarse centering, press ENTER, then fine
center using the UP and RIGHT buttons, then
press ALIGN.
6. Press ALIGN to add the alignment object.
OTHER ALIGN FUNCTIONS
Save / Load Alignment: Allows you to save
your alignment for future use or load a previous
StarSense alignment.
To save an alignment:
1. When the hand control displays StarSense
Ready, press ALIGN.
2. Scroll UP/DOWN (also the 6 and 9 keys) to
select Save / Load Align and press ENTER.
3. Scroll UP/DOWN (also the 6 and 9 keys) to
select the slot you wish to save under. There
are 10 available save positions, 0-9.
4. Press OPTION (Celestron logo key on
bottom left) and ENTER simultaneously to
save the alignment.
The save name is a date code in YYMMDD
HHMMSS format.
To load an alignment:
1. With StarSense powered on and booted up,
press ALIGN.
2. Scroll UP/DOWN (also the 6 and 9 keys) to
select Save / Load Align and press ENTER.
3. Scroll UP/DOWN (also the 6 and 9 keys to
select the slot you wish to load.
4. Press OPTION (Celestron logo key on bottom
left) and ALIGN simultaneously to load the
alignment.
StarSense will need to sync the telescope position
in the sky to restore your saved alignment.
5. Press ENTER when the hand controller displays
Sync Reference.
6. Select Camera in the Sync Reference screen
and press ENTER. Alternatively, you can scroll
UP/DOWN and select Switch (requiring that
you move the telescope to its home position) or
Index position. Telescopes with switches will
automatically move to their home switch position.
7. Slew the telescope to an open area of sky.
Remember to finish the movement with the UP
and RIGHT direction buttons. A small checkmark
will appear on the upper right screen when this
is done.
8. Press ENTER. StarSense will capture an image
and complete the sync.
Quick Align: Sets the telescope home position
as the sole reference point to determine where
objects are in the sky based on the site information
given. Use Quick Align for rough GoTo alignment.
This can be useful if you want the telescope to be
able to track without performing a full StarSense or
Solar System alignment.

16 I
SYNC
Syncing on a star will shift the mount model to the
star position. It will improve GoTo pointing in the
region of sky close to the star you synced on. Sync
can also be used if the mount was bumped or the
clutches were loosened for either axis. Sync will
restore the position of the StarSense GoTo without
using the camera.
1. With a named star selected, press OPTION and
ALIGN simultaneously.
2. Coarse center the star in your finder or eyepiece
and press ENTER.
3. Fine center the star in your eyepiece, finishing in
the UP and RIGHT directions and press ALIGN.
POLAR ALIGN
This feature aligns the mount through the hand
controller, using any of the named stars in its
database, essentially eliminating the need for a
polar axis finder. Polar Align is use for Equatorial
mounts, or wedge-mounted Altazimuth mounts
only. Polar Align must be performed after a
StarSense Auto or StarSense Manual Align. We
recommend you also add multiple Cal Reference
points to improve the mount model, thereby
improving the polar alignment when adjustments
are made to the mount.
1. After your mount’s GoTo is aligned, Press
ALIGN, scroll UP/DOWN, and select Polar
Align and press ENTER.
2. The screen will display the polar alignment
error of your mount. Press ENTER and select a
named star from the list, then press ENTER to
slew to that star.
3. The controller will prompt you to add a Cal
Star to improve the accuracy, or you may press
BACK to skip this step.
4. Adjust the mount by physically moving the alt-az
adjustments. The direction buttons are locked
out at this time to prevent accidentally moving
the motors in the mount.
5. Press ENTER to complete the polar alignment.
For best accuracy, perform another StarSense
Auto alignment.

I 17
STARSENSE CAMERA
Modular Jack: Connects the StarSense Camera
to your telescope using the provided cable.
USB Port: Available for future software development
and camera fi rmware upgrades.
Camera Lens: A fully multi-coated 20mm f/2
lens responsible for capturing images to align
the telescope.
Lens Shroud: Helps protect the lens from dew
and peripheral light.
Large Camera Bracket: This bracket is preinstalled
in the box with StarSense. The bracket can be
removed and swapped with the smaller included
bracket (see Assembly, Changing Brackets).
Camera Bracket Attachment Thumbscrews:
Used with the large camera bracket.
STARSENSE HAND CONTROL
StarSense AutoAlign’s hand control gives you
instant access to the night sky. With automatic
slewing to over 40,000 objects and common sense
menu descriptions, even a beginner can master its
features in just a few observing sessions. Below is
a brief description of the individual components of
the StarSense hand control:
1. Liquid Crystal Display (LCD) Window:
Features a four-line, 18-character display screen
that has red backlighting for comfortable viewing.
2. ALIGN: Instructs StarSense to begin alignment
of your telescope.
3. Direction Buttons: Used to manually slew your
telescope in any direction and center objects in
the eyepiece.
4. Catalog Buttons: StarSense has a key on the
hand control to allow direct access to each of
the main catalogs in its 40,000+ object database.
StarSense contains the following catalogs in its
database: Solar System, Stars, and Deep Sky.
5. IDENTIFY: Searches StarSense’s databases
and displays the name and offset distances to
the nearest matching objects.
USB Port for future upgrades
and development
Modular Jack
Connection to mount
Lens shroud
Camera Lens
Large Bracket
(pre-installed on
camera in box)
Attachment Screws
STARSENSE OVERVIEW

18 I
6. MENU: Displays the many utilities and setup
functions, such as tracking rate, user defined
objects, and others.
7. OPTION (Celestron Logo): Can be used in
combination with other keys to access more
advanced features and functions.
8. ENTER: Selects any of StarSense’s functions,
accepts entered parameters, and slews the
telescope to displayed objects.
9. BACK: Exits the current menu and displays
the previous level of the menu path. Press
BACK repeatedly to get back to a main menu
or erase data entered by mistake.
10. SKY TOUR: Activates the tour mode, which
seeks out all the best objects in the sky and
automatically slews StarSense to those objects.
11. Scroll Buttons: Used to scroll up and down
within any of the menu lists. A double arrow
symbol on the right side of the LCD indicates
that the scroll keys can be used to view addi-
tional information.
12. MOTOR SPEED: Instantly changes the
motor’s rate of speed when the direction
buttons are pressed.
13. OBJECT INFO: Displays coordinates and useful
information about objects from StarSense’s
database.
14. RS-232 Jack: Connects your telescope to
a computer to access software programs for
point-and-click slewing, or updating firmware
via PC.
OBJECT CATALOG
Selecting an Object
Now that the telescope is properly aligned, you
can choose an object from any of the catalogs in
the StarSense’s database. The hand control has a
key designated for each category of objects in its
database, Solar System objects, Stars, and Deep
Sky objects.
Solar System: The Solar System catalog will
display all the planets in our Solar System that are
currently visible in the sky, along with the Moon
and Pluto. To allow the Sun to be displayed as an
option in the database, see Allow Sun option in the
Database Setup section of the manual.
Stars: The Stars catalog displays a custom list of
variable stars, double stars, asterisms, named star,
and the SAO star catalog.
Deep Sky: The Deep Sky catalog displays a list
of the complete NGC, IC and Messier catalogs,
including star clusters, nebulae, galaxies, and
planetary nebulae objects. There is also an alpha-
betical list of all deep sky objects in order by their
common name.
The Messier and NGC catalogs require you to
enter a numeric designation. Selecting these
catalogs will display a blinking cursor next to the
name of the catalog chosen. Use the numeric key
pad to enter the number of any object within these
standardized catalogs. For example, to find “M42”
(the Orion Nebula), press the DEEP SKY, use the
UP/DOWN keys to scroll to Messier, then key in
042 and press ENTER.
Holding down either the UP or DOWN key allows
you to scroll through any catalog faster. Holding
down the OPTION button while pressing the UP/
DOWN keys allows you to scroll through the
database three objects at a time.

I 19
SLEWING TO AN OBJECT
Once the desired object is displayed on the hand
control screen, you have two options:
• Press the OBJECT INFO Key. This will display
information about the selected object such as
magnitude, constellation, and extended informa-
tion about the most popular objects.
• Use the UP/DOWN keys to scroll through the
displayed object info.
• Press BACK or OBJECT INFO to return to the
object database.
• Press ENTER. The telescope will slew to the
object displayed on the hand control. While the
telescope is slewing, you can still access many
of the hand control functions, such as displaying
information about the object.
Caution: Never slew the telescope when someone
is looking into the eyepiece. The telescope can move
quickly and may hit an observer in the eye.
SKY TOUR BUTTON
The StarSense includes a tour feature, which takes
you through the most interesting celestial objects
based on your time and location. The list of objects
is prioritized based on where your telescope is
pointed, so the telescope always slews to an object
nearby rather than scattered throughout the sky. The
tour will display only those objects that are within
your set catalog filter limits. To activate the tour fea-
ture, press the SKY TOUR key on the hand control.
1. Press the SKY TOUR button on the hand control.
2. Follow the prompts on the hand control. Using
the direction buttons, slew the telescope to its
index marks or home position.
3. Press ENTER and the Sky Tour will begin. A
message will appear SkyTour Searching.
StarSense will slew to the first object. After the
object is located, you may press ENTER to
proceed to the next object.
IDENTIFY BUTTON
Pressing the IDENTIFY button will search
StarSense’s database and display the name and
angular distances to the nearest matching objects
from the telescope’s current location. This feature
can serve two purposes. First, it can be used to
identify an unknown object in the field of view
of your eyepiece. Stars will be searched first,
followed by deep sky objects.
Additionally, IDENTIFY can be used to find other
celestial objects that are close to the objects you
are currently observing.
For example, if your telescope is pointed at the
brightest star in the constellation Lyra, choosing
IDENTIFY will no doubt return the star Vega as
the star you are observing. However, the Identify
feature will also search its NGC and Solar System
databases and display any planets or Deep Sky
objects that are close by. In this example, StarSense
would identify the Ring Nebula (M57), which is
approximately 6º away.
You can specify the brightness and proximity of the
objects displayed by the IDENTIFY feature using
the Identify Filter under Telescope Setup.
DIRECTION BUTTONS
The StarSense has four direction buttons in the
center of the hand control which slew the telescope
in altitude (up and down) and azimuth (left and right).

20 I
MOTOR SPEED BUTTON
The telescope can be controlled at nine different
speed rates. Pressing the MOTOR SPEED button
allows you to instantly change the speed of the
motors from high-speed slew rate to precise
guiding rate, or anywhere in between. Each rate
corresponds to a number on the hand control key
pad. The number 9 is the fastest rate (approximately
3.5º per second, depending on power source) and
is used for slewing between objects and locating
alignment stars. The number 1 on the hand control
is the slowest rate (2x sidereal) and can be used
for accurate centering of objects in the eyepiece.
To change the speed rate of the motors:
1. Press MOTOR SPEED. The LCD will display
the current speed rate.
2. Press the number of the desired speed.
The hand controller has a “double button” feature
that allows you to instantly speed up the motors
without having to choose a speed rate. Simply press
the arrow button for the direction that you want
to move the telescope. While holding that button
down, press the opposite directional button. This
will increase the speed to the maximum slew rate.
When using the UP and DOWN buttons on the
hand control, the slower slew rates (6 and lower)
move the motors in the opposite direction than the
faster slew rates (7- 9). This is so that an object
moves in the appropriate direction when looking
into the eyepiece (i.e. pressing the up arrow button
will move the star upwards in the field of view of
the eyepiece). However, if any of the slower slew
rates (rate 6 and below) are used to center an
object in an optional finderscope, you may need to
press the opposite directional button to make the
telescope move in the correct direction.
HELP BUTTON
The HELP button gives you instant access to
helpful information and utilities that can improve
the pointing accuracy of your telescope.
• General FAQ: A quick reference guide for the
features and functions of your telescope.
• Glossary: Provides definitions for many
astronomical terms you may come across
while using your telescope.
The HELP button can also be used to improve
pointing accuracy should you notice that bright
objects are not well centered in (or completely
missing from) the eyepiece. This is particularly
useful when using the StarSense Manual
alignment process. To use the HELP button to
improve accuracy:
1. Slew to the database object that is not visible
(or not well centered) in the eyepiece.
2. After the slew is complete press the HELP
button. Do not attempt to use the direction
buttons to manually search for the object.
The telescope will then slew to a nearby bright star
and take a reference image. StarSense will make
adjustments to its sky alignment model based on
the stars captured in the image.
3. Once complete, slew the telescope back to the
original object. You should notice a considerable
improvement in pointing accuracy in that region
of the sky.
MENU BUTTON
StarSense contains many user-defined setup
functions so you can customize your telescope’s
features. Access the setup and utility features by
pressing the MENU key and scrolling through the
options below.
/