Page is loading ...

D
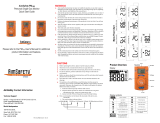
Dräger Pac® 7000
en Instructions for Use
2 - 6 sv Bruksanvisning
53 - 57 bg Ръководство за работа
109 - 114
de Gebrauchsanweisung
7 - 11 et Kasutamisjuhised
58 - 62 ro Instruciuni de utilizare
115 - 120
fr Notice d’utilisation
12 - 16 lv Lietošanas instrukcija
63 - 68 hu Használati útmutató
121 - 126
es Instrucciones de uso
17 - 21 lt Naudojimo vadovas
69 - 73 el Οδηγίες Χρήσης
127 - 132
pt Instruções de utilização
22 - 26 pl Instrukcja obsługi
74 - 79 tr Kullanma talimat
133 - 137
it Istruzioni per l'uso
27 - 32 ru Руководство по зксплуатации
80 - 85 ar 138 - 142
nl Gebruiksaanwijzing
33 - 37 hr Upute za uporabu
86 - 91 zh
143 - 147
da
Brugsanvisning
38 - 42
sl
Navodilo za uporabo
92 - 97
ja
148 - 153
fi
Käyttöohjeet
43 - 47
sk
Návod na použitie
98 - 103
ko
154 - 158
no
Bruksanvisning
48 - 52
cs
Návod na použití
104 - 108

2
1 For Your Safety
– The use of the Dräger Pac 7000 instruments assumes a
complete knowledge and adherence to the user’s manual.
– In areas that are subject to explosion hazards, the Dräger
Pac 7000 can only be used if these hazards are explicitly
covered under the Ex Approvals which have been granted to
the Dräger Pac 7000.
– Dräger Pac 7000 is not for use in oxygen-enriched atmos-
pheres.
– Please check calibration before safety relevant use.
– The performing of calibration and bump testing shall be con-
ducted according to local regulations. Do not inhale the test
gas. Observe the hazard warnings of the relevant Safety Data
Sheets.
– The gas opening is equipped with a dust and water filter.
This filter protects the sensor against dust and water.
Do not destroy the filter. Replace destroyed or clogged filter
immediately (see “Changing dust and water filter” on
page 6).
2 Intended Use
– Personal gas alarm in the workplace.
3 What is What?
1
Alarm LED
6
Gas Opening
2
Horn
7
Screw
3
Concentration Display
8
Clip
4 [OK]
Key On/Off/Alarm Acknowledge
9
Label
5 [+]
Key Off/Bump Test
10
IR Interface
1
6
5
2
3
9
4
7
7
1
7
8
10
7
9
St-5047/5053-2004.eps
Pac 7000
4 Operation
4.1 Turning the instrument on
– Press and hold
[OK]
. The display counts down until start-up:
"3, 2, 1".
– All display segments are lit. Next, the LED, Alarm and Vibrat-
ing alarm are activated in sequence. Please check these be-
fore each use.
– The instrument will perform a self test.
– The software version and the gas name are displayed.
– The A1 and A2 alarm limits are displayed.
– After max. 20 seconds the gas concentration is displayed
and the instrument is ready for use.
– For the O
2
sensor: after the first turning on of the instrument,
a sensor warm up time of up to 15 minutes is needed. The
gas value flashes until the warm up time has passed.
4.2 Before entering a working place
– After turning the instrument on, the actual measurement
value will normally be shown in the display.
– Check for the notice icon [!]. When lit, it is recommended
that you perform a bump test as described in chapter 4.3.
– Clip the instrument to clothing before working in or near
potential gas hazards.
– Insure that the gas opening is not covered and that the instru-
ment is also near to your breathing area.
4.3 Performing a "bump test" with gas
– Prepare a Dräger test gas cylinder with 0.5 l/min and a gas
concentration higher than the alarm threshold to be tested.
– Connect Dräger Pac 7000 and the test gas cylinder to the
calibration adapter or connect Dräger Pac 7000 to the
Dräger Bump Test Station.
– To enter the bump test mode, press the [+] 3 times within
3 seconds. The instrument beeps twice, quickly. The notice
icon [!] begins to flash.
1Fresh Air Calibration Icon
2Span Calibration Icon
3Password Icon
4Peak Concentration Icon
5TWA Icon
6STEL Icon
7Error Icon
8Bump Test Icon
9Low Battery Icon
10Selected measuring unit
11Concentration display
10
8
7
9
12345
6
00123826_04.eps
11
Remark: With Dräger Bump Test Station “Printer” the unit
can be configured to automatically start the bump test with-
out pressing any key.
– To activate the bump test press [OK].
– Open the regulator valve to let test gas flow over the sensor.
– If gas concentration exceeds the alarm thresholds A1 or A2
the corresponding alarm will occur.
– To finish the bump test press [OK], the [!] icon is removed
from the display and the instrument returns to the measuring
mode.
– If during the bump test no alarm occurs within 1 minute, the
instrument alarm mode is entered to indicate failure.
The error icon [X] and the notice icon [!] are flashing; error
code 240 is shown upon acknowledgement. "– – –" is
shown instead of the measured value, and the [X] and [!]
icons are lit. In this case the bump test can be repeated or the
instrument can be calibrated.
– The result of the bump test (passed or failed) will be stored
in the data logger (see chapter 6.1).
– The bump test can also be made by an automatic function.
This function can be activated using the PC software
Pac Vision or CC Vision (see chapter 6).
– If the bump test mode was entered by mistake, while the
notice icon [!] was not lit and no gas flow over the sensor,
press [+] to cancel the bump test mode and switch over to
measurement screen.
4.4 During operation
– If the allowable measurement range is exceeded or a nega-
tive drift occurs, the following will appear in the display:
" " (too high concentration) or " " (negative drift).
– Alarms are indicated as described in chapter 7.
– Continuous function of the instrument is indicated by the life
signal, which is a beep every 60 seconds, if configured (see
chapter 11).
– For measurements according to EN 45544 (CO, H2S) or
EN 50104 (O2) the Life Signal must be switched on.
– To illuminate the display press [+].
4.5 Show peak concentration, TWA and STEL
– During measuring mode press [OK]. The peak concentration
and the peak concentration icon will be shown.
After 10 seconds the display will return to the measuring
screen, or if [OK] is pressed again the TWA concentration
and the TWA icon will be shown. After 10 seconds the dis-
play will return to the measuring screen, or if [OK] is pressed
again the STEL concentration and the STEL icon will be
shown. After 10 seconds the display will return to the meas-
uring screen, or if [OK] is pressed again the number of STEL
periods and the STEL icon will be shown. After 10 seconds
the display will return to the measuring screen.
4.6 Turning the instrument off
– Simultaneously hold both keys for approximately 2 seconds
until "3" appears in the display. Continue to hold both keys
until the countdown is finished. The alarm and LED will be
activated momentarily.

3
5 Calibration
– Dräger Pac 7000 is equipped with a calibration function. The
instrument will automatically return to the measuring screen
if no key is pressed in the calibration menu for 1 minute
(except in the span calibration menu which will wait for
10 minutes).
– Calibration shall be performed by trained personnel if the
bump test is failed or after specified calibration intervals (see
chapter 11 and European standard EN 50073).
5.1 Enter the password
– To enter the calibration menu press the [+] 3 times within
3 seconds. The instrument beeps twice, quickly. The notice
icon [!] begins to flash.
– Press [+] again. If a password has been set, three zeros
"000" will appear on the display with the first zero flashing.
The password is entered one digit at a time. Change the
value of the flashing digit by pressing [+] and press [OK] to
accept the value. The next digit will now be flashing. Repeat
this process to select the next two values. After the last
acceptance using the [OK] button the password is complete.
Note: the default password is "001".
– If a correct password has been entered or no password has
been set, the display shows the icon for fresh air calibration
flashing.
– Press [OK] to enter the fresh air calibration function or press
[+] to switch over to the span calibration function. After this
the display shows the icon for span calibration flashing.
– Press [OK] to enter the span calibration function or press [+]
again to switch over to the measurement mode.
5.2 Fresh air calibration
– To enter the fresh air calibration function press [OK] after
entering the menu while the fresh air calibration icon flashes.
The fresh air calibration icon stops flashing and the indicated
value flashes.
– To finish the fresh air calibration press [OK], the fresh air
calibration icon is removed from the display and the instru-
ment returns to the measuring mode.
– If the fresh air calibration failed a long single beep occurs.
"– – –" is shown instead of the measured value, and the [X]
icon and the fresh air calibration icon are lit. In this case the
fresh air calibration can be repeated or the instrument can be
calibrated.
5.3 Calibration
5.3.1 Automatically Calibration
– With Dräger Bump Test Station “Printer” the unit can be con-
figured to automatically start a calibration after a failed bump
test without pressing any key.
5.3.2 PC-based Calibration
– For calibration connect Pac 7000 to a PC using the connect-
ing cradle or the E-Cal System. Calibration can be done with
installed software Pac Vision or CC Vision. A calibration
"due date" can be set using the operation timer (in days).
5.3.3 Calibration without PC
– Pac 7000 is also equipped with an onboard calibration func-
tion. Prepare the calibration cylinder, connect the cylinder to
the calibration adapter, and connect the calibration adapter
to the instrument.
– To enter the span calibration function press [OK] after
entering the menu, while the span calibration icon flashes.
Now the calibration icon stops flashing and the adjusted cal-
ibration concentration flashes.
– It is possible to use this adjusted calibration concentration or
to change it to be in line with the concentration of the gas
cylinder.
– To change the adjusted calibration concentration press [+].
The first digit flashes. Change the value of the flashing digit
by pressing [+] and press [OK] to accept the value. The next
digit will now be flashing. Repeat this process to select the
next three values. After the last acceptance using the [OK]
button the calibration concentration is complete.
– Open the regulator valve to let calibration gas flow over the
sensor (flow: 0.5 l/min).
– Press [OK] to start the calibration. The concentration flash-
es. When the indicated value shows a stable concentration
press [OK].
– If the calibration is successful a short double beep occurs
and the instrument returns to the measuring mode.
– If the calibration failed a long single beep occurs.
"– – –" is shown instead of the measured value, and the [X]
icon and the span calibration icon are lit. In this case the cal-
ibration can be repeated.
5.4 Adjustment of the password
– For adjustment of the password connect Dräger Pac 7000 to
a PC using the connecting cradle or the
E-Cal System. The password can be adjusted with installed
software Pac Vision or CC Vision.
Note: If the passowrd is set to "000", this means no password
is set.
6 Maintenance and Configuration
– The device does not need any special maintenance.
– For individual configuration or individual calibration connect
Dräger Pac 7000 to a PC using the connecting cradle or the
E-Cal System. Configuration and calibration can be done
with installed software Pac Vision or CC Vision. Strictly
follow the instructions for use of the modules and software in
use.
6.1 Data logger
– Dräger Pac 7000 is equipped with a data logger. The data
logger stores events and the peak concentration measured
during during a variable interval adjustable with Pac Vision or
CC Vision. The data logger runs about 5 days in a 1 minute
intervall. If the memory of the data logger is filled the data log-
ger overwrites the oldest stored data.
– For adjustment of the peak concentration to be stored or for
download of the stored data connect Dräger Pac 7000 to a
PC using the connecting cradle or the E-Cal System. The
stored data can be downloaded with installed software
Pac Vision or CC Vision.
6.2 Adjustable operation timer (in days)
– Dräger Pac 7000 is equipped with an adjustable operation
timer. The operation timer can be used to set an individually
operation period e. g. to adjust a "calibration due date", an
"inspection due date", an "out of order date", a “usable life
alarm” etc.
– To adjust the operation timer connect Dräger Pac 7000 to a
PC using the connecting cradle or the E-Cal System. The ad-
justment can be done with installed software Pac Vision or
CC Vision.
6.3 Usable life alarm / end of operation period
– A useable life alarm can be adjusted using the adjustable op-
eration timer (see chapter 6.2).
– If an operation period is set a warning period begins before
the end of the installed operation period.
– During this period the remaining life time flashes just after
turning the instrument on, e. g. "30" / "d".
– This alarm occurs at 10 % of the set operation period or at
least 30 days before end of the operation period.
– To acknowledge this message [OK] must be pressed. After
that, the instrument can be used further.
– After the usable operation period has expired, the text "0" /
"d" will alternate in the display and cannot be acknowledged.
The instrument will not longer measure.
6.4 Measurement of % COHB
– Dräger Pac 7000 CO-version is equipped with a measuring
mode to measure % HBCO in exhaled air. The exhaled CO
provides a convenient and reliable concentration value to
measure the carboxyhemoglobin (COHB) content of the
blood.
– To activate this function connect Dräger Pac 7000 to a PC
using the connecting cradle or the E-Cal System. The adjust-
ment can be done with installed software Pac Vision or
CC Vision.
– After activation of this function the display alternates
between "HB" and a concentration. The concentration will be
indicated in the unit of % COHB.
– For the measurement connect Dräger Pac 7000 to the cali-
bration adapter and connect a mouth piece (Dräger order
code: 68 05 703) to the calibration adapter.
– Blow into the mouth piece for approximately 20 seconds.
– Wait for the highest indication in the display.
– During calibration and bump test, the instrument reverts back
to the regular ppm CO mode and returns to COHB mode
once finished.
– There are no gas alarms and no TWA / STEL measurements
available in COHB mode.

4
7 Alarms
7.1 Concentration Pre/Main Alarms
– The alarm will activate whenever the alarm thresholds A1 or
A2 are exceeded.
– The instrument is equipped with a vibrating alarm. It vibrates
in parallel to these alarms.
– During an A1, the LED will blink and the alarm will sound.
– During an A2, the LED and alarm tone will repeat in a double
repeating pattern.
– The display will alternate between the measurement value
and "A1" or "A2".
– When the TWA A1 alarm is activated, the TWA icon flashes
in addition to the audible, optical and vibrating alarm.
– When the STEL A2 alarm is activated, the STEL icon flashes
in addition to the audible, optical and vibrating alarm.
– The alarms may, according to the selected configuration, be
acknowledged or turned off (see chapter 11). "Acknowledge-
able": alarm tone and vibration can be acknowledged by
pressing [OK].
– "Latching": The alarm will only deactivate when the concen-
tration falls under the alarm threshold and then [OK] is
pressed.
– If the alarm is not latching, the alarm will deactivate as soon
as the concentration falls under the alarm threshold.
7.2 Battery pre / main alarms
– When the battery pre-alarm is activated, the audible alarm
sounds and the LED blinks, and the "low battery" icon " "
flashes.
– To acknowledge the pre-alarm, push [OK].
– After the first battery pre-alarm, the battery will last for approx.
1 further week and the "low battery" icon stays lit.
– When the battery main alarm is activated, the audible alarm
sounds in a repeating pattern of 2 repeating tones and the
LED blinks in the same pattern.
– The battery main alarm is not acknowledgeable; the instru-
ment will automatically turn off after approx. 10 seconds.
– In case of a very low battery, the internal voltage monitor
could activate the LED’s.
8 Battery
8.1 Changing the battery
–Do not change the battery in explosion-hazard areas!
– The instrument contains a replaceable lithium battery.
– The battery is part of the Ex approval.
– Only the following battery types shall be used:
Duracell 123 Photo, Lithium, 3 V
Duracell 123 Ultras, Lithium, 3 V
Panasonic CR123A, Lithium, 3 V
Energizer EL123A, Lithium, 3 V
Powerone CR123A, Lithium, 3 V
– Turn the instrument off.
– Unscrew the 4 screws from the back case.
– Open the front case and remove the depleted battery.
– Press and hold [OK] for approx. 3 seconds while battery is
not installed.
– Insert the new battery according to specified polarity (+/–).
– Place front case back and fasten it by tightening the 4 screws
of the back case.
– After changing the battery a sensor warm up time is needed
(see chapter 11). The gas value flashes until the warm up
time has passed.
8.2 Handling of exhausted batteries
–Caution:
– Never throw them into a fire!
– Never attempt to charge them!
– Never attempt to open them, danger of explosion!
– Dispose of exhausted batteries only as special waste in
accordance with local regulations.
– Spent batteries may be returned to Dräger Safety for dispos-
al.
9 Sensor
9.1 Changing the sensor
–Do not change the sensor in explosion-hazard areas!
–Replace sensor when instrument can no longer be
calibrated!
–Use only the DrägerSensor XXS of the same gas type!
– Turn the instrument off.
– Unscrew the 4 screws from the back case.
– Open the front case and remove the battery.
– Remove the sensor.
– Insert the new sensor.
– Press and hold [OK] for approx. 3 seconds while battery is
not installed.
– Insert the battery according to specified polarity (+/–).
– Place front case back and fasten it by tightening the 4 screws
of the back case.
– After inserting the battery a sensor warm up time is needed
(see chapter 11). The gas value flashes until the warm up
time has passed.
– After changing the sensor and after the warm up time is fini-
shed the instrument must be calibrated (see chapter 5.3).
10 Instrument alarm
– The alarm and LED will be activated three times, periodically.
– The [X] icon is flashing; a 3 digit error code will be shown in
the display.
– If an error appears in the display see chapter 10.1 and if
necessary please contact Service of Dräger Safety.
10.1 Trouble shooting errors
11 Technical Specifications
11.1 General
11.2 Standard Configuration (Factory Settings)
1) For measurements according to EN 45544 (CO, H2S) or EN 50104 (O2) the
Life Signal must be switched on.
Code Cause Remedies
100 Flash / EEprom write
failed Contact Service
102 AD system defect Contact Service
104 Flash check sum wrong Contact Service
105 Broken or missing O2
sensor Replace O2 sensor
106 Most recent settings
restored Recalibrate instrument
107 Self test failed Contact Service
108 Data Logger download
faild Repeat operation
109 Configuration incomplete Configure again
240 Bump test failed Repeat operation or
calibrate instrument
Environmental Conditions
During operation temperature see 11.3 and 11.4
700 to 1300 hPa
10 to 90 % relative humidity
Conditions for
storage 0 to 40 oC 32 to 104 oF
30 to 80 % relative humidity
Battery life
(typical at 25 oC) 24 hours of use per day,
1 minute alarm per day:
>5,500 hours, O2: >2,700 hours
Intensity of alarm typical 90 dBA at 30 cm / 1 ft.
Dimensions
(without clip) 64 x 84 x 20 mm
(battery compartment
25 mm)
2.5 x 3.3 x 0.8 (battery compartment 1 in.)
Weight 106 g / 3.8 oz.
Ingress protection IP 65
Approvals (see “Approvals” on page 159)
Vibration Alarm yes
Bump Test Interval off
Life Signal 1) off
Turning the instrument off always allowed
Data Logger Interval 1 minute
Operation Timer off
% COHB Mode off

5
11.3 Sensor Specifications and Instrument Configuration
1) For O2 A1 is the lower alarm threshold, used to indicate Oxygen deficiency.
2) Please be aware of special settings by customer requirements.
3) Please be aware of limited lifetime of sensors. Excessive storage reduces
operating time of sensors.
Temperature range of storage is 0 ... 35 oC (32 ... 95oF)
Principle of measurement is an electrochemical 3-electrode sensor. Oxygen (O2) cannot be measured in the presence
of Helium (He)!
The Type-Examination-Certificate covers the measuring function for Oxygen enrichtment and defficiency.
CO H2S O2
Measuring Range 0 ... 1999 ppm 0 ... 100 ppm 2 ... 25 vol.-%
Certified range 3 to 500 ppm 1 to 100 ppm 2 to 25 vol. %
test gas concentration 20 to 999ppm 5 to 90ppm 10 to 25 vol.%
factory set calibration concentration 50 ppm 20 ppm 18 vol.%
Temperature range, operation –20 ... 50 oC
–4 ... 122oF–20 ... 50 oC
–4 ... 122oF–20 ... 50 oC
–4 ... 122oF
Alarm Threshold A1 2) 30 ppm 10 ppm 19 vol.-% 1)
acknowledgeable Yes Yes No
latching No No Yes
Alarm Threshold A2 2) 60 ppm 20 ppm 23 vol.-%
acknowledgeable No No No
latching Yes Yes Yes
TWA Threshold A1 2) 30 ppm 10 ppm No
STEL Threshold A2 2) 60 ppm 10 ppm No
No. of STEL periods 4 4 No
Average STEL duration 15 minutes 15 minutes No
Warm up time (switch on) 20 minutes 20 minutes 20 minutes
Warm up time (sensor or battery change) 15 minutes 15 minutes 15 minutes
Reproducibility
Zero point: ≤ ± 2 ppm ≤ ± 0.5 ppm ≤ ± 0.2 vol.-%
Sensitivity: [% of measured value] ≤ ± 2 ≤ ± 2 ≤ ± 1
Drift (20 oC)
Zero point: ≤ ± 2 ppm/a ≤ ± 1 ppm/a ≤ ± 0.5 vol.-%/a
Sensitivity:
[% of meas. value/month
]≤ ± 1 ≤ ± 1 ≤ ± 1
Response times t0...50/t0...90 7/11 seconds 7/13 seconds 12/20 seconds
Zero error (EN45544) 6 ppm 2 ppm – – –
Standards, performance tests for toxic gases and
oxygen deficiency and enrichment Type Certificate
PFG 07 G 003
EN 45544
EN 50271 EN 45544
EN 50271 EN 50104
EN 50271
Sensor Order Number 3) 6810882 6810883 6810881
Sensor Data Sheet Order Number 9023816 9023819 9023820
4) Multiply cross sensitivity factor by gas concentration to get reading.
Cross sensitivity factors 4) CO H2S O2
Acetylene ≤ 2 negligible ≤ –0.5
Ammonia negligible negligible negligible
Carbon dioxide negligible negligible ≤ –0.04
Carbon monoxide negligible ≤ 0.2
Clorine ≤ 0.05 ≤ –0.2 negligible
Ethane no value no value ≤ –0.2
Ethanol negligible negligible negligible
Ethene no value no value ≤ –1
Hydrogen ≤ 0.35 negligible ≤ –1.5
Hydrogen chloride negligible negligible negligible
Hydrogen cyanide negligible negligible negligible
Hydrogen sulphide ≤ 0.03 negligible
Methane negligible negligible negligible
Nitrogen dioxide ≤ 0.05 ≤ –0.25 negligible
Nitrogen monoxide ≤ 0.2 ≤ 0.03 negligible
Propane negligible negligible negligible
Sulphur dioxide ≤ 0.04 ≤ 0.1 negligible

6
12 Accessories
11.4 Sensor Specifications and Instrument Settings for other Gases
NH3SO2PH3HCN NO2CO2Cl2H2S LC OV 3) OV-A 3)
Measuring Range 0 ... 300 ppm 0 ... 100 ppm 0 ... 20 ppm 0 ... 50 ppm 0 ... 50 ppm 0 ... 5 vol.-% 0 ... 20 ppm 0 ... 100 ppm 0 ... 200 ppm 0 ... 200 ppm
Calibration concentration 50 ppm in N210 ppm in N20.5 ppm in N210 ppm in N210 ppm in N22.5 vol.-% in air 5 ppm in N220 ppm in N220 ppm in N220 ppm in N2
Temperature range, operation –30 ... 50 oC
–22 ... 122oF–30 ... 50 oC
–22 ... 122oF–20 ... 50 oC
–4 ... 122oF–20 ... 50 oC
–4 ... 122oF–30 ... 50 oC
–22 ... 122oF–20 ... 40 oC
–4 ... 104oF–30 ... 50 oC
–22 ... 122oF–40 ... 50 oC
–40 ... 122oF–20 ... 50 oC
–4 ... 122oF–20 ... 50 oC
–4 ... 122oF
Alarm Threshold A1 2) 50 ppm 1 ppm 0.1 ppm 10 ppm 5 ppm 0.5 vol.-% 0.5 ppm 1.6 ppm 10 ppm 10 ppm
acknowledgeable Yes Yes Yes Yes Yes Yes Yes Yes Yes Yes
latching No No No No No No No No No No
Alarm Threshold A2 2) 100 ppm 2 ppm 0.2 ppm 20 ppm 10 ppm 3 vol.-% 1 ppm 3.2 ppm 20 ppm 20 ppm
acknowledgeable No No No No No No No No No No
latching Yes Yes Yes Yes Yes Yes Yes Yes Yes Yes
TWA Threshold A1 2) 50 ppm 1 ppm 0.1 ppm 10 ppm 5 ppm 0.5 vol.-% 0.5 ppm 5 ppm No No
STEL Threshold A2 2) 50 ppm 1 ppm 0.1 ppm 40 ppm 5 ppm 2 vol.-% 0.5 ppm 5 ppm No No
No. of STEL periods 4 4 4 4 4 4 4 4 No No
Average STEL duration 15 minutes 15 minutes 15 minutes 15 minutes 15 minutes 15 minutes 15 minutes 15 minutes No No
Warm up time 2.5 hours 15 minutes 15 minutes 35 minutes 15 minutes 12 hours 40 minutes 15 minutes 18 hours 18 hours
Reproducibility
Zero point: ≤ ± 3 ppm ≤ ± 0.2 ppm ≤ ± 0.02 ppm ≤ ± 0.5 ppm ≤ ± 0.5 ppm ≤ ± 0.2 vol.-% ≤ ± 0.05 ppm ≤ ± 0.1 ppm ≤ ± 3 ppm ≤ ± 5 ppm
Sensitivity: [% of measured value] ≤ ± 3 ≤ ± 2 ≤ ± 2 ≤ ± 5 ≤ ± 2 ≤ ± 20 ≤ ± 2 ≤ ± 5 ≤ ± 5 ≤ ± 20
Drift (20 oC)
Zero point: ≤ ± 5 ppm/a ≤ ± 1 ppm/a ≤ ± 0.05 ppm/a ≤ ± 2 ppm/a ≤ ± 1 ppm/a ≤ ± 0.2 vol.-%/a ≤ ± 0.2 ppm/a ≤ ± 0.2 ppm/a ≤ ± 5 ppm/a ≤ ± 5 ppm/a
Sensitivity:
[% of meas. value/month
]≤ ± 2 ≤ ± 2 ≤ ± 2 ≤ ± 5 ≤ ± 2 ≤ ± 15 ≤ ± 2 ≤ ± 5 ≤ ± 2 ≤ ± 3
Sensor Order Number 1) 68 10 888 68 10 885 68 10 886 68 10 887 68 10 884 68 10 889 68 10 890 68 11 525 68 11 530 68 11 535
Sensor Data Sheet Order Number 90 23 922 90 23 919 90 23 920 90 23 921 90 23 918 90 23 923 90 23 924 90 23 970 90 23 994 90 23 995
Please be aware of possible sensor cross sensitivities (see Sensor Data Sheet).
Description Order-code
Connecting Cradle, complete with USB cable and Pac Vision software 83 18 587
Calibration Adapter 83 18 588
Lithium battery 45 43 808
Dust and water filter 45 43 836
Leather carrying case 45 43 822
Bump Test Station, complete with test gas cylinder 58 L
(gas type by customer request) 83 18 586
E-Cal instrument module for connection of 4 Dräger Pac 1000 to 7000 to a E-Cal Master Station or to Module
Adapter 83 18 589
Dräger Bump Test Station “Printer” complete with test gas cylinder 58 L, including Auto Detect Function for
Pac 7000 (gas type by customer request) 83 21 008
1) Please be aware of limited lifetime of sensors. Excessive storage reduces operating time of sensors. Temperature range of storage is 0 to 35 oC (32 to 95oF)
2) Please be aware of special settings by customer requirements.
3) For ethylene oxide only.
13 Changing dust and water filter
!
00223826_04.eps
/