1
Ames Model
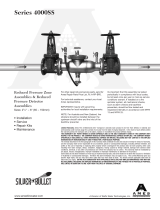
4001SS and 5001SS
Reduced Pressure Backflow Preventer
General Installation, Maintenance,
and Parts Information
3" - 6"
1. Before installing any Ames assembly, FLUSH THE LINE THOROUGHLY
to remove all debris, chips and other foreign objects. Failure to do so may make
the assembly inoperable.
2. The Ames 4001SS and 5001SS Reduced Pressure Backflow Preventers may
be installed in horizontal or vertical positions as shown below. LOCAL WATER
AUTHORITIES MUST APPROVE ALL INSTALLATION CONFIGURATIONS.
3. Backflow preventers must be installed in high-visibility locations in order
to allow for immediate notice of telltale discharge or other malfunction. This
location should also facilitate testing and servicing and protect against
freezing and vandalism.
4. Installing a backflow preventer in a pit or vault is not recommended. Ensure
that all local codes and required safety provisions are met. An air gap below the
relief port must be maintained so as to avoid flooding and submersion of the
assembly, which may lead to a cross connection. Ames recommends installa-
tions indoors or above ground in an insulated enclosure. Normal discharge and
nuisance spitting are accommodated by the use of an Ames air gap fitting and
a fabricated indirect waste line. Adequate floor drain MUST be provided in case
of excessive discharge.
5. IF INSTALLING ON FIRE PROTECTION SYSTEM, BE SURE TO PURGE
AIR FROM FIRE SYSTEM.
Fill system slowly with all inspector's test valves open. Additional venting of air
may be required.
6. The flange gasket bolts for the gate valves shall be retightened during
installation as the bolts may have loosened due to shipping.
Please Read Prior to Installation:
Place yourself so that the water flow through the valve is left to right.
1. Shut down water system and lock out system if possible. Slowly open all ball valves to relieve air and water pressure. After
pressure is relieved, loosen bolts on groove coupler and remove groove coupler and cover plate from valve body.
2. Remove #1 Cam-check Assembly. Do not use Cam Arm as a handle to unscrew Cam-Check. Insert lid bolts in 1st check
seat ring (see fig. 1), insert a long screwdriver or pry bar between lid bolts. Gently apply pressure against the bolts and turn seat
assembly counter clockwise moving bolts hole to hole to maintain turning leverage (two additional bolts will eliminate need to
move lid bolts from hole to hole). Finish unscrewing by hand and remove through top access port. Unscrew #2 Cam-Check
(turn counter-clock wise) by placing a long screwdriver across lid bolts inserted in holes located in the 2nd check seat ring,
similar in method used to remove 1st check and applying pressure to loosen #2 Cam-Check. Finish unscrewing by hand.
3. To clean Cam-Check, locate the Cam Arm opening stud on the outlet flange of the valve assembly. Slide the Cam Arm over
the stud with the check threads facing downward (fig. 2). Tighten a 1/4" nut on stud to secure cam bar. Slowly pull the assembly
outward to open check allowing exposure of the seat and clapper contact area for cleaning. The assembly may be locked open
by aligning the holes in the cam bar and hinge arms and inserting a rod (fig. 4).
12" MIN
36" MAX
RELIEF VALVE
VENT
AIR GAP
DRAIN CONNECTION
FLOOR DRAIN
TO FLOOR DRAIN
12" MIN
36" MAX
INDOOR INSTALLATION
HORIZONTAL INSTALLATION
12" MIN
36" MAX
OUTDOOR INSTALLATION
REMOVING CAM-CHECKS
RP/IS-A-4001SS/5001SS

2
Item # Part Description Qty 3" 4" 6"
1. #1 Cam-Check 1 116-04200 116-04200 116-06200
2. #2 Cam-Check 1 116-04101 116-04101 116-06101
3. Relief Valve Assembly 1 116-04020 116-04020 116-06020
Cover Plate
Diaphragm
Relief Valve Internals
4. Groove Coupler 1 6-05028 6-05028 6-05128
5. Diaphram / Gasket 1 16-00067 16-00067 16-00075
6. Ball Valve 3 980-00527 980-00527 980-00449
7. Relief Valve Seat Assy. 1 116-04022 116-04022 116-04022
8. Relief Valve Sensing Line 1 16-00079 16-00079 16-06079
9. 1st Cam Check O-ring 1 6-05064 6-05064 6-05142
10. 2nd Cam Check O-ring 1 6-05021 6-05021 6-05121
11. Shutoff valves
(not shown)
DETAILED PARTS LISTING - PARTS TABLE #1 (Figure 7)
Figure 1
Long Cam
Arm
3", 4" & 6" RP 1st
Cam-Check
CAM-CHECK DISASSEMBLY
Please use caution when disassembling cam-check.
The cam-check is a spring-loaded mechanical device. Failure to do so may result in potential injury.
FIGURE 5
Remove 1 c-clip from the center
pivot pin. Withdraw the center
pivot pin from the clapper and
the hinge arms. Remove the
clapper assembly from the
check assembly module. Note:
You may replace this item as
an assembly or you may
continue and replace only the
sealing disc.
FIGURE 4
Using your free hand, swing the
clapper assembly away from
the seat. Align (A) lockout
holes.
FIGURE 3
Press down on the check
assembly to unload the
cambar from hinge arms and
roller. Then place a thin rod
into a maintenance hole in one
hinge arm.
FIGURE 6
Disassemble the clapper by
removing 4 screws, disc retainer
and the clapper disc. Disc may
be flipped if sealing surface is
damaged.
Before reinstallation of check assembly, thoroughly clean O-ring groove and lubricate O-ring
with F.D.A. approved lubricant.
5001SS: Contact factory for bypass component servicing information.
Air Gap Drain: Contact factory for additional information.
Short Cam
Arm
6
8
3
5
4
6
2
10
7
9
1
#1 Cam-
Check
#2 Cam-
Check
SCREWDRIVER OR PRYBAR
SCREWDRIVER OR PRYBAR
COVER BOLTS
CAM CHECK
BODY
CAM CHECK
Figure 2
Figure 7

3
SERVICING THE RELIEF VALVE
RELIEF VALVE SERVICE INSTRUCTIONS
1. Prior to beginning any maintenance work, shut down the
water supply to the unit.
2. The relief valve is an integral part of the lid assembly and
may be serviced when the lid assembly is removed from
the body of the valve.
3. The relief valve may be disconnected from the sensing line
hose if desired to enable easier access to all parts of the
assembly.
REPLACING THE SEALING DISC.
1. Unscrew the lower guide, (5) from the shaft (3).
2. Replace the sealing disc assembly (4).
3. Screw the lower guide (5) back into the shaft (3). The
lower guide will seal the assembly with pressure against
the elastomer in the sealing disc assembly (4).
COMPLETE DISASSEMBLY OF THE RELIEF VALVE.
1. Remove the sealing disc as above.
2. Remove the dust cover (10) from the cover weldment (1)
3. Unload the internal spring by unscrewing the guide,
shaft (9) using a socket wrench.
4. Draw the shaft out through the bottom of the diaphragm.
5. Remove the spring through the top of the cover weldment
6. Remove guide O-ring (6)
7. Remove O-ring (12) from the guide shaft.
REASSEMBLY
1. Replace all O-rings
2. Reverse disassembly steps above.
CAM-CHECK- PARTS TABLE #2 (Figure 8)
Item # Part Description Qty 3" 4" 6"
1. Cover 1 116-04023 116-04023 116-06023
2. Diaphragm/Gasket* 1 16-00067 16-00067 16-00075
3. Shaft 1 16-00063 16-00063 16-00073
4. Sealing Disc* 1 16-00054 16-00054 16-00054
5. Guide, Lower 1 16-00055 16-00055 16-00055
6. O-Ring* 1 5-06090 15-06090 5-06090
7. Support Disc 1 16-00059 16-00059 16-00072
8. Disc, Diaphragm Stop 1 16-00058 16-00058 16-00074
9. Guide, Upper 1 16-00061 16-00061 16-00061
10. Cover, Dust 1 980-00721 980-00721 980-00721
11. O-Ring, Upper* 1 5-06089 5-06089 5-06089
12. Spring 1 16-00099 16-00099 16-00066
13. Relief Valve Rubber Kit 1 116-04031 116-04031 116-06031
(consists of * items)
PARTS TABLE #3 (Figure 9)
Item # Part Description Qty. 3” 4” 6”
1. 1st Cam-Check O-ring (removable)* 1 6-05064 6-05064 6-05142
2. Clapper Assembly (removable) 1 116-04026 116-04026 116-06026
3. Clapper Retaining Plate Screws (removable) 4 16-00080 16-00080 16-00084
4. Clapper Retainer Plate (removable) 1 16-00017 16-00017 16-00018
5. Clapper Disc (removable)* 1 16-00019 16-00019 16-00020
6. Pivot Arm Pin (removable) 2 c-clips* 1 16-00041 16-00041 16-00025
7. 2nd Cam-Check O-ring (removable)* 1 6-05021 6-05021 6-05121
8. 1st Cam-Check Rubber Kit 1 116-04032 116-04032 116-06032
(consists of * items)
9. 2nd Cam-Check Rubber Kit 1 116-04033 116-04033 116-06032
(Consists of * items)
10. C-Clips Kit 1 116-04034 116--04034 116-06033
Note: Align holes
and insert pin or
small screwdriver
to hold in open
position.
Figure 8
5
4
3
1
7
6
2
Figure 9
8
10
9
11
12
7
6
1
2
3
4
5

PROBLEM CAUSE SOLUTION
A. Assembly discharges from Fouled first check Disassemble and clean No. 1
differential relief valve during check valve
no flow condition. Fluctuating inlet pressure Control supply line water pressure
Outlet pressure higher than inlet Disassemble, clean #2 check valve
pressure & leak in No. 2 check valve & identify cause of back pressure
Leak through diaphragm Service relief valve (page 3)
Pressure relief valve does not close See problem D
B. Assembly discharges from Pressure relief valve does not close See problem D
differential relief valve during
a flow condition.
C. Differential pressure relief valve Differential pressure across No. 1 Repair shut-off valves
does not open during test check valve stays above 2.0 PSI
due to leaking outlet gate valve
Weak or broken relief valve spring Disassemble and replace relief valve spring
Winged retainer bound in body Disassemble and repair
Plugged hydraulic hose Disassemble and repair
D. Pressure relief valve Debris on sealing surface Remove relief valve and clean
does not close
Plugged hydraulic hose Disassemble and clean
Damaged seat or rubber shut off disc Remove relief valve assembly and replace
Ruptured diaphragm Disassemble and replace diaphragm
TROUBLE SHOOTING GUIDE - 4001SS and 5001SS
1. When using differential pressure gauge.
A. Check differential across No. 1 check valve
READING PROBLEM
2 to 3 PSID Leak in No. 1 or No. 2
check valve
4 to 7 PSID and steady Malfunctioning pressure
relief valve
2 to 7 PSID fluctuating Inlet pressure fluctuating
2. Without using differential pressure gauge.
A. Close gate valve No. 2
RESULT PROBLEM
If discharge stops Leak in No. 2 check valve
If discharge does not stop Go to B
B. Open No. 4 test cock to produce a flow greater
than differential relief valve discharge
RESULT PROBLEM
If discharge stops Leak in No. 1 check valve
If discharge does not stop Malfunctioning pressure
relief valve
PROBLEM IDENTIFICATION PROCEDURES - MODEL 4001SS and 5001SS
LIMITED WARRANTY (Full description of limited warranty is found in Ames Product catalogue.)
This Ames warranty is expressly in lieu of any other warranties, expressed or implied, including without limitation, warranties of
MERCHANTABILITY AND FITNESS FOR A PARTICULAR PURPOSE. Ames shall not be responsible for any incidental or consequential
damages including without limitation, damages or other costs resulting from labor charges, delays, vandalism, negligence, fouling caused
by foreign material, damage from adverse water conditions, chemicals, or any other circumstances over which Ames has no control.
No statement, representation, agreement or understanding, oral or written, made by agent, by an authorized Ames dealer, an Ames
representative or employee which is not contained in this limited warranty will be recognized or enforceable or binding upon Ames
Company, Inc. Only a written statement signed by an officer of Ames may modify this limited warranty.
Any action for breach of any Ames Warranty must be commenced within one (1) year after date on which cause of action occurred.
Ames Company Inc.
1485 Tanforan Ave.
Woodland, CA 95776
(530) 666-2493
Fax (530) 666-5320
A DIVISION OF WATTS INDUSTRIES
RP/IS-A-4001SS/5001SS 0221 EDP# 7016810 Printed in U.S.A.
/