5. Health and Safety Information
– 7 –
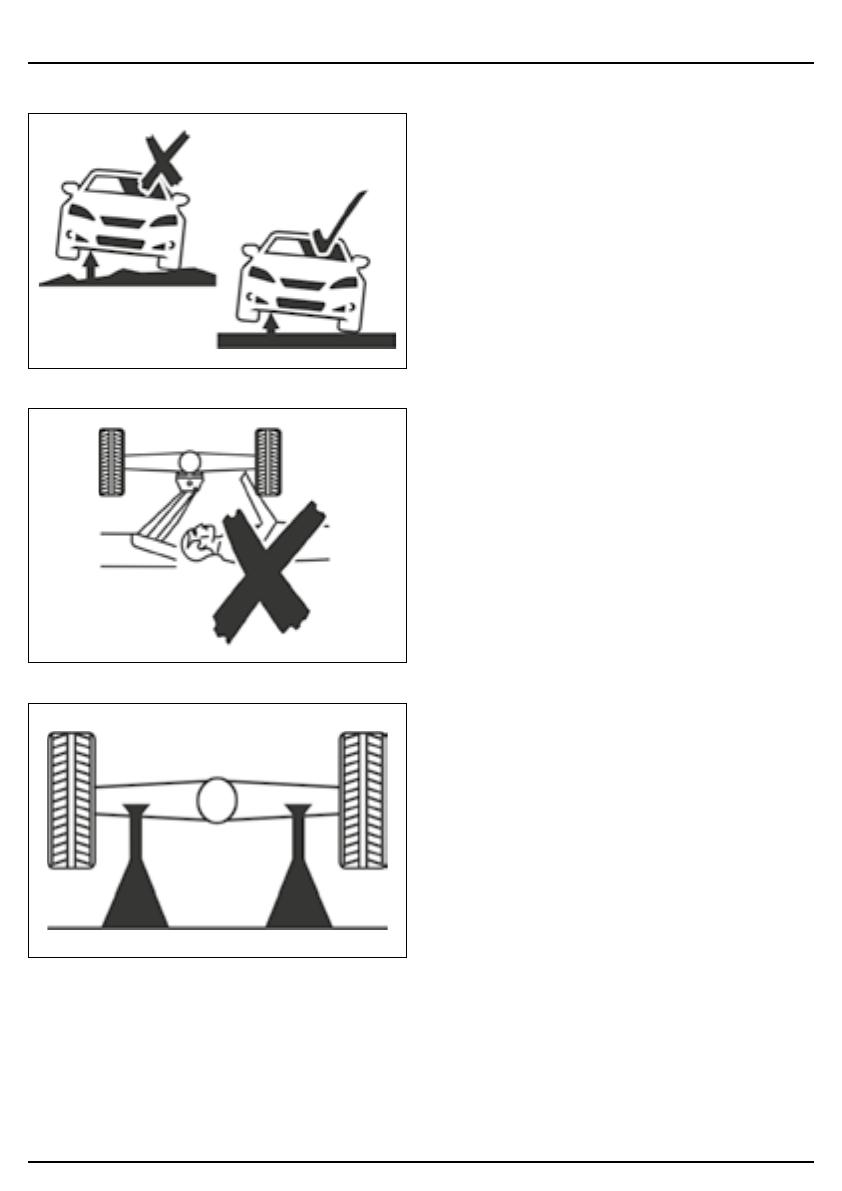
5.3 Correct Use of the Jack
Important: The jack is a lifting device ONLY and should
never be used to move the vehicle. The vehicle to be
lifted should never exceed the rated capacity of the jack.
• ALWAYS bleed the jack piston before use.
• ONLY operate the jack on solid, level and horizontal
surfaces.
− A concrete surface is recommended,
where possible.
− All four wheels of the jack should be in contact
with the operating surface when in use.
WARNING! Never use the jack on any surface that is
slippery or may sink or rock.
• When positioning the jack, ALWAYS use the
manufacturer’s recommended lifting point.
− These points vary between vehicles; consult the
manufacturer’s manual or the Haynes workshop
manualforthespecicvehicleinformation.
• Ensure that the lifting point is not dirty, greasy or
corroded.
• The lifting point must remain centred over the saddle
duringraisingandlowering;o-centredloadsmay
slip and cause injury.
• Position the jack so that no part of the operator is
required to be underneath the vehicle at any time
during lifting or lowering.
• Keep clear of all movable parts of the jack mechanism
when in use.
• Topreventoverloading,thejackisttedwithan
overload valve set at the factory.
Important: The overload valve should not be adjusted
under any circumstances. If the capacity of the jack is
exceeded, the valve will prevent the lifting operation.
• Take all precautions to prevent movement of the
vehicle during raising and lowering.
− Beawarethattracandotherexternalforcesmay
cause the load to rock if used at the roadside.
• Remain alert and observe the load at all times during
operation.
− Should any dangerous conditions occur, including
unexpected movement of the vehicle, cease all
operationuntiltheseconditionshavebeenrectied.
• NEVER work under a raised vehicle without using the
correct axle supports or other appropriate supporting
methods.
• DO NOT enter the vehicle or start the engine while it is
supported on the jack or axle stand.
• NEVER leave the jack unattended when in use.
• NEVER detach the handle shaft while the jack is
under load.
• ALWAYS ensure that there are no persons or
obstacles beneath the vehicle before lowering.


