10
BEFORE USING THE MACHINE
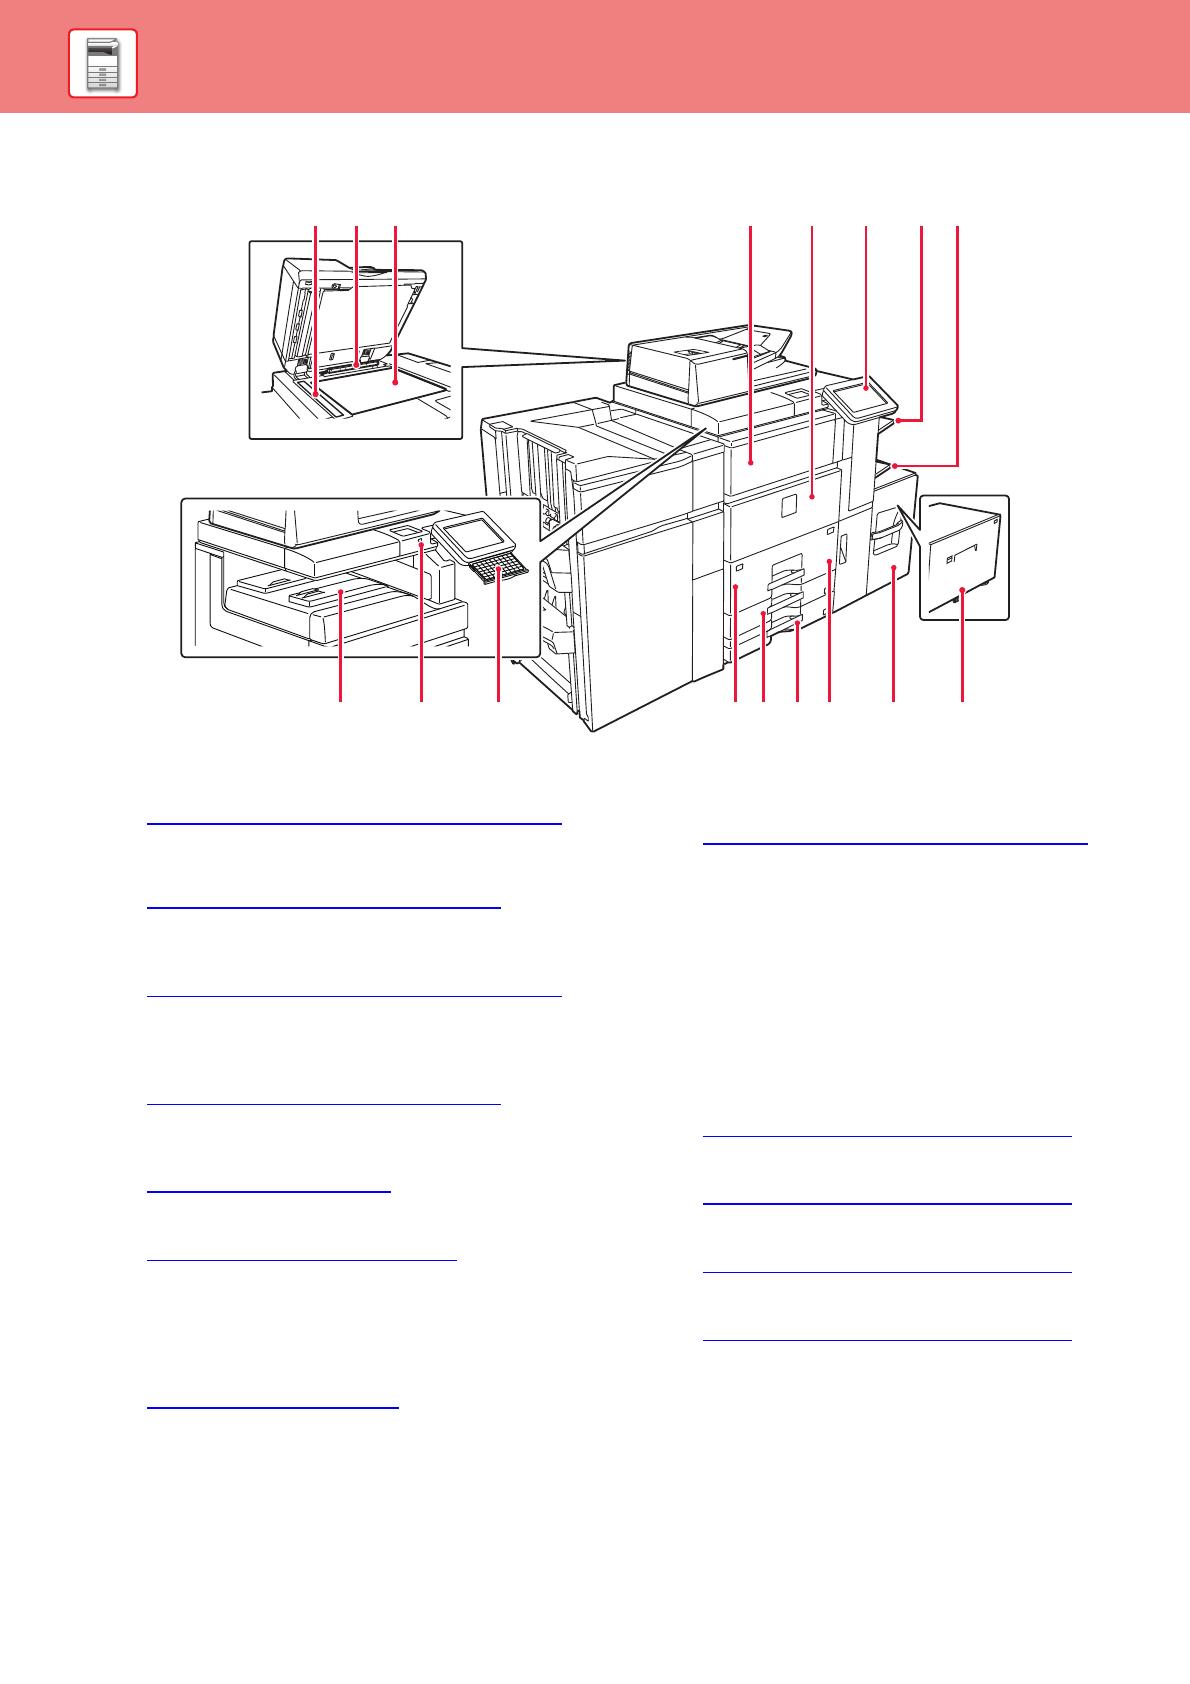
PART NAMES AND FUNCTIONS
(1) Scanning area
Originals placed in the automatic document feeder tray
are scanned here.
►
USING THE AUTOMATIC DOCUMENT FEEDER (page 16)
(2) Original size detector
This unit detects the size of an original placed on the
document glass.
► USING THE DOCUMENT GLASS (page 16)
(3) Scanning area
Originals placed in the automatic document feeder tray
are scanned here.
►
USING THE AUTOMATIC DOCUMENT FEEDER (page 16)
(4) Document glass
If you want to scan books or other thick originals that
cannot be fed through the automatic document feeder,
place them on this glass.
► USING THE DOCUMENT GLASS (page 16)
(5) Toner cover (Upper front cover)
Open this cover to replace the toner cartridge or to
remove misfed paper in the paper pass unit.
► REPLACING TONER
(page 6)
(6) Front cover
Open this cover to switch the main power switch to "On" or "Off".
► TURNING ON THE POWER (page 13)
(7) Operation panel
This panel hosts the [Power] button, [Power Save]
button/indicator, [Home Screen] button/indicator, main
power indicator and touch panel.
Use the touch panel to operate each of these functions.
An NFC touch point area also appears.
► OPERATION PANEL (page 14)
(8) Exit tray unit (right tray)*
Set this tray as the output tray if needed.
Outputting received fax printouts into the right tray allows
you to separate them from other printed paper.
(9) Bypass tray
Use this tray to feed paper manually.
When loading paper larger than A4R or 8-1/2" × 11"R,
pull out the extension guide.
► LOADING PAPER IN OTHER TRAY
S (page 21)
(10) Output tray (centre tray)*
Printed paper is output into this tray.
(11) USB port (A type)
This is used to connect a USB device such as a USB
memory device to the machine.
Supports USB 2.0 (Hi-Speed).
(12) Keyboard*
Use this as a substitute for the soft keyboard displayed on the
touch panel. When not being used, it can be stored under the
operation panel.
(13) Tray 1
Store paper in this tray. Up to 1200 sheets can be stored.
► LOAD PAPER INTO THE TRAY
1/2 (page 19)
(14) Tray 3
Store paper in this tray. Up to 500 sheets can be stored.
► LOAD PAPER INTO THE TRAY 3/4 (page 20)
(15) Tray 4
Store paper in this tray. Up to 500 sheets can be stored.
► LOAD PAPER INTO THE TRAY
3/4 (page 20)
(16) Tray 2
Store paper in this tray. Up to 800 sheets can be stored.
► LOAD PAPER INTO THE TRAY
1/2 (page 19)
(17) Tray 5 (MX-LC12)*
Store paper in this tray. Up to 3500 sheets can be stored.
(18) Tray 5 (MX-LCX3 N)
*
Store paper in this tray. Store paper in this tray. Up to
3000 sheets can be stored.
* Peripheral device. For more information, see the User's Manual.
(9) (10) (11)
(4) (5) (6)
(12)(13) (14) (16)
(17)
(7) (8)
(15)
(1) (2) (3)


