Page is loading ...

Important
This aircraft is not a toy and is only suitable for, or under the guidance of an
experienced pilot.
Not recommended for anyone under 14 years old unless supervised.
Please read this manual carefully and follow the instructions fully before you use
this aircraft.
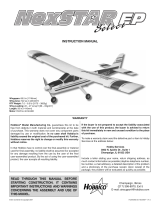
Max-Thrust products are distributed by:
Century UK LTD, 7 Anchor Business Park, Castle Road, Sittingbourne,
KENT. ME10 3AE
www.max-thrust.com
Specification
63 in (1600 mm)
50.7 in (1287 mm)
5.24 lb-5.39 lb(2380g-2450g)
SF1470 prop

4
1
2
3
5
6
7
8
9
10
11
12
13
14
15
16
17
18
19
20
21
22
Caution
Examine your kit carefully!
Our model aircraft kits are subject to constant quality checks thro
ughout the production process and we sincerely hope that
you are completely satisfied with the contents of your kit. However, we would ask you to check all the parts before you start
construction, referring to the parts list, as we cannot exchange components which you have already assembled or modified.
If you find any part is not acceptable for any reason we will readily correct or exchange the part once we have examined the
faulty component. Please contact your place of purchase first and follow the correct returns process.
We are constantly working on improving our models and for this reason we must reserve the right to change the kits
contents in terms of shape or dimension of parts, technology, materials and fittings without prior notification. Please
understand that we cannot entertain claims against us if the kit contents do not agree in every respect with the instructions
and the illustrations.
This aircraft is a sophisticated hobby product and is NOT a toy. It must always be operated with caution and common sense
and some basic mechanical ability. This manual provides instructions as to the assembly and maintenance of the Riot XL, if
you are unsure of any stage please seek out experienced advice, contact your place of purchase or ourselves.
It is highly recommended that you follow and read the instructions and warnings stated in this manual.
If you have never flown an RC aircraft we would suggest you talk to your local model flying club or an experienced RC pilot
before attempting to fly this aircraft. You are responsible for the safe operation and the safety of others whilst using this
aircraft. For further advice or to find your local model flying club visit www.bmfa.org
1. Fuselage x 1
2. Right Wing x 1
3. Left Wing x 1
4. Horizontal Tail x 1
5. Rudder and Fin x 1
6. Battery Cover x 1
7. Cowling x 1
8. Main Spar x 1
9. Rear Wing Connector x 1
10. Front Wing Connector x 1
11. Wing Location Rod x 1
12. Landing Gear x 1
13. Screw (M3 x 10mm) x 4
14. Screw (M2 x 14mm) x 2
15. Screw (M4 x 70mm) x 2
16. Screw (M4 x 65mm) x 2
17. Screw (M4 x 50mm) x 2
18. Screw (M3 x 45mm) x 2
19. Spinner x 1
20. Push rod 1 x 4
21. Push rod 2 x 2
22. Propeller 14x7 x 1
The Riot XL is very stable thanks to its large 1600mm Wingspan
The airframe has been specially designed to provide maximum strength and
rigidity without compromising the flight characteristics of the model.
Aircraft grade aluminium single piece undercarriage provides a solid landing
platform.
Glider tow and release system fitted as standard
Quick and easy battery changes.
High performance brushless motor and ESC
Wing tip LED navigation lights.

3
4
gFlying faster or slower: When your aircraft is stable in the air, push the throttle
stick up to make the aircraft go faster, and pull the throttle stick back to slow down.
The aircraft will climb when the throttle is increased.
gElevator up and down: Push the elevator stick forward to make the aircraft go
down and pull the elevator stick back to go up.
gSteering right and left: Move the rudder or aileron stick right to make the aircraft
go right and move the rudder or aileron stick left to go left (as if you are seated in
the cockpit).
Flight Trimming
Elevator trim:
Only trim the aircraft at half throttle. When trimmed correctly, your aircraft climbs
steadily at full throttle and wil
fly level at half throttle.
gWhen the aircraft's nose drifts up or down while the elevator stick is at
neutral (centered) position, push the elevator trim button by one or two “beep”
increments OPPOSITE the direction of drift.
gAdjust trim so the aircraf
straight and level when the elevator stick is
neutral.
Rudder trim:
gWhen the aircraft drifts left or right while the rudder stick is at the neutral position
(centered), push the rudder trim button by one “beep” increments OPPOSITE the
direc tion of drift.
gAdjust trim so the aircraf
straight when the control stick is neutral.
Aileron Trim
gWhen the aircraft rolls left or right while the aileron stick is at the neutral position
(centered), push the aileron trim button by one “beep” increments OPPOSITE the
direc tion of drift.
ASSEMBLY
1
12
17
1.Install the landing gear on corresponding slot of fuselage, and fix with two pcs
screws.
flies
flys
If you have purchased this model as a Plug and Play aircraft you may find that some of
the following steps have already been completed for you. It is a good idea to check all
screws are tight and everything has been assembled correctly though.

65
2.Insert elevator and rudder on the corresponding slot of fuselage,meanwhile
ensure to insert the tail wheel steel wire to the corresponding slot of rudder, and
fix with two pcs screw.
5
1
18
4
3.Take out 2 wires from wing (the female plug which connect the ai leron and
flap )
4.Insert the cable from aileron servo and flap servo into the corresponding slot of left
wing, and put the servo on the slot.
5.Fix the aileron s ervo and flap servo on left wing with screw.

7
8
6.Attach Push rod 1 to the servo arm.
20
20
3
20
20
7.Fix the pushrod 1 servo arm on the servo, put one head plastic clip of pushrod 1
and fix on servo with screw.
8.Connect the aileron servo lead and flap servo lead (male plug ) to corresponding
female plug.
9.Insert the connected wires i nto the corresponding slot.
10.Repeat the left wing installation steps from 3 to 9 for the right hand wing panel

9
10
2
3
8
11
11. Insert the main spar and the locating rod in to one half of the wing and then slide
the other side on being careful to make sure everything is aligned and no cables are
snagged.
12.Install elevator servo and rudder servo in the correspoding slot of fuselage with
screw.
13.Install and connect pushrod 2 to the servo horns and fit to the servos
14. Fi x the servo arm with pushrod 2 on servo with screw.
21
5
15.Installed one clip head of pushrod2 on rudder servo arm, fix on rudder with screw.

11
12
21
4
16.Installed one clip head of pushrod2 on rudder servo arm, fix on rudder with
screw.
1
13
17.Fix the motor on the motor mount with screw.
7
14
18.Install the front nose cowling and fix with 2 screws through the air inlets
19.Put the ESC on the battery renforcement plate,fix with velcro strap.
20.Connect the motor wires to the ESC. If motor runs backwards reverse this connection.

13
14
21.Insert all servo wires and esc signal lines to correspoding channel of radio in turn.
22.Insert the reciever into the fuselage and fix securely.
7
22
19
23.Fix the propeller on the motor with screw,and then fix the spinner with screw.
24.Insert the connected plug on the right and left wing to socket on PCB of fuselage.
2
3
10
9
15
16
25.Fix the wing on fuselage with screws.

15
16
26.Put the battery on battery plate and fix with velcro strap.
1
6
27.Clip in the battery compartment door.
Connect the Flight Battery
1.Lower the throttle
stick and throttle
trim to their lowest
settings and power
on your transmitter.
2.Connect th flight
battery to the aircraft
2.Immobile for 5 seconds. Series of tones.
CAUTION: Always keep hands away from the propeller. When armed, the motor will
turn the propeller in response to any throttle movement.
CAUTION: Always disconnect the Li-P
flight battery from the aircraft receiver when
no
flying to avoid over discharging the battery.
Control Surface Test
1 . Power on the transmitter.
2. Install a fully charge
flight battery and allow the aircraft's ESC to initialize.
Test the Elevator
MODE 1 MODE 2

17
18
gTest your Elevator control by moving your elevator stick down and up. Make
sure that the elevator responds according to the illustrations.
Test the Aileron
gTest your Aileron control by moving your aileron stick down and up. Make sure
that the aileron responds according to the illustrations.
Test the Rudder
gTest your rudder control by moving your rudder stick left and right. Make sure
that the rudder responds according to the illustrations.
Test the flap
Make sure that the rudder responds according to the illustrations.
Test the Tow Release
Make sure that the tow release responds according to the illustrations.
Centre of Gravity
CG:85-95MM
MODE 2
MODE 2
MODE 2

19
20
The centre of gravity (CG) should be at a position of
85mm-95mm away from
leading edge,Please refer to above picture.
Safety
Safety is the First Commandment when flying any model a
ircraft.
Third party insurance should be considered a basic essential. If you join a
model club suitable cover will usually be available through the organisation.
It is your personal responsibility to ensure that your insurance is adequate.
Make it your job to keep your models and your radio control system in perfect
order at all times. Check the correct charging procedure for the batteries yo
u
are using. Make use of all sensible safety systems and precautions which are
advised for your system.
Always fly in such a way that you do not endanger yourself or others. Bear in
mind that even the best RC system in the world is subject to outside
interference. No matter how many years of accident-free flying you have
under your belt, you have no idea what will happen in the next minute.
The team - hop
e y
ou have many hours of pleasure Max-Thrust
building and flying your new model.
Wing
Fuselage
rudder
Cowling
Main landing gear
Spinner
Tail wheel
Main Spar and Location Rod
Front and Rear Wing
Connectors
Servo horn
Plastic Clevice
Battery Cover Retainer
PCB
Main Landing Legs
Float
Snow skids
Stabilizer
Battery Cover
Pushrod set
/