Page is loading ...

LIMITED WARRANTY
Aroma Housewares Company warrants this product free from defects in material
and workmanship for one year from provable date of purchase in continental United
States.
Within this warranty period, Aroma Housewares Company will repair or replace, at
its option, defective parts at no charge, provided the product is returned, freight
prepaid with proof of purchase and U.S. $6.00 for shipping and handling charges
payable to Aroma Housewares Company. Before returning an item, please call the
toll free number below for return authorization number. Allow 2-4 weeks for return
shipping.
This warranty does not cover improper installation, misuse, abuse or neglect on the
part of the owner. Warranty is also invalid in any case that the product is taken apart
or serviced by an unauthorized service station.
This warranty gives you specific legal rights and which may vary from state to state
and does not cover areas outside the United States.
AROMA HOUSEWARES COMPANY
6469 Flanders Drive
San Diego, California 92121
1-800-276-6286
M-F, 8:30 AM - 5:00 PM, Pacific Time
Website: www.aromaco.com
5
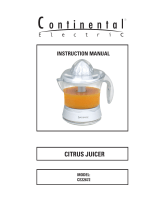
Citrus Juicer
Instruction Manual
ACJ-150

HOW TO USE AND CLEAN
4
Before First Use:
1. Read all instructions and important safeguards.
2. Remove all packaging materials and make sure items are received in good
condition.
3. Tear up all plastic bags as they can pose a risk to children.
4. Wash accessories in warm soapy water. Rinse and dry thoroughly.
5. Wipe body clean with a damp cloth.
¾ Do not use abrasive cleaners or scouring pads.
¾ Do not immerse the citrus juicer base, cord or plug in water at any time.
To Assemble:
1. Place the pitcher over the base, making sure it sits evenly.
2. Place strainer on pitcher.
3. Choose the appropriate reamer and place over the drive shaft inside the pitcher
(See Parts Identification on page 3).
To Make Juice:
1. Cut the citrus fruit into halves.
2. Push down on reamer with fruit to automatically start juicing. Move fruit from side
to side while reaming to get all juice from fruit.
3. When finished, lift the remains of the fruit off the reamer and juicing action stops.
4. To make more juice, repeat the above steps.
NOTE:
• When pulp starts to accumulate in strainer, stop juicing temporarily and remove
the reamer to empty the pulp. Replace the reamer back on the drive shaft to
continue juicing.
To Clean:
1. Unplug the juicer. Remove reamer, strainer and pitcher from the base. Clean
with warm, soapy water. Rinse thoroughly and dry before storing.
2. Clean the juicer base by wiping with a damp cloth.
CAUTION:
• Do not wash citrus juicer or any parts in the dishwasher.

PARTS IDENTIFICATION
3
1. See-through storage cover
2. Reamer 1 (for small- medium citrus fruit)
3. Reamer 2 (for large citrus fruit)
4. Strainer spout
Note:
• The strainer spout must always be aligned with the spout of
pitcher to ensure proper operation of the juicer.
5. Strainer
6. Pitcher
7. Drive shift
8. Juicer base
Congratulations on your purchase of the Citrus Juicer. It will
surely become a convenient and refreshing addition to your home. We hope
you enjoy it.
Please read all instructions carefully before your first use.
Published By:
Aroma Housewares Co.
6469 Flanders Drive
San Diego, CA 92121
U.S.A.
1-800-276-6286
www.aromaco.com
© 2003 Aroma Housewares Company All rights reserved.

SHORT CORD INSTRUCTIONS
1. A short power-supply cord is provided to reduce risk resulting from becoming
entangled in or tripping over a longer cord.
2. Longer extension cords are available and may be used if care is exercised in
their use.
3. If a longer extension cord is used:
a. The marked electrical rating of the extension cord should be at least as great
as the electrical rating of the appliance.
b. The longer cord should be arranged so that it will not drape over the counter
top or tabletop where it can be pulled by children or tripped over
unintentionally.
POLARIZED PLUG
This appliance has a polarized plug (one blade is wider than the other); follow
the instructions below:
To reduce the risk of electric shock, this plug is intended to fit into a polarized
outlet only one way. If the plug does not fit fully into the outlet, reverse the plug. If
it still does not fit, contact a qualified electrician. Do not attempt to modify the plug
in any way.
This appliance is for household use only.
2
IMPORTANT SAFEGUARDS
1. Important: Read all instructions carefully before first use.
2. To protect against electrical shock, do not immerse cord, plug or the appliance
itself in water or other liquid.
3. Close supervision is necessary when the appliance is used near children.
4. Unplug from outlet when not in use and before cleaning.
5. Do not operate any appliance with a damaged cord or plug or after the
appliance malfunctions or has been damaged in any manner. Return appliance
to the nearest authorized service facility for examination, repair or adjustment.
6. Do not use attachments or accessories other than those supplied or
recommended by the manufacturer. Incompatible parts create a hazard.
7. Do not use outdoors.
8. Do not let cord hang over edge of table or counter, or touch hot surfaces.
9. Do not place on or near a hot burner or in a heated oven.
10. Do not use the appliance for other than intended use.
11. Do not clean with metal scouring pads. Pieces can break off the pad and touch
electrical parts, creating a risk of electric shock. Metal-scouring pads may also
damage the finish.
12. Always unplug from the base of the wall outlet. Never pull on the cord.
13. Store in a cool, dry place.
14. Operate appliance on a sturdy, flat, heat resistant surface.
SAVE THESE INSTRUCTIONS
1
/


