7
English
Note:
• You will see the icon blinking on the display. This confirms that
the radio is in Easy Pairing mode waiting to receive the Channel
and Sub-Code settings from the Leader’s radio. All Members’
radios will remain in this mode for 3 minutes.
• A group with many radios should have all users take this step at
the same time, so all radios can be programmed in one go.
3. On the Leader’s radio, press and hold down the button
until you hear a double beep.
Note:
• At the double beep, this radio’s Channel and Sub-Code settings
will be transmitted, which will be received and copied by all the
other (Members’) radios.
• The Leader’s radio must make this transmission when all the
Members’ radios are still in the Easy Pairing mode, otherwise the
transmission will not be picked up.
• On the Leader’s radio, user must remember not to release the
button on the first (single) beep, otherwise this radio will become
another Member’s radio. If that happens, you can press PTT to
escape, and retry the steps described in #3 again.
• If the Leader’s radio is set to a channel between 9 and 16, please
ensure that all Members’ radios have channels 9 to 16 activated.
• When a Member’s radio with only eight Channels is being Easy-
Paired by a Leader’s radio on Channel 9 or above, Easy-Pairing
will fail, indicated by three short beeps, and “Err” is displayed briefly.
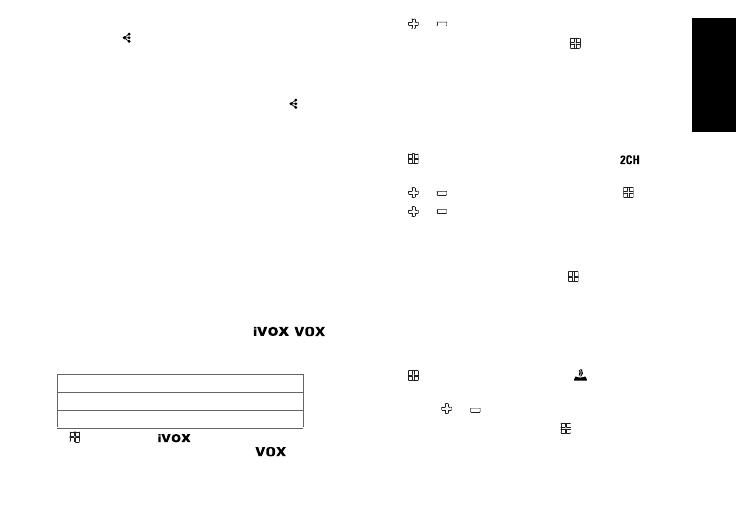
Internal Voice Operated Transmission/
Voice Operated Transmission ( / )
Transmission is initiated by speaking into the microphone of
the radio/audio accessory instead of pushing the PTT button.
1. Press Menu until the icon appears on the display.
When audio accessory is connected, the icon will
be shown. The current setting (Off, L1–L3) will flash.
2. Press or to select the sensitivity level.
3. Press the PTT button to exit menu or Menu to continue
set up.
Note: When using iVOX/VOX, there will be a short delay.
Dual Channel Monitor
Enables you to scan the current channel and another
channel alternately.
To set another channel and start Dual Channel Monitor:
1. Press Menu until the Dual Channel Monitor icon
appears. The Dual Channel Monitor icon will flash.
2. Press or to select the channel then press Menu.
3. Press or to select the Sub-Code.
4. Press the PTT button or wait until time out to activate
Dual Channel Monitor. The screen will alternate between
home channel and Dual Channel Monitor channel.
5. To end Dual Channel Monitor, press Menu.
Note: If you set the same channel and Sub-Code as the current channel,
Dual Channel Monitor does not work.
Keypad Tones
You may enable or disable the keypad tones. You will hear
the key tone each time a button is pushed.
1. Press Menu until the Keypad Tone icon appears.
The current setting on/off will flash.
2. Press either or to turn on/off.
3. Press the PTT button to confirm or Menu to continue
set up.
L3 = High Sensitivity for quiet environments
L2 = Medium Sensitivity for most environments
L1 = Low Sensitivity for noisy environments