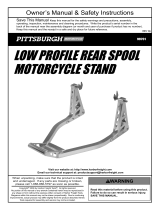
HAUL MASTER LOW PROFILE REAR MOTORCYCLE SPOOL STAND Instructions And Precautions
- Type
- Instructions And Precautions

INSTRUCTIONS AND PRECAUTIONS
Distributed exclusively by Harbor Freight Tools®.
3491 Mission Oaks Blvd., Camarillo, CA 93011
Visit our website at: http://www.harborfreight.com
SAVE THESE INSTRUCTIONS. READ ALL
PRECAUTIONS AND INSTRUCTIONS.
Copyright© 2008 by Harbor Freight Tools®. All rights reserved. No portion of this document or any artwork contained
herein may be reproduced in any shape or form without the express written consent of Harbor Freight Tools.
Diagrams within this document may not be drawn proportionally. Due to continuing improvements, actual product
may differ slightly from the product described herein. Tools required for assembly and service may not be included.
For technical questions or replacement parts, please call 1-800-444-3353.
SPECIFICATIONS
Maximum Weight Capacity 700 Lbs. Maximum
Adjustable Width 10-1/2” min. to 14”
max.
UNPACKING
When unpacking, check to make sure that
the item is intact and undamaged. If any parts are
missing or broken, please call Harbor Freight Tools
at the number shown on the cover of this document
as soon as possible.
IMPORTANT SAFETY
INFORMATION
Assembly Precautions
Assemble only according to these instruc-1. tions. Improper assembly can create haz-
ards.
Wear ANSI-approved safety goggles and 2. heavy-duty work gloves during assembly.
Keep assembly area clean and well lit.3.
Keep bystanders out of the area during as-4. sembly.
Do not assemble when tired or when under 5.
the inuence of drugs or medication.
Use Precautions
This product is not a toy. Do not allow chil-1. dren to play with or near this item.
Use for intended purpose(s) only. Not for any 2. aircraft purpose.
LOW PROFILE
REAR MOTORCYCLE
SPOOL STAND
99701

SKU 99701 For technical questions, please call 1-800-444-3353. Page 2
Inspect before use; do not use if parts loose 3. or damaged.
The oor must be rm, level and in good 4.
repair. The oor must be strong enough to
support the weight of the tool and the vehicle.
Maintain product labels and nameplates. 5. These carry important safety information.
If unreadable or missing, contact Harbor
Freight Tools for a replacement.
ASSEMBLY INSTRUCTIONS
Loosely assemble the Bracket Covers (3) to 1. the ends of each Support Arm (2) using the
Bolts (11).
Insert the Square rods of the Left and Right 2. Support Brackets (4 and 5) into the Bracket
Covers as shown in the assembly diagram.
Note: The Paddle Adapters (12, sold separately)
can be used instead of the Support Brackets.
Adjust the Left and Right Support Brackets to 3. match the width of your motorcycle axle.
Tighten the Support Brackets rmly in place 4. by tightening the Bolts (11).
OPERATION
If your motorcycle kick stand holds the ve-1. hicle vertically upright, you can use the kick
stand. Otherwise, have an assistant hold the
vehicle vertically upright.
Holding the Handle (1), roll the Stand under 2. the rear of the motorcycle. Align and engage
the Left and Right Support Brackets (4 and
5) with the axle of the motorcycle.
When the brackets are rmly engaged, lower 3. the Handle (1), lifting the rear of the motor-
cycle. Lower the Handle all the way to the
oor, which will create a support base for the
vehicle. CAUTION: Do not attempt to lift the
motorcycle if the Support Brackets are not
fully engaged with the vehicle axle.
To raise the vehicle, have an assistant sup-4. port the handlebars. Raise the Handle (1)
from the oor, which will lower the motor-
cycle.
Disengage the Stand from the motorcycle 5. axle, and roll it away.
Put the motorcycle on its kick stand. Store 6. this tool in a safe place.
PARTS LIST
Part Description Qty.
1 Handle 1
2 Support Arm 2
3 Bracket Cover 2
4 Left Support Bracket 1
5 Right Support Bracket 1
6 Wheel 2
7 Bolt m8 x 50 2
8 Nut m8 2
9 Bolt m6 x 50 2
10 Nut m6 2
11 Bolt m6 x 18 8
12 Paddle Adapter (not included) 1 Set
Record Serial Number Here:
Note: If product has no serial number, record
month and year of purchase instead.
Note: Some parts are listed and shown for illustra-
tion purposes only, and are not available
individually as replacement parts.
PLEASE READ THE FOLLOWING
CAREFULLY
THE MANUFACTURER AND/OR DISTRIBUTOR HAS
PROVIDED THE PARTS LIST AND ASSEMBLY DIAGRAM IN
THIS DOCUMENT AS A REFERENCE TOOL ONLY. NEITHER
THE MANUFACTURER OR DISTRIBUTOR MAKES ANY
REPRESENTATION OR WARRANTY OF ANY KIND TO THE
BUYER THAT HE OR SHE IS QUALIFIED TO MAKE ANY
REPAIRS TO THE PRODUCT, OR THAT HE OR SHE IS
QUALIFIED TO REPLACE ANY PARTS OF THE PRODUCT.
IN FACT, THE MANUFACTURER AND/OR DISTRIBUTOR
EXPRESSLY STATES THAT ALL REPAIRS AND PARTS
REPLACEMENTS SHOULD BE UNDERTAKEN BY CERTIFIED
AND LICENSED TECHNICIANS, AND NOT BY THE BUYER.
THE BUYER ASSUMES ALL RISK AND LIABILITY ARISING
OUT OF HIS OR HER REPAIRS TO THE ORIGINAL PRODUCT
OR REPLACEMENT PARTS THERETO, OR ARISING OUT
OF HIS OR HER INSTALLATION OF REPLACEMENT PARTS
THERETO.
REV 08i; 09b

SKU 99701 For technical questions, please call 1-800-444-3353. Page 3
LIMITED 90 DAY WARRANTY
Harbor Freight Tools Co. makes every effort to assure that its products meet high quality and durability
standards, and warrants to the original purchaser that this product is free from defects in materials and
workmanship for the period of 90 days from the date of purchase. This warranty does not apply to damage
due directly or indirectly, to misuse, abuse, negligence or accidents, repairs or alterations outside our facilities,
criminal activity, improper installation, normal wear and tear, or to lack of maintenance. We shall in no event
be liable for death, injuries to persons or property, or for incidental, contingent, special or consequential
damages arising from the use of our product. Some states do not allow the exclusion or limitation of incidental
or consequential damages, so the above limitation of exclusion may not apply to you. THIS WARRANTY
IS EXPRESSLY IN LIEU OF ALL OTHER WARRANTIES, EXPRESS OR IMPLIED, INCLUDING THE
WARRANTIES OF MERCHANTABILITY AND FITNESS.
To take advantage of this warranty, the product or part must be returned to us with transportation charges
prepaid. Proof of purchase date and an explanation of the complaint must accompany the merchandise. If
our inspection veries the defect, we will either repair or replace the product at our election or we may elect
to refund the purchase price if we cannot readily and quickly provide you with a replacement. We will return
repaired products at our expense, but if we determine there is no defect, or that the defect resulted from
causes not within the scope of our warranty, then you must bear the cost of returning the product.
This warranty gives you specic legal rights and you may also have other rights which vary from state
to state.
3491 Mission Oaks Blvd. • PO Box 6009 • Camarillo, CA 93011 • (800) 444-3353
ASSEMBLY DIAGRAM
The Paddle Adapters (12)
are not included. They are
for supporting motorcycles
by swing arm. They can
be ordered by calling:
(800) 444-3353.
REV 08i
-
 1
1
-
 2
2
-
 3
3
HAUL MASTER LOW PROFILE REAR MOTORCYCLE SPOOL STAND Instructions And Precautions
- Type
- Instructions And Precautions
Ask a question and I''ll find the answer in the document
Finding information in a document is now easier with AI
Related papers
Other documents
-
Harbor Freight Tools 1000 Lb Capacity Motorcycle Swingarm Rear Stand Owner's manual
-
Harbor Freight Tools Low Profile Rear Spool Motorcycle Stand User manual
-
Central Hydraulics 66305 User manual
-
 Pittsburgh Item 99701 Owner's manual
-
Harbor Freight Tools Motorcycle Wheel Cleaning Stand Owner's manual
-
Harbor Freight Tools 91764 User manual
-
Central Hydraulics Item 99887 Owner's manual
-
Central Hydraulics 91764 Operating instructions
-
 Pittsburgh Motorcycle 1000 lb. Capacity Motorcycle Lift Owner's manual
-
Harbor Freight Tools 97071 User manual


