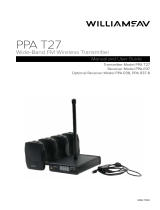
Williams Sound PPA R38 User manual

Category
FM transmitters
Type
User manual

Williams Sound PPA R38 is a feature-rich FM receiver that offers crystal-clear audio streaming for various applications. With its easy-to-read OLED display and intuitive menu navigation, you can effortlessly tune into 17 wideband channels. The sleep mode and auto-off features conserve battery life, extending usage time. Connect your preferred headphones or earphones to enjoy immersive audio experiences. Whether you're in a tour group, classroom, conference room, or seeking assistive listening solutions, the PPA R38 delivers reliable performance and versatility.

Williams Sound PPA R38 is a feature-rich FM receiver that offers crystal-clear audio streaming for various applications. With its easy-to-read OLED display and intuitive menu navigation, you can effortlessly tune into 17 wideband channels. The sleep mode and auto-off features conserve battery life, extending usage time. Connect your preferred headphones or earphones to enjoy immersive audio experiences. Whether you're in a tour group, classroom, conference room, or seeking assistive listening solutions, the PPA R38 delivers reliable performance and versatility.

PPA R38
PPA SelectView FM Receiver
USER Manual
©2013 Williams Sound, LLC MAN 185B
2
PPA R38 FM Receiver
Contents
Safety Warnings ...................................................................................................................................................................... 3
Hearing Safety ................................................................................................................................................................. 3
Battery Safety and Disposal ............................................................................................................................................. 3
Pacemaker Safety ............................................................................................................................................................ 3
Recycling Instructions .......................................................................................................................................................... 3
Receiver Applications ........................................................................................................................................................... 3
Important Note about OLED Care ........................................................................................................................................3
Receiver Overview .................................................................................................................................................................. 4
Main Features ......................................................................................................................................................................... 4
Initial Setup ............................................................................................................................................................................. 5
Figure A: Battery Compartment ........................................................................................................................................ 5
Figure B: Headphone Jack ............................................................................................................................................... 5
Figure C: Belt Clip Installation ........................................................................................................................................... 5
Controls and Display ...............................................................................................................................................................6
Figure D: Top Controls ...................................................................................................................................................... 6
Figure E: Front Controls ....................................................................................................................................................6
Figure F: Main “Home” Screen ......................................................................................................................................... 6
Basic Settings ...................................................................................................................................................................... 6-7
Advanced Settings ................................................................................................................................................................. 7
Hidden Settings ...................................................................................................................................................................... 8
Turn-On Volume ............................................................................................................................................................... 8
RSSI Display Mode (Received Signal Strength Indicator) ..................................................................................................8
Settings Lock ................................................................................................................................................................... 8
Soft Audio Turn-On .......................................................................................................................................................... 8
Specications ......................................................................................................................................................................... 9
Troubleshooting .................................................................................................................................................................... 10
Lifetime PLUS Limited Warranty ........................................................................................................................................... 11
PPA R38 Receiver
3
PPA R38 FM Receiver
Safety Warnings
HEARING SAFETY
CAUTION!
This receiver is designed to amplify sounds to a high volume
level, which could potentially cause hearing damage if used
improperly. To protect your hearing and the hearing of others:
1. Make sure the volume is turned down before putting on the
earphone or headphone—only then adjust the volume to a
comfortable level.
2. Set the volume level at the minimum setting that you need to
hear.
3. If you experience feedback (a squealing or howling sound),
reduce the volume setting and move the microphone away
from the earphone or headphone.
4. Do not allow children or other unauthorized persons access to
this product.
BATTERY SAFETY AND DISPOSAL
CAUTION!
This receiver may be used with non-rechargeable alkaline batteries.
Do not attempt to recharge non-rechargeable batteries; they may
explode, release dangerous chemicals, cause burns, or cause other
serious harm to the user or product.
This receiver can be used with, and recharge, NiMH Batteries. To
reduce the risk of re or burns, do not attempt to open, disassemble,
or service NiMH batteries. Do not crush, puncture, short contacts
or dispose of in re or water. Do not incinerate or expose to
temperatures above 140F (60C). Replace only with battery type
designated for this product. Recycle or dispose of properly.
Do not attempt to charge this receiver with any charger other than a
Williams Sound compatible charger. When charging NiMH batteries
in the receiver, the battery switch must be in the “NiMH” position.
PACEMAKER SAFETY
CAUTION!
If you have a pacemaker or other medical device, make sure that
you are using the receiver in accordance with safety guidelines
established by your physician or the pacemaker/medical device
manufacturer.
Servicing or attempting to service this device will void
the warranty
Refer servicing to qualied personnel at Williams Sound.
Recycling Instructions
Help Williams Sound protect the environment! Please take the
time to dispose of your equipment properly.
Product Recycling Instructions:
Please do NOT dispose of your Williams Sound equipment
in the household trash. Please take the equipment to an
electronics recycling center; OR, return the product to the
factory for proper disposal.
Battery Recycling Instructions:
Please do NOT dispose of used batteries in the
household trash. Please take the batteries to a retail or
community collection point for recycling.
Receiver Applications
· Tours
· Schools
· Hearing Assistance
· Conference Rooms
- Languange Interpretation
Important Note about OLED Care
The PPA R38 must be powered off before removing the batteries.
Failure to do so may decrease the life of the OLED display.
4
PPA R38 FM Receiver
Receiver Overview
Thank you for purchasing the PPA R38 PPA SelectView™ FM
Receiver.
Much like a miniature radio station, a Williams Sound FM transmitter
broadcasts audio over an FM radio signal. Receivers are used
to pick up the broadcast up to 1000 feet away, depending on
environmental conditions. The system helps large or small groups
overcome background noise and distance to clearly hear the
speaker.
The Williams Sound PPA T45, PPA T35, PPA T46, or PPA T27 FM
transmitters broadcast voice and/or audio programs on one of 17
available channels, 72-76 MHz. Listeners use either the PPA R38
receiver equipped with headphones, earphones, or neckloops to
hear the broadcast.
The PPA R38 has an easy-to-read high-resolution OLED display.
The unit also has push-button on/off controls, settings lock and
many other features.
To avoid difculties, please read through these instructions, and
keep them for reference.
Feature Detail
CHANNEL STEP/SEEK
Step: If the listener knows what channel or frequency they need to
be on, they can change to that channel by stepping through each
channel in the menu. See Step 1 under “Basic Settings”.
Seek: If the listener does not know what channel or frequency
they need to be on, they can seek through actively-broadcasting
channels (similar to the seek function on a car radio). See Step 1
under “Basic Settings”.
POWER-SAVE MODES (IN ORDER OF OCCURENCE):
1. DISPLAY TIME OUT
The display screen has a timer that will turn the screen off after a
period with no button pushes. This period can be adjusted in the
menu between 5, 30, or 60 seconds. After the screen turns off, The
receiver still continues to receive and produce audio after the display
screen turns off. This feature, in conjunction with the sleep mode/
auto off, serve to save battery life. See Step 5 under “Advanced
Settings”.
2. SLEEP MODE
After approximately 6 minutes with no RF signal on the current
channel, the receiver goes into “sleep mode” and starts a sleep
timer. During sleep mode, the receiver consumes approximately
80% less power. Periodically it checks for RF signal on the current
channel. If it nds signal on the current channel, it will wake up,
produce audio, and reset the sleep timer. Any button push during
sleep mode will also wake the receiver up and reset the sleep timer.
During sleep mode, the receiver will not be looking for signal on
any other channel than the one the receiver is set to. So, it will not
nd another transmitter on a different channel, or wake up simply
because there is RF signal present within the 72-76MHz band. It
will only wake up if there is a strong broadcast on the channel/
frequency the receiver is set to.
3. AUTO-OFF
After approximately 2 hours with no RF signal on the current channel,
the receiver will turn itself off completely. Once this happens, it
cannot wake up. The user must power the unit ON again with the
power button.
SQUELCH
When low RF signal is present from the transmitter, or if the receiver
is getting too far away from the transmitter, the receiver may produce
static or noisy audio. If the signal is low enough, the receiver will
mute the audio completely. The point at which the receiver mutes
the audio is adjustable. See Step 2 under “Advanced Settings”.
Main Features
NEW! OLED high-resolution screen - easy to read and
provides a quick view of receiver status.
NEW! Sleep/Auto-Off Feature saves 80% power!*
All user settings are accessible via the on-screen menu –
including all 17 wideband channels.
Stylish new design
Stereo headphone jack
Can use rechargeable or non-rechargeable batteries
Digital volume control
4-step battery level indication
Display shows channel number or frequency
Step/seek function allows user to increment channel
manually, or seek to the next active channel
Squelch Adjustment
*Up to 80% less power consumption while in sleep mode.
Total battery life dependent on device usage and user settings
such as screen time-out.
5
PPA R38 FM Receiver
A311
ALKALINE/
NiMH SWITCH
CAUTION: RECHARGE
ONLY NiMH BATTERIES
Initial Setup
1. Open the battery compartment. Slide the battery selection switch
to the correct position for the type of batteries that will be used. Use
“Alkaline” for non-rechargeable batteries, “NiMH” for rechargeable
NiMH batteries (only). (Figure. A)
IMPORTANT: If the battery switch is not in the correct position,
damage may be caused to the unit. Alkaline batteries cannot be
recharged.
2. Install the AA batteries. Be sure to observe proper polarity (+/-).
Damage due to improper battery installation may void the warranty
on the product. The battery icon on the display and the “Power On”
LED on top of the unit will ash when the batteries are getting low;
you may continue to use the receiver until it quits operating, then
replace or recharge the batteries. (Figure. A)
3. Plug in an earphone, headphone, or neckloop using the
3.5mm jack on the top of the receiver. Note that the earphone,
headphone or neckloop cable is also the receiving antenna.
(Figure B)
Figure B: Headphone Jack
3.5mm STEREO
EARPHONE/
HEADPHONE
JACK
Figure A: Battery Compartment
SOFT AUDIO TURN-ON
When powered on, or if the channel is changed, the receiver will
mute the audio, then gradually bring the audio level up to the current
volume setting. This setting can either be the last volume used, or a
specic volume level. See “Volume Level at Turn On” under “Hidden
Settings”.
4. To install the belt clip on the rear of the R38, position the belt
clip on the back of transmitter. Turn the belt clip 180˚ left or right to
secure the clip. The transmitter can now be clipped onto a belt. To
remove, turn the belt clip 180˚ so the open end of the clip points up,
and gently pull the belt clip off. (Figure F)
A119
A119
Figure C: Belt Clip Installation
6
PPA R38 FM Receiver
Basic Settings
The Basic Setup functions allow the user to change
the most frequently used settings easily. The user
can change the receiving channel (or frequency),
and the volume level. Before performing these
steps, plug in earphones, headphones, or a
neckloop into the headphone jack on the receiver.
1. POWER UP: Turn on the receiver by pushing and
holding the power button for 3 seconds. The receiver will
start up and show the following three screens. The last
screen is the Main or “Home” screen.
2. CHANNEL: Next, set the receiving channel. Push the
menu button once to show the channel set screen.
Push either arrow button to step to one of the 17
channels (above) -or- push-and-hold either arrow
button to seek to the next active channel (below).
The receiver is seeking the next frequency, so
channels may appear out of order when seeking.
If no actively-broadcasting channels are found during the
seek, a message is displayed (below). Make sure you are
on the same channel as the transmitter. When nished,
push the menu button once to get back to the home
screen, and go to step 3.
LEFT
ARROW
BUTTON RIGHT
ARROW
BUTTON
MENU
BUTTON
OLED
DISPLAY
A309
Figure E: Front Controls
A430
VOLUME
LEVEL
BATTERY
LIFE
CHANNEL
(OR FREQ.)
RF SIGNAL STRENGTH SETTINGS LOCKED
Figure F: Display showing Main ”Home” Screen
Controls and Display
The top and front controls referred to in this manual, along with an
illustration of the indicators on the main screen, are shown in Figures
D, E and F.
POWER BUTTON/
LOW BATTERY
INDICATOR
Figure D: Top Controls
7
PPA R38 FM Receiver
3. VOLUME: Adjust the volume level
to your taste by using the left or right
arrow buttons. This can only be done
from the home screen. The display
will indicate the current volume level.
Advanced Settings
The Advanced Setup Menu provides the
ability to change between ‘channel’ and
‘frequency’ display mode, adjust the squelch,
change the receiver to 8 or 17-channel
mode, change the amount of time for the
display to time-out, change the screen
brightness, or restore factory default settings.
1. ADVANCED SETUP MENU: To access
the Advanced Setup Menu, push-and-hold
the Menu button for 3 seconds until you see
the “LOADING ADVANCED SETUP” screen
displayed.
Within the advanced menu, pressing the
menu button will advance to the next
setting.
2. SQUELCH: This is the rst screen in the
Advanced Menu. The receiver will silence the
audio if the RF signal strength falls below a
certain level. The squelch adjustment sets
the level of RF signal strength at which the
audio will be muted. This has the effect to
the listener of eliminating static when the
broadcast signal is weak. Push the left or right
arrow buttons to adjust the squelch level (1-4).
3. CH/FREQ DISPLAY MODE: To change
the display to show either channel number
(1-17) or frequency (72.1-75.9MHz) push the
left or right arrow buttons to toggle between
“CH NUMBER” or “FREQUENCY”.
4. 8/17 CHANNEL MODE: 17-channel
mode allows the receiver to change to any
one of the 17 possible broadcast channels.
8-channel mode restricts the receiver to the
8 non-interfering (simulataneous broadcast)
channels. To change the receiver between
8-channel and 17-channel modes, use
the arrow buttons to toggle between “17
CHANNEL MODE” or “8 CHANNEL MODE”.
5. DISPLAY TIME-OUT: This feature
sets the amount of time before the display
turns off. Use the left or right arrow buttons
to toggle between “5 SECONDS” “30
SECONDS” or “60 SECONDS”. Note that
even though the display is off, the receiver
still continues to function.
6. SCREEN BRIGHTNESS: To change the
display brightness (level 1-4), use the left,
right arrow buttons to toggle between “1”,
“2”, “3” or “4”.
7. RESTORE FACTORY SETTINGS: The
next screen shows: “ERASE ALL SETTINGS
RESTORE DEFAULTS?” (below).
To reset, push the right arrow button to
choose “YES”. After this you will see the
conrmation screen “FACTORY DEFAULTS
RESTORED”, followed by the home screen.
If you chose “NO” to NOT reset, you will be
returned to the squelch screen (step 2).
8. At any time, the Advanced Setup menu
can be exited in three different ways:
a. Push and hold the menu button for 3
seconds, or
b. wait 20 seconds without pushing any
buttons, or
c. repeatedly push the menu button until
you see the screen “EXIT ADVANCED
SETUP?” screen. Push the right arrow
button to choose “YES”. The Home
Screen will then be displayed.
8
PPA R38 FM Receiver
Hidden Settings
To put the receiver in RSSI Display Mode,
the receiver must be off. Hold down the
menu button and while holding it, hold down
the power button to turn the receiver on. The
receiver will turn on in RSSI Display Mode
and “RSSI” with the numeric value(s) will be
displayed in place of the battery strength
bars.
Note that the receiver will remain in this mode
until it is powered off. When powered back
on, the receiver will return to it’s normal home
screen, displaying the battery strength bars.
SETTINGS LOCK
To lock (or unlock) the settings, you must
rst be on the home screen. Push-and-
hold the left and right arrow buttons at the
same time. While holding the buttons, you
will see the following dashed-lines appear
one-by-one, then disappear one-by-one.
Keep holding the buttons until all three
lines disappear and the “PRESS MENU TO
LOCK” screen is displayed.
When the display shows “PRESS MENU TO
LOCK”, release the buttons. Then push the
Menu button to lock. The display will show
“LOCKED” (below) and then will return to the
home screen.
TURN-ON VOLUME
When the unit is powered on, or when the
channel is changed, the audio will be muted,
then rise to a set volume. This set volume
can be: (1) a specic volume level or (2) the
last volume used when the receiver was
powered off. This is called the “Turn-On
Volume” setting.
To access the Turn-On Volume setting, the
receiver must be off. Hold down the right
arrow button and while holding it, hold down
the power button to turn the receiver on. The
receiver will turn on and display “VOLUME AT
PWR ON”.
The default turn-on volume from the factory
is 8. This means every time the receiver
turns on, the audio will rise to volume level 8.
To change this to a different level, use the left
or right arrow buttons to adjust it. (Note that
this screen times-out in 20 seconds without
any button pushes). The highest turn-on
volume level is 15. The lowest setting (where
“0” would be) will restore the audio to the
last-used volume. Instead of “0”, the words
“LAST SETTING” will be displayed. This
means the next time the receiver is turned
on, the audio will rise to the volume setting
used when the receiver was turned off.
RSSI DISPLAY MODE
The receiver can be used as a portable RF
eld-strength meter for testing the amount
of signal received from a transmitter. In this
mode, the receiver will display a numeric value
between 000000 and 032764, representing
the level of RF eld strength received. This
numeric readout is displayed in place of the
battery strength bars on the home screen.
This is called the RSSI (Received Signal
Strength Indicator) Display Mode.
Note: To unlock the settings, perform Step
9 again.
SOFT AUDIO TURN ON
When the unit is powered on, or when the
channel is changed, the audio will be muted,
then rise slowly to the turn-on volume
setting. This feature allows the user time
to turn the volume down or remove the
earphones/headphones before the volume
level becomes uncomfortable. The rate of
the soft audio turn on is not adjustable.
9
PPA R38 FM Receiver
Specications
Dimensions: 4.1” x 2.85” x 1.38” (104 x 72 x 35mm)
Weight: 4.6oz (130g) with batteries. 2.6oz (73g) without batteries
Color: Black/Silver. Black ABS Plastic case with Aluminum faceplate.
Battery Type: (2) AA Alkaline or (2) AA NiMH Rechargeable
Battery Life: (2) AA non-rechargeable alkaline batteries (BAT 001-2), approx. 50 hrs
(2) AA rechargeable NiMH batteries (BAT 026-2), 1500mAh, approx. 32 hrs
Current Consumption: 47mA nominal at 2.4VDC
Operating Temp. Range: 32° – 122°F (0° to 50°C)
Channels: 17 Wideband, accessed via menu
Operating Frequencies: 72.1, 72.2, 72.3, 72.4, 72.5, 72.6, 72.7, 72.8, 72.9, 74.7, 75.3, 75.4, 75.5, 75.6, 75.7, 75.8, 75.9 MHz*
FM Deviation: 75 kHz
De-Emphasis: 75 µS
Display Screen: 1” OLED
Power Indication: Power button, backlit green.
Good battery strength - glows solid. Low battery - ashes. Error - fast ashes with 1 sec. delay.
Sensitivity: 2 µV at 12 dB Sinad with squelch defeated
Input Overload: 100 mV
Frequency Response: 200 Hz – 15 kHz, ±3dB
Modulation: FM, +/- 75 kHz peak deviation
Signal-to-Noise Ratio: Minimum 65 dB @ 1.0V
Receive Antenna: Integral with earphone/headphone cord
Audio Output: 18 mW max at 32 Ω
Headphone Connector: 3.5 mm stereo jack, mono output for stereo or mono earphones, headphones, or neckloops
Earphone/Headphone/
Neckloop Impedance:
32 Ω
Power Save - Display Off/
Sleep Mode/Auto Off:
Display Off: 5,30, or 60 seconds of no button pushes (adjustable in menu)
Sleep Mode: 6 mins of no RF signal or button pushes; wakes up with RF signal or any button push
Auto Off: 2 hours of no RF signal or button pushes
Approvals: FCC, Industry Canada, RoHS, WEEE
Warranty: Lifetime PLUS Limited Warranty, 90 Days on most accessories.
NOTE: SPECIFICATIONS SUBJECT TO CHANGE WITHOUT NOTICE.
This device complies with “RSS-Gen Issue 2 June 2007” for Industry Canada and FCC part 15.105[b] for the United States.
Operation is subject to the following two conditions: [1] this device may not cause interference, and [2] this device must accept any interfer-
ence, including interference that may cause undesired operation of the device.
This device complies with Industry Canada licence-exempt RSS standard(s). Operation is subject to the following two conditions: (1) This
device may not cause interference, and (2) this device must accept any interference, including any interference that may cause undesired
operation of the device.
Cet appareil est conforme à la norme RSS Industrie Canada exempt de licence. Son fonctionnement est soumis aux deux conditions suiv-
antes: (1) cet appareil ne doit pas provoquer d’interférences et (2) cet appareil doit accepter toute interférence, y compris les interférences
pouvant causer un mauvais fonctionnement du dispositif.
This device complies with ICES-003 class B. Test data is available from the manufacturer on request.
10
PPA R38 FM Receiver
Troubleshooting
Problem Solution
Can’t hear the person speaking/no audio · Verify transmitter and receiver are both ON
· Verify transmitter and receiver are both on the same channel/frequency.
· Verify transmitter is set up and working properly; i.e. the mic is not muted.
· Make sure the earphone/headphone/neckloop plug is inserted all the way into the jack
of the receiver. The cord is the receiving antenna.
· Try a different earphone, headphone, or neckloop.
· Try a different receiver.
Can’t hear the person speaking above the
room noise
· Adjust the microphone volume on the transmitter.
· Reposition the transmitter microphone closer to the mouth.
Limited Range · The earphone/headphone/neckloop cord is the receiving antenna. Make sure it is not
coiled up or obstructed, and that it is a Williams Sound approved earphone, headphone,
or neckloop.
· Verify the transmitter distance from the receiver - try bringing them closer.
· Verify there are no other transmitters in the area on the same (interfering) channels.
· Transmitter batteries low? Receiver batteries low? Try new batteries.
Feedback (squealing) · Lower the microphone volume on the transmitter
· Increase the distance between the microphone and the electronic speaker
Receiver not working, power button
blinking
Return receiver to Williams Sound for service. This is an internal error code and cannot
be serviced by the consumer.
Screen turns off too quickly Adjust the screen timeout in the advanced settings menu.
Won’t Charge NiMH batteries Make sure the “Alkaline/NiMH” battery switch (located in the battery compartment) is set
to “NiMH”.
Can’t change channels or access any of
the settings. Display shows “LOCKED”.
Refer to Hidden Settings for instructions on how to unlock the receiver.
11
PPA R38 FM Receiver
Lifetime Plus Limited Warranty
Williams Sound products are engineered, designed, and manufactured under carefully controlled conditions to provide you with many years
of reliable service.
Williams Sound warrants the Personal PA® FM Listening transmitters and receivers (models PPA T45, PPA T35, PPA T27, PPA T46, PPA
R38, PPA R37, and PPA R35-8) against defects in materials and workmanship under normal use and conditions for the useful lifetime of the
product from date of purchase.
This warranty is available to the original end purchaser of the product and CAN BE transferred to subsequent purchasers of the product.
Microphones, earphones, headphones, batteries, chargers, cables, carry cases, and most other accessory products carry a 90-day warranty.
Williams Sound has no control over the conditions under which this product is used. Williams Sound, therefore, disclaims all warranties not
set forth above, both express and implied, with respect to the Personal PA® FM Listening System, including but not limited to, any implied
warranty of merchantability or tness of use of such equipment including, without limitation, any warranty that the use of such equipment
for any purpose will comply with applicable laws and regulations. Williams Sound shall not be liable to any person or entity for any medical
expenses or any direct, incidental or consequential damages caused by any use, defect, failure or malfunctioning of the product, whether
a claim for such damages is based upon warranty, contract, tort or otherwise, the sole remedy for any defect, failure or malfunction of the
products is replacement of the product. No person has any authority to bind Williams Sound to any representation or warranty with respect to
the Personal PA® FM Listening System. Unauthorized repairs or modications will void the warranty. This warranty is void if damage occurred
because of misuse, or if the product has been repaired or modied by anyone other than a factory authorized service technician. Warranty
does not cover normal wear and tear on the product or any other physical damage unless the damage was the result of a manufacturing
defect. Williams Sound is not liable for consequential damages due to any failure of equipment to perform as intended. Williams Sound shall
bear no responsibility or obligation with respect to the manner of use of any equipment sold by it.
This warranty does not cover reimbursement for your costs of removing and transporting the product for warranty service evaluation or
installation of any replacement product provided under this warranty.
The exclusions and limitations set out above are not intended to, and should not be construed so as to contravene mandatory provisions
of applicable law. If any part or term of this Disclaimer of Warranty is held to be illegal, unenforceable, or in conict with applicable law by a
court of competent jurisdiction, the validity of the remaining portions of this Disclaimer of Warranty shall not be affected, and all rights and
obligations shall be construed and enforced as if this Limited Warranty did not contain the particular part or term held to be invalid. The terms
of the warranty are governed by the laws of the State of Minnesota.
Prices and the specications of the products are subject to change without notice.
*For Complete Warranty Statement go to: www.williamssound.com/warranty-statement
NOTICE: Williams Sound products are NOT designed for use in extreme temperature, humidity or chemical environments. The introduction
of chemicals such as chlorine, salt water or human sweat into the product will cause damage to the circuitry. Damage due to these causes is
NOT covered under the Product Warranty.
If you experience difculty with your system, call Toll-Free for Customer Assistance 1-800-843-3544 (U.S.A.) or +1 952 943 2252 (Outside
the U.S.A.)
If it is necessary to return the system for service, your Customer Service Representative will give you a Return Authorization Number (RA) and
shipping instructions.
10300 Valley View Rd · Eden Prairie, MN 55344
800-328-6190 / 952-943-2252 · FAX: 952-943-2174
www.williamssound.com ©2013 Williams Sound, LLC MAN 185B
  • Page 1 1
  • Page 2 2
  • Page 3 3
  • Page 4 4
  • Page 5 5
  • Page 6 6
  • Page 7 7
  • Page 8 8
  • Page 9 9
  • Page 10 10
  • Page 11 11
  • Page 12 12

Williams Sound PPA R38 User manual

Category
FM transmitters
Type
User manual

Williams Sound PPA R38 is a feature-rich FM receiver that offers crystal-clear audio streaming for various applications. With its easy-to-read OLED display and intuitive menu navigation, you can effortlessly tune into 17 wideband channels. The sleep mode and auto-off features conserve battery life, extending usage time. Connect your preferred headphones or earphones to enjoy immersive audio experiences. Whether you're in a tour group, classroom, conference room, or seeking assistive listening solutions, the PPA R38 delivers reliable performance and versatility.

Ask a question and I''ll find the answer in the document

Finding information in a document is now easier with AI