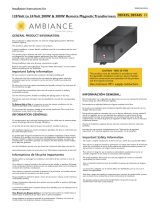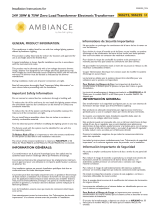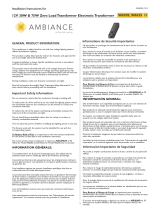
A. Mount Bracket
Support de Monter
Corchete de Montaje
B. Power Supply
L’alimentation du Courant
Suministro de Electricidad
C. Cover
Couvercle
Cubierta
D. Terminal Block
Bloc de la Borne
Bloque Terminal
E. Ground Stud
Tige de Terre
Montante A Tierra
F. Re-Set / Circuit Breaker
Réarmer / Disjoncteur
Botón de Reinicio/ Disyuntor
G. 120V Input Conductors
Conducteur D’Entrée 120V
Conductores de Entrada de 120V
Figure 1
Le Schéma 1
Figura 1
HC-1559FS 020811
HC-1559FS 020811
IMPORTANT SAFETY INSTRUCTIONS
• This power supply unit complies with UL standard 2108.
• Be sure the electricity to the system you are working on is turned off;
either the fuse removed or the circuit breaker set at off.
• Use of other manufacturers components will void warranty, listing and
create a potential safety hazard.
• If you are unclear as to how to proceed, contact a qualified electrician.
• You don’t need special tools to install this fixture.
• Be sure to follow the steps in the order given.
• Risk of electric shock.
• This power supply is for indoor use only.
• Do not energize electrical supply circuit to power supply(s) until all
connections have been made and tested according to national electrical
codes and all local electrical codes.
• Read instructions carefully.
SAVE THESE INSTRUCTIONS
CAUTION: To Avoid Risk of Fire, DO NOT
Exceed These Limits
• 10/2 Ambiance cable is suitable for 600W maximum consumed load when
used with 24V system.
• The voltage at the start of the lighting system, or a single fixture, must not
exceed 25V for 24V system.
• The wattage load cannot exceed a maximum of 100% for each output.
Power Supply Installation
1. Power supply should be installed so that it is not in contact with
insulation and away from oven or any other source of intense heat and
as close as possible to the lighting system to achieve the most efficient
operation. Minimum airspace around power supply should be at least 12"
on each side. Mount on vertical surface with cover facing down as shown.
2. Use MOUNTING BRACKETS on POWER SUPPLY(S) as a template to
determine mounting screw location.
3. After firmly mounting the POWER SUPPLY(S) select a listed
CONNECTOR ( not furnished ) appropriate to the type of ELECTRICAL
SUPPLY CABLE at site. Remove cover and desired KNOCKOUTS from
POWER SUPPLY(S) CASE and fasten CONNECTOR to CASE and secure
in place with CONNECTOR.
4. To control power supply, install ON/OFF switch, a good quality low
voltage magnetic dimmer on 120V side of power supply. You may also
use a good quality line voltage dimmer.
5. Connect SUPPLY GROUND TO STUD (E), inside POWER SUPPLY
CASE with HEX NUT. Use listed wire connector to connect wire marked
“common” on power supply to white supply wire. Connect either wire
marked “120 volt” or “Boost” to black supply wire (cap off the unused
boost or 120V tap with wirenut). Use boost tap only if input voltage is
below 110V or the power supply is mounted in a remote location from
the lighting system more than 20 feet away.
6. Select another listed CONNECTOR (not furnished) appropriate to
the type of CONDUIT or cables and fasten CONNECTOR to POWER
SUPPLY CASE. Slip CONDUIT or cables into POWER SUPPLY CASE
and secure in place with CONNECTOR. Connect Ambiance low voltage
cables or extension wires to terminal block (D). Output is not polarized.
7. Install COVER on POWER SUPPLY CASE and secure in place with cover
screws.
Remote Power Supply Installation
1. The boost tap will generate a higher output to compensate for the voltage
drop in the extension wire from the power supply to the lighting system.
2. Proper selection of the cable size between remote power supply and first
socket, is based on the total wattage load and length of the run. (See chart
below).
3. CAUTION: To avoid risk of fire when using boost tap. DO NOT exceed
90% of rated power supply wattage
4. Use a listed Junction Box with a listed Terminal Block inside or 9481
wiring compartment (see FIG 2).
5. Caution: risk of re. 12V lamps must not be used in a 24v system.
Install cable so that caution printed on cable is visible after
installation.
6. Caution: the location and number of power supplies installed on
residential circuit breaker may cause the breakers to trip when the
lighting load is energized. If this occurs replace the residential circuit
breaker with a breaker rated for high in-rush current.
RTx Low Voltage Rail System Installation
1. Use properly sized extension wire and run extension wires to outlet box
where RTx powerfeed will be installed.
2. Be sure that all wiring is done in accordance with national and local
codes.
LX Linear System Installation
1. Attach track to all surfaces with screws, nails, staples or double face tape
( not furnished ) where cable will run, mitering the track for right or left
angles or wall to shelf surfaces. DO NOT NAIL OR SCREW THROUGH
CABLE TO ATTACH TO A SURFACE. Use 9430 sleeving to cover wire
when going through holes in combustible materials, or notch the cabinet
wall and run track from cabinet to cabinet.
2. Drill 1/2" diameter holes in surface where cable will be running through
cabinets, shelving etc.
3. Each Ambiance cable from the power supply to the point where the first
socket will be installed, must be a minimum 18" long and enclosed in the
9435 track and 9439 cover or listed conduit as noted in illustrations FIG.
2 and FIG. 3. Cable between illuminated sections must be protected from
damage. Enclose the cable in these areas with track and cover or listed
conduit.
LX Linear Inside Cabinet Installation
1. Drill 1/2" diameter hole or notch surfaces where cable will be running
through shelving or cabinet partition. NOTE: Low Voltage Ambiance
Cable must be covered in Sea Gull Lighting Sleeving (#9430) or track and
cover (#9435 & #9439).
2. Install lampholders (#9830 & #9428 etc.), space lampholder no closer
than 6" center to center.
3. Do not install lampholder closer than 1 1/2" to closed ends (wall surfaces,
partitions etc.).
4. Do not install more than 20 watts per cubic foot of cabinet air space.
5. Be sure not to decrease the free air space inside the cabinet.
Remote Power Supply For Sea Gull Lighting Low Voltage Systems
L’Alimentation Electrique A Distance de Sea Gull Lighting Systèmes à Basse Tension
Fuente de Energía Remota para los Sistemas de Voltaje Bajo de Sea Gull Lighting
A
F
M. Track and Cover
(Non-Illuminated Section)
Rail & Couvercle (Partie Non
Illuminée)*
Circuito y Cubierta
(Sección No Iluminada)
N. Wiring Compartment
Coffret de Branchement
Compartimiento de Cableo*
O. Extension Wire
Câble d’Extension
Cable de Extensión
P. Sleeving
Gaine Isolante
Embalaje
Q. Illuminated Section
Partie Illuminée
Sección Iluminada
I. Ambiance Cable
le Câble Ambiance
Cable de Ambiance
J. Junction Box
Boîte de Raccordement
Caja de Conexiones*
K. Extension Wire
Câble d’Extension
Cable de Extensión
L. Power
Courant
Electricidad
B
A
E
C
D
I
J
L
K
Figure 3
Le Schéma 3
Figura 3
Figure 4
Le Schéma 4
Figura 4
Figure 2
Le Schéma 2
Figura 2
M
N
O
P
Q
M
P
Q
R
* not included
non fourni
Helpful Tools / Outils Utiles / Herramientas Útiles
M. Track and Cover
(Non-Illuminated Section)
Rail & Couvercle (Partie Non
Illuminée)*
Circuito y Cubierta*
(Sección No Iluminada)
P. Sleeving
Gaine Isolante
Embalaje
Q. Illuminated Section
Partie Illuminée
Sección Iluminada
R. Lampholder
Porte-lampes
Portalámparas
Track*
Rail*
Circuito*
G


