Page is loading ...

Bluetooth
®
GPS
Enable Car Holder
4in1
HI-701 BT
Bluetooth
®
GPS
USER MANUAL

Introduction:
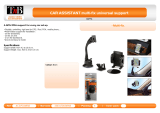
HI-701 BT 4 in 1 car holder is a complete PDA car holder
solution with the following functions:
1. Charging and supply power to the PDA
2. Amplifying the PDA sound
3. Making the PDA as a GPS or Bluetooth
®
GPS enable unit
4. Holding the PDA in car
By changing the PDA base connector on the holder, almost any
type of PDA can be an independent and complete GPS PDA.
HI-701 BT advantages:
1. Almost any type of PDA can be used with the 4 in 1
car holder by using suitable base connector. User can
only change the base connector when he changes his
PDA. User can also use different kinds of PDA with
the same car holder.
2. Taking the GPS signal from the hinged GPS receiver
back card from the back of the holder the PDA
become a complete GPS enable PDA. The attached
GPS receiver can also act as an independent GPS
mouse by using different kinds of connecting cables.
3. HI-701 BT + GPS version make the PDA GPS enable
wire or wirelessly
1
1

Accessories:
Standard Accessories:
1. HI-701 BT 4 in 1 car holder
2. PDA base connector (one type)
3. DC 12V Cigarette lighter power cable
(compatible from DC12V to DC24V)
4. Hinged Bluetooth
®
GPS receiver back card
5. Audio cable
6. Suction cup car mount
1
2
2
2

3
4
5
6
3
3

Optional Accessories:
1. Different type of PDA base connector
2. CF slot back card
3. PS/II GPS receiver
4. External antenna
(for Hinged GPS receiver back card)
5. Mini1394 to PS/II connecting cable
2
1
4
4

5
4
3
5
5

l
o
c
k
u
n
l
o
c
k
Installations:
GPS receiver installation:
Slide the inclusive Bluetooth
®
GPS receiver into the back of the
car holder so that the PCB golden finger insert and contact
properly into the female connector inside. Based on the most
powerful and recent SiRF StarIII ultra high sensitive GPS
receiver module, the receiver can get satellite signal in very
poor reception environment.
Beside, the inclusive
Bluetooth
®
GPS receiver
is come with a hinge
design and can be
folded from 0 to
180 degree to
adjust the best
reception angle.
LED off
LED flashing
LED stay on
Receiver switch off
GPS Position Fixed
GPS Signal searching
LED Indicator (Red)
6
6

BT / GPS
LED indicator
LED off
LED flashing
LED stay on
Bluetooth
®
switch off
Bluetooth
®
searching
Bluetooth
®
connected
LED Indicator (Blue)
7
7

GPS Receiver
Specification
Chipset
Interfaces
Protocol
Baud Rate
Max. Update Rate
Datum
Channel
Frequency
Hot Start
Warm Start
Cold Start
Reacquisition Tike
Position Accuracy
Macimum Altitude
Maximum velocity
Voltage
Power consumption
Antenna Type
External Antenna
Connector
Dimension
LED Indicator
SiRF Star III
PCB golden finger & Mini-1394
NMEA0183 GGA, GSA, GSV, RMC, GLL
4800, N, 8, 1
1 Hz
WGS84
20 channel
L1, 1575.42MHz
8 sec. Average
38 sec. Average
48 sec. Average
100 ms
15m 2D RMS, SA off
18,000m
515m/s
DC 3.3V+-10%
90mA continuous mode
Built-in active antenna
MMCX (Optional)
Fold: 79 (L) x 60 (W) x 26 (H)mm
Unfold: 132 (L) x 60 (W) x 26 (H)mm
3D Positioning (blinking) or
Searching GPS (on)
8
8

Specifications:
V1.1 Compliances
Frequency Range:
Interface:
Receiver Sensetivity:
Transmitting Power:
RF Input Impedance:
Frequency hopping:
Baseband Crystal OSC:
Data Rate:
Operating Temperature:
Storage Temperature:
Transmitting Range:
Power Consumption:
2.4 ~ 2.4835 GHz
unlicensed ISM band
USB/UART/SPI
-80 dBm @ 0.1% BER
Class 2 -6 dBm ~ +4 dBm
50 ohms
1600hops/sec.
16MHz
Up to 723Kb/s
-20° C ~ +80° C
-30° C ~ +90° C
10 meters (Typical)
65 mA (Typical)
Bluetooth®
Bluetooth
®
9
9

PDA base connector
installation:
Insert the base connector
in the front-lower part of
the car holder. Make sure
the PDA base connector is
compatible to the PDA
that you using.
10
10

Goose neck to the holder installation:
Place the top of the goose neck to the back of the holder and
push up for fixing.
Suction cup support installation:
Power up:
Connect the inclusive power
cable one end to the
car cigarette lighter
and another end to
the holder lower-left
side's connector jack.
11
11

Install your PDA
Editor's Note:
Do you need to turn off car ignition to insert PDA?
Caution: Turn off the car's ignition before proceeding.
When installed in HAICOM 4 in 1 car holder, the battery in your
PDA is recharged. Refer to the following to insert your PDA into
the cradle:
1. Align the PDA's connector with the
connector on the cradle and push down.
2. Press the padded arms firmly
against the sides of the PDA
to secure it in place.
Push in
12
12

Removing your PDA
Refer to the following to remove your PDA from the cradle:
1. Push the release button (A) on the side of the cradle to
release the padded arms.
2. Lift the PDA straight up to remove it.
Caution: Do not twist the PDA
as this can cause permanent
damage to the connector
and/or your PDA.
Press
13
13

Connecting to the PDA
You can connect the supplied audio cable from your PDA to the
to avail of the HAICOM 4 in 1 car holder's built-in speaker. You
can connect a GPS antenna to the HAICOM 4 in 1 car holder if
you have a GPS-enabled PDA.
1. Connect the supplied audio cable to the HAICOM
4 in 1 car holder (A) and the PDA (B).
2. Connect the PS2 jack from the PS/II GPS receiver
to the HAICOM 4 in 1 car holder (C).
3. Position the GPS receiver on the dash or outside the car.
Important: If you cannot receive signals
from at least three satellites, try relocating
the GPS antenna.
14
14

A
C
B
Important Safety Notice:
Most GPS software has built-in voice navigation to allow you to
keep your eyes on the road while driving. If you need to study
the map on your PDA, stop the car and pull into the side of the
road first.
15
15

Vcc 3.3V
TX
RX
GND
NC
NC
GPS connector pin assignment
Ensure the PS2 connector for your GPS receiver conforms to
the pin assignments shown below.
The connector is a 6-pin Mini-DIN (male) with 3.6± 0.1mm wire.
Hinge GPS back card pin assignment
Color
Green
White
Red
Black
Function
TX
RX
VCC
GND
CN1
5
4
2
1
16
16

Hinged Bluetooth
®
GPS receiver back card
as a GPS mouse:
By connecting different optional connecting cables, the Hinge
GPS receiver back card can be all kinds of independent wired
GPS receiver solutions.
17
17

Get Connected; Installation Guide
Laptop PC Installations
Run "My Bluetooth
®
Places" and Double
Click the "Find Bluetooth
®
Devices" icon Double Click "BT GPS"
Double Click "SPP on BT GPS"
18
18

Key in pin code: “0000” Connected
PDA Installations
Double Click the icon
Bluetooth
®
19
19
/