Fishman Aura Pro Owner's manual

Category
Guitar accessories
Type
Owner's manual
1
www.fishman.com
Read Me First!
Installation of this product is a straightforward
procedure, but we recommend this job only if you
are an experienced repair technician.
Requirements
Saddle Slot:
Minimum saddle slot length: 2.775” (70.48mm)
Maximum E to E string spacing at saddle: 2.5”
(63.5mm)
Preliminary
1. Widen the endpin hole to
15
32
” (11.9mm) to
accommodate the endpin jack.
2. Drill a
3
32
” hole (2.4mm) in the saddle slot for
the pickup wire, no less than .100” (2.5mm) from
nearest string. Install the pickup per Acoustic
Matrix installation instructions.
Location
Before you cut the cavity on the side of the guitar,
choose a compatible location:
• Pick a location that allows the preamp
to swing freely without bumping into the
internal braces. The preamp housing
requires at least 1
11
16
” (4.3cm)
clearance inside the guitar.
• Position the preamp on the flattest conve
-
nient surface on the side of the instrument.
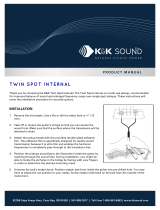
The flattest and most comfortable location is usually
at the upper bout, just above the instrument’s waist
and well below the shoulder (figure 1). Note that
when the bezel is fastened to the side, it will bend
just enough to conform to the curves of most
standard instruments.
To help prevent cracks and provide structural
support for the preamp, we recommend reinforcing
the mounting area with thin veneer before you cut
out the cavity.
Installation
1. Once you select the mounting location, affix
the template and cut out the cavity. Use a #45
(.082”, 2mm) drill for the screw holes.
2. Install the endpin jack per Switchjack Installation
Instructions.
3. To access the input, open the trap door on the
back of the preamp chassis (figures 2, 3).
Figure 1.
AURA PRO
INSTALLATION GUIDE
Figure 2.
Figure 3.
www.fishman.com
4. Fasten the pickup wires to the terminal block
(figure 4). The signal wire goes to the terminal
marked “IN” and the shield wire goes to the “GND.”
Tighten the screws on the block to secure the wires.
5. Loop the pickup wire to the right and press it into
the slot on the edge of the chassis. Snap the trap
door shut (figure 5). Place the preamp in the cavity.
6. For easy access installing the screws/mounting
brackets, swing the preamp open. Insert the mount-
ing screws in their holes. Reach inside the soundhole
and fasten the screws to the mounting brackets with
a #1 Phillips driver. Snap the four covers in place
over the screw heads.
7. Secure the wires inside the instrument with the
supplied adhesive backed clips (figure 1). Clean the
mounting surface with an alcohol wipe or a cotton
swab moistened with rubbing alcohol.
8. Swing the preamp open and install a fresh 9V
alkaline or lithium battery.
Sound Image upload
Install the included Aura Image Gallery software on
your computer. Open the preamp compartment and
connect a “mini-B” USB cable between the preamp
and the computer (figure 6). Follow the onscreen
instructions to upload Images.
Input trim adjust
• Unplug the guitar and open the preamp
compartment. Locate the small circular
potentiometer on the right side of the
preamp (figure 7).
• To turn on the VU meter, move the Edit/Play
switch to Play, hold down the Tuner button
and plug in the guitar. The Tuner display
will flash.
• Play the instrument strongly and watch the
Tuner display. Use a small flat-head screw-
driver to adjust the trim control so all three
LEDs flash occasionally with hard strumming.
• To exit the VU meter, push the Tuner button.
Figure 4.
Figure 5.
514-300-002 Rev A 6-07
Figure 6.
Figure 7.
  • Page 1 1
  • Page 2 2

Fishman Aura Pro Owner's manual

Category
Guitar accessories
Type
Owner's manual

Ask a question and I''ll find the answer in the document

Finding information in a document is now easier with AI