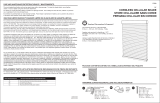
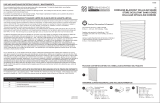
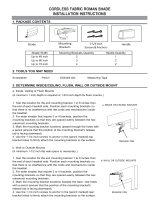
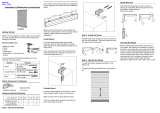
78700

Allen + Roth 78700, 78706, 78715 Installation guide

  • Hello! I am an AI chatbot trained to assist you with the Allen + Roth 78700 Installation guide. I’ve already reviewed the document and can help you find the information you need or explain it in simple terms. Just ask your questions, and providing more details will help me assist you more effectively!
PACKAGE CONTENTS/CONTENU DE L’EMBALLAGE/CONTENIDO DEL PAQUETE
HARDWARE CONTENTS/QUINCAILLERIE INCLUSE/ADITAMENTOS
Wood Screw
Vis/Tornillo para madera
Handle
Poignée
Manija
x 1
AA
BB
CC
A
x 1
ATTACH YOUR RECEIPT HERE/JOIGNEZ VOTRE REÇU ICI/ADJUNTE SU RECIBO AQUÍ
Serial Number/Numéro de série/Número de serie
Purchase Date/Date d’achat/Feacha de compra
Mounting Bracket
Charnière
Abrazaderas de montaje
23 in. - 47 in. = x 2
48 in. - 72 in. = x 3
58,42 cm - 119,38 cm = x 2
121,92 cm - 182,88 cm = x 3
23 in. - 47 in. = x 4
48 in. - 72 in. = x 6
58,42 cm - 119,38 cm = x 4
121,92 cm - 182,88 cm = x 6
AB17667
®
allen + roth® is a registered trademark of LF, LLC.
All Rights Reserved.
allen + roth® est une marque decommerce
déposée de LF, LLC. Tous droits réservés.
allen + roth® es una marca registrada de LF, LLC.
Todos los derechos reservados.
MODEL/MODÈLE/MODELO #78679 - 78723
CORDLESS CELLULAR SHADE
STORE CELLULAIRE SANS CORDE
PERSIANA CELLULAR SIN CORDON
ITEM/ARTICLE/ARTÍCULO # 0053401, 0122692, 0159439, 0159490, 0159538,
0159556, 0159568, 0163013, 0166445, 0166614, 0175267, 0177174, 0181543,
0199981, 0210390, 0228015, 0251235, 0251236, 0251237, 0251238, 0251239,
0251240, 0251241, 0251242, 0251243, 0251244, 0251245, 0251246, 0251247,
0251248, 0924719, 0924720, 0924721, 0924722, 0924723, 0924724, 0924725,
0924726, 0924727, 0924728, 0924729, 0924730, 0924731, 0924732, 0924733
Questions?/Des questions?/¿Preguntas?
Call customer service at 1-866-439-9800,
8 a.m. - 8 p.m., EST. Monday - Sunday.
Appelez notre service à la clientèle au 1 866 439-9800,
entre 8 h et 20 h (HNE) du lundi au dimanche.
Llame a nuestro Departamento de Servicio al Cliente
al 1-866-439-9800, de lunes a domingo de 8 a.m. a 8
p.m.hora estándar del Este.
PREPARATION/PRÉPARATION/PREPARACIÓN
Before beginning installation of product, make sure all parts are present. Compare parts with package contents list and
hardware contents list. If any part is missing or damaged, do not attempt to assemble, install or operate the product.
Estimated Assembly Time: 30 minutes
Tools Required for Assembly (not included): Measuring tape, drill with 3/32 in. bit, and pencil.
Avant de commencer l’installation du produit, assurez-vous d’avoir toutes les pièces. Comparez le contenu de l’emballage avec
la liste des pièces et celle de la quincaillerie. S’il y a des pièces manquantes ou endommagées, ne tentez pas d’assembler,
d’installer ni d’utiliser le produit.
Temps d’assemblage approximatif : 30 minutes
Outils nécessaires pour l’assemblage (non inclus) : ruban à mesurer, perceuse, foret de 3/32 po, et crayon.
Antes de comenzar a instalar ek producto, asegúrese de tener las piezas. Compare las paiezas con la lista del contenido del
paquete y la de los aditamentos. No intente ensamblar, instalar ni usar el producto se falta alguma pieza o si éstas están
dañadas.
Tiempo aproximado de ensamblaje: 30 minutos
Herramientas necesarias para el ensamblaje (no se incluyen): Cinta métrica, taladro con broca de 3/32, y lápiz.
SAFETY INFORMATION/CONSIGNES DE SÉCURITÉ/INFORMACIÓN DE SEGURIDAD
Please read and understand this entire manual before attempting to assemble or install the product.
Assurez-vous de lire et de comprendre l’intégralité de ce manuel avant de tenter d'assembler le produit.
Lea y comprenda completamente este manual antes de intentar ensamblar o instalar el producto.
Bracket Location and Installation:
The shade may be installed either inside or outside the window frame. A mounting bracket should be positioned on each end of
the headrail. Wider shades that require 3 or more brackets should be spaced evenly between the two outermost brackets.
Always position the brackets such that there is no interference with cords and mechanisms inside the headrail. The procedure
outlined below will assure proper bracket placement.
Installation des charnières :
Vous pouvez installer le store à l’intérieur ou à l’extérieur du châssis de la fenêtre. Posez une charnière à chaque extrémité du
caisson. Pour les grands stores nécessitant 3 charnières, espacezles de façon uniforme. Assurez-vous que les charnières ne
font pas obstacle aux cordons et aux mécanismes du caisson. Suivez les étapes ci-dessous pour installer les charnières
correctement.
Ubicación e instalación de las abrazaderas:
La persiana se puede instalar dentro o fuera del marco de la ventana. Se debe colocar una abrazadera de montaje en cada
extremo del cortinero. Las persianas más anchas que necesitan 3 o más abrazaderas de soporte centrales deben espaciarse
de forma uniforme entre las dos abrazaderas de montaje de los extremos. Siempre coloque las abrazaderas de tal forma que
no interfieran con los cordones o conlos mecanismos internos del cortinero. El procedimiento que se explica a
continuación asegura la instalación correcta de las abrazaderas.
ASSEMBLY INSTRUCTIONS/INSTRUCTIONS POUR LASSEMBLAGE/INSTRUCCIONES DE ENSAMBLAJE
1a.
For outside mounting, clip
themounting bracket (AA) onto
the headrail of shade (A). Hold
shade (A) level at the height
desired and center it over the
window opening. Mark the exact
location of each mounting
bracket (AA) with a pencil.
Remove the mounting brackets
(AA) from the headrail of shade
1b.
2.
3. Attach the handle (BB) to the
center of the bottom rail of shade
(A). Check carefully to assure
that the handle (BB) is properly
snapped into place.
3
Fixez la poignée (BB) au centre
de la traverse inférieure du store
(A). Vérifiez soigneusement
que poignée (BB) est bien fixée.
Fije la manija (BB) al centro del riel inferior de
persiana (A). Verifique con cuidado para asegurarse
de manija (BB) haya ingresado en su lugar.
A
BB
1a
AA
CC
1b
AA
CC
2
click
déclic
escuche un clic
A
(A). Predrill the screw holes and then securing bracket (AA)
to the wall or window molding with wood screws (CC).
Pour une installation à l’extérieur du châssis, fixez les
charnières (AA) au caisson du store (A). Maintenez le store
(A) à la hauteur désirée et centrez-le par rapport à la
fenêtre. Marquez l’empacement de chaque charnière (AA)
à l’aide d’un crayon. Retirez les charnières (AA) du
caisson (A) et placez l’extrémité de chacune d’entre elle à
l’endroit marqué. Percez des avant-trous pour les vis.Fixez
chaque charnière (AA) à l’aide des vis à bois (CC).
Para montaje exterior, coloque la abrazadera de montaje
(AA) sobre el cortinero de persiana (A). Sostenga la
persiana (A) a la altura deseada y céntrela sobre la aber
tura de la ventana. Use un lápiz para marcar la ubicación
exacta de cada abrazadera de montaje (AA).Retire las
abrazaderas de montaje (AA) del cortinero de persiana (A).
Taladre previamente los orificios para los tornillos. Atornille
cada abrazadera de montaje (AA) en la pared o en la
moldura de la ventana con los tornillos para madera (CC).
For inside mounting, clip the
mounting brackets (AA) onto the
headrail of shade (A). Hold
shade(A) in place and make
pencil mark at the rear of each
mounting bracket(AA). Remove
the mounting brackets (AA) from
the headrail. Predrill the screw
holes and then secure the
mounting bracket (AA) to the wall
or window molding with wood screws (CC).
Pour une installation à l’intérieur du châssis, fixez les
charnières (AA) au caisson du store (A). Miantenez le store
(A) à la hauteur désirée et marquez l’arrière de chaque
charnière (AA) à l’aide d’un crayon. Retirez les charnières
(AA) du caisson et alignez-les en fonction des marques.
Percez des avant-trous pour les vis. Fixez chaque charière
(AA) à l’aide des vis à bois (CC).
Para montaje interior, coloque la abrazadera de montaje
(AA) sobre el cortinero de persiana (A). Sostenga la
persiana (A) en su lugar y usando un lápiz haga una marca
en la parte posterior de cada abrazadera de montaje
(AA).Saque las abrazaderas de montaje (AA) del cortinero
y alíneelas con las marcas. Taladre previamente los
orificios para los tornillos. Fije cada abrazadera de montaje
(AA) con los tornillos para madera (CC).
Lift the headrail of shade (A)
into position such that the
inner front edge of the
headrail slides into the slot at
the front of each mounting
bracket (AA). Push the
headrail upward until the
flexible tab at the bottom of
each mounting bracket (AA)
snaps onto the back of the
headrail. Check carefully to assure each mounting
bracket (AA) is properly snapped into place.
Soulevez le caisson du store (A) de façon à ce que son
rebord intérieur avant glisse dans la fente située à
l’avant de chaque charnière (AA). Poussez le caisson
vers le haut jusqu’à ce que la languette souple située au
bas de las charnière (AA). Vérifiez soigneusement que
chaque charière (AA) est bien fixée.
Levante el continero de persiana (A) hasta colocarlo de
tal forma que el extremo frontal interior del continero se
deslice en la ranura en la parte frontal de cada abraza-
dera de montaje (AA). Presione el continero de persi-
ana hacia arriba hasta que la lengüeta flexible en la
parte inferior de cada abraza-dera de montaje (AA)
ingrese en la parte posterior del continero de persiana.
Verifique con cuidado para asegurarse de que cada
abrazadera de montaje (AA) haya ingresado en su
lugar.
ONE-YEAR LIMITED WARRANTY/GARANTIE LIMITÉE DE UN AN/UN AÑO DE GARANTÍA LIMITADA
For a period of one (1) year from the date of purchase, the manufacturer will replace this window covering with one of equal or superior value,
if this window covering is found to be defective in material or workmanship. To obtain warranty service contact our customer service depart-
ment at 1-866-439-9800. This warranty does not cover damage of defects caused by or resulting from improper maintenance, negligent or
improper use, abuse, misuse, neglect, accidents, act of God, alteration, commercial use, installation, removal or reinstallation.
This warranty is restricted to normal consumer use within the United States and Canada.
MANUFACTURER WILL NOT BE LIABLE FOR INCIDENTAL OR CONSEQUENTIAL DAMAGES, SOME STATES DO NOT ALLOW THE
EXCLUSION OR LIMITATION OF INCIDENTAL OR CONSEQUENTIAL DAMAGES, SO THE ABOVE LIMITATION OR EXCLUSION MAY
NOT APPLY TO YOU. This warranty gives you specific legal rights, and you may also have other rights which vary from state to state.
Le fabricant remplacera cette parure de fenêtre par une autre d’une valeur égale ou supérieure si elle présente un défaut de
matériaux ou de fabrication dans une période de un (1) an suivant la date d’achat. Pour effectuer une réclamation,
communiquez avec notre service à la clientèle au 1 866 439-9800. Cette garantie ne couvre pas les dommages ou les défauts
résultant d’un entretien inadéquat, d’une négligence, d’un usage abusif ou inapproprié, d’un accident, d’un cas de force
majeure, d’une modification, d’un usage commercial, de l’installation, du retrait ou de la réinstallation. Cette garantie est valable
uniquement si l’article s’avère défectueux dans des conditions normales d’utilisation aux États-Unis ou au Canada. LE
FABRICANT N'EST PAS RESPONSABLE DES DOMMAGES ACCESSOIRES OU CONSÉCUTIFS. CERTAINS ÉTATS OU
CERTAINES PROVINCES NE PERMETTENT PAS L’EXCLUSION OU LA LIMITATION DES DOMMAGES ACCESSOIRES OU
CONSÉCUTIFS, DE SORTE QUE LES LIMITATIONS ET EXCLUSIONS CI-DESSUS PEUVENT NE PAS S’APPLIQUER À
VOUS. Cette garantie vous confère des droits précis. Il est possible que vous disposiez également d’autres droits, qui varient
d’un État ou d’une province à l’autre.
Por un período de un (1) año desde la fecha de compra, el fabricante reemplazará esta cubierta para ventanas con una de
valor igual o superior si se descubre que esta cubierta para ventanas tiene defectos en el material o en la mano de obra. Para
obtener el servicio de garantía, llame al Departamento de Servicio al Cliente al 1-866-439-9800. Esta garantía no cubre el daño
o los defectos causados o resultantes por mantenimiento incorrecto, uso negligente o inadecuado, abuso, mal uso, descuido,
accidentes, desastres naturales, alteraciones, uso comercial, instalación, remoción o reinstalación. Esta Garantía se restringe al
uso del consumidor normal dentro de Estados Unidos y Canadá. EL FABRICANTE NO SERÁ RESPONSABLE DE DAÑOS
ACCIDENTALES O RESULTANTES, ALGUNOS ESTADOS NO PERMITEN LA EXCLUSIÓN O LIMITACIÓN DE DAÑOS
ACCIDENTALES O RESULTANTES, DE MODO QUE LA EXCLUSIÓN O LIMITACIÓN ANTERIOR PUEDE NO APLICARSE
EN SU CASO. Esta garantía le otorga derechos legales específicos pero podría tener también otros derechos que varían de
estado a estado.
CARE AND MAINTENANCE/ENTRETIEN/
CUIDADO Y MANTENIMIENTO
The vinyl headrail and bottom rail can be wiped clean with a damp sponge. To clean the shade fabric, use a feather
duster or vacuum lightly using the soft brush attachment.
Le caisson en vinyle peut être nettoyé à l’aide d’une éponge humide. Pour nettoyer le tissu de store, utilisez un plumeau
ou un aspirateur muni d’une brosse douce.
El cortinero se puede limpiar con una esponja húmeda. Para limpiar la persiana de madera, use un plumero de plumas o
el accesorio para cepillar cuando aspire suavemente.
4
A
AA
4. OPTIONAL: To remove the shade (A) from the mounting brackets (AA) after installation lift up
the bottom of the shade (A) to gain access to the flexible tab on the bottom of the mounting
brackets (AA). Use a screwdriver (Not Included) to press in the flexible tab until the shade
loosens. Repeat for all mounting brackets (AA).
FACULTATIF : Après l’installation, pour retirer le store (A) des charniéres (AA),
soulevez le bas du store (A) pour accéder à la languette souple qui se trouve sous les
charniéres (AA). À l’aide d’un tournevis (non inclus), enfoncez la languette souple jusqu’à ce
que le store se détache. Faites de même pour toutes les charniéres (AA).
OPCIONAL: para retirar la persiana (A) de los soportes de montaje (AA) después de la
instalación levante la parte inferior de la persiana (A) para obtener acceso a la lengüeta
flexible en la parte inferior de los soportes de montaje (AA). Utilice un destornillador (no se
incluye) para presionar la lengüeta flexible hasta soltar la persiana. Repita con todos los
soportes de montaje (AA).
ASSEMBLY INSTRUCTIONS/INSTRUCTIONS POUR L’ASSEMBLAGE/INSTRUCCIONES DE ENSAMBLAJE
REPLACEMENT PARTS LIST/LISTE DES PIÈCES DE RECHANGE/LISTA DE PIEZAS DE REPUESTO
For replacement parts, call customer service 1-866-439-9800./Pour obtenir des pièces de rechange, communiquez avec notre
service à la clientèle au 1 866 439-9800./Para obtener piezas de repuesto, llame al Servicio al Cliente al 1-866-439-9800.
PART/PIÈCES/PIEZAS DADITNAC/ÉTITNAUQ/YTITNAUQ NÓICPIRCSED/NOITPIRCSED/NOITPIRCSED
Hardware Box includes all of the following/La boîte de quincaillerie inclut tout ce qui suit/La caja de aditamentos incluye lo siguiente:
AA
Mounting Bracket/Charnière/Abrazaderas de montaje
2
BB
Handle/Poignée/Manija
1
CC
Wood Screw/Vis/Tornillo para madera
4
PART/PIÈCES/PIEZAS .ON AZEIP/ECÉIP ED °N/# TRAP NÓICPIRCSED/NOITPIRCSED/NOITPIRCSED
79074-0CELZ000HW2LAM sotnematida ed ajaC/eirelliacniuq ed etîoB/xoB erawdraH DD
Printed in Taiwan
Imprimé à Taiwan
Impreso en Taiwan
/