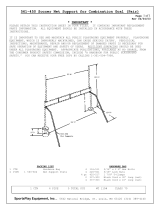
561-501 Official Soccer Goal (Pair)
Page 1 of 2
Rev 11/07/19
SportsPlay Equipment, Inc., 8505 Delmar Blvd, Ste G, University City, MO 63124
(800) 727-8180
* IMPORTANT *
PLEASE RETAIN THIS INSTRUCTION SHEET IN YOUR FILES. IT CONTAINS IMPORTANT REPLACEMENT
PARTS INFORMATION. ALL EQUIPMENT SHOULD BE INSTALLED IN ACCORDANCE WITH THESE
INSTRUCTIONS.
IT IS IMPORTANT TO USE AND MAINTAIN ALL PUBLIC PLAYGROUND EQUIPMENT PROPERLY. PLAYGROUND
EQUIPMENT, WHICH IS IMPROPERLY MAINTAINED, CAN CAUSE SERIOUS INJURY. PERIODICAL
INSPECTIONS, MAINTENANCE, REPAIR AND/OR REPLACEMENT OF DAMAGED PARTS IS NECESSARY FOR
SAFE OPERATION OF EQUIPMENT AND SAFETY OF USERS. RESILIENT SURFACING SHOULD BE USED
UNDER ALL PLAYGROUND EQUIPMENT. APPROPRIATE PUBLICATIONS, AVAILABLE AT NO CHARGE, FROM
THE CONSUMER PRODUCT SAFETY COMMISSION, INCLUDE “A HANDBOOK FOR PUBLIC PLAYGROUND
SAFETY.” YOU CAN RECEIVE YOUR FREE COPY BY CALLING 1-301-504-7908.
QTY PACKING LIST
QTY HARDWARE BAG
1
CTN
Hardware Bag
2
337-303
Yellow Cord x 100’ Long
4
WF
1
563-601
Goal Post
4
337-303
Yellow Cord x 25’ Long
2
WF
1
563-219
Cross Bar
8
116-513
5/16” x 3 ¼” Hex Head Bolt
4
PIPE
1
563-602
Net Support
8
226-501
5/16” Lock Nut
4 PIPE 1 CTN 6 WF 11 TOTAL PCS WT 570# CLASS 70

561-501 Official Soccer Goal (Pair)
Page 2 of 2
Rev 11/07/19
SportsPlay Equipment, Inc., 8505 Delmar Blvd, Ste G, University City, MO 63124
(800) 727-8180
NOTE:
All threaded ends of bolts protruding beyond nuts must be
cut off and/or peened to eliminate sharp edges. No more
than two threads should extend beyond face of nut.
All washers, “T” nuts, and other fastener hardware used on
round pipe or tubing must be hammered down to conform to the
curved underlying surface to eliminate catch points.
DO NOT tighten nuts more than hand-tight until entire
assembly is completed.
STEP #1:
Mark and dig footing holes
STEP #2:
Place 563-601 Uprights in Footing Holes.
Brace uprights so that the bottom does not rest on the
footing hole bottom. Make sure uprights are level.
STEP #3:
Pour footings using:
12 – 80lb. Bags Pre-Mix Cement – 3 bags per hole.
Be sure to ‘cone’ the top of the pour for drainage.
STEP #4:
Attach 563-219 Bar
STEP #5:
Attach 563-602 Supports
NOTES:
Wait 48 hours for concrete to harden before using unit.
DO NOT install where overhead electrical wires are present.
MAINTENANCE INSTRUCTIONS:
Check periodically for loose bolts, broken parts and replace immediately.
/


