Page is loading ...

© Muxlab Inc. 2020 94-000937-A / SE-000937-A
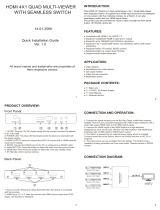
4X2 HDMI 2.0 Quad-View Processor
Operation Manual
500446

4x2 HDMI 2.0 Quad-View Processor Installation Guide
© Muxlab Inc. 2020 2
SAFETY PRECAUTIONS
To insure the best performance from the product, please read all instructions carefully before using the device. Save
this manual for future reference.
⚫ Follow basic safety precautions to reduce the risk of fire, electrical shock and injury.
⚫ Do not dismantle the housing or modify the module. It may result in electrical shock or burns.
⚫ Do not open or remove the housing of the device as you may be exposed to dangerous voltage or other
hazards.
⚫ To prevent fire or shock hazard, do not expose the unit to rain, moisture and do not install this product near
water. Keep the product away from liquids.
⚫ Spillage into the housing may result in fire, electrical shock, or equipment damage. If an object or liquid falls or
spills on to the housing, unplug the module immediately.
⚫ Do not use liquid or aerosol cleaners to clean this unit. Always unplug the power to the device before cleaning.
⚫ Using supplies or parts not meeting the products’ specifications may cause damage, deterioration or
malfunction.
⚫ Refer all servicing to qualified service personnel.
⚫ Install the device in a place with adequate ventilation to avoid damage caused by overheat.
⚫ Unplug the power when left unused for a long period of time.
⚫ Information on disposal of devices: do not burn or mix with general household waste, please treat them as
normal electrical waste.
NOTICE: Please read this manual carefully before using this product.

4x2 HDMI 2.0 Quad-View Processor Installation Guide
© Muxlab Inc. 2020 3
Table of Contents
1.Introduction ............................................................................................................................................................... 3
2. Features .................................................................................................................................................................... 4
3. Package Contents ...................................................................................................................................................... 4
4. Specifications ............................................................................................................................................................ 5
5. Panels Description .................................................................................................................................................... 6
5.1 Front Panel ....................................................................................................................................................... 6
5.2 Rear Panel ........................................................................................................................................................ 6
6. Remote Control ......................................................................................................................................................... 7
7. Operate and Connect ................................................................................................................................................ 8
Regulatory Compliance ............................................................................................................................................... 21
1.Introduction
The 4x2 HDMI 2.0 Quad-View Processor supporting 4K/60 (4:4:4) resolution provides the most flexible and cost
effective solution in the market to route ultra-high definition video sources from any of the four UHD HDMI sources
to the remote display at the same time. This solution is also well suited for use in digital signage, conference room
presentation systems or other similar settings or applications.
With up to 4K/60 (4:4:4) output resolution, users can display the mixed video with improved presentation quality.
This unit can be controlled thru an RS232 serial port and Ethernet port to provide flexible control methods to fit
numerous applications. May also be controlled via IR remote and front panel buttons.

4x2 HDMI 2.0 Quad-View Processor Installation Guide
© Muxlab Inc. 2020 4
2. Features
⚫ 4 HDMI inputs and 2 HDMI outputs
⚫ Input resolution support from 640x480 to 4096x2160@60Hz (4:4:4 8bits), interlaced or progressive
⚫ Output resolution support up to 4096x2160@60Hz (4:4:4 8bits)
⚫ Adjustable size & position through software and Cloud
⚫ Supports PIP, PBP, POP, full screen & quad-view display
⚫ HDCP 1.4/2.2 compliant
⚫ Firmware upgradable to support new features and product enhancements
⚫ Supports titles, borders and colored backgrounds
⚫ Supports Background picture & logo update
⚫ Resize, position, zoom & pan and blend output video
⚫ Supports seamless, fade-in-&-out, wipe and dissolve switching in full screen mode
⚫ Perfect as a video converter and a live video switcher
⚫ Pure unaltered uncompressed 7.1ch digital HDMI
⚫ Software control through RS-232 and Ethernet
⚫ Supports IR remote and front panel control
⚫ Supports Cloud Control (Cloud support is through encrypted communication for security/privacy protection)
3. Package Contents
⚫ One (1) 4x2 HDMI 2.0 Quad-View Processor
⚫ One (1) 12VDC/3.33A power adapter
⚫ One (1)Installation Guide
⚫ One (1) IR Remote control
⚫ One (1) IR Sensor
⚫ One (1) Quick Reference sheet
Notes:Confirm that the product and accessories are all included. If not, please contact the supplier from which
you purchased the unit.

4x2 HDMI 2.0 Quad-View Processor Installation Guide
© Muxlab Inc. 2020 5
4. Specifications
Model Name
500446
Technical
Role of usage
Multi-viewer / video processor
Background picture update
Yes
HDCP compliance
1.4 / 2.2
HDMI compliance
HDMI 2.0a
Video bandwidth
HDMI [594MHz [18Gbps]
Output Video Support
Up to 4K@60Hz (4:4:4 8bits)
Input Video Support
Up to 4K@60Hz (4:4:4 8bits)
Video Format Support
HDMI 2.0
Audio support
Bypass (signal pass-thru)
Control
RS-232/ Ethernet/ IR/ Front panel Control/ Cloud
Embedded video mixer
Yes
Input TMDS signal
1.2 Volts [peak to peak]
ESD protection
Human body model — ±15kV [air-gap discharge] & ±8kV [contact discharge]
Input
Four HDMI, one RS-232, one RJ-45 (Ethernet) & one 3.5mm
Output
Two HDMI & Two RCA Jack
HDMI connector
Type A [19-pin female]
RS-232 connector
DB-9 [9-pin D-sub female]
RJ-45 connector
WE/SS 8P8C
Mechanical
Housing
Metal enclosure
Dimensions
(L x W x H)
Model
390 x 248 x 44mm [1'3" x 9.8" x 1.7"]
Package
526 x 318 x 156mm [1'7" x 12.5" x 6.1"]
Carton
543 x 335 x 344mm [1'8" x 13.2" x 1'1"]
Weight
Model
2.2 kg [5 lbs]
Package
3.3 kg [7.3 lbs]
Power supply
12VDC 3.33A
Power Consumption
22 Watts [max]
Operation temperature
0~40°C [32~104°F]
Storage temperature
-20~60°C [-4~140°F]
Relative humidity
20~90% RH [no condensation]

4x2 HDMI 2.0 Quad-View Processor Installation Guide
© Muxlab Inc. 2020 6
5. Panels Description
5.1 Front Panel
No.
Name
Description
1
Window
Source
Selection
Select the Window source A, B, C & D.
2
Presets
Recall preset 1 or preset 2.
3
Quad
Fast Selection to view Quad-View Mode
4
Full
Switch output Window to full screen mode
5
IR
IR Sensor for receiving the IR commands from
the IR Remote Control.
6
OSD
Buttons to navigate and manage the internal
menus of the product.
5.2 Rear Panel
No.
Name
Description
7
Power
Switch
Power On/Off Switch.
8
Power
Jack
Use included DC adaptor to power the product.
9
IR Ext.
This port is for a local IR sensor, used to extend
the IR signal. Connect to an IR Sensor.
10
HDMI
Input
Connect HDMI input sources 1 to 4.
11
Stereo
Output
Stereo Audio Output extraction (L/R).
12
HDMI
Output
Output for HDMI displays 1 and 2.
13
RS232
RS232 Serial Port for remote control.
14
Ethernet
Ethernet LAN Port, for remote control.
15
Service
For Firmware Upgrades.

4x2 HDMI 2.0 Quad-View Processor Installation Guide
© Muxlab Inc. 2020 7
6. Remote Control
Button
Function
POWER
Power on/off the device
LOCK
Lock/unlock the device
▲
Arrow button (up)
MENU
OSD (On Screen Display) menu
AUDIO
Select audio sources
Arrow button (right)
OK
Select the setting (similar to Enter)
Arrow button (left)
MUTE
Turn off the audio
BACK
Back to previous page of OSD menu
▼
Arrow button (down)
EXIT
Exit from the menus
F1
Reserved
720P
Switch output resolution to 720p @ 60Hz
1080P
Switch output resolution to 1080p @ 60Hz
4K2K
Switch output resolution to 4K @ 60Hz
QUAD
Fast switch to quad-view mode
FULL
Fast switch to full screen mode
Background
Set up the background picture of a
window
LABEL
Window label ON/OFF
A
Select source A to be the input source
B
Select source B to be the input source
C
Select source C to be the input source
D
Select source D to be the input source
P1
User preset 1
P2
User preset 2
P3
User preset 3
P4
User preset 4
▲
▲

4x2 HDMI 2.0 Quad-View Processor Installation Guide
© Muxlab Inc. 2020 8
7. Operate and Connect
Software Control through RS-232 / Ethernet port
1. System Requirement
(1) OS information: MS Win XP/7/8/10
(2) Baud rates: 115200
(3) Free space taken on hard disk (software size): 10 MB
(4) Minimum RAM requirement: 256MB
2. Control interface
When clicking on the executable file, the following dialog will pop-up (under Microsoft Windows 7, please run
as administrator).
RS-232 serial Mode: Use RS-232 to connect the port on device and computer. Select correct COM port and click
the OK button.
Ethernet Mode: Enter the IP address of the device and click the OK button.
After the software control method setting is selected, the system control interface will automatically start up.

4x2 HDMI 2.0 Quad-View Processor Installation Guide
© Muxlab Inc. 2020 9
Control Interface
1. Connection Status:
Shows the connect information and status. If the User uses RS-232 serial Mode to control the device, the
following graph is shown:
Else if the User uses Ethernet Mode to control the device, the following graph is shown:
In addition, if the User would like to change the control method, the User can click on the
or button to change modes.
2. Output Settings
In this section, the User can configure the inputs, the source of window A~D, output resolution, layout setting
(PAP or full screen) and switch mode.
(1) Source Selection
For each display window, you can assign arbitrary video sources here.
1
2
3
4
5
6
7
8

4x2 HDMI 2.0 Quad-View Processor Installation Guide
© Muxlab Inc. 2020 10
(2) Quick Selection
The system provides 5 default modes, 8 custom modes and 4 switching effects (Seamless, Fade in/out,
Dissolve, Wipe) for the User to select from.
(3) Output Resolution
Set the output resolution.
(4) Save Layout
The system provides 8 custom layouts, for Users to save frequently used scenarios.

4x2 HDMI 2.0 Quad-View Processor Installation Guide
© Muxlab Inc. 2020 11
(5) Display Panel
In the left portion of the control interface, the User can customize the display. The different colored frames
represent the different input windows. The coordinate information shows the position of the input source
screen. In addition, the User is provided with display ratios, used to set the display panel sizes. The User can
change the window layer level/order by dragging the window icons in Layer Control section.

4x2 HDMI 2.0 Quad-View Processor Installation Guide
© Muxlab Inc. 2020 12
3. Advanced Setting
(1) Label Text
In this section, Users can input the text to be shown along with the video.
(2) Sound
To select which input source drives the audio output R/L channels.
(3) Window Label
The User can determine if the window’s label/border is turned on or off.

4x2 HDMI 2.0 Quad-View Processor Installation Guide
© Muxlab Inc. 2020 13
(4) Background
To setup the background image of a window. There are 4 available memory banks for the User to upload
background images. The User can click on the File button to load the picture he wants to use, and click on
the Start button to write this picture into the devices memory.
(5) Cloud Setting
➢ Register mode
To get an “association code”. The device can use this code to pair with a cloud server.
➢ Cloud mode
To reset the cloud after a successful pairing.
➢ MAC
Read the device’s MAC address information.

4x2 HDMI 2.0 Quad-View Processor Installation Guide
© Muxlab Inc. 2020 14
4. EDID (Extended display identification data)
(1) Learn/Set Default EDID
➢ Select Default EDID
➢ Select Input
➢ Click button to set Default EDID.

4x2 HDMI 2.0 Quad-View Processor Installation Guide
© Muxlab Inc. 2020 15
5. System Setting
(1) Firmware Update
➢ Click the button to do a firmware update.
➢ The “Firmware update” window appears as shown below.
➢ Please select the correct COM port, or click the “Scan” button to connect the device.
➢ Click “update” button to do a firmware update.

4x2 HDMI 2.0 Quad-View Processor Installation Guide
© Muxlab Inc. 2020 16
(2) Factory Reset
➢ Click the button to do a factory (default) reset.
➢ The Factory Reset process will take about 25 seconds.

4x2 HDMI 2.0 Quad-View Processor Installation Guide
© Muxlab Inc. 2020 17
6. IP Configure
The User can also manage this device via WEB Interface control. First the User should click on button
to configure the network settings. The User can then setup the Ethernet Ip information for the unit as shown
below. Once the information has been entered, click on to save the settings.
Unit default IP Address: 192.168.1.46
7. Info
Get the unit Software and Firmware versions.
Note: The Software and Firmware version shown above are only examples and may change as needed.
8. Refresh
This function refreshes the information presented, and can get updated information of the device and software
states.

4x2 HDMI 2.0 Quad-View Processor Installation Guide
© Muxlab Inc. 2020 18
Cloud Control (Eagleyes) through the Ethernet Port
Control via the cloud is available via the Eagleyes Cloud service.
Create an Eagleyes Cloud Account
For first time users of the Eagleyes service, please create a new account as follows.
1. Access Eagleyes (http://www.eagleyes.io) and click “Create new account”.
2. The Registration page will pop up. Fill in your email and password information and click on “Apply” to create
your private account.

4x2 HDMI 2.0 Quad-View Processor Installation Guide
© Muxlab Inc. 2020 19
Add a Device to the Eagleyes Cloud Service
1. First, please make sure the device is connected to the Ethernet. Then run the software with the device to get
the register code (Note that the status of software is set as “Connected”). Get the code on bottom right.
2. Access the Eagleyes Cloud Service (http://www.eagleyes.io), and then log into your account on the right top
corner. Click Add device to add the device which you just got its associated code.
3. Enter the Installer Email for online support in the future, and the Association Code to pair with your device.

4x2 HDMI 2.0 Quad-View Processor Installation Guide
© Muxlab Inc. 2020 20
4. After adding the device, the list of devices related to your account will show on the upper right corner. You
can click the button to switch between devices for control.
/