Page is loading ...

22355 TAG WAY
Dulles, Virginia 20166-9310
(703) 406.3000 (800) TAG-POWER
tag.com
22 October, 2002
Reference Manual
KVM-8
KVM-8
HIGH-END TACTICAL SOLUTIONS
®

Mailing Address:
Technology Advancement Group®, Inc.
22355 TAG WAY
Dulles, VA 20166-9310
USA
Telephone Numbers:
Headquarters
+1.703.406.3000
Toll-Free 1.877.TAG-POWER (CONUS ONLY)
0800 - 1700 Eastern Time USA
Technical Support
+1.703.406.4516
Toll-Free 1.877.TAG-TECH (CONUS ONLY)
24x7x365
Internet:
Web Site
tag.com
E-Mail
©2000 Technology Advancement Group, Inc. All rights reserved.
Technology Advancement Group, TAG, HDIT, and the TAG Ball graphic are trademarks
or registered trademarks of Technology Advancement Group, Inc. This manual and/or
its contents may not be duplicated without written permission of Technology Advance-
ment Group, Inc. Printed in the USA.
15
Contact Information Notes

- 1U (1.75”) Design
- Cascadable to Three Levels - Control Up to 512 PCs from a single Console.
- No software required
- PC Selection via Front Panel Switches, Hot Keys, or OSD (On Screen Display)
- Quick View Scan Feature for Monitoring Selected PCs
- PS/2 and Serial Mouse Emulation provided for system Bootup
- Console’s PS/2 Mouse controls all connected PCs
- SVGA, VGA, and Multisync Monitor support
- Superior Video Quality; 1920x1440; DDC28
- LED Display for easy status monitoring
- Supports high quality CS Series Custom Connector Cables
- Rack Mountable in 19” System Rack
- Hot Pluggable - Add or remove PCs without powering down the switch
14 i
FeaturesNotes

Introduction..........................................................................................................1
Front & Rear Panels ........................................................................................2
Installation............................................................................................................3
Powering Down & Restarting.......................................................................4
Port ID Numbering............................................................................................5
Port Selection .....................................................................................................6
On-Screen Display (OSD) Operation...........................................................7
Function Keys......................................................................................................9
On-Screen Display (OSD) Security...........................................................11
PC Connection Table .....................................................................................12
Specifications & Requirements ................................................................13
Notes...................................................................................................................14
Figures
Figures 1 & 2 - Front & Rear Panels ........................................................1
Figures 3 & 4 - Front & Rear Panel Decriptions..................................2
Figure 5 - OSD Screen Example ..................................................................7
13i i
Characteristics Items Specifications
PC Connections (1 KVM-8) 8
PC Connections Max (73 KVM-8s) 512 (via Daisy Chain)
Port Selection Front Panel Switches
Hot Keys
On Screen Display (OSD)
LEDs
Power 1 (Blue)
On-Line Port LEDs 8 (Orange)
Selected Port LEDs 8 (Green)
Console Connectors
Keyboard 1 6-Pin Mini-DIN Female (PS/2)
Mouse Connector 1 6-Pin Mini-DIN Female (PS/2)
Video Connector 1 HDB-15 Female (Std VGA/SVGA)
CPU Connectors
Keyboard 8 6-Pin Mini-DIN Female (PS/2)
Mouse Connector 8 6-Pin Mini-DIN Female (PS/2)
Video Connector 8 HDB-15 Female (Std VGA/SVGA)
Scan Interval (OSD Select) 3, 5, 10, 15, 20, 30, 40, 60 secs.
Power Consumption DC 9V 1080mW
Temperature Range
Operating +5 to +40° C
Storage (Shipping) -20 to +60° C
Humidity 0 to 80% RH, Noncondensing
Housing Metal
Weight [grams] 2,850 typical
Dimensions [L x W x H] 483 x 150 x 44.5 mm (19” 1U)
Table of Contents Specifications & Requirements

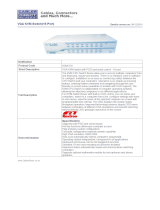
The TAG® KVM-8 is a control unit that allows access to multiple computers from
a single console (keyboard, monitor, mouse). With the TAG® KVM-8, you can easily
access multiple computers in a cost effective manner. The TAG® KVM-8 can control,
up to 8 PCs. Units can be cascaded to three levels, which means that up to 73 TAG®
KVM-8s can control up to 512 PCs - all from a single console. Setup is fast and easy;
plugging cables into their appropriate ports is all that is entailed. There is no software
to configure, so there is no need to get involved in complex installation routines or be
concerned with incompatibility problems. Since the TAG® KVM-8 intercepts keyboard
input directly, it works on virtually any hardware platform and with all operating sys-
tems.
The TAG® KVM-8 provides three convenient methods to access any PC connected to
the system: (1) using the pushbutton port selection switches located on each unit’s
front panel; (2) entering Hotkey combinations from the keyboard; and (3) selecting from
on screen menus provided by the On Screen Display (OSD) feature. In addition, a power-
ful Quick View Scan feature allows you to auto scan and monitor the activities of all
operating PCs on the installation one by one.
There is no better way to save time and money than with a TAG® KVM-8 installation.
By allowing a single console to manage all the attached PCs, the TAG® KVM-8 elimi-
nates the expense of purchasing a separate keyboard, monitor, and mouse for each PC
as well as saving all the space they would take up. It also eliminates the inconvenience
and wasted effort involved in constantly moving around from one PC to another.
Figure 1 - Front Panel
Figure 2 - Rear Panel
112
The following tables indicates the relationship between the number of TAG® KVM-8 units
and the number of PCs that they control.
PC Table Introduction

Front Panel
1. Port LEDs - On Line: Lights ORANGE to indicate that the PC attached to the corresponding port
is up and running. If the LED is flashing, it indicates that the Port is being used for Cascading to
another TAG® KVM-8. Selected: Lights GREEN to indicate the currently selected port. The LED
is steady under normal conditions, but flashes when its port is accessed under Auto Scan mode.
2. Port Selection Switches - Press a switch to access the PC attached to the corresponding port.
Pressing Buttons 1 and 2 simultaneously for 3 seconds performs a Keyboard and Mouse reset;
pressing Buttons 7 and 8 simultaneously starts Auto Scan Mode.
3. Sound Opening - System sounds (beeps, etc.), are emitted from this opening.
4. Reset Button - To reset the TAG® KVM-8, use a thin object (such as the end of a paper clip, or
a ballpoint pen), to press this recessed switch in to initiate a warm reset. If the switch is kept in
for longer than three seconds, a cold reset takes place.
5. Power LED - Lights to indicate that the TAG® KVM-8 is receiving power.
Rear Panel
6. Power Jack - The power adapter plugs in here.
7. Root/Slave Switch - Slide this switch to the ROOT position if this unit is the first station on the
installation (i.e., the one that the monitor, mouse, and keyboard plug into). Slide this switch to the
SLAVE position if this unit is daisy chained down from a higher TAG® KVM-8 unit.
8. Console Port Section - If this is a first station unit, your monitor, keyboard and mouse plug in
here. If this is a daisy chained unit, the cables that link back to a port on a higher TAG® KVM-8
unit plug in here.
9. CPU Port Section - The cables that link to the PCs plug in here.
Figure 3 - Front Panel
Figure 4 - Rear Panel
112
Front & Rear Panels On-Screen Display (OSD) Security
Access authorization
In order to prevent unauthorized access to the computers, OSD provides two security features: Pass-
word; and Lock/Unlock Console. If a password is set, the console can only be locked/unlocked, by
first specifying the password. When the console is locked, only the current monitor screen displays.
Attempts to input information from the console has no effect; attempts to switch to a different port,
either from the console or by pressing the manual switches have no effect, either. The only way to
regain access to the computers is by unlocking the console.
Password
To set a password:
1 - Highlight this item, then press [Enter]. You are presented with a screen that allows you to key in
your own password. The password may be up to 15 characters long, and can consist of any combina-
tion of letters and numbers (A - Z, 0 - 9).
2 - Key in the new password, then press [Enter]. You are asked to key in the password again, in order
to confirm that it is correct.
3 - Key in the new password again, then press [Enter]. If the two entries match, the new password
is accepted and the screen displays the following message:
PASSWORD OK
If the entries do not match, the screen displays the message:
INVALID PASSWORD
In which case you must start again from the beginning.
Note: To modify or delete a previous password, use the backspace key to erase individual letters or
numbers, or, with the cursor at the beginning of the password, press the [Spacebar] to erase the
entire password at once.
Lock/Unlock Console
To lock/unlock the console:
1 - Highlight this item, then press [Enter].
If no password has been set, the system locks the console (if it is unlocked), or unlocks the console
(if it is locked).
To acknowledge the change, the buzzer sounds three times, and one of the following messages dis-
plays on the screen for three seconds; ‘LOCK OK’ (if the console has been locked), or ‘UNLOCK OK’
(if the console has been unlocked).
When the Console is Locked, a zzz displays in front of the Port ID on the monitor to indicate so.
2 - If a password has been set (see above), a password entry screen appears. Key in the password,
then press [Enter]. If the password is correct, the system locks/unlocks the console as in step 1
If the password in incorrect, the message: “INVALID PASSWORD’ Displays for three seconds. After
it disappears, you can try again.

10
Connecting your console to the TAG® KVM-8.
You will need you VGA monitor, PS/2 mouse, PS/2 keyboard and the TAG® KVM-8 power adapter.
NOTE: To prevent damage to unit due to pround potential difference, make sure that all devices are properly
grounded.
Console Connection (Power adapter connection)
The TAG® KVM-8 is designed to be non-powered (no external power required). The only time
power is required is when you daisy chain it, or if operation becomes errativ because the unit
isn’t obtaining enough power from the computer connections. If you choose to use external power,
plug the power adapter into your TAG® KVM-8 power jack and the other end into a standard
surge protector.
Console Connection
First connect the end of your monitor cable into the console side of the TAG® KVM-8 video port.
Second plug in your PS/2 mouse and PS/2 keyboard into their designated ports on the console
side of the TAG® KVM-8.
Connecting the PC
To connect any PC to the TAG® KVM-8, you will need one set of cables per system. First connect
the female end of your video cable into the male video port on the TAG® KVM-8 labeled with a
CPU port number. Second plug in the PS/2 mouse and PS/2 keyboard connectors located on
the same end as the female video connector. The cables have images on them indicating that
they are for the keyboard or mouse. Repeat for all additional computers you wish to connect
to the TAG® KVM-8.
NOTE: You may need to attach a PS/2 to AT adapter on the keyboard cable if your computer as an AT keyboard
connection. Also, if you do not have a PS/2 mouse port you will need to use our PS/2 to Serial adapter to
connect the mouse cable. You can use any manufacturer’s PS/2 to AT adapter but you must use our PS/2
to Serial adapters for the mouse.
Cascading TAG® KVM-8 units
Use standard PS/2 cables to cascade units.
First connect the female end of your video cable into the male video port on an available CPU
section of the TAG® KVM-8. Second plug in the PS/2 mouse and PS/2 keyboard connectors
located on the same end as the female video connector. The cables have images on them indicating
that they are for the keyboard or mouse. Third plug the male end of the video cable into the female
video port on the secondary TAG® KVM-8 console section. Forth plug in the remaining PS/2
mouse and PS/2 keyboard connectors into the keyboard and mouse ports on the secondary TAG®
KVM-8 console section. If you are using only one TAG® KVM-8 unit, then make sure the root/slave
switch is set to root mode. Cascading units works in a pyramid format. The root unit is the first
unit (top of pyramid) and the cascaded TAG® KVM-8 are the secondary slave units. Only the first
unit will be set to root while the preceding switches will be set to slave mode. There is a maximum
of up to three levels of TAG® KVM-8 for a maximum of up to 512 PCs.
Note: All TAG® KVM-8s must be plugged in and receiving power prior to turning on the power of the PCs.
Press Port Selection Buttons 1 and 2 on the Level 1 unit simultaneously for 3 seconds
to perform a Keyboard and Mouse reset, it necessary.
3
F4 - QV
You can broaden or narrow the number of ports that get automatically scanned by selecting
only the ones you want with the QV (Quick View) function. [F4] is a toggle that selects or
deselects the currently highlighted port for the Quick View Scanning function (see F2, above).
To select/deselect a port for Quick View Scanning:
1 - Use the Up and Down Arrow Keys or Mouse to move the highlight bar to the port.
2 - Press [F4].
When a port has been selected for Quick View Scanning, an arrowhead displays in the QV
column to indicate so. When a port is deselected, the arrowhead disappears.
F5 - Name
For convenience in remembering which PC is attached to a particular port, every port can be
named. The Name function allows you name the currently highlighted CPU Port (if it doesn’t
already have a name), or to modify/delete the Port Name if it does. To edit a Port Name:
1 - Use the Navigation Keys or Mouse to move the highlight bar to the port you want (you can
use the F3 List function to broaden or narrow the port selection list).
2 - Press [F5].
3 - Key in the new Port Name, or modify/delete the old one.
a - The maximum number of characters allowed for the Port Name is 15. Legal
Characters include:
i. All alpha characters: a - z, A - Z
ii. All numeric characters: 0-9
iii. +, -, /, :, ., and Space
Case does not matter; OSD displays the Port Name in all capitals no matter how they were
keyed in.
4 - When you have finished editing, press [Enter] to have the change takes effect. To abort
the change, press [Esc].
F6 - Set
When you press [F6] and OSD configuration submenu opens. To change a setting, move the
highlight bar to the choice you want, then press [Enter], or Double Click on your choice. On
the submenu that appears next, move the highlight bar to the choice you want and press
[Enter], or Double Click on your choice. An icon of a pointing finger indicates which choice
is currently the selected one.
Continued
Function Keys Installation

94
If it becomes necessary to Power Off one of the TAG® KVM-8 units, before starting it
back up you must do the following:
1 - Shut down all the computers that are attached to it, as well as all the stations and
all the computers that are daisy chained down from it (all the child stations and the
computers attached to them).
Note: If the unit is operating under non-powered mode (without optional power adapter),
you must unplug the power cords of any PCs that are connected to it that have the
Keyboard Power On function, otherwise the TAG® KVM-8 will still be receiving power
from the computer connections. If the unit is operating under external power, unplug
the power adapter cable.
2 - Wait 10 seconds, then power on the TAG® KVM-8 back on, starting with the last
station in the chain and working back into the station that you originally shut down.
3 - After the TAG® KVM-8 are up, Power On the PCs, starting with the ones attached to
the last station in the chain and working back to the station you originally shut down.
Note: It is not necessary to shut down and restart any of the stations computers above
the station you powered off.
Hot Plugging
The TAG® KVM-8 supports hot plugging, which means that components can be removed
and added to the unit by unplugging their cables from the CPU ports without shutting
the unit down. There are certain procedures that must be followed in order for the hot
plugging to work properly.
Hot Plugging CPU Ports:
1 - The cable must be plugged back into the same port it was removed from.
2 - The mouse cable must be plugged in before the keyboard cable.
3 - After plugging the cable back in, you must perform a KVM RESET on the First Stage
unit (by pressing the RESET switch).
Hot Plugging Console Ports:
1 - You may unplug the mouse and plug it back in again (to reset the mouse, for
example), as long as you use the same mouse.
2 - If you plug in a different mouse, all stations and all computers connected must be
powered down for 10 seconds and then restarted.
Pressing a Function key brings up a related submenu that is used to configure and control
the OSD to make it convenient for you to work with. For example, you can: rapidly switch to
any port; scan selected ports only; limit the list you wish to view; create or edit a port name;
or make OSD setting adjustments.
F1 - GoTo
GoTo allows you to switch directly to a port by the following methods:
a - Move the Highlight Bar to the port you want then press [Enter] or Double Click with
the left mouse button.
b - Key in the PortID or Name, then press [Enter].
Note: GoTo has a special feature that narrows the list of available choices as you type the
name. For example, if the first letter you type is a, the list only displays those ports whose
names begin with a. If the next letter you type is b, the list is further narrowed down to only
those ports whose names begin with ab, etc.
To return to the OSD Main Menu without making a choice, press [Esc].
F2 - Scan
Pressing [F2] initiates Quick View Scanning, in which the OSD cycles through all the ports
that have been selected for Quick View Scanning (see F4, below), and displays each one for
the amount of time set with the Set Scan Duration function (see F6, below). When you want
to stop at a particular location, press the [Spacebar] to stop scanning.
Note: 1 - If the scanning stops on an empty port, or one where the computer is attached
but is powered Off, the monitor screen will be blank, and the mouse and keyboard will have
no effect. To recover, key in the Hotkey sequence (see Hotkey Selection, above), for any Port
ID that has an active PC attached.
2 - As the OSD cycles though the selected ports, and S appears in front of the Port ID
display as each computer is accessed to indicate that the computer is being accessed under
Quick View Scan Mode.
F3 - List
This function brings up a submenu that lets you broaden or narrow the scope of which ports
the OSD lists. The choices are their meaning are given in the table, next page:
To make a choice move the Highlight Bar to it, then press [Enter] or Double Click with
the left mouse button. An icon appears before the choice to indicate that it is the current
selected one.
Note: You can access any port on any list by using the navigation Keys or Mouse to move the
Highlight Bar to it, then pressing [Enter] or Double Clicking with the left mouse button.
Powering Down & Restarting Function Keys

58
All operations start from the OSD Main Menu. To pop up to the Main Menu, tap ether
Ctrl key twice:
- OSD always starts in List view, with the highlight bar at the same position it was in the
last time it was closed.
- From the Main Menu, you can go directly to any port by either keying in its Port ID (Station
Number - Port Number), and pressing [Enter], or by double clicking on it with a mouse.
- [Esc] cancels the current selection, or dismisses the current menu and moves back to the
menu one level above. If you are at the highest menu level, it deactivates OSD.
- Use the Up and Down Arrow Keys to move up or down through the list one line at a time.
- Use [Pg Up] and [Pg Dn] to move up or down through the list one screen at a time.
- Click the Up and Down Triangle symbols to move up or down through the list one line
at a time.
- Click on the Up and Down Arrow symbols to move up or down through the list one screen
at a time.
- To activate a port, move the Highlight Bar to it then press [Enter] or Double Click on it.
- After executing any action by pressing [Enter] or Double Clicking with the left mouse button,
you automatically go back to the menu one level above.
OSD Main Menu Headings
Port ID - This column lists the Port ID numbers (Station Number - Port Number) for all the
CPU Ports on the installation. The simplest method to access a particular PC (assuming you
know which port it is attached to), is to use the Navigation Keys to move the Highlighted Bar
to the desired location, then press [Enter], or double click on it with the mouse.
QV - Ports that have been selected for Quick View scanning have an arrowhead displayed
in the column to indicate so.
PC - Lists all the PCs that are Powered On and are On-line
Name - If a port has been given a name, its name appears in this column.
Continued
On-Screen Display (OSD) Operation Port ID Numbering
Each TAG® KVM-8 is assigned a unique Port ID, this way you directly access
any computer on any level. Specify the Port ID using the Hotkey port selection
method or the OSD Main Menu.
The Port ID is a one, two, or three digit number that is determined by the
Stage Level and CPU Port number of the TAG® KVM-8 that the computer is
connected to. The first digit represents the CPU Port number of the First
Stage unit; the second digit represents the CPU Port number of the Second
Stage; the third digit represents the CPU Port number of the Third Stage.
For example, a computer attached to a First Stage unit has one digit Port ID
Number (1 - 8), that corresponds to the CPU Port number that the computer
is connected to.
A computer attached to a Second Stage unit has two digit Port ID number.
The first digit represents the CPU Port number (1 - 8), on the First Stage unit
the Second Stage unit is cascaded down from; the second digit represents the
CPU Port number of the Second Stage unit that the computer is connected
to. For example, a Port ID of 23 refers to a computer that is connected to
CPU Port 3 of a Second Stage unit that, in turn, is cascaded down from CPU
Port 2 of the First Stage unit.
Port Key Examples:
1 - To control a computer attached to Port 3 of a Single Stage installation, key
in 3 for Port ID, as follows:
[Ctrl+Alt+Shift) 3 [Enter]
2 - To access a computer attached to Port 3 from a Second Stage unit that
is cascaded down from Port 2 of the First Stage unit, key in 23 for the port
ID as follows:
[Ctrl+Alt+Shift) 2 3 [Enter]
3 - To access a computer attached to Port 1 of a Third Stage unit that is
cascaded down from Port 4 of a Second Stage unit, which, in turn, is cascaded
down from CPU Port 2 of the First Stage unit, key in 241 for the Port ID,
as follows:
[Ctrl+Alt+Shift) 2 4 1 [Enter]
Note: You must key in the numbers one at a time.

76
Hotkey Navigation
Hotkey navigation allows you to conveniently access the connected PCs directly from the
keyboard, instead of having to manually select them by pressing Port Selection switches.
To select a port with the Hotkey method, do the following:
1 - Activate the OSD by pressing the Ctrl key twice ([Ctrl][Ctrl]).
Note: Is the OSD is already active, when you are at the Main Menu you can key in the Port ID
for the computer you wish to access without having to press [Ctrl][Ctrl[.
2 - From the OSD Main Menu, key in the Port ID for the computer you wish to access (see
Port ID Numbering, above, for details), then press [Enter]. The console now controls the PC
that you have selected, and the OSD automatically closes.
When you key in the Port ID, note the following:
- You must key in the Port ID and press[Enter] within 10 seconds of pressing the [Ctrl][Ctrl]
combination.
- Number keys must be pressed from the regular keyboard; not from the numeric keypad.
- The keys must be pressed and released one key at a time.
- If you submit an incorrect Port ID, an error message displays, and you are returned to
the OSD Main Menu.
On Screen Display (OSD), provides a menu driven interface to handle the PC switching
procedure. Although Hotkey switching still works, using ISD is a great deal more convenient
- especially in large, daisy chained installations where a great number of PCs are connected
to several TAG® KVM-8 Units, and it is difficult to keep track of which port a particular
PC is attached to.
Figure 5 - OSD Screen Example
Port Selection On-Screen Display (OSD) Operation
Controlling all the PC’s connected up in your TAG® KVM-8 installation from a single
console could not be easier. Three methods are available that provide instant access
to any PC on the chain;
Manual; Hotkey; and OSD.
Manual
Simply press the appropriate port selection switch on the TAG® KVM-8’s front panel.
After you press the witch, the Selected LED lights to indicate the port is currently
selected. The On Screen Display automatically switches to highlight the PC that you
have selected.
Note: On a daisy chained installation, you must press the Port Selection switch on the
TAG® KVM-8 Station that connects directly to the PC you want to access.
Hotkey
Press the Ctrl key or the Scroll Lock key twice ([Ctrl] [Ctrl] or [Scroll Lock][Scroll Lock])
to activate the OSD function; key in the Port ID (see Port ID Numbering, below, for
details); then press [Enter].
OSD
To enter the OSD Main Menu, press the Ctrl key or the Scroll Lock key twice ([Ctrl] [Ctrl]
or [Scroll Lock] [Scroll Lock]). From there, either:
Key in the Port ID (see Port ID Numbering, below, for details); then press [Enter], or
Use the Arrow Keys to move the Highlight Bar to the port you want, (or click with the
Mouse); then press [Enter], or Double Click on it with the mouse).
Quick View Scanning
Press Port Selection buttons 7 and 8 simultaneously for three seconds to start the
Quick View mode. This will cycle through the ports one at a time. Press the space bar
or a port key to stop it.
Note: The next section describes the Port ID Numbering system. Hotkey and OSD
operation are explained in detail in the sections that follow it.
/