Page is loading ...

U.S. PATENT ALLOWED
DASH DISASSEMBLY
SINGLE OPENING 2"x 7"
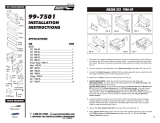
1. Gently Pry off ignition key cover. See Fig. 1.
2. Remove (1) screw directly below cover and
(1) screw below parking brake.
3. Remove AC/heater control panel knobs.
4. Gently unsnap AC/heater control panel and
remove.
5. Remove (3) screws inside of glovebox.
6. Remove (1) screw below glovebox.
7. Remove entire dash by pulling outward
toward seat, making sure to disconnect any
electrical connections.
8. Remove (2) screws securing radio in place.
9. Break away bottom portion of main bracket as
illustrated in fig. 1a.
10. Install radio into kit and wire per radio
manufacturer's instructions.
11. Reinstall radio bt reversing steps 1 thru 8.
DASH DISASSEMBLY
DOUBLE OPENING 4"x 7"
1. Gently Pry off ignition key cover. See Fig. 2.
2. Remove (1) screw below cover, above parking
brake, and (1) screw directly below on
bottom of dash panel lip.
3. Remove AC/heater control panel knobs.
4. Remove lower dash cowling by locating
plastic rivets (1) on each side. Push center
pin to release.
5. Remove (1) screw below the left side of the
glovebox, (2) screws above glovebox, and
(1) in the back.
6. Remove (1) screw behind glovebox location
in upper left corner.
7. Gently unsnap AC/heater control panel and
remove.
8. Remove entire dash by pulling outward
toward seat, making sure to disconnect any
electrical connections.
9. Remove (4) screws securing radio in place.
10. 89-91H Trucks: snap off side brackets and
use spacers as illustrated in fig. 2a.
92-93 Trucks: Snap off side brackets as
illustrated in fig. 2b.
11. Install radio into kit and wire per radio
manufacturer's instructions.
12. Reinstall radio by reversing steps 1 thru 8.
Note: This kit fits both types of
truck dash boards with single
DIN opening (approx. 2"x 7")
and double DIN opening
(approx. 4"x 7").
THIS KIT CONTAINS:
1 TOY-K963 MAIN BRACKET
1 FP-963 FACEPLATE
1 EQ-963 EQUALIZER PROVISION TRIM PANEL
SHAFT RADIO
(shaft mounted style)
Using TOY-K963 main bracket as is, mount radio into
main bracket using spacers, shaft nuts, and hardware
supplied with radio. See fig. 3. NOTE: For shaft
spacing, use breakaway shaft provisions on back side
of faceplate.
INSTALLATION
DIN RADIO
(DIN E or sleeve style)
Break away shaft radio mounting provisions in
TOY-K963 main bracket as illustrated in shaded
area. See fig 4. This will leave a rectangular
opening in the main bracket approx. 2"x 7"
to mount your DIN snap-in or sleeve radio with the
hardware supplied with the radio as per your radio
manufacturer's instructions.
INSTALLATION
EQUALIZER
1/4 OR 1/2 DIN only,
1"x 3 1/2" or 1"x 7" only)
Remove equalizer trim panel EQ-963. Using
hardware
supplied with equalizer, mount unit inside mounting
provisions of main bracket. See fig. 5.
INSTALLATION
KIT: TOY-K963
WIRE HARNESS REQ'D: TWH-950
FRONT SPEAKERS: 4" 2 BOLT
REAR SPEAKERS: EXTENDED CAB 4"
NOTE: OPTIONAL DRINK TRAY AVAIL-
ABLE, MOUNTS IN EQ PROVISION.
ASK FOR PART NO. DLX-5000.
SHEET NO.: 022892
NATIONAL HELP LINE:
YOU MAY CALL TOLL FREE
1-800-323-4329
BETWEEN 9 AM AND 4 PM, PACIFIC COAST TIME,
FOR TECHNICAL ASSISTANCE
© American International Pacific Industries, Corp. 1995
CAUTION: Set emergency brake and disconnect negative battery terminal before
proceeding.
CAUTION: Set emergency brake and disconnect negative battery terminal before
proceeding.
FIG.1
FIG.2
FIG.1a
FIG.3
FIG.4
FIG.5
SNAP
SNAP
FIG.2bFIG.2a
Snap off
Snap off
Use Spacer
Use Spacer
Breakaway?shaded
areas
1989-911/2?T
RUCK
1992-95?T
RUCK
89-93
DOUBLE
DIN
89-93
SINGLE DIN
1990-95
CAUTION: Set
emergency
brake and
disconnect
negative battery
terminal before
proceeding.
1989-95 TOYOTA TRUCKS
DASH DISASSEMBLY
DOUBLE OPENING 4"x 7"
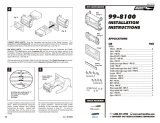
1. Gently Pry to unsnap dash panel.
2. Remove (4) screws securing radio in place.
3. Install radio Into kit and wire per radio
manufacturer's instructions.
4. Reinstall radio but reversing steps 1 and 2.
T -100
1993-95 T-100
FULL SIZE TRUCK
1993-95
American International
Ai
Use Spacer
/


