Page is loading ...

CDD100
1
HDWPK-#8 SCREW PLUGS, 4X (EXTRAS)
CDD101
9/13/2012
ASSEMBLY INSTRUCTIONS
Models:
CDD100, CDD101, CDD102
DESCRIPTION
2.
Features
No assembly required1.
Extra screw plugs included
QTY
CDD102

9/14/2012
ASSEMBLY INSTRUCTIONS
CDD200, CDD201, CDD202
Qty. Description
on the arm supports
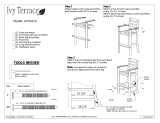
Step 1
Attach back of arm by threading
frame into the insert nuts
the attached dowel screw into the pilot hole
Model:
4mm Hex Key (included)
until the arm is snug against the back leg.
Step 2
Attach (4)1-3/4 bolts thru the seat
TOOLS NEEDED
ALLHARDWAREISCOATEDSTAINLESSSTEEL
__(1) CHAIR
__(2) ARM ASMB (RH/LH)
__(1) HARDWARE PACK
HDWPK-#8 SCREW PLUGS, 4X (EXTRAS)
1
CDD202
CDD201
A -1/4-20 X 1-3/4 WAFER SHCS
4
PILOT HOLE
ROTATE
CLOCKWISE
A
INSERT
NUTS
ROTATE
CLOCKWISE
CDD200

A
B
Leg
B
Brace
C
A
C
Table Frame
Removable table plug
included in table.
Foot
Leg
C - 1/4-20 X 2-1/2 WAFER SHCS
9/17/2012
ASSEMBLY INSTRUCTIONS
8
Model: NCCT3772, NCT3772, NCRT3772, NCBT3772
Qty. Description
__(1) Hardware pack
__(1) Table top
__(8) Leg
__(4) Foot
__(4) Brace
ALL HARDWARE IS COATED STAINLESS STEEL
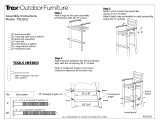
Step 1
Attach feet to legs using (8) 2½" Chair bolts.
Step 2
Lay the table frame on a flat surface.
Attach the leg assemblies to the frame using
(16) .27x2½" screws - Do not tighten yet.
Step 4
Set table upright and tighten all bolts.
Step 3
Attach braces to the leg assemblies using
(8) .27x3" screws
TOOLS NEEDED
4mm T Handle HEX KEY: INCLUDED
88
B - .27 X 3 SOCKET WAFER A
16
A - .27 X 2-1/2 SOCKET WAFER A
/


