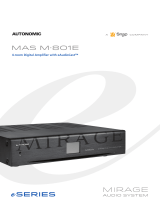
AU-MMS-1E

Autonomic AU-MMS-1E, AU-MMS-2A, AU-MMS-3E, AU-MMS-5A, AU-MMS-5E Installation guide

  • Hello! I am an AI chatbot trained to assist you with the Autonomic AU-MMS-1E Installation guide. I’ve already reviewed the document and can help you find the information you need or explain it in simple terms. Just ask your questions, and providing more details will help me assist you more effectively!
040419
©2006–2019 Autonomic Controls, Inc. Autonomic and TuneBridge are registered trademarks of Autonomic Controls, Inc.
All other trademarks are property of their respective owners.
®
compatible with
Setup guide
Control4 sample Install
for Autonomic Streamers and Amplifiers
OS 2.10.5
mms·5e
mms·3e
mms·1e
Autonomic Programming Guide | 2 of 18
MirageAudioSystem.com
Vocabulary
MCP Driver
MMS control program driver or MCP, also known as the central driver, is the
conductor of the MMS drivers. It makes communication between the MMS and
processor appear similar to an MAS setup. According to the server, the MCP driver
isanAutonomic amplier, which allows communication with other control 4
compatibleampliers.
Instance Driver
The Instance driver represents and controlsa single output on the MMS. One
driver is needed per output on theMMS.
A Series Instance: Instance driver for MMS-5A and MMS-2A servers
eSeries instance: Instance driver for MMS-1e, MMS-3e and MMS-5e streamers.
Favorites Driver
The Favorites driver will display and grant access to all saved favorites on the MMS.
Favorites can also be linked to actions in the programing section under a specic
room, they will appear as a broadcast audio items when browsing for media.
Service Drivers
Service driversare drivers for all the embedded streaming services offered on the MMS.
Amp Driver
Provides user control over power, volume, source selection and zone selection for
any Autonomic amplier.
MCP Actions
Congure MMS
This action informs the MCP server of the available outputs based on the drivers
available in the Control4 program.
Refresh Driver State
The MCP server makes every effort to maintain up to date information on all of
its bound Service drivers, but this can be forced using this action.
Update Rooms
The MCP driver requires a current list of Autonomic services for each room in the
project. It is important to press this button after adding or removing rooms and
after completing initial setup.
Autonomic Programming Guide | 3 of 18
MirageAudioSystem.com
Pre-Conguration
Conrm MMS is running the minimum required rmware.
Autonomic Ampliers should be on the latest public release
MMS minimum supportedrmware for Control4 driver
MMS-5A and MMS-2A: minimum rmware v. 5.3.5 or greater
MMS-1e, MMS-3e, MMS-5e: minimum rmware v. 6.1.20190206.2
All eSeries systems comprised of “e” servers and amplier models must be set on
different stack IDs
Conguration
1. To begin, select the System view and add the amplier driver. All drivers
can be found by selecting the search tab in the Items box. Be sure to
uncheck online to ensure the recently downloaded drivers are being used.
Autonomic Programming Guide | 4 of 18
MirageAudioSystem.com
2. In the text eld enter “Autonomic” and all drivers will populate. Double
click the M801e driver to add it to your program.
Autonomic Programming Guide | 5 of 18
MirageAudioSystem.com
3. Select the Connections view and set the end points to the zone
Autonomic Programming Guide | 6 of 18
MirageAudioSystem.com
4. Go back to Systems view and set the amplier IP address. After setting it,
wait for the Status eld to change to “Amplier found OK”.
Autonomic Programming Guide | 7 of 18
MirageAudioSystem.com
5. Add the rest of the drivers, beginning with the MCP driver followed by the
Instance drivers.
NOTE: Remember to add one instance driver per output of the MMS. Adding a
streamer requires adding another Instance driver, however stacking ampliers
does not require adding another amplier driver per amp in the stack. Be sure to
have two system ID groups. One for the MMSs and another for the Amps.
6. Use the “A Series” instance driver for A series units. Use an “eSeries”
instance driver for eSeries servers.
7. Add all the drivers for the streaming services applicable for the end user.
NOTE: All account credentials for streaming services need to be added on
theconguration pageof the MMS.
8. Select the MCP driver and enter the IP address of the MMS. Once
Control4has discovered the MMS, the status eld will change to
Connection OK.
Note: The screenshot below shows an A Series MCP Instance driver.
Autonomic Programming Guide | 8 of 18
MirageAudioSystem.com
9. Set each instance driver to an output on the MMS. Select an instance driver
and choose the output from the drop down menu.
A Series MCP Instance Driver Setup shown below:
NOTE: Be sure to click on the set button after an output has been chosen.
Autonomic Programming Guide | 9 of 18
MirageAudioSystem.com
eSeries MCP Instance Driver Setup is shown below:
10. Now, go back to the “Connections” view and select the amplier driver. Bind
the instance driver to its corresponding amplier input. Bind the physical
output of the streamer to the amplier input for A series streamers.
A Series amp driver selection process shown below:
Autonomic Programming Guide | 10 of 18
MirageAudioSystem.com
eSeries amp driver selection process shown below:
Binding the driver shown with an A Series driver.
Autonomic Programming Guide | 11 of 18
MirageAudioSystem.com
11. Select the MCP driver and click on the “Actions” tab. The actions tab
contains three buttons that will nalize the project.
a. First select the “Update Rooms” buttonand wait for the idle status.
b. Click on “Refresh Driver State”.
c. Select the “Congure MMS” button.
Autonomic Programming Guide | 12 of 18
MirageAudioSystem.com
Recall a Favorite
A favorite can be recalled to a single room or more using a Control 4 remote.
Start the process in the programming view of Composer.
1. In the programming view, select a room from the device events window.
2. Go to the rooms events and select commands.
3. Choose the button press to program.
4. In the device actions window select the room in which the event will take
place.
5. From the rooms action window choose “Select Media”, which will open up
the browse for media pop up window.
6. Click Broadcast Audio in the pop up window and choose a favorite.
Autonomic Programming Guide | 13 of 18
MirageAudioSystem.com
7. After choosing a favorite, drag the Room Actions command to the middle
script eld. A one button press has now been created, favorites recall to
one room.
Autonomic Programming Guide | 14 of 18
MirageAudioSystem.com
8. To make the favorites event occur in more than one room:
a. Click on the drop-down for the second rooms variables in the Device actions
window and select “Current_Selected_Device”.
b. In the action window, click “Set to Value of” and choose the room to which the
favorite was rst congured with, and the “Current_Selected_Device” parameter.
c. Drag the action command to the middle script eld. Repeat these steps to add more
rooms.
Autonomic Programming Guide | 15 of 18
MirageAudioSystem.com
Isolate an Output to a Specic Room
Go to the systems design view and select the room to which an output will be
isolated. Click the Navigator tab in the Properties window and select Music in the
submenu lters. Next, select the Modify button from the Device Visibility and
Display Order window.
Autonomic Programming Guide | 16 of 18
MirageAudioSystem.com
In the pop up window, hide the instances which the room should not be using. Only
leave visible the instance that will be designated to the room. Make sure this visible
instance is hidden in every other room otherwise the other rooms will have access to it.
Once customization is completed, go through all the MCP actions starting from Update
Rooms to ensure they are properly set.
Autonomic Programming Guide | 17 of 18
MirageAudioSystem.com
It is possible to hide the Instance drivers from the navigator panels. This is only
recommended when all Instances are available in all rooms. To hide Instance
drivers from the navigator panels, go to the Navigators tab in Composer and
select Listen from the Experience Menus. Next, select the Modify button from the
Device Visibility and Display Order window.
In the pop up window, hide all the instances so they do not appear in the
Navigator panel.
Autonomic Programming Guide | 18 of 18
MirageAudioSystem.com
Complete this process for every room so the instances will always be hidden.
Technical Support
If you require further assistance with conguring the Control4 Driver Suite for
the Mirage Media Server, please contact Technical Support at (866) 838-5052, or
email techsupport@snapav.com. You can also visit the Autonomic Knowledgebase
(http://www.autonomic-controls.com/kb) for troubleshooting information and
access to submitting a support ticket.
/