RQT8596-1B
E
GCS GC GCT GS
Operating Instructions
DVD Home Theater Sound System
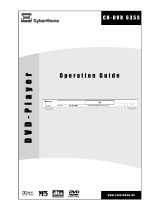
Model No. SC-HT540/SC-HT990
Region number
The player plays DVD-Video marked with labels containing the region
number or “ALL”.
Example: [Continental[Europe]
Before connecting, operating or adjusting this product,
please read the instructions completely.
Please keep this manual for future reference.
Region Number
Continental Europe, the Middle East, South Africa,
Saudi Arabia and Kuwait
2
Southeast Asia and Thailand 3
2 ALL
3
5
2
Advanced
progressive scan
Provides a smoother
and sharper image.
page
11
Compatible with a variety
of media formats
DVD-RAM, DVD-Audio,
DVD-Video, DivX and more.
page
14
High-performance
sound effects
Sound quality enhancement,
Bass enhancement and more.
page
30
The illustration shows SC-HT540 for Continental Europe.
8596En_p01-02.fm Page 1 Wednesday, April 12, 2006 6:04 PM

RQT8596
2
Accessories
Dear customer
Thank you for purchasing this product. For optimum performance and
safety, please read these instructions carefully.
[HT540]: indicates features applicable to SC-HT540 only.
[HT990]: SC-HT990 only.
Please check and identify the supplied accessories.
≥ These operating instructions are applicable to models
SC-HT540 and SC-HT990 for a variety of regions.
≥ Unless otherwise indicated, illustrations in these operating
instructions are of SC-HT540 for Continental Europe.
≥ Operations in these instructions are described mainly with the
remote control, but you can perform the operations on the main
unit if the controls are the same.
System SC-HT540 SC-HT990
Main unit SA-HT540 SA-HT990
Front speakers SB-FS540 SB-FS990
Center speaker SB-PC540 SB-PC895
Surround speakers SB-FS741 SB-FS540
Subwoofer SB-W540 SB-W895
CAUTION!
THIS PRODUCT UTILIZES A LASER.
USE OF CONTROLS OR ADJUSTMENTS OR PERFORMANCE OF
PROCEDURES OTHER THAN THOSE SPECIFIED HEREIN MAY
RESULT IN HAZARDOUS RADIATION EXPOSURE.
DO NOT OPEN COVERS AND DO NOT REPAIR YOURSELF.
REFER SERVICING TO QUALIFIED PERSONNEL.
WARNING:
TO REDUCE THE RISK OF FIRE, ELECTRIC SHOCK OR
PRODUCT DAMAGE, DO NOT EXPOSE THIS APPARATUS TO
RAIN, MOISTURE, DRIPPING OR SPLASHING AND THAT NO
OBJECTS FILLED WITH LIQUIDS, SUCH AS VASES, SHALL BE
PLACED ON THE APPARATUS.
CAUTION!
≥ DO NOT INSTALL OR PLACE THIS UNIT IN A BOOKCASE,
BUILT-IN CABINET OR IN ANOTHER CONFINED SPACE.
ENSURE THE UNIT IS WELL VENTILATED. TO PREVENT RISK
OF ELECTRIC SHOCK OR FIRE HAZARD DUE TO
OVERHEATING, ENSURE THAT CURTAINS AND ANY OTHER
MATERIALS DO NOT OBSTRUCT THE VENTILATION VENTS.
≥
DO NOT OBSTRUCT THE UNIT’S VENTILATION OPENINGS WITH
NEWSPAPERS, TABLECLOTHS, CURTAINS, AND SIMILAR ITEMS.
≥ DO NOT PLACE SOURCES OF NAKED FLAMES, SUCH AS
LIGHTED CANDLES, ON THE UNIT.
≥ DISPOSE OF BATTERIES IN AN ENVIRONMENTALLY
FRIENDLY MANNER.
For Southeast Asia, Thailand, the Middle East, South Africa,
Saudi Arabia and Kuwait
CAUTION:
The AC voltage is different according to the area.
Be sure to set the proper voltage in your area before use.
(For details, please refer to page 12.)
LUOKAN 1 LASERLAITE
KLASS 1 LASER APPARAT
(Side of product)
(Inside of product)
(Produktets innside)
(Tuotteen sisällä)
Accessories
∏
1 Remote control
[HT540] (N2QAYZ000004)
[HT990] (N2QAYZ000002)
∏
2 Remote control batteries
∏
1 AM loop antenna
∏
1 FM indoor antenna
∏ 1Video cable
∏ Speaker cables
[HT540]
1kshort cable
2klong cables
[HT990]
1kshort cable
∏ 2 Sheets of speaker cable
stickers
∏ [HT540] 2 Stands
[HT990] 4 Stands
2kstands with short cable
2kstands with long cable
∏ [HT540] 2 Bases
[HT990] 4 Bases
∏ [HT540] 8 Screws
[HT990] 16 Screws
∏ [HT540] 2 Cover plates
[HT990] 4 Cover plates
∏ AC mains leads
[Continental[Europe,[Southeast[Asia,
[
[Thailand,[the[Middle[East,[South[
[Africa,[Saudi[Arabia[and[Kuwait[
[Saudi[Arabia[and[Kuwait[
4
4
2
2
6
6
5
3
5
3
1
1
SURROUND
Rch
Rch
SURROUND
Rch
Rch
FRONT
WOOFER
SUB
Lch
Lch Lch
CENTER
Lch
SURROUND
SURROUND
FRONT
SUB
WOOFER
FRONT
FRONT
CENTER
8596En_p01-02.fm Page 2 Thursday, March 30, 2006 3:21 PM

RQT8596
3
TABLE OF CONTENTS
Accessories . . . . . . . . . . . . . . . . . . . . . . . . . . . . . 2
Caution for AC Mains Lead. . . . . . . . . . . . . . . . . 4
Safety precautions . . . . . . . . . . . . . . . . . . . . . . . 5
About DivX VOD content . . . . . . . . . . . . . . . . . . 5
Simple Setup
STEP 1
Assembling the speakers . . . . . . . . .6
Speaker installation options . . . . . . . . . . . . . 8
STEP 2
Positioning the speakers . . . . . . . . . 9
STEP 3
Speaker connections
. . . . . . . . . . . . 10
STEP 4
Audio and video connections. . . . 10
Basic audio connection . . . . . . . . . . . . . . .10
Basic video connection . . . . . . . . . . . . . . .11
STEP 5
Radio and AC mains lead
connections . . . . . . . . . . . . . . . . 12
STEP 6
Preparing the remote control . . . . 12
STEP 7
Performing QUICK SETUP . . . . . . 13
Control reference guide . . . . . . . . . . . . . . . . . 13
Discs that can be played. . . . . . . . . . . . . . . . . 14
Disc caution . . . . . . . . . . . . . . . . . . . . . . . . . . . 14
Maintenance. . . . . . . . . . . . . . . . . . . . . . . . . . . 14
Glossary . . . . . . . . . . . . . . . . . . . . . . . . . . . . . . 15
Basic play. . . . . . . . . . . . . . . . . . . . . . . . . . . . . .16
Using the main unit. . . . . . . . . . . . . . . . . . . . . . . . . . . 16
Using the remote control . . . . . . . . . . . . . . . . . . . . . . 17
Convenient functions . . . . . . . . . . . . . . . . . . . . 18
Displaying current playback condition. . . . . . . . . . . . . 18
All group, Program and Random play. . . . . . . . . . . . . 18
Playing data discs using navigation menus
. . . 19
Playing data discs. . . . . . . . . . . . . . . . . . . . . . . . . . . . 19
Selecting a track using CD text. . . . . . . . . . . . . . . . . . 20
Playing HighMAT
TM
discs . . . . . . . . . . . . . . . . . . . . . . 20
Playing RAM and DVD-R/-RW (DVD-VR) discs . . . . . 20
Using on-screen menus . . . . . . . . . . . . . . . . . . 22
Main menu . . . . . . . . . . . . . . . . . . . . . . . . . . . . . . . . . 22
Other Settings . . . . . . . . . . . . . . . . . . . . . . . . . . . . . . 23
Changing the player settings . . . . . . . . . . . . . . 25
Changing the delay time of the speakers. . . . . . . . . . 27
Using the radio . . . . . . . . . . . . . . . . . . . . . . . . . 28
Presetting stations automatically . . . . . . . . . . . . . . . . 28
Selecting the preset channels . . . . . . . . . . . . . . . . . . 28
Manual tuning . . . . . . . . . . . . . . . . . . . . . . . . . . . . . . . 28
RDS broadcasting . . . . . . . . . . . . . . . . . . . . . . . . . . . 29
Using an outdoor antenna (optional) . . . . . . . . . . . . . 29
Using sound effects . . . . . . . . . . . . . . . . . . . . . 30
Changing the sound quality: Sound Field Control . . . 30
Enhancing the sound from the center speaker:
Center Focus . . . . . . . . . . . . . . . . . . . . . . . . . . . . . . 30
Enhancing the stereo sound: Dolby Pro Logic II . . . . 30
Adjusting the amount of bass: Subwoofer level . . . . . 30
Enhancing the bass sound: H.BASS . . . . . . . . . . . . . 31
[HT990] Enhancing the surround sound effect:
Surround Enhancer. . . . . . . . . . . . . . . . . . . . . . . . . 31
Adjusting the volume of each speaker:
Speaker level adjustments . . . . . . . . . . . . . . . . . . . 31
Using other useful functions . . . . . . . . . . . . . . 32
Setting the sleep timer . . . . . . . . . . . . . . . . . . . . . . . . 32
Muting the sound . . . . . . . . . . . . . . . . . . . . . . . . . . . . 32
Using headphones. . . . . . . . . . . . . . . . . . . . . . . . . . . 32
Using the Music Port . . . . . . . . . . . . . . . . . . . . . . . . . 32
Enjoying Karaoke. . . . . . . . . . . . . . . . . . . . . . . . . . . . 33
Operating other equipment . . . . . . . . . . . . . . .33
Operating the television . . . . . . . . . . . . . . . . . . . . . . . 33
Troubleshooting guide . . . . . . . . . . . . . . . . . . .34 Specifications . . . . . . . . . . . . . . . . . . . . . . . . . . 37
Getting
Started
Reference
Playing
Discs
Other
Operations
HT540En.book Page 3 Monday, February 20, 2006 2:03 PM

RQT8596
4
Caution for AC Mains Lead
Caution for AC Mains Lead
(For Saudi Arabia and Kuwait)
(“GS” area code model only)
For your safety, please read the following text carefully.
This appliance is supplied with a moulded three pin mains plug for your
safety and convenience.
A 5-ampere fuse is fitted in this plug.
Should the fuse need to be replaced please ensure that the replacement
fuse has a rating of 5-ampere and that it is approved by ASTA or BSI to
BS1362.
Check for the ASTA mark Ï or the BSI mark Ì on the body of the fuse.
If the plug contains a removable fuse cover you must ensure that it is
refitted when the fuse is replaced.
If you lose the fuse cover the plug must not be used until a replacement
cover is obtained.
A replacement fuse cover can be purchased from your local dealer.
If a new plug is to be fitted please observe the wiring code as stated
below.
If in any doubt please consult a qualified electrician.
IMPORTANT
The wires in this mains lead are coloured in accordance with the following
code:
Blue: Neutral, Brown: Live.
As these colours may not correspond with the coloured markings
identifying the terminals in your plug, proceed as follows:
The wire which is coloured Blue must be connected to the terminal which
is marked with the letter N or coloured Black or Blue.
The wire which is coloured Brown must be connected to the terminal
which is marked with the letter L or coloured Brown or Red.
WARNING: DO NOT CONNECT EITHER WIRE TO THE
EARTH TERMINAL WHICH IS MARKED WITH THE LETTER
E, BY THE EARTH SYMBOL Ó OR COLOURED GREEN OR
GREEN/YELLOW.
THIS PLUG IS NOT WATERPROOF—KEEP DRY.
Before use
Remove the connector cover.
How to replace the fuse
The location of the fuse differ according to the type of AC mains plug
(figures A and B). Confirm the AC mains plug fitted and follow the
instructions below.
Illustrations may differ from actual AC mains plug.
1. Open the fuse cover with a screwdriver.
2. Replace the fuse and close or attach the fuse cover.
CAUTION!
IF THE FITTED MOULDED PLUG IS UNSUITABLE FOR THE
SOCKET OUTLET IN YOUR HOME THEN THE FUSE SHOULD BE
REMOVED AND THE PLUG CUT OFF AND DISPOSED OF SAFELY.
THERE IS A DANGER OF SEVERE ELECTRICAL SHOCK IF THE
CUT OFF PLUG IS INSERTED INTO ANY 13-AMPERE SOCKET.
Figure A Figure B
Fuse cover
Figure A Figure B
Fuse
(5 ampere)
Fuse
(5 ampere)
8596En_p03-15.fm Page 4 Monday, February 20, 2006 3:38 PM

RQT8596
5
Safety precautions / About DivX VOD content
Safety precautions
Set the unit up on an even surface away from direct sunlight, high
temperatures, high humidity, and excessive vibration. These conditions
can damage the cabinet and other components, thereby shortening the
unit’s service life.
Do not place heavy items on the unit.
Do not use high voltage power sources. This can overload the unit and
cause a fire.
Do not use a DC power source. Check the source carefully when setting
the unit up on a ship or other places where DC is used.
Ensure the AC mains lead is connected correctly and not damaged.
Poor connection and lead damage can cause fire or electric shock. Do not
pull, bend, or place heavy items on the lead.
Grasp the plug firmly when unplugging the lead. Pulling the AC mains
lead can cause electric shock.
Do not handle the plug with wet hands. This can cause electric shock.
Do not let metal objects fall inside the unit. This can cause electric
shock or malfunction.
Do not let liquids get into the unit. This can cause electric shock or
malfunction. If this occurs, immediately disconnect the unit from the power
supply and contact your dealer.
Do not spray insecticides onto or into the unit. They contain flammable
gases which can ignite if sprayed into the unit.
Do not attempt to repair this unit by yourself. If sound is interrupted,
indicators fail to light, smoke appears, or any other problem that is not
covered in these instructions occurs, disconnect the AC mains lead and
contact your dealer or an authorized service center. Electric shock or
damage to the unit can occur if the unit is repaired, disassembled or
reconstructed by unqualified persons.
Extend operating life by disconnecting the unit from the power source if
it is not to be used for a long time.
DivX Video-on-Demand (VOD) content is encrypted for copyright protection. In order to play DivX VOD content on this unit, you first need to register the
unit.
Follow the online instructions for purchasing DivX VOD content to enter the unit’s registration code and register the unit. For more information about
DivX VOD, visit www.divx.com/vod.
Display the unit’s registration code
(➜ page 26, “DivX Registration” in “Others” tab)
≥ We recommend that you make a note of this code for future reference.
≥ After playing DivX VOD content for the first time, another registration
code is then displayed in “DivX Registration”. Do not use this
registration code to purchase DivX VOD content. If you use this code to
purchase DivX VOD content, and then play the content on this unit, you
will no longer be able to play any content that you purchased using the
previous code.
≥ If you purchase DivX VOD content using a registration code different
from this unit’s code, you will not be able to play this content.
(“Authorization Error” is displayed.)
Regarding DivX content that can only be played a set
number of times
Some DivX VOD content can only be played a set number of times. When
you play this content, the remaining number of plays is displayed. You
cannot play this content when the number of remaining plays is zero.
(“Rented Movie Expired” or “Rental Expired” is displayed.)
When playing this content
≥ The number of remaining plays is reduced by one if
– you press [Í] or press and hold [—SETUP].
– you press [∫ STOP]. (Press [; PAUSE] to pause play.)
– you press [:, 9 SKIP] or [6, 5 SLOW/SEARCH] etc. and
arrive at another content or the start of the content being played.
≥ Resume (➜ page 17, Stop) and Marker (➜ page 23, Play Menu)
functions do not work.
Placement
Voltage
AC mains lead protection
Foreign matter
Service
About DivX VOD content
Video
Audio
Display
Disc
Setup
Others
DivX Registration
DivX Video-on-Demand
To learn more visit www.divx.com/vod
to continuePress
ENTER
Your registration code is : XXXXXXXX
8 alphanumeric characters
8596En_p03-15.fm Page 5 Wednesday, March 1, 2006 8:25 AM

RQT8596
Simple Setup
6
[HT540] Front speakers
[HT990] Front and surround speakers
Preparation
≥ To prevent damage or scratches, lay down a soft cloth and perform assembly on it.
≥ For assembly, use a Phillips-head screwdriver.
≥ Make sure you have all the indicated components before starting assembly, setup, and connection.
≥ There is no difference between the right and left speakers and stands.
≥ For optional wall mount, refer to page 8.
[Note]
≥ [HT990] The front and surround speakers are different.
– Check the label on the rear of speaker before attaching the stand (➜ page 9).
– The stand with shorter cable is for the front speaker.
1 Attach the stand to the base.
1 Thread the speaker cable through the base.
For quicker threading, loosely fold the cable in half (do not
crease), pass the folded portion through the hole, and then pull
the rest of the cable through the base.
2 Attach the stand to the base while gently pulling on the
end of the speaker cable.
2 Secure the stand to the base.
3 Attach the speaker to the stand.
1 Pull out the end of the speaker cable and position it
between the ridges.
2 Attach the speaker to the stand.
STEP1 Assembling the speakers
The supplied stands are specially designed for
attachment to Panasonic SB-FS990 front speakers
or SB-FS540 front and surround speakers.
Use only as indicated in this setup.
[HT540] 2 Front speakers
(with cover plate)
[HT990] 2 Front speakers and
2 Surround speakers
(with cover plate)
[HT540] 2 Bases
[HT990] 4 Bases
[HT540] 2 Stands (with cable)
[HT990] 4 Stands
≥ 2kstands with short cable: For front speakers
≥ 2kstands with long cable: For surround speakers
[HT540] 8 Screws
[HT990] 16 Screws
Base
Cable
Stand
Base
Cable
Pull gently.
Screw
Tighten securely.
Slide the speaker
cable into the groove.
Stand
Base
Screws
Tighten securely.
Cable
Ridges
Stand
Speaker
Stand
Cover plate
Remove before attaching the
speaker and keep for wall-mount
use (➜ page 8).
Assembling the speakers
8596En_p03-15.fm Page 6 Tuesday, April 11, 2006 7:41 PM

RQT8596
7
Simple Setup
4 Secure the speaker to the stand.
5 Connect the speaker cable.
∫ Preventing the speakers from falling
≥ You will need to obtain the appropriate screw eyes to match the
walls or pillars to which they are going to be fastened.
≥ Consult a qualified housing contractor concerning the
appropriate procedure when attaching to a concrete wall or a
surface that may not have strong enough support. Improper
attachment may result in damage to the wall or speakers.
Speaker
Stand
Screw
Tighten securely.
Ensure the speaker cable is
centered in the groove.
_: White
`: Blue
Push!
Press the speaker cable
into the groove.
Insert the wire fully.
Assembled!
String (not included)
Thread from the wall to the
speaker and tie tightly.
Rear of the speaker
Wall
Approx. 150 mm
Screw eye
(not included)
Assembling the speakers
HT540En.book Page 7 Monday, February 20, 2006 2:03 PM

RQT8596
Simple Setup
8
∫ Attaching to a wall
You can attach all of the speakers (except subwoofer) to a wall.
≥ The wall or pillar on which the speakers are to be attached
should be capable of supporting over 10 kg per screw. Consult a
qualified building contractor when attaching the speakers to a
wall. Improper attachment may result in damage to the wall and
speakers.
≥ When mounting the front speakers or surround speakers ([HT540]
front speakers only) to a wall, we recommend using a string (not
included) to prevent it from falling.
1 Attach the cover plate to the front speaker or surround speaker
([HT540] front speaker only).
2 Drive a screw (not included) into the wall.
3 Fit the speaker securely onto the screw(s) with the hole(s).
Reattaching the speaker cable to the stand
1
Remove the eight screws from the stand, and remove the speaker net.
2 Position the cable.
3 Attach the speaker net with the screws.
∫ Fitting speaker stands (not included)
[Except front speakers ([HT540] [HT990]) and surround speakers
([HT990])]
Ensure the stands meet these conditions before purchasing them.
Note the diameter and length of the screws and the distance
between screws as shown in the diagram.
≥ The stands must be able to support over 10 kg.
≥ The stands must be stable even if the speakers are in a high
position.
Speaker installation options
Preparation for front speakers and surround speakers
([HT540] front speakers only)
1 Remove the speaker cable from the stand.
2 Connect the cable (➜ page 7).
[HT540] 2 Cover plates
[HT990] 4 Cover plates
[HT540] 2 Screws
[HT990] 4 Screws
Release the cable
from the groove.
1
2
Screw
Tighten securely.
Cover plate
‰7.5 to 9.5 mm
5.0 to 7.0 mm
Wall or pillar
‰4.0 mm
In this position, the
speaker will likely
fall if moved to the
left or right.
Move the speaker
so that the screw is
in this position.
106 mm
200 mm
Center speaker
Surround speaker [HT540]
340 mm
Front speaker [HT540]
Front and surround speakers [HT990]
e.g.
Screw
Press the cable
into the groove.
Approx. 15 cm
Cable
Speaker stand
(not included)
Plate thickness plus
7 mm to 10 mm
e.g. Center speaker
5 mm, pitch 0.8 mm
Metal screw holes
For attaching to
speaker stands
60 mm
Assembling the speakers
8596En_p03-15.fm Page 8 Thursday, March 30, 2006 11:24 AM

RQT8596
9
Simple Setup
How you set up your speakers can affect the bass and the sound field. Note the following points:
≥ Place speakers on flat secure bases.
≥ Placing speakers too close to floors, walls, and corners can result in excessive bass. Cover walls and windows with thick curtains.
≥ Left and right speakers are interchangeable, but front and surround speakers are not.
≥ Place the front, center, and surround speakers at approximately the same distance from the seating position.
The angles in the diagram are approximate.
≥Use only supplied speakers
Using other speakers can damage the unit, and sound quality will be
negatively affected.
≥ Set the speakers up on an even surface to prevent them from falling.
Take proper precautions to prevent the speakers from falling if you
cannot set them up on an even surface.
Main unit
[Note]
≥ Keep your speakers at least 10 mm away from the system for proper
ventilation.
≥ To allow for proper ventilation and to maintain good airflow around the
main unit, position it with at least 5 cm of space on all sides.
≥ Do not block the ventilation holes of the main unit.
Center speaker
≥ Vibration caused by the center speaker can disrupt the picture if it is
placed directly on the television. Put the center speaker on a rack or
shelf.
≥ To prevent the speakers from falling, do not place directly on top of the
television.
Subwoofer
Place to the right or left of the television, on the floor or a sturdy shelf so
that it will not cause vibration. Leave about 30 cm from the television.
Caution
≥ Do not stand on the base.
Be cautious when children are near.
≥ Do not touch the netted area of
the speakers.
Notes on speaker use
≥ You can damage your speakers and shorten their useful life if you play
sound at high levels over extended periods.
≥ Reduce the volume in the following cases to avoid damage:
– When playing distorted sound.
– When the speakers are reverberating due to a record player,
a microphone (except [Continental]Europe]), noise from FM
broadcasts, or continuous signals from an oscillator, test disc, or
electronic instrument.
– When adjusting the sound quality.
– When turning the unit on or off.
If irregular coloring occurs on your television
The front and center speakers are designed to be used close to a
television, but the picture may be affected with some televisions and
setup combinations.
If this occurs, turn the television off for about 30 minutes.
The demagnetizing function of the television should correct the problem.
If it persists, move the speakers further away from the television.
STEP2 Positioning the speakers
Setup example
Main unit
FRONT
(L, R)
SURROUND
(L, R)
CENTER
SUBWOOFER
Setup example
Main unit
FRONT
(L, R)
SURROUND
(L, R)
CENTER
SUBWOOFER
Speaker label
Do not use a front
speaker as a
surround speaker or
vice versa. Verify the
type of speaker with
the label on the rear
of the front speaker.
e.g. Front speaker
Caution
≥ The main unit and supplied speakers are to be used only as
indicated in this setup. Failure to do so may lead to damage to
the amplifier and/or the speakers, and may result in the risk of
fire. Consult a qualified service person if damage has occurred
or if you experience a sudden change in performance.
≥ Do not attempt to attach these speakers to walls using
methods other than those described in this manual.
e.g. [HT540] Surround speaker
Positioning the speakers
HT540En.book Page 9 Monday, February 20, 2006 2:03 PM

RQT8596
Simple Setup
10
≥ Do not connect through the video cassette recorder.
Due to copy guard protection, the picture may not be displayed properly.
≥ Turn the television off before connecting, and refer to the television’s operating instructions.
≥ This audio connection will enable you to play audio from your
television through your home theater system. Refer to “Operating other
equipment” (➜ page 33).
Basic audio connection
STEP3 Speaker connections
4
4
2
2
6
6
5
3
5
3
1
1
SURROUND
Rch
Rch
SURROUND
Rch
Rch
FRONT
WOOFER
SUB
Lch
Lch Lch
CENTER
Lch
SURROUND
SURROUND
FRONT
SUB
WOOFER
FRONT
FRONT
CENTER
FRONT
Lch
Rch
SURROUND
Rch
FRONT
2
Rch
FRONT
FRONT
Lch
Rch
SURROUND
CENTER
5
CENTER
5
Lch
SURROUND
Lch
SURROUND
2
1
1
4
4
3
3
SUB
WOOFER
6
Be careful not to cross
(short-circuit) or reverse
the polarity of the speaker
wires as doing so may
damage the speakers.
2 sheets of speaker cable stickers
≥ Attach the speaker-cable stickers to
make connection easier.
Speaker cable sticker
2 FRONT (R)
1 FRONT (L)
4 SURROUND (R)
3 SURROUND (L)
5 CENTER
Main unit
Insert the wire fully.
i: White
j: Blue
Push!
6 SUBWOOFER
The illustration shows the model for Continental Europe.
Speaker cables
[HT540]
≥ 1kshort cable: For center speaker
≥ 2klong cables: For surround speakers
Insert the
wire fully.
i: White
j: Blue
Push!
[HT990]
≥ 1kshort cable: For center speaker
STEP4 Audio and video connections
Video cable
VIDEO
OUT
R
RF IN
AUDIO
OUT
L
R
VIDEO IN
AUDIO
IN
VIDEO OUT
L
AUX
AUX
S-VIDEO
OUT
COMPONENT VIDEO OUT
P
B
P
R
Y
Television
(not included)
Back of the main unit
Audio cable
(not included)
Speaker connections / Audio and video connections
8596En_p03-15.fm Page 10 Thursday, March 16, 2006 2:13 PM

RQT8596
11
Simple Setup
COMPONENT VIDEO OUT
≥ Using the COMPONENT VIDEO OUT terminals
The COMPONENT VIDEO OUT terminals provides a purer picture than
the S-VIDEO OUT terminal. These terminals can be used for either
interlaced or progressive output. Connection using these terminals
outputs the color difference signals (P
B/PR) and luminance signal (Y)
separately in order to achieve high fidelity in reproducing colors.
≥ The description of the component video input terminals depends on
the television or monitor (e.g. Y/P
B/PR, Y/B-Y/R-Y, Y/CB/CR). Connect
to terminals of the same color.
[Continental]Europe]
≥ When making this connection, select “Video/YPbPr” or “S-Video/
YPbPr” from QUICK SETUP (➜ page 13). If “RGB/No Output” is
selected, the RGB signal is output from the SCART (AV) terminal, but
no signal is output from the component video output terminals.
S-VIDEO OUT
≥ Using the S-VIDEO OUT terminal
The S-VIDEO OUT terminal achieves a more vivid picture than the
VIDEO OUT terminal by separating the chrominance (C) and luminance
(Y) signals. (Actual results depend on the television.)
[Continental]Europe]
SCART
≥ Using the SCART (AV) terminal
To improve picture quality, you can change the video signal output from
the SCART (AV) terminal from “Video” to either “S-Video” or “RGB” to
suit the type of television you are using. Select “S-Video/YPbPr” or
“RGB/No Output” from QUICK SETUP (➜ page 13).
This connection will also enable you to play audio from your television
through your home theater system. Refer to “Operating other
equipment” (➜ page 33).
∫ Cable TV box or video cassette recorder connection
Basic video connection
Other video connections for improved picture quality
VIDEO
VIDEO
OUT
OUT
S-VIDEO
OUT
COMPONENT VIDEO OUT
P
B
P
R
Y
VIDEO IN
Television (not included)
Back of the main unit
Video cable
(included)
VIDEO
OUT
S-VIDEO
OUT
COMPONENT VIDEO OUT
P
B
P
R
Y
COMPONENT
VIDEO IN
PR
PB
Y
Television
(not included)
Back of the
main unit
Video cables
(not included)
To enjoy progressive video
≥ Connect to a progressive output compatible television.
≥ Set “Video Output Mode” to “480p” or “576p”, and then follow the instructions on the menu screen (➜ page 23, Picture Menu).
[Continental]Europe]
≥ Panasonic televisions with 625 (576)/50i·50p, 525 (480)/60i·60p input terminals are progressive compatible. Consult the manufacturer if you
have another brand of television.
VIDEO
OUT
S-VIDEO
OUT
COMPONENT VIDEO OUT
P
B
P
R
Y
S-VIDEO
IN
Television
(not included)
S-video cable
(not included)
Back of the
main unit
AV
AV
Television
(not included)
Scart cable
(not included)
Back of the
main unit
RF IN
RF OUT
RF IN
AUDIO
OUT
L
R
VIDEO IN
AUDIO
IN
VIDEO OUT
AUX
AUX
VIDEO
VIDEO
OUT
OUT
S-VIDEO
OUT
COMPONENT VIDEO OUT
P
B
P
R
Y
L
R
Television
(not included)
Video cable
(included)
Back of the main unit
Audio cable (not included)
≥ You can use the scart cable
connection (➜ above) instead
of this connection.
RF cable
(not included)
Cable TV box or video cassette recorder
(not included)
To your cable TV
service or television
antenna
Audio and video connections
8596En_p03-15.fm Page 11 Tuesday, April 4, 2006 8:55 AM

RQT8596
Simple Setup
12
Conserving power
The main unit consumes a small amount of power, even when it is turned off (For Continental Europe: approx. 0.5 W or for other areas: approx.
0.65 W). To save power when the unit is not to be used for a long time, unplug it from the household mains socket.
You will need to reset some memory items after plugging in the unit.
[Note]
The included AC mains lead is for use with this unit only. Do not use it with other equipment. Also, do not use cords for other equipment with this unit.
Do not:
≥ mix old and new batteries.
≥ use different types at the same time.
≥ heat or expose to flame.
≥ take apart or short circuit.
≥ attempt to recharge alkaline or manganese batteries.
≥ use batteries if the covering has been peeled off.
Mishandling of batteries can cause electrolyte leakage which can
severely damage the remote control.
Remove the batteries if the remote control is not going to be used for a
long period of time. Store in a cool, dark place.
∫ Use
Aim at the remote control signal sensor (➜ page 13), avoiding
obstacles, at a maximum range of 7 m directly in front of the unit.
STEP5 Radio and AC mains lead connections
Adhesive tape
To household mains socket
AC mains lead
Main unit
AM loop antenna
Stand the antenna up on its base.
Place the antenna where reception is best.
Keep loose antenna cable away from other wires
and cables.
Click!
AM loop antenna FM indoor antenna AC mains lead
[Continental[Europe,[Southeast[Asia,[Thailand,[
[the[Middle[East,[South[Africa,[Saudi[Arabia[and[Kuwait[
FM indoor antenna
Affix this end of the antenna where
reception is best.
≥ Connect the AC mains lead after all other connections are complete.
≥ Using an outdoor antenna (optional) (➜ page 29).
The illustration shows the model
for Continental Europe.
[Saudi[Arabia[and[Kuwait[
[Saudi[Arabia[and[Kuwait[
BE SURE TO READ THE
CAUTION FOR THE AC
MAINS LEAD ON PAGE 4
BEFORE CONNECTION.
Re-tighten the
terminal screw.
Loosen the terminal
screw with a Phillips-
head screwdriver.
White
Red
Black
While pushing, insert the wire fully.
[Southeast[Asia,[Thailand,[the[Middle[East,[
[South[Africa,[Saudi[Arabia[and[Kuwait[
Before connecting
the AC mains lead
Set the voltage.
Change the voltage selector to the
appropriate position for the area in
which this system is used.
STEP6 Preparing the remote control
R6/LR6, AA
1
3
2
Remote control Batteries
Insert so the poles (i and j) match those in the remote control.
≥ Do not use rechargeable type
batteries.
Radio and AC mains lead connections / Preparing the remote control
8596En_p03-15.fm Page 12 Thursday, March 16, 2006 2:13 PM

RQT8596
13
Simple Setup
The QUICK SETUP screen assists you to make necessary settings.
To display the picture from the main unit, turn on your television and change its video input mode (e.g. VIDEO 1, AV 1, etc.).
≥ To change your television’s video input mode, refer to its operating instructions.
≥ This remote control can perform some basic television operations (➜ page 33).
To change these settings later
Select “QUICK SETUP” in the “Others” tab (➜ page 26).
1 2 3 4 5 6
Turn on the
unit.
Select
“DVD/CD”.
Press and hold to
show the QUICK
SETUP screen.
Follow the messages and
make the settings.
Press to finish
QUICK SETUP.
Press and
hold to exit.
STEP7 Performing QUICK SETUP
Select
Register
ENTER
(30) (30)
(31, 30)
(30)
(32, 25)
(31) (18) (32)
(30, 31)
SURROUND
ENHANCER
Turn the unit on/off (13)
Select disc’s title numbers etc./Enter numbers (17)
Basic operations for play (16, 17)
Show a disc top menu (19) or program list (20)
Frame-by-frame/Select or register menu items on the
television screen (17)
Show on-screen menu (22) or
display RDS text data ([Continental]Europe] only) (29)
Change the television’s video input mode (33)
Show a disc menu (19) or play list (20)
Return to previous screen (17)
Adjust the volume of the main unit (17)
Select the source
DVD: DVD/CD (13)
TUNER/BAND: FM/AM (28)
EXT-IN: MUSIC P. (32), TV
§
(33), AUX (33)
Cancel (17)
Change the unit’s display (17)
Control reference guide
See page references in parentheses.
SELECTOR (28)
DVD/CD#FM#AM#TV
§
#AUX#MUSIC P.#
Return to DVD/CD
§
]Continental]Europe]
“TV” works only when the scart cable is
connected (➜ page 11).
< OPEN/CLOSE
Open/Close the disc tray (16)
∫ /
-
TUNE MODE /
-
FM MODE
Stop playing (16)/Select the tuning mode (28)
Adjust the FM reception condition (28)
1 / MEMORY
Play discs (16)/Memorize the receiving radio
stations (28)
4, 5 / X TUNING W
Skip or slow-search play (16)/
Select the radio stations (28)
Standby/on switch [Í/I]
Press to switch the unit from on to standby mode
or vice versa. In standby mode, the unit is still
consuming a small amount of power. (16)
VOLUME
Turn up/down the volume (16)
AC supply indicator [AC IN]
This indicator lights when the unit is
connected to the AC mains supply.
Phones
Connect headphones (32)
MUSIC PORT
Connect an external device (32)
Remote control signal sensor
Television operations (33)
Adjust the television volume (33)
Select preset radio stations (28)
SURROUND ENHANCER ([HT990] only)
Enhancing the surround sound effect (16)
The illustration shows SC-HT990.
[HT990]
To use functions labeled with “
-
”:
Press and hold the button for at least 2 seconds.
The illustration shows SC-HT540.
Display
Performing QUICK SETUP / Control reference guide
8596En_p03-15.fm Page 13 Wednesday, March 29, 2006 10:51 AM

RQT8596
14
Discs that can be played / Disc caution / Maintenance
Discs that can be played
Operations in these instructions are described mainly with formats. Icons such as [DVD-V] show the formats.
§1
Functions added with DivX Ultra are not supported.
§2
Includes single-sided, dual-layer discs.
§3
A process that allows play on compatible equipment.
≥ It may not be possible to play all the above-mentioned discs in some cases due to the type of disc or condition of the recording.
∫ Discs that cannot be played
DVD-RW version 1.0, DVD-ROM, CD-ROM, CDV, CD-G, SACD and
Photo CD, DVD-RAM that cannot be removed from their cartridge, 2.6-GB
and 5.2-GB DVD-RAM, and “Chaoji VCD” available on the market
including CVD, DVCD and SVCD that do not conform to IEC62107.
∫ Video systems
– This unit can play PAL and NTSC, but your television must match
the system used on the disc.
– PAL discs cannot be correctly viewed on an NTSC television.
– This unit can convert NTSC signals to PAL 60 for viewing on a PAL
television (➜ page 26, “NTSC Disc Output” in “Video” tab).
∫ To clean discs
Wipe with a damp cloth and
then wipe dry.
∫ Disc handling precautions
≥ Do not attach labels or stickers to discs. This may cause disc
warping, rendering it unusable.
≥ Do not write on the label side with a ball-point pen or other writing
instrument.
≥ Do not use record cleaning sprays, benzine, thinner, liquids which
prevent static electricity, or any other solvent.
≥ Do not use scratch-proof protectors or covers.
≥ Do not use the following discs:
– Discs with exposed adhesive from removed stickers or labels
(rented discs, etc).
– Discs that are badly warped or cracked.
– Irregularly shaped discs, such as heart shapes.
Clean this unit with a soft, dry cloth.
≥ Never use alcohol, paint thinner or benzine to clean this unit.
≥ Before using chemically treated cloth, carefully read the instructions that
came with the cloth.
Do not use commercially available lens cleaners as they may cause
malfunction. Cleaning of the lens is generally not necessary although
this depends on the operating environment.
DVD-Video [DVD-V]
—
DVD-Audio [DVD-A] [DVD-V]
≥ [DVD-V] Some DVD-Audio discs contain DVD-Video content. To play DVD-Video content, select “Play as DVD-Video” in
Other Menu (➜ page 24).
Video CD [VCD]
≥ Including SVCD (Conforming to IEC62107)
DVD-RAM [DVD-VR] [MP3] [JPEG] [MPEG4] [DivX]
§1
≥ [DVD-VR] Recorded with devices using Version 1.1 of the Video Recording Format (a unified video recording standard),
such as DVD video recorders, DVD video cameras, personal computers, etc.
≥ [JPEG] Recorded with Panasonic SD multi cameras or DVD video recorders using the DCF (Design rule for Camera
File system) Standard Version 1.0.
≥ [MPEG4] Recorded with Panasonic SD multi cameras or DVD video recorders [conforming to SD VIDEO specifications
(ASF standard)/MPEG4 (Simple Profile) video system/G.726 audio system].
DVD-R (DVD-Video)
§2
/DVD-RW (DVD-Video) [DVD-V]
≥ Discs recorded and finalized
§3
on DVD video recorders or DVD video cameras.
DVD-R (VR)
§2
/DVD-RW (VR) [DVD-VR]
≥ Discs recorded and finalized
§3
on DVD video recorders or DVD video cameras using Version 1.1 (or 1.2 DVD-R DL
only) of the Video Recording Format (a unified video recording standard).
DVD-R/DVD-RW [MP3] [JPEG] [MPEG4] [DivX]
§1
≥ Finalize
§3
the disc after recording.
—
iR (Video)
§2
/iRW (Video) [DVD-V]
≥ Discs recorded and finalized
§3
on DVD video recorders or DVD video cameras.
CD [CD] [WMA] [MP3] [JPEG] [VCD] [MPEG4] [DivX]
§1
≥ This unit can play CD-R/RW recorded with the above formats. Close the sessions or finalize
§3
the disc after recording.
≥ [CD] This unit is compatible with HDCD, but does not support the Peak Extend function (a function which expands the
dynamic range of high-level signals).
HDCD-encoded CDs sound better because they are encoded with 20 bits, as compared with 16 bits for all other CDs.
≥ [WMA] [MP3] [JPEG] This unit also plays HighMAT discs.
≥ [WMA] This unit does not support Multiple Bit Rate (MBR: a file that contains the same content encoded at several
different bit rates).
Disc caution Maintenance
Before moving the unit, ensure the disc tray is empty. Failure to
do so will risk severely damaging the disc and the unit.
HT540En.book Page 14 Monday, February 20, 2006 2:03 PM

RQT8596
15
Glossary
Glossary
Decoder
A decoder restores the coded audio signals on DVDs to normal. This is
called decoding.
DivX
DivX is a popular media technology created by DivX, Inc. DivX media files
contain highly compressed video with high visual quality that maintains a
relatively small file size.
Dolby Digital
This is a method of coding digital signals developed by Dolby
Laboratories. Apart from stereo (2-channel) audio, these signals can also
be multi-channel audio. A large amount of audio information can be
recorded on one disc using this method.
DTS (Digital Theater Systems)
This surround system is used in many movie theaters around the world.
There is good separation between the channels, so realistic sound effects
are possible.
Dynamic range
Dynamic range is the difference between the lowest level of sound that
can be heard above the noise of the equipment and the highest level of
sound before distortion occurs.
Film and video
DVD-Videos are recorded using either film or video. This unit can
determine which type has been used, then uses the most suitable method
of progressive output.
Film: Recorded at 25 frames per second (PAL discs) or 24 frames per
second (NTSC discs). (NTSC discs recorded at 30 frames per
second as well).
Generally appropriate for motion picture films.
Video: Recorded at 25 frames/50 fields per second (PAL discs) or
30 frames/60 fields per second (NTSC discs). Generally
appropriate for TV drama programs or animation.
Frame still and field still
Frames are the still pictures that go together to make a moving picture.
There are about 30 frames shown each second.
One frame is made up of two fields. A regular television shows these
fields one after the other to create frames.
A still is shown when you pause a moving picture. A frame still is made up
of two alternating fields, so the picture may appear blurred, but overall
quality is high.
A field still is not blurred, but it has only half the information of a frame still
so picture quality is lower.
I/P/B
MPEG 2, the video compression standard adopted for use with
DVD-Video, codes frames using these 3 picture types.
I: Intra coded picture
This picture has the best quality and is the best to use when adjusting
the picture.
P: Predictive coded picture
This picture is calculated based on past I- or P-pictures.
B: Bidirectionally-predictive coded picture
This picture is calculated by comparing past and future I- and
P-pictures so it has the lowest volume of information.
JPEG (Joint Photographic Experts Group)
This is a system used for compressing/decoding color still pictures. If you
select JPEG as the storage system on digital cameras, etc., the data will
be compressed to 1/10–1/100 of its original size. The benefit of JPEG is
less deterioration in picture quality considering the degree of
compression.
Linear PCM (pulse code modulation)
These are uncompressed digital signals, similar to those found on CDs.
MP3 (MPEG Audio Layer 3)
An audio compression method that compresses audio to approximately
one tenth of its size without any considerable loss of audio quality.
MPEG4
A compression system for use on mobile devices or a network, that allows
highly efficient recording at a low bit rate.
Playback control (PBC)
If a Video CD has playback control, you can select scenes and
information with menus.
Progressive/Interlaced
The PAL video signal standard has 576 interlaced (i) scan lines, whereas
progressive scanning, called 576p, uses twice the number of scan lines.
For the NTSC standard, these are called 480i and 480p respectively.
Using progressive output, you can enjoy the high-resolution video
recorded on media such as DVD-Video.
Your television must be compatible to enjoy progressive video.
Sampling frequency
Sampling is the process of converting the heights of sound wave (analog
signal) samples taken at set periods into digits (digital encoding).
Sampling frequency is the number of samples taken per second, so larger
numbers mean more faithful reproduction of the original sound.
WMA (Windows Media
TM
Audio)
WMA is a compression format developed by Microsoft Corporation. It
achieves the same sound quality as MP3 with a file size that is smaller
than that of MP3.
HT540En.book Page 15 Monday, February 20, 2006 2:03 PM

RQT8596
16
Basic play
Basic play
To display the picture from the main unit, turn on your television and change its video input mode (e.g. VIDEO 1, AV 1, etc.).
≥ To change your television’s video input mode, refer to its operating instructions.
[Note[
≥ Discs continue to rotate while menus are displayed. To preserve the unit’s motor and your television screen, press [∫] (Stop) when you are finished
with the menus.
≥ Total title number may not be displayed properly on iR/iRW.
Using the main unit
SURROUND
ENHANCER
VOLUME
Press to skip.
Press and hold to
– search during play
– start slow-motion play during pause
(Motion picture part)
≥ Press [1] (Play) to start normal play.
6 Adjust the
volume.
5 Start play.
The tray is automatically closed.
To change the sound quality ➜ page 30
3 Open the disc tray.
∫ (Stop)
2 Select “DVD/CD”.
≥ Select “AUX” or “TV” to enjoy video
cassette recorder, television or cable
TV programs.
(Refer to page 11 for the necessary
connections.)
1 Turn the unit on.
4 Load the disc.
≥ Load double-sided discs so the label for the
side you want to play is facing up.
≥ For DVD-RAM, remove
the disc from its
cartridge before use.
The illustration shows SC-HT990.
SURROUND ENHANCER
(➜ page 31)
HT540En.book Page 16 Monday, February 20, 2006 2:03 PM

RQT8596
17
Basic play
If you are experiencing problems, refer to troubleshooting (➜ page 34 to 36).
Using the remote control
Stop
The position is memorized while
“RESUME” is on the display.
≥ Press [1 PLAY] to resume.
≥ Press [∫ STOP] again to clear
the position.
Pause
≥ Press [1 PLAY] to restart play.
Skip
—
≥ [WMA] [MP3] [JPEG] [MPEG4] [DivX]
[This feature does not work
during program and random play
(➜ page 18).]
[3, 4]: Group skip
[2, 1]: Content skip
Search
(during play)
≥ Up to 5 steps.
≥ Press [1 PLAY] to start normal
play.
Slow-motion
(during pause)
≥ [VCD] Slow-motion: forward
direction only.
≥ [MPEG4] [DivX] Slow-motion:
Does not work.
Frame-by-
frame
(during pause)
[DVD-A] (Motion picture part)
[DVD-VR] [DVD-V] [VCD]
≥ [VCD] Forward direction only.
1
2
5
6
,
SLOW/SEARCH
RETURN
,
SKIP
STOP
PAUSE
TOP MENU,
DIRECT NAVIGATOR
MENU,
PLAY LIST
FL DISPLAY
ENTER
CANCEL
Numbered
buttons
On-screen
item select
—
Enter number
[DVD-VR] [DVD-A] [DVD-V] [VCD] [CD]
e.g. To select 12:
[S10] ➜ [1] ➜ [2]
[VCD] with playback control
Press [∫ STOP] to cancel the PBC
function, and then press the
numbered buttons.
[WMA] [MP3] [JPEG] [MPEG4] [DivX]
e.g. To select 123:
[1] ➜ [2] ➜ [3] ➜ [ENTER]
≥ Press [CANCEL] to cancel the
number(s).
[DVD-A] [DVD-V]
Shows a disc top menu.
[DVD-VR]
Press the button to show the
programs (➜ page 20).
Disc menu
[DVD-V]
Shows a disc menu.
[DVD-VR]
Press the button to show a playlist
(➜ page 20).
[VCD] with playback control
Shows a disc menu.
Return to
previous
screen
—
Main unit
display
[DVD-VR] [DVD-A] [DVD-V] [WMA]
[MP3] [MPEG4] [DivX]
Time display
,-.Information display
(e.g. [DVD-VR] Program
number)
[JPEG]
When Slideshow (➜ page 22) is
on:
SLIDE
,-.Contents number
When Slideshow is off:
PLAY
,-.Contents number
Select
Register
HT540En.book Page 17 Monday, February 20, 2006 2:03 PM

RQT8596
18
Convenient functions
Convenient functions
Press [FUNCTIONS].
Each time you press the button:
Main menu (➜ page 22) --------------------> Basics -------------------->Details
^---------------------- off (No on-screen display) ,------------------b
≥ [MPEG4] [DivX] Video and audio information is not displayed during
search.
≥ Selecting “Play as Data Disc” in Other Menu (➜ page 24) will be
effective if the following functions are not available to play WMA, MP3,
JPEG, MPEG4 or DivX video contents.
≥ [DVD-V] Some items cannot be played even if you have programmed
them.
≥ [DVD-A] Some discs contain bonus groups. If a password screen
appears after selecting a group, enter the password with the numbered
buttons to play the bonus group. Refer also to the disc’s jacket.
[DVD-A]
Press [1 PLAY].
To select an item using the cursor buttons
Press [ENTER] and [3, 4] to select an item, and then press [ENTER]
again to register.
To select all the items
While the “Chapter”, “Track” or “Content” field is
highlighted, press [3, 4] to select “ALL”. Then
press [ENTER] again to register.
To change the selected program
1 Press [3, 4] to select the program number.
2 Press the numbered buttons to change each item.
([WMA] [MP3]
[JPEG]
[MPEG4] [DivX]
Press [ENTER] to register the
selection.)
To clear the selected program
1 Press [3, 4] to select the program number.
2 Press [CANCEL] (or press [3, 4, 2, 1] to select “Clear” and press
[ENTER]).
To clear the whole program
Select “Clear all” with [3, 4, 2, 1] and press [ENTER].
The whole program is also cleared when the disc tray is opened, the unit
is turned off or another source is selected.
Displaying current playback
condition
All group, Program and Random
play
Press [PLAY MODE] while stopped.
All group, program and random playback screens appear sequentially.
All group ([DVD-A]) __--------) Program ------------------) Random
^------------------------- off (Normal play) (__------__----}
To exit the all group, program and random mode
Press [PLAY MODE] several times while stopped.
CANCEL
FUNCTIONS
PLAY MODE
ENTER
PLAY
Numbered
buttons
FUNCTIONS
Chapter
Time
4
Title
1 0:41:23
Program Playback
Details-DVD-Video
Audio
Subtitle
Angle
Source Aspect
Title Total Time
1 DTS 3/2.1ch
1/1
4:3
0:54:28
e.g. [DVD-V]
∫ Basics
Audio information
Subtitle information
Angle information
Aspect of current title
Total play time of current title
∫ Details
Elapsed play time
Current playback number
Current positionPlay mode
Playback
condition
e.g. [DVD-V]
All group play
Program play (up to 32 items)
1
Press the numbered buttons to select the item.
([WMA] [MP3] [JPEG]
[MPEG4]
[DivX]
Press [ENTER] to
register the selection.)
≥ Repeat this step to program other items.
≥ To select a 2-digit number
e.g. To select 12: [S10] ➜ [1] ➜ [2]
[WMA] [MP3] [JPEG] [MPEG4] [DivX] [1] ➜ [2] ➜ [ENTER]
2
Press [1 PLAY].
Random play
1
[DVD-A] [DVD-V] [WMA] [MP3] [JPEG]
[MPEG4]
[DivX]
Press the numbered buttons to select a group or title.
([WMA] [MP3] [JPEG]
[MPEG4]
[DivX]
Press [ENTER] to
register the selection.)
[DVD-A]
≥ To enter all groups, press [2, 1] to select “All” and press
[ENTER].
≥ To deselect a group, press numbered buttons corresponding to the
group you want to clear.
2
Press [1 PLAY].
All Group Playback
Press PLAY to start
Program Playback
ENTER
to select and press
PLAY
to start
TitleNo. Chapter Time
Play
Clear
Clear all
Choose a title and chapter.
1
e.g. [DVD-V]
e
Chapter Time
ALL
e.g. [DVD-V]
Random Playback
Title
Choose a title.
1
0 ~ 9
PLAY
to start
to select
e.g. [DVD-V]
HT540En.book Page 18 Monday, February 20, 2006 2:03 PM

Playing data discs using navigation menus
RQT8596
19
Playing data discs using navigation menus
Selecting “Play as Data Disc” in Other Menu (➜ page 24) will be effective
if the following functions are not available to play WMA, MP3, JPEG,
MPEG4 or DivX video contents.
≥ Playing HighMAT
TM
discs (➜ page 20)
To enjoy listening to WMA/MP3 contents while showing a JPEG image on
the screen, select a JPEG file first and then select audio contents.
(The opposite order is not effective.)
∫ Using the submenu
1 While Navigation Menu is displayed
Press [FUNCTIONS].
2 Press [3, 4] to select an item and press [ENTER].
Items shown differ depending on the type of disc.
∫ Searching by a content or group title
Highlight a group title to search the group, or a content title to search
its content.
1 While the submenu is displayed (➜ above)
Press [3, 4] to select “Find” and press [ENTER].
2 Press [3, 4] to select a character and press [ENTER].
≥ Repeat to enter another character.
≥ Lower case characters are also searched.
≥ Press [6, 5 SLOW/SEARCH] to skip between A, E, I, O
and U.
≥ Press [2] to erase a character.
≥ Leave the asterisk (¢) when you search for the titles including
the character you enter.
≥ Erase the asterisk (¢) to search for the titles starting with the
character you enter. To add the asterisk (¢) again, display the
submenu again and select “Find”.
3 Press [1] to select “Find” and press [ENTER].
The search result screen appears.
4 Press [3, 4] to select the content or group and press
[ENTER].
(Continued on next page)
Playing data discs
[WMA] [MP3] [JPEG] [MPEG4] [DivX]
Playing items in order (Playback Menu)
1
Press [TOP MENU].
≥ To exit the screen, press [TOP MENU].
2
Press [3, 4] to select “All”, “Audio”, “Picture” or
“Video” and press [ENTER].
Playing from the selected item (Navigation Menu)
1
Press [MENU].
≥ To exit the screen, press [MENU].
2
Press [2] followed by [3, 4] to select the group and
press [ENTER].
3
To play content in the group in order
Press [ENTER].
To start play from the selected content
Press [3, 4] to select and [ENTER].
ENTER
TOP MENU,
DIRECT NAVIGATOR
FUNCTIONS
MENU,
PLAY LIST
,
SLOW/SEARCH
STOP
Numbered
buttons
Playback Menu
ENTER
to select and press
All
Total 434
Audio
Total 7
Picture
Total 427
Video
Total 2
All contents
WMA/MP3
JPEG
e.g.
MPEG4 and DivX video
N
avigation
M
enu
Group 005/023
Content 0001/0004
Perfume
001 Brazilian
002 Chinese
003 Czech
004 Hungarian
006 Mexican
007 Philippine
008 Swedish
009 Piano
010 Vocal
001 Lady Starfish
002 Metal Glue
003 Life on Jupiter
004 Starperson
005 Starpersons
006 Starperson
001 My favorite1
002 My favorite2
5
JPEG
002 My favorite2
005 Japanese
001 Lady Starfish
005 Japanese
007 Starpersons
Group and content number
currently playing
: WMA/MP3
Content
Group
e.g.
Number currently selected
: JPEG
: MPEG4 and DivX video
Multi
List
Tree
Thumbnail
All
Audio
Picture
Video
Next group
Previous group
Help display
Find
Groups and contents are displayed.
Contents only
Groups only
Thumbnail images [JPEG]
To go to next group
To go to previous group
WMA/MP3, JPEG, MPEG4 and DivX video
WMA/MP3 only
JPEG only
MPEG4 and DivX video only
To switch between guide messages and the
elapsed play time indicator
To search by content or group title (➜ below)
A
Find
¢
8596En_p16-27.fm Page 19 Thursday, March 2, 2006 9:10 AM

RQT8596
20
Playing data discs using navigation menus
Playing data discs using navigation menus
Titles appear with CD Text disc playback.
≥ Titles appear only if the titles are recorded on the disc.
≥ You cannot edit programs, playlists and disc titles.
This works only when the disc contains a playlist.
∫ Playing scenes one by one
1 While the playlist menu is displayed
Press [1].
2 Press [3, 4] to select “Scene List” and press [ENTER].
≥ “Contents” shows playlist information.
3 Press [3, 4, 2, 1] to select a scene and press [ENTER].
Selecting a track using CD text
[CD]
1
Press [TOP MENU] or [MENU].
≥ To exit the screen, press [TOP MENU] or [MENU].
2
Press [3, 4] to select the track and press [ENTER].
≥ Press [FUNCTIONS] to show the playback condition and current
position.
Playing HighMAT
TM
discs
[WMA] [MP3] [JPEG]
1
Press [TOP MENU].
≥ To exit the screen, press [∫ STOP].
≥ To change the menu background to the one recorded on the disc,
press [FUNCTIONS].
2
Press [3, 4, 2, 1] to select the item, and then press
[ENTER].
≥ Repeat this step if necessary.
Selecting from the list
1
During play
Press [MENU].
≥ To exit the screen, press [MENU].
2
Press [2] followed by [3, 4] to switch among
“Playlist”, “Group” and “Content” lists.
3
Press [1] followed by [3, 4] to select an item and
press [ENTER].
CD Text
1.
2.
3.
4.
5.
6.
7.
8
Ashley at Prom
63 00
1/23
Disc Title: All By Artist
Disc Artist: Pink Island
Track title: Long John Platinum
Track Artist: SHIPWRECKED
City Penguin
Formura one
Soccer
Baseball
Neanderthal
Cartoons
Trilobites
e.g. CD text
2
Prev
3
Return
Next
1
New Playlist Item Long Name Display Te PAGE 1/3
Menu1
Menu2
Menu3
Play list1
Play list2
Play list3
Menu: Takes you to the next
menu which shows
playlists or another
menu
Playlist: play starts
e.g.
Playlist
Group
Content
All By Artist
ENTER
RETURN
to playto select
to exit
09
Content title
No.
1
Few times in summer
Less and less
And when I was born
Quatre gymnopedies
You've made me sad
I can't quit him
Evening glory
Wheeling spin
Velvet Cuppermine
Ziggy starfish
2
3
4
5
6
7
8
9
10
Playlist
Krissa
e.g.
Playing RAM and DVD-R/-RW
(DVD-VR) discs
[DVD-VR]
Playing the programs
1
Press [DIRECT NAVIGATOR].
≥ To exit the screen, press [DIRECT NAVIGATOR].
2
Press [3, 4] or the numbered buttons to select the
program.
≥ To select a 2-digit number
e.g. 12: [S10] ➜ [1] ➜ [2]
≥ Press [1] to show the contents of the program and the disc.
3
Press [ENTER].
Playing a playlist
1
Press [PLAY LIST].
≥ To exit the screen, press [PLAY LIST].
2
Press [3, 4] or the numbered buttons to select the
playlist.
≥ To select a 2-digit number
e.g. 12: [S10] ➜ [1] ➜ [2]
3
Press [ENTER].
Direct Navigator
11/ 1(WED) 0:05 AM Monday feature1
1/ 1 (MON) 1:05 AM Auto action2
2/ 2 (TUE) 2:21 AM Cinema3
3/ 3 (WED) 3:37 AM Music4
4/10(THU) 11:05 AM Baseball5
Date
No.
On
Title Contents
RETURN
to select
to exit
09
e.g.
to select and press
09
RETURN
ENTER
to exit
Playlist
11/1 0:00:01 City Penguin1
1/ 1 0:01:20 Ashley at Prom2
2/ 2 1:10:04 Formula one3
3/ 3 0:10:20 Soccer4
4/10 0:00:01 Baseball5
DateNo. Total Time Title Contents
21
e.g.
HT540En.book Page 20 Monday, February 20, 2006 2:03 PM
Page is loading ...
Page is loading ...
Page is loading ...
Page is loading ...
Page is loading ...
Page is loading ...
Page is loading ...
Page is loading ...
Page is loading ...
Page is loading ...
Page is loading ...
Page is loading ...
Page is loading ...
Page is loading ...
Page is loading ...
Page is loading ...
Page is loading ...
Page is loading ...
Page is loading ...
Page is loading ...
/