Page is loading ...

MOBILE PRINTER
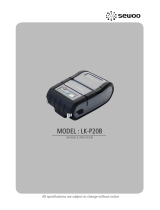
MODEL : LK-P25
Bluetooth
All specifications are subject to change without notice
P25 Rev. B 07/19
J.STEPHEN Co., Ltd.
28-6, Gajangsaneopdong-ro, Osan-si, Gyeonggi- do, 18103, Republic of Korea
TEL : +82-31-8077-5000 / FAX : +82-31-624-5310
http://www.miniprinter.com

This device complies with part 15 of the FCC Rules.
Operation is subject to the following two conditions.
1) This device may not cause harmful interference, and
2) This device must accept any interference received,
including interference that may cause undesired operation.
Hong yul Jun
20280 S. Vermont Ave. STE 200, Torrance, CA 90502 | USA
+310-561-8030

For better safety and reliability, adhere to the following precautionary measures.
Read and follow the instructions carefully before operation of the product.
Safety Precautions
WARNING
Failure to follow these instructions could result in re, electric shock,
other injuries, or property damage.
Indication
Prohibition
(Potential risk of electric shock or re)
(Potential risk of electric shock or re)
(Potential risk of electric shock or re)
(Potential risk of electric shock or re)
Must follow
Do not disassemble
Unplug the power from the
outlet
Grounding to prevent electric
shock
Do not handle the product
with wet hands
Do not pull or touch the power plug with
wet hands.
Do not bend the wire and do not allow the
wire to be pinched or crushed by heavy
objects.
If a power plug is broken or a plug is cut or
worn, do not use it.
Do not overload an electrical outlet.
WARNING
Failure to follow these instructions could result in re, electric shock, other
injuries, or property damage.
Failure to follow these instructions could result in re, electric shock, other
injuries, or property damage.
(Turn off the power using the power button)
(Potential risk of re or unit malfunction)
(Potential risk of re or property damage)
(Potential risk of electric shock or damage)
(Potential risk of malfunction, electric shock,
or re. When the product needs to be repaired,
please contact your reseller)
Dealer
Do not unplug the power cable to turn off
the product.
If the product needs to be repaired,
please contact your reseller.
Avoid excessive shock or drops.
Keep product away from the water and
other material.
Do not disassemble, repair or modify the
product.
CAUTION

1
2
Table of Contents
SPECIFICATION
11. ROLL MEDIA SPECIFICATION
18
12. BLACK MARK
19
13. PRINTER SPECIFICATION
20
PRODUCT OVERVIEW
1. UNPACKING
2
2. PRODUCT OVERVIEW
3
3. CONTROL PANEL USAGE
4
SET UP
4. PAPER INSTALLATION
5
5. BATTERY
6
5-1. BATTERY INSTALLATION
6
5-2. BATTERY CHARGING
7
6. LEATHER CASE USAGE (OPTIONAL)
10
7. SELF TEST
11
PERIPHERAL CONNECTION
8. PERIPHERAL CONNECTION
13
8-1. BLUETOOTH CONNECTION
13
8-2. NFC CONNECTION
14
8-3. INTERFACE CONNECTION
15
MAINTENANCE
9. CLEANING THE PRINTER
16
10. JAM ERROR
17

2
3
1. UNPACKING
Printer
Roll Paper
Leather Case &
Shoulder strap
Quick Manual
Belt Clip
Battery Cover
Charger
(USB Cable)
Battery
Standard
Option
2. PRODUCT OVERVIEW
Battery
Cover
USB &
DC
Power
Open Button
- Button Up: Opening the cover
Power
Button
Paper
feed Button
Front
Rear

4
5
Button Name function
Power
Button /
Stand-by
Button
This button is used to turn the printer on and off.
When the printer is off, press this button for approximately 3
seconds and the printer will power on. When you press this button
while the printer is powered on, the printer will turn off.
When the printer is in power save mode, you can press the button
to enter standby mode.
Paper
Feed
Button
This button can be used to manually feed the paper.
Additionally, this button is also used to initiate self-tests and
Hexadecimal Dumping.
1. Refer to the Self Test section of this manual for information
regarding self-tests.
2. Refer to the Note in Self Test section of this manual for
information regarding Hexadecimal Dumping.
Battery
Status
Lamp
1. If the Batt LED is lit, the battery is fully charged.
2. If you can hear a beeping sound and LED light is turned off, the
battery is at the lowest level.
3. If the battery is not charged at all, the printer turns off
automatically.
Error
Lamp
If the red light is turned on, there is no paper or the
paper cover is open.
LINK/
Power
Light
- Link: LED Blink
- Power ON: Green LED ON
- Power OFF: LED OFF
3. CONTROL PANEL USAGE
4. PAPER INSTALLATION
1 2
3
4
Open Button
Press the Open button up to
open the paper cover.
CAUTION
Make sure to be careful of
the HOT head
Place the paper roll as shown. Make
sure the paper is placed in the right
direction.
Please make sure you hear
the closing sound of
the upper cover.
Pull a short length of paper out of
the printer and close the cover.
Tear o the additional paper using
tear bar.
**If the cover is not shut down completely,
the printer may not work properly**

6
7
5. BATTERY
NOTE
- As the battery is not charged at the time of your purchase,
charge the battery prior to using the printer
5-1. Battery Installation
Belt Clip Battery CoverStandard
1 2
3
4
Remove the screw as
shown.
Open the battery cover and connect
the battery jack to the printer.
Install in the same order as the battery cover.
Insert the battery and close the
battery cover.
Install the screw.

8
9
1. Make sure the printer is turned o.
2. After opening the DC JACK cover, connect the DC JACK to the printer.
3. Plug the power cord into the electrical outlet.
(Do not turn o the printer while charging.
When charging is completed, the power is automatically turned o)
NOTE
1. If the charger provided by the manufacturer is not used, the printer can be
damaged, and the manufacturer is not liable for the consequential damage.
2. Before removing the battery, make sure that power is turned o.
3. The printer does not work when only connected to the charger.
4. While charging, do not turn on the power.
5. If the battery jack is connected in reverse, the product will be damaged.
6. When the printer is turned o, the battery will not charge.
5-2. Battery Charging
How to charge with power cord
How to charge with PC
Connect the USB cable to the PC to charge the printer.
Disconnect the USB cable from the power cord adapter.
1
2
After opening the DC cover,
pull the cover slightly.
*Be careful not to pull too hard.

10
11
1 2
3
6. LEATHER CASE USAGE
Open the leather case.
Close the cover and press
down on the Velcro.
Connect the shoulder strap
to leather case rings.
Place the printer into
the leather case.
1 2
3
7. SELF TEST
Turn o the power by pressing the
power button for approximately
3 seconds.
The self-test will print.
While you are holding the FEED
button, press the power button.
NOTE
1. To enter hex dump mode,
press the Feed button once more
2. If the Feed button is not pressed,
the self-test will automatically nish
after 3 seconds.
4

12
13
Self-Test Printout Sample
Upon initial installation or for
troubleshooting, you can run the
diagnostic test to get information about :
Firmware version, emulation, codepage,
sensor settings, interface settings, etc.
If no issues are found with the diagnostic
test, examine other devices and software.
The diagnostic test is working
independently of devices and software.
●
Motor protection from being overheated
To prevent the motor from overheating,
stop the printer for at least 30 seconds after
continuously printing 1.5 meters.
8. PERIPHERAL CONNECTION
NOTE
- This model supports Numeric Comparison function.
- Please refer to the conguration manual for details.
8-1. Bluetooth Connection
1. The Printer can be connected to devices equipped with Bluetooth communication
capabilities (PDAs, PCs, etc.).
2. Use the Bluetooth connection function supported by your device to connect to
the printer.
This product can communicate with other devices via Bluetooth
or a communication cable.

14
15
8-2. NFC Connection
NOTE
- Please refer to the Conguration manual for details.
- NFC is only compatible with Bluetooth.
1. The printer can be connected to devices equipped with NFC communication
capabilities.
2. Use the NFC connection function supported by the device to connect to the printer.
8-3. Interface Cable Connection
1. Flip over the connector cover and connect USB cable to
the printer connector.
2. Connect the interface cable to the USB port of the device(PDA, PC, etc.).
NOTE
Use the cable oered by the manufacturer (USB)
USB
COVER

16
17
HEAD
9. CLEANING THE PRINTER
If the interior of the printer is dusty, printing quality can be reduced.
In this case, follow the instructions below to clean the printer.
NOTE
1. Make sure to turn the printer power o prior to cleaning.
2. Regarding printhead cleaning, as the printhead gets very hot during printing,
turn o the printer power and wait approximately 10 minutes before cleaning.
3. When cleaning the printhead, take care not to touch the heated portion of the
printhead. The printhead can be damaged by static electricity.
4. Take care not to allow the printhead to become scratched and /
or damaged in any way.
1. Use an applicator swab moistened with an alcohol solution to clean the printhead
and remove any dust.
2. Once the cleaning is completed, wait a few minutes before inserting the paper roll
into the printer.
Preventing Overheating
To prevent the motor from overheating, stop the printer for at least 30 seconds
after continuously printing 1.5 meters.
10. JAM ERROR
1 2
3
When you face with a paper jam
error, please press the button up
to open the printer cover.
Please remove the paper.
CAUTION
Make sure to be careful of the HOT head
After removing, close the cover.
The printer will work normally.
**If the cover is not shut down completely,
the printer may not work properly**
Please make sure you hear
the closing sound of
the upper cover.

18
19
11. ROLL MEDIA SPECIFICATION
Core
Diameter(A) 12.5mm
Roll
Max.diameter(B) 40mm
Max.Media Width (C) 58mm
Min.media Thickness 0.06mm
Protect the printhead from sand, grit, and other hard particles during printing
and storage. Keep the cover closed. Even very small foreign particles may cause
severe harm to the printhead.
12. BLACK MARK
58 (MAX PAPER WIDTH)
48 (PRINT WIDTH )
55
1.8 ~ 8.3
12.5
10 ~ 58
PAPER FEEDING DIRECTION

20
21
Printing Method Direct Thermal
Printing Speed Max. 60mm/s
Resolution 203 DPI
Character FontA(12x24), FontB(9x17), Asian Font(KOR, JPN,
CHN_GB2312, CHN_BIG5)
Barcode 1D UPC-A, UPC-E, EAN-8, Code39, ITF, Codabar, Code93,
Code128, EAN-13
2D QR, PDF417, Maxicode, Datamatrix
Emulation ESC/POS Compatible
Driver Windows Driver(10, 2012, 8, 7, 2008, VISTA, 2003, XP,
32bit & 64bit), Window CE & Mobile Driver & SDK
(CE 4.2~, Mobile 5.0~), Linux Driver, Mac Driver,
OPOS Driver, JavaPOS Driver, iOS SDK, Android(2.1~) SDK,
Blackberry SDK, Symbian
Sensor Paper end, Cover open, Black mark
Paper Paper type Thermal Paper
Width Max. 58mm
Thickness 0.06mm
Roll Max Diameter Max. 40mm
Roll Core 12.5mm ± 0.5mm
Interface Standard USB, Bluetooth Smart Ready
(Bluetooth4.2+BLE), NFC Tag
Battery Charger Input AC100~240V, 50/60Hz
Output 5V, 1A
13. PRINTER SPECIFICATION
Battery Battery type Li-ion
Output 3.7V, 2600mAh
Charging time Adaptor - 3.5 Hrs / USB - 6 Hrs
Size 79 x 44.4 x 103.2
[W x D x H (mm)]
Weight 189g (with battery)
Temperature Operation -10~50℃
Storage -20~60℃
Humidity Operation 10 ~ 80%
Storage 10 ~ 90%

22
PATENT
/