SEWOO LK-P24 Quick Manual

Type
Quick Manual

SEWOO LK-P24 is a portable receipt printer with Bluetooth, Wi-Fi, and NFC connectivity options. With its advanced manual cutter (AMC) button, you can easily cut papers and open the cover for maintenance. The AMC function enhances safety by preventing finger injuries near the printer head. The printer also features a battery status lamp and an error lamp for quick troubleshooting. It supports various paper roll sizes and provides clear black marks for precise paper cutting. The LK-P24 is a versatile tool for mobile printing needs.

SEWOO LK-P24 is a portable receipt printer with Bluetooth, Wi-Fi, and NFC connectivity options. With its advanced manual cutter (AMC) button, you can easily cut papers and open the cover for maintenance. The AMC function enhances safety by preventing finger injuries near the printer head. The printer also features a battery status lamp and an error lamp for quick troubleshooting. It supports various paper roll sizes and provides clear black marks for precise paper cutting. The LK-P24 is a versatile tool for mobile printing needs.

P24 Rev. A 04/18
J. STEPHEN Co., Ltd.
MOBILE PRINTER
MODEL : LK-P24
Wi-Fi & Bluetooth
All specifications are subject to change without notice
28-6, Gajangsaneopdong-ro, Osan-si, Gyeonggi-do ,18103, Republic of Korea
TEL : +82-31-8077-5000 FAX : +82-31-459-8880
http://www.miniprinter.com
For better safety and reliability, adhere to the following precautionary measures.
Read and follow the instructions carefully before operation of the product.
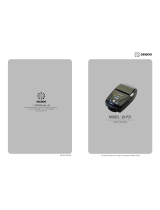
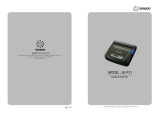
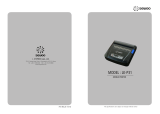
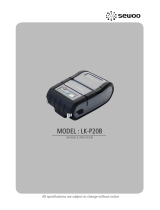
Safety Precautions
WARNING
Failure to follow these instructions could result in re, electric shock,
other injuries, or property damage.
Indication
Prohibition
(Potential risk of electric shock or re)
Must follow
Do not disassemble
Unplug the power from the
outlet
Grounding to prevent electric
shock
Do not handle the product
with wet hands
Do not pull or touch the power plug with
wet hands.
Do not bend the wire and do not allow the
wire to be pinched or crushed by heavy
objects.
If a power plug is broken or a plug is cut or
worn, do not use it.
Do not overload an electrical outlet.
WARNING
Failure to follow these instructions could result in re, electric shock, other
injuries, or property damage.
Failure to follow these instructions could result in re, electric shock, other
injuries, or property damage.
(Turn off the power using the power button)
(May cause damage or injury)
(Potential risk of re or unit malfunction)
(Potential risk of re or property damage)
(Potential risk of electric shock or damage)
(Potential risk of malfunction, electric shock,
or re. When the product needs to be repaired,
please contact your reseller)
Dealer
Do not unplug the power cable to turn off
the product.
Do not install the product on an unstable
or inclined surface.
If the product needs to be repaired,
please contact your reseller.
Avoid excessive shock or drops.
Keep product away from the water and
other material.
Do not disassemble, repair or modify the
product.
CAUTION
1
2
Table of Contents
PERIPHERAL CONNECTION
9. PERIPHERAL CONNECTION 18
9-1. BLUETOOTH CONNECTION (OPTIONAL)
18
9-2. Wi-Fi CONNECTION (OPTIONAL)
18
9-3. NFC CONNECTION (OPTIONAL)
19
9-4. INTERFACE CABLE CONNECTION
20
MAINTENANCE
10. CLEANING THE PRINTER 21
11. JAM ERROR 22
SPECIFICATION
12. ROLL MEDIA SPECIFICATION 23
13. BLACK MARK 24
14. PRINTER SPECIFICATION 25
PRODUCT OVERVIEW
1. UNPACKING 2
2. PRODUCT OVERVIEW 3
3. AMC(ADVANCED MANUAL CUTTER) BUTTON 4
4. CONTROL PANEL USAGE 5
SET UP
5. PAPER INSTALLATION 6
6. BATTERY 7
6-1. BATTERY INSTALLATION
7
6-2. BATTERY REMOVAL
8
6-3. BATTERY CHARGING
9
6-3-1. CHARGING USAGE
9
6-3-2. CHARGING CRADLE (OPTIONAL)
10
6-4. SET CRADLE USAGE (OPTIONAL)
11
7. BELT CLIP & STRAP, LEATHER CASE 12
7-1. BELT STRAP+BRACKET USAGE
12
7-2. BELT CLIP USAGE (OPTIONAL)
14
7-3. LEATHER CASE USAGE (OPTIONAL)
15
8. SELF TEST 16
2
3
1. UNPACKING
2. PRODUCT OVERVIEW
- Button Up: Cutting the paper
- Button down: Opening the cover
USB
DC POWER
Printer
Quick Manual
AC Cord
Set Cradle
(Charging Cradle)
Charger
Roll Paper
Shoulder Strap
Battery
CD (Manual)
Adaptor
Leather Case
USB Cable
Belt Strap+Bracket
Belt Clip
Front
Rear
Power
Button
AMC Button
Paper
feed Button
Battery
Belt clip
hole
Optional
Standard
4
5
3. AMC(Advanced Manual Cutter) BUTTON
AMC function gives the convenient
way for users to cut papers.
CAUTION
When using the AMC function, do not put fingers into the printer
head where the paper comes out. This may cause injury.
Button
Press the button up to cut the paper.
Press the button down to open the cover.
Please press the button down and open the
cover in situations such as cleaning
the head, replacing a paper, and
having a paper jam error.
Button Up
Button Down
4. CONTROL PANEL USAGE
Button
Name
function
Power
Button
This button is used to turn the printer on and off.
When the printer is off, press this button for approximately 3 seconds
and the printer will power on. When you press this button while the
printer is powered on, the printer will turn off.
Paper
Feed
Button
This button can be used to manually feed the paper.
Additionally, this button is also used to initiate self-tests and
Hexadecimal Dumping.
1. Refer to the Self Test section of this manual for information
regarding self-tests.
2. Refer to the Note in Self Test section of this manual for information
regarding Hexadecimal Dumping.
Battery
Status
Lamp
1. If the Batt LED is lit, the battery is fully charged.
2. If you can hear a beeping sound and LED light is turned off, the
battery is at the lowest level.
3. If the battery is not charged at all, the printer turns off
automatically.
Error
Lamp
If the red light is turned on, there is no paper or the
paper cover is open.
LINK/
Power
Light
- LINK: LED BLINK
- POWER ON: GREEN LED ON
- POWER OFF: LED OFF
6
7
5. PAPER INSTALLATION
1 2
3
4
Press the AMC button down
to open the paper cover.
Place the paper roll as shown. Make
sure the paper is placed in the right
direction.
Pull a short length of paper out of
the printer and close the cover.
Press the AMC button up to cut
the unnecessary paper.
**If the cover is not shut down completely,
the printer may not work properly**
CAUTION
Make sure to be careful of
the HOT head
Please make sure you hear
the closing sound of
the upper cover.
AMC BUTTON
6. BATTERY
1. Align battery hook as shown in the picture
2. Push the battery into the printer until it locks in place.
6-1. Battery Installation
OPEN
CLOSE
Please make sure you hear
the closing sound of
the upper cover.
HOOK
NOTE
As the battery is not charged at the time of your purchase, charge the
battery prior to using the printer
(Battery charger or Cradle can be used to charge)
CAUTION
Risk of explosion if the battery is replaced by an incorrect type.
Dispose of used batteries according to local regulations.
8
9
1. Remove the battery as shown.
1. Make sure the printer is turned o.
2. After opening the DC JACK cover, connect the DC JACK to the printer.
3. Plug the power cord into the electrical outlet.
6-2. Battery Removal 6-3. Battery Charging
LAMP
6-3-1. Charging Usage
OPEN
REMOVE
The charging status LED
Status charging charging complete
Charging Lamp
Red
Green
NOTE
1. If the charger provided by the manufacturer is not used, the printer can be
damaged, and the manufacturer is not liable for the consequential damage.
2. Before removing the battery, make sure that power is turned o.
3. The printer does not work when only connected to the charger.
4. The battery needs to be installed to operate the printer.
5. While charging, do not turn on the power.
6. Do not operate the printer while charging the battery.
7. Do not connect the charger while the printer is operating.
10
11
6-3-2. Charging Cradle
The charging status LED
Optional
Status charging charging complete
Charging Lamp
Red
Green
1. Place the printer into the charging cradle as shown above.
2. Connect the DC JACK to the charging cradle.
3. Plug the power cord into an electrical outlet.
4. Once the charging is completed, remove the printer from the charging cradle.
CHARGING (RED ON)
ERROR (RED Flicker)
CHARGING COMPLETE
(GREEN ON)
NOTE
If the printer is not properly mounted on the charging cradle,
the red lamp will blink. Remove and reinsert the battery.
6-4. Set Cradle Usage
1
2
Optional
Press the PUSH button to pop out
the cradle connector.
Align the second cradle with the connector of the existing cradle,
and connect the cradles by pressing down.
(To disassemble, repeat these steps in reverse order)
12
13
1 2
3
4
7. BELT CLIP & STRAP, LEATHER
7-1. Belt Strap+bracket Usage
Prepare the belt strap, bracket,
and 2 screws.
Slide the strap into the loop on
the back side.
Put the strap into the hole on the
top of the belt bracket.
Make sure the strap is fastened
tight enough.
5
6
After connecting the strap and bracket, insert the screws
into the bracket hole.
Use a screw driver to tighten
the bracket.
14
15
1
2
7-2. Belt Clip Usage
Optional
Tighten the screw with a screwdriver as shown in the picture above.
Insert the belt clip screw into the hole of the belt clip.
7-3. Leather Case Usage
1 2
3
4
Optional
Open the leather case.
Place the printer into
the leather case.
Close the cover and press
down on the Velcro.
Connect the shoulder strap
to leather case rings.
16
17
Self-Test Printout Sample
Upon initial installation or for
troubleshooting, you can run the
diagnostic test to get information about :
Firmware version, emulation, codepage,
sensor settings, interface settings, etc.
If no issues are found with the diagnostic
test, examine other devices and software.
The diagnostic test is working
independently of devices and software.
Motor protection from being overheated
To prevent the motor from overheating,
stop the printer for at least 30 seconds after
continuously printing 1.5 meters.
8. SELF TEST
NOTE
Turn o the power by pressing the
power button for approximately
3 seconds.
The self-test will print.
While you are holding the FEED
button, press the power button.
1. To enter hex dump mode, press the Feed
button once more
2. If the Feed button is not pressed,
the self-test will automatically nish
after 3 seconds.
18
19
NOTE
- Please refer to the Conguration manual for details.
- NFC is only compatible with Bluetooth.
9-3. NFC Connection
Optional
1. The printer can be connected to devices equipped with NFC communication
capabilities.
2. Use the NFC connection function supported by the device to connect to the printer.
NOTE
- This model supports Numeric Comparison function.
- Please refer to the conguration manual for details.
NOTE
- Please refer to the conguration manual for details.
9. PERIPHERAL CONNECTION
9-1. Bluetooth Connection
9-2. Wi-Fi Connection
Optional
Optional
1. The Printer can be connected to devices equipped with Bluetooth communication
capabilities (PDAs, PCs, etc.).
2. Use the Bluetooth connection function supported by your device to connect to
the printer.
1. The Printer can be connected to devices equipped with Wi-Fi communication
capabilities (PDAs, PCs, etc.).
2. Use the Wi-Fi connection function supported by the device to connect to the printer.
This product can communicate with other devices via Bluetooth,
Wi-Fi or a communication cable.
20
21
HEAD
10. CLEANING THE PRINTER
If the interior of the printer is dusty, printing quality can be reduced.
In this case, follow the instructions below to clean the printer.
NOTE
1. Make sure to turn the printer power o prior to cleaning.
2. Regarding printhead cleaning, as the printhead gets very hot during printing,
turn o the printer power and wait approximately 10 minutes before cleaning.
3. When cleaning the printhead, take care not to touch the heated portion of the
printhead. The printhead can be damaged by static electricity.
4. Take care not to allow the printhead to become scratched and /
or damaged in any way.
1. Use an applicator swab moistened with an alcohol solution to clean the printhead
and remove any dust.
2. Once the cleaning is completed, wait a few minutes before inserting the paper roll
into the printer.
Preventing Overheating
To prevent the motor from overheating, stop the printer for at least 30 seconds
after continuously printing 1.5 meters.
9-4. Interface Cable Connection
1. Flip over the connector cover and connect USB cable to
the printer connector.
2. Connect the interface cable to the USB port of the device(PDA, PC, etc.).
NOTE
Use the cable oered by the manufacturer (USB)
USB
COVER
22
23
12. ROLL MEDIA SPECIFICATION
Core
Diameter(A) 12.5mm
Roll
Max.diameter(B) 40mm
Max.Media Width (C) 58mm
Min.media Thickness 0.06mm
Protect the printhead from sand, grit, and other hard particles during printing
and storage. Keep the cover closed. Even very small foreign particles may cause
severe harm to the printhead.
11. JAM ERROR
1 2
3
When you face with a paper jam
error, please press the button down
to open the printer cover.
After removing, close the cover.
The printer will work normally.
Please remove the paper.
CAUTION
Make sure to be careful of the HOT head
**If the cover is not shut down completely,
the printer may not work properly**
Please make sure you hear
the closing sound of
the upper cover.
24
25
Printing Method Direct Thermal
Printing Speed Max. 100mm/s
Resolution 203 DPI
Character Font A(12×24), Font B(9×17), Asian
Font(KOR,JPN,CHN-GB2312,CHN-Big5),
Font0/1/2/4/5/6/7, Resident TTF, Downloadable TTF,
FontA~H, FontGS, Residnt TTF(Font0), Font 1~8
Barcode 1D EAN-8,EAN8(+2+5), EAN-13, EAN13(+2+5), Codabar,
Code11, Code39, Code93, Code128, ITF, LUPC-
A(+2+5), UPC-E, UPC-E(+2+5), Planet, UPC-A etc
2D PDF417, QR, Maxicode, RSS14, TLC39, Datamatrix,
Aztec, MicroPDF417
Emulation ESC/POS, CPCL, ZPL Command compatible
Driver Windows Driver(10, 2012, 8, 7, 2008, VISTA, 2003, XP,
32bit & 64bit), Window CE & Mobile Driver & SDK(CE
4.2~, Mobile 5.0~),
Linux Driver, Mac Driver, OPOS Driver, JavaPOS Driver, iOS
SDK, Android(2.1~) SDK, Blackberry SDK, Symbian
Sensor Black mark, Cover open, Paper end
Paper Paper type Thermal Receipt
Width Max. 58mm
Thickness 0.06-0.09mm
Roll Max Diameter 40mm
Roll Core 12.5mm
Interface Standard USB
Option Wi-Fi(802.11a/b/g/n) or Bluetooth Smart
ready(Bluetooth 4.2+BLE)
14. PRINTER SPECIFICATION
58 (MAX PAPER WIDTH)
48 (PRINT WIDTH)
55
1.8 ~ 8.3
10 ~ 58
1.8 ~ 8.3
2.5
20 ~ 300
15
5
PAPER FEEDING DIRECTION
13. BLACK MARK
26
27
PATENT
Battery Charger Input AC100~240V, 50/60Hz
Output 8.4V , 800~1400mA
Battery Battery type Li-ion
Output 7.4V, 1510mAh
Charging time 2.5 Hrs (55Hrs stand-by)
Cutter AMC(Advanced Manual Cutter)
Size 81.5×121.4×45.3 [W x D x H (mm)]
IP IP43
Weight 261.5g (with battery)
Temperature Operation -10~50
Storage -20~60
Humidity Operation 10 ~ 80%
Storage 10 ~ 90%
  • Page 1 1
  • Page 2 2
  • Page 3 3
  • Page 4 4
  • Page 5 5
  • Page 6 6
  • Page 7 7
  • Page 8 8
  • Page 9 9
  • Page 10 10
  • Page 11 11
  • Page 12 12
  • Page 13 13
  • Page 14 14
  • Page 15 15
  • Page 16 16
  • Page 17 17

SEWOO LK-P24 Quick Manual

Type
Quick Manual

SEWOO LK-P24 is a portable receipt printer with Bluetooth, Wi-Fi, and NFC connectivity options. With its advanced manual cutter (AMC) button, you can easily cut papers and open the cover for maintenance. The AMC function enhances safety by preventing finger injuries near the printer head. The printer also features a battery status lamp and an error lamp for quick troubleshooting. It supports various paper roll sizes and provides clear black marks for precise paper cutting. The LK-P24 is a versatile tool for mobile printing needs.

Ask a question and I''ll find the answer in the document

Finding information in a document is now easier with AI