Page is loading ...

1
DIAGNOSTIC SERVICE MANUAL
ROOF TOP AC/HP SYSTEMS
TROUBLESHOOTING
USA
Service Ofce
Dometic Corporation
2320 Industrial Parkway
Elkhart, IN 46516
CANADA
Dometic Corporation
46 Zatonski Unit 3
Brantford, Ontario
CANADA N3T 5L8
Form No. 3311071.017 01/12
©2007 Dometic Corporation
LaGrange, IN 46761
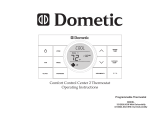
MECHANICAL CONTROL
COMFORT CONTROL
COMFORT CONTROL 2
SINGLE ZONE LCD CONTROL
ANALOG CONTROL

2
SAFETY INSTRUCTIONS
This manual has safety information and instructions
to help users eliminate or reduce the risk of accidents
and injuries.
RECOGNIZE SAFETY INFORMATION
This is the safety-alert symbol. When you see this
symbol in this manual, be alert to the potential for
personal injury.
Follow recommended precautions and safe operating
instructions.
UNDERSTAND SIGNAL WORDS
A signal word , WARNING OR CAUTION is used
with the safety-alert symbol. They give the level of
risk for potential injury.
Indicates a potentially hazardous
situation which, if not avoided, could result in death
or serious injury.
Indicates a potentially hazardous
situation which, if not avoided may result in minor
or moderate injury.
When used without the safety alert
symbol indicates, a potentially hazardous situation
which, if not avoided may result in property dam-
age.
Read and follow all safety information and instruc-
tions.
WARNING
CAUTION
CAUTION
Foreword
This service manual is the result of the dedication
of The Dometic Corporation Technical staff and its
engineers in giving service people the necessary
instruction for making accurate analyses of certain
conditions. Provided is a diagnostic chart leading a
qualied mechanic into the service manual pages to
locate and solve symptoms which may occur. Do-
metic has continued its commitment in providing
service people with this, the most up-to-date infor-
mation about servicing Dometic RV accessories.

3
PAGE NO.
Diagnostic Flow Chart ............................................................. 4
CONTENTS
Section 1
Operation
1.1 Mechanical Controls .............................................................................................. 10
1.2 Analog Controls .....................................................................................................10
1.3 Comfort Control Center ......................................................................................... 11
1.4 CCC 2 .....................................................................................................................14
1.5 Single Zone LCD Control ...................................................................................... 19
Section 2
AC Power Requirements
2.1 AC Voltage .............................................................................................................22
2.2 Breaker ................................................................................................................... 22
2.3 Unit Wiring ............................................................................................................22
2.4 Field Wiring ......................................................................................................22-27
Section 3
DC Voltage Requirements (Electronic) .............................................................................28
Section 4
Components
4.1 Mechanical Selector Switch ...................................................................................28
4.2 Mechanical Thermostat ..........................................................................................28
4.3 Change Over Thermostat (59146.XXX) ................................................................29
4.4 Analog Thermostat .................................................................................................29
4.5 Comfort Control Thermostat ..................................................................................30
4.6 Ccc 2 T-STAT ......................................................................................................... 31
4.7 Single Zone LCD T-stat ......................................................................................... 32
4.8 CCC & CCC2 Cable Assembly .............................................................................33
4.9 Analog Power Module ........................................................................................... 33
4.10 Comfort Control Power Module ............................................................................ 34
4.11 Single Zone LCD Power Module...........................................................................35
4.12 CCC2 Power Module ............................................................................................. 37
4.13 Start Device ............................................................................................................39
4.13.1 PTCR ......................................................................................................................39
4.13.2 Start Relay ..............................................................................................................39
4.14 Capacitors...............................................................................................................39
4.14.1 Run Capacitors ....................................................................................................... 39
4.14.2 Start Capacitors ......................................................................................................39
4.15 Blower Motor .........................................................................................................40
4.16 Compressor ............................................................................................................ 40
4.17 Heat Strips ..............................................................................................................41
4.17.1 Heat Strip Ducted ...................................................................................................41
4.17.2 Heat Strip ADB ......................................................................................................41
4.18 Thermistor Temperature Sensors ........................................................................... 42
4.18.1 Remote Temperature Sensor ..................................................................................42
4.18.2 Cold (freeze) Control Sensor .................................................................................42
4.18.3 Ambient Temperature Sensor .................................................................................43
4.19 Analog Cold (freeze) Control ................................................................................ 43
4.20 Reversing Valve (HEAT PUMP) ............................................................................43

4
PAGE NO.
CONTENTS
Section 5
Air Flow
5.1 User Maintenance .................................................................................................. 44
5.2 Frost on Coil...........................................................................................................44
5.3 Recirculation, Obstructions, Restrictions...............................................................44
5.4 Air Distribution Box (ADB) .................................................................................. 47
Section 6
Congeration .....................................................................................................................47
Section 7
Thermostat Location ..........................................................................................................49
Section 8
Other
8.1 Ambient Temperature .............................................................................................50
8.2 Heat Gain ............................................................................................................... 50
8.3 Blower Fan/Wheel Noise ....................................................................................... 50
8.4 Water Leakage ........................................................................................................50
8.5 Temperature Differential Across Coil .................................................................... 52
8.6 Amp Draw ..............................................................................................................52
8.7 Wiring ....................................................................................................................52
8.8 Short Cycle .............................................................................................................61
Section 9
Quick Tips
9.1 Mechanical Control ................................................................................................62
9.2 Comfort Control .....................................................................................................62
9.3 Analog Control .......................................................................................................62
9.4 CCC2/Single Zone .................................................................................................62
PRINCIPLES OF HEAT PUMP OPERATION .....................................................63

5
SYMPTOM CAUSE PAGE #
1. Unit does not run; no fan no compressor
Mechanical Control Operation
AC Voltage
Breaker
Changeover Thermostat
Selector Switch
Wiring
09
21
21
29
27
51
Analog Control Operation
Ambient Temperature
AC Voltage
DC Voltage
Breaker
Changeover Thermostat
Analog Thermostat
Analog Power Module
Wiring
09
50
21
28
21
29
29
33
51
Comfort Control / CCC2
Single Zone LCD T-stat
Conguration
Operation
Ambient Temperature
AC Voltage
DC Voltage
Breaker
Cable Assembly
Freeze Sensor
Ambient Sensor
Remote Temperature Sensor
Comfort Control Power Module / CCC2
Wiring
Operation
AC Voltage
DC Voltage
Breaker
Single Zone LCD T-stat
Single Zone LCD Power Module
Wiring
47
10/13
50
21
28
21
33
43
43
42
34/37
51
18
21
27
21
32
35
51
2. Fan operates; no compressor
Mechanical Control Wiring
Selector Switch
Mechanical Thermostat
Overload
Compressor
51
27
24
41
40
Analog Control Operation
Wiring
Analog Thermostat
Analog Power Module
Overload
Compressor
09
51
29
33
41
40
Comfort Control / CCC2 Operation
DC Voltage
Wiring
Cable Assembly
Comfort Control Power Module / CCC2
Overload
Compressor
Comfort Control Thermostat / CCC2
10/13
27
51
32
34/37
41
40
29/30

6
SYMPTOM CAUSE PAGE #
2. Fan operates; no compressor
Single Zone LCD T-stat Operation
AC Voltage
Freeze Sensor
Overload
Compressor
Single Zone LCD T-sta
System Initialation
18
21
42
41
40
32
32
3. Fan Operates; compressor tries to start, cycles “OFF” and hums
again, or blows circuit
Mechanical Control AC Voltage
Start Device
Start Capacitor
Run Capacitor
Overload
Compressor
21
39
40
39
41
40
Analog Control AC Voltage
Start Device
Start Capacitor
Run Capacitor
Overload
Compressor
21
39
40
39
41
40
Comfort Control / CCC2 AC Voltage
Start Device
Start Capacitor
Run Capacitor
Overload
Compressor
21
39
40
39
41
40
Single Zone LCD T-stat AC Voltage
Start Device
Start Capacitor
Run Capacitor
Overload
Compressor
21
39
40
39
41
40
4. Fan Operates: compressor runs for a short while, cycles off,
cycles back on hums, blows breaker
Mechanical Control Operation
AC Voltage
Start Device
Start Capacitor
Run Capacitor
Mechanical Thermostat
Short Cycle
Air Flow Obstruction
Overload
Compressor
09
21
39
40
39
24
61
44
41
40
Analog Control AC Voltage
Start Device
Start Capacitor
Run Capacitor
Thermostat Location
Analog Thermostat
Short Cycle
Air Flow Obstruction
Overload
Compressor
21
39
40
39
49
29
61
44
41
40

7
SYMPTOM CAUSE PAGE #
4. Fan Operates: compressor runs for a short while, cycles off,
cycles back on hums, blows breaker
Comfort Control / CCC2 AC Voltage
Start Device
Start Capacitor
Run Capacitor
Thermostat Location
Comfort Control Thermostat/CCC2
Short Cycle
Air Flow Obstruction
Overload
Compressor
21
39
40
39
49
30/31
40
44
41
40
Single Zone LCD T-stat AC Voltage
Start Device
Start Capacitor
Run Capacitor
Thermostat Location
Single Zone LCD T-stat
Short Cycle
Air Flow Obstruction
Overload
Compressor
21
39
40
39
49
32
40
44
41
40
5. Compressor run, no fan
Mechanical Control Wiring
Selector Switch
Run Capacitor
Motor
51
27
39
40
Analog Control Wiring
Run Capacitor
Motor
Analog Thermostat/Cable
Analog Power Module
51
39
39
29
33
Comfort Control / CCC2 Wiring
Run Capacitor
Motor
Comfort Control Thermostat/CCC2
Comfort Control Power Module / CCC2
51
39
39
30/31
34/37
Single Zone LCD T-stat Wiring
Run Capacitor
Motor
Single Zone LCD T-stat
System Initialation
Single Zone Power Module
51
39
39
32
32
35
6. Compressor runs, fan runs, but on one speed only
Mechanical Controls Selector Switch
Wiring
Motor
27
51
39
Analog Control Wiring
Motor
Analog Thermostat/Cable
Analog Power Module
51
39
29
33
Comfort Control / CCC2 Wiring
Run Capacitor
Motor
Comfort Control Power Module/CCC2
51
39
39
34/37

8
SYMPTOM CAUSE PAGE #
6. Compressor runs, fan runs, but on one speed only..Con’t
Single Zone LCD T-stat Wiring
Motor
Single Zone LCD T-stat
System Initialation
Sngle Zone Power Module
51
39
32
32
35
7. Inside Coil Freezes Up`
Mechanical Control Operation
Ambient Temperature
Air Flow
Mechanical Thermostat
Run Capacitor
Motor
Amp Draw
09
50
44
24
39
39
52
Analog Control Operation
Ambient temperature
Run Capacitor
Analog Cold Control
Motor
Air Flow
Thermostat Location
Amp Draw
Analog Thermostat/Cable
Analog Power Module
09
49
39
42
39
44
49
52
29
32
Comfort Control / CCC2 Operation
Ambient Temperature
Run Capacitor
Comfort Control Cold Control/CCC2
Motor
Air Flow
Thermostat Location
Remote Temperature Sensor
Amp Draw
Comfort Control Power Module
10/13
49
39
41
39
44
49
41
52
34/37
Single Zone LCD T-stat Operation
Ambient temperature
Run Capacitor
Cold Control
Motor
Air Flow
Thermostat Location
Amp Draw
Single Zone LCD t-stat
Single Zone Power Module
18
49
39
41
39
44
49
52
32
35
8. Insufcient Cooling, compressor runs constantly :
Mechanical, Analog, Comfort Control and CCC2
Air Flow
Heat Gain/Loss
Compressor
Amp Draw
44
49
39
52

9
SYMPTOM CAUSE PAGE #
9. Unit operates in wrong mode (cool instead of heat or reversed...
Con’t
Mechanical Control Mechanical Thermostat
Change Over Thermostat
Wiring
Reversing Valve
24
29
51
42
Analog Control Analog Thermostat
Change Over Thermostat
Wiring
Reversing Valve
28
29
51
42
Comfort Control / CCC2 Ambient Temperature Sensor
Conguration
Wiring
Reversing Valve
42
46
51
42
Single Zone LCD T-stat Ambient Temperature Sensor
Wiring
Reversing Valve
42
51
42/61
10. Insufcient cooling or heating; compressor cycles on and off
Mechanical Controls Air Flow
Heat Gain/Loss
Mechanical Thermostat
44
50
24
Analog Control Air Flow
Heat Gain/Loss
Analog Thermostat
Thermostat Location
44
50
29
48
Comfort Control / CCC2 Air Flow
Heat Gain/Loss
Comfort Control Thermostat /CCC2
Remote Temperature Sensor
Thermostat Location
44
50
30/31
41
48
Single Zone LCD T-stat Air Flow
Heat Gain/Loss
Single Zone LCD t-stat
Thermostat Location
44
50
32
49
11. Excessive cooling or heating; compressor will not shut off 49
Mechanical Control Mechanical Thermostat 24
Analog Control Thermostat Location
Analog Thermostat/Cable
Analog Power Module
49
29
32
Comfort Control/CCC2 Thermostat Location
Remote Temperature Sensor
Comfort Control / CCC2 Power Module
49
41
34/37/61
Single Zone LCD T-stat Thermostat Location
Single Zone LCD t-stat
Single Zone Power Module
49
32
35/61
12. Water Leaks; All units Water Leakage 49

10
SECTION 1
The operating instructions can change from one model number
to another. Be sure you are familiar with the proper operating
instructions for the specic control system or model of air con-
ditioner you are diagnosing. If not sure, acquire the proper op-
erating instructions for the unit you are trouble shooting.
Operating Instructions
1.1 Mechanical Controls
This type of air conditioner has an air distribution box that has a
mechanical selector switch and thermostat installed in it.
Selector Switch
The selector switch has eight positions including “OFF”.
This controls the fan speed, heating mode (HEAT STRIP OP-
TIONAL) and cooling modes.
Thermostat
The thermostat controls the temperature range from 65° F. on
the coldest side to 90° F. on the warmest side. In the cooling
mode, the compressors ON/OFF cycling are controlled by the
thermostat setting.
COOLING OPERATION:
A. Set the thermostat at the desired temperature level.
B. Select the fan speed that best satises your needs:
1. HIGH COOL: Selected when maximum cooling
and dehumidication required.
2. MED. COOL: Selected when normal or average
cooling required.
3 .
Note: The blower runs continuously to circulate air and main-
tain an even temperature. The compressor will come on as cool-
ing is required to maintain the selected temperature level.
FROST FORMATION ON COOLING COIL:
Under certain conditions, frost may form on the evaporator coil.
If this should occur, inspect the lter and clean if dirty. Make
sure air louvers are not obstructed and completely open. Air
conditioners have a greater tendency to frost when the outside
temperature is relatively low or fan run on a low speed. This
may be prevented by adjusting the thermostat control knob to a
warmer setting (counter clockwise). Should frosting continue,
operate on LOW, MED, or HIGH FAN setting only until the
cooling coil is free of frost.
AFTER SHUTTING THE AIR CONDITIONER DOWN
WITH EITHER SELECTOR SWITCH OR THERMOSTAT,
WAIT AT LEAST TWO (2) MINUTES BEFORE RESTART-
ING. THIS ALLOWS THE REFRIGERANT PRESSURE
TO EQUALIZE AND COMPRESSOR TO START EASILY.
FAILURE TO FOLLOW THIS INSTRUCTION MAY CAUSE
CIRCUIT BREAKERS OR FUSES TO OPEN.
Heating Operation:
(With Optional Heat Kit Installed)
Note: This electric heater will not replace a furnace for heating
the RV in cold weather. The intent is to remove the chill on cool
days or mornings. The temperature rise across the heat strip
should be 5° to 7° degrees. If the temperature in the coach is 50°
degrees the temp coming out of the unit will be approximately
55° to 57°. On the hand this will feel cool and the user may not
think the unit is working.
A. Turn the selector switch to “OPT. HEAT”.
B. The heater will come on and begin heating.
C. When desired temperature level in RV is reached,
move the selector switch to off position or fan position.
Note: Thermostat does not control heater ON/OFF cycle.
Fan Operation
This will circulate the air in your RV without cooling or heat-
ing. There are three positions: HIGH FAN, MED FAN or LOW
FAN to select from, depending upon personal choice. “OFF”
POSITION: This is to turn unit off.
1.2 Analog Control System
This type of air conditioner controls can be ducted or have an
air distribution box with wall T-Stat.
Cooling Operation:
A. Place the Temperature Set Lever to the desired temperature
level (located at right side of thermostat).
B. Select fan speed that best satises your needs (switch lo-
cated at lower center of thermostat).
• High Speed: Selected when the maximum cooling and dehu-
midication are required.
• Low Speed: Selected when RV reaches desired comfort level
and needs to be maintained. Normally this speed is used for
nighttime operation
C. Select Auto/On Switch operation as follows: (switch lo-
cated at upper center of thermostat)
LOW COOL: Selected when room at desired com-
fort level and needs to be maintained. Normal-
ly this is speed used for night time operation.

11
• Auto Position: Air Conditioner fan runs whenever cooling is
required and stops whenever cooling is not required. (I.E.:
Temperature set point reached)
• ON Position: The fan will run continuously. The compressor
will turn ON and OFF to maintain set temperature.
D. Set the System Switch to cool position (located at the left
side of the thermostat). The air conditioner compressor will
now come on when cooling is required and cycle off when
the temperature level selected is reached.
Wait at least two (2) minutes before restarting the air condi-
tioner after shutting off with either the system switch or the
temperature set lever. This allows the refrigerant pressure in the
air conditioner to equalize and will allow the compressor to re-
start easily. Failure to follow this instruction may cause circuit
breakers or fuses to open. The analog system does not have a
built in time delay.
Furnace Operation:
(If Furnace is connected to control system)
A. Set the Temperature Set Lever to desired temperature level
(located on the right of thermostat).
B. Set the System Switch to furnace position (located on the
left side of thermostat). The furnace will now come on
when heat is required and cycle off when the temperature
level selected is reached.
Special Feature:
When thermostat:
A. Switch: is in the COOL, OFF or FURNACE position and
B. Auto/On Switch: is in the ON position, the air conditioner
fan will run continuously at selected fan speed to circulate
the air inside the RV.
Optional Feature:
Electric Heat Strip (If Unit so Equipped)
A. Set the Temperature Set Lever (located at right of thermo-
stat) to desired temperature level.
B. Set the System Switch (located at left side of thermostat)
to heat strip position. The unit’s heat strip will now come
“ON” and cycle “OFF” when the temperature level select-
ed is reached.
C. Move the FAN Auto/On Switch
1. Auto Position: Unit fan runs whenever heat is required and
stops whenever heating is not required.
2. ON Position: Unit fan runs continuously to circulate air
in RV.
The temperature rise across the heat strip should be 5° to 7°
degrees. If the temperature in the coach is 50 degrees the tem-
perature coming out of the unit will be approximately 55° to
57°. On the hand this will feel cool and the user may not think
the unit is working.
Heat Pump Operation
Note: The outside thermostat (change-over thermostat) will not
allow the heat pump to operate when outside temperatures are
below 40° (+/-2) Fahrenheit.
A. Set the Temperature Set Lever (located on the right of ther-
mostat) to desired temperature level.
B. Set the System Switch (located at the left side of thermo-
stat) to heat pump position. The compressor will now come
on when heating is required and cycle off when the tem-
perature level selected is reached. If the outside tempera-
ture is below 40° (+/-2) Fahrenheit, the heat pump will not
operate. If the RV is equipped with a furnace the System
Switch must be set to furnace for operation.
Frost Prevention
Heat pumps have a tendency to frost during operation when the
outside temperature is below 50° Fahrenheit with moderate hu-
midity conditions. It may be necessary to reverse the refriger-
ant cycle (switch to cooling mode) to clear frost off the outside
coil.
1.3 Comfort Control
This type of air conditioner controls can be ducted or have an
air distribution box with wall T-Stat. The Comfort Control Cen-
ter has been designed for you to easily operate all the air condi-
tioning and heating appliances found in your vehicle from one
location. In order to familiarize you with the operation of the
Comfort Control Center, the following diagram along with the
accompanying text will explain all the functional characteris-
tics of the system.
Controls
A. Liquid Crystal Display
The Comfort Control Center is equipped with a liquid crystal
display (LCD) that identies the mode of operation, the temper-
ature set-point, the zone identication and the fan speed. The
Comfort Control Center is designed to accept and control many
varied air conditioning and heating appliances. When you begin
to rst operate the Comfort Control Center, you will see that the
LCD readout will only show the options available based on the
appliances installed on the vehicle.

12
An incandescent light will illuminate the LCD area when a se-
lector button is pushed for easy reading at all times.
B. MODE SELECTOR BUTTON.
Modes of operation available are: OFF, FAN ONLY, COOL,
HEAT PUMP, FURNACE, HEAT STRIP, AGS and AUX.
HEAT. Remember, the LCD readout will only show the options
available based on the appliances installed on your vehicle. To
select the mode of operation, momentarily depress the MODE
push-button. You will need to continue to depress and release
the button until the desired mode is shown in the LCD readout
area on the Comfort Control Center. To determine the Comfort
Control Center options available to you, depress and release the
MODE push-button until it goes through all selections.
C. FAN SPEEDS.
Possible available fan speeds are: LOW, MEDIUM, HIGH and
AUTO. To select the desired fan speed, momentarily depress
the FAN push button. You will need to continue to depress and
release the FAN button until the desired fan speed is shown in
the LCD readout area of the Comfort Control Center.
D. Temperature Selector Buttons.
The temperature Set-point range is from 40° to 99° Fahrenheit
or 4° to 37° Celsius. Determination of Fahrenheit or Celsius
standard is done at the time of your manufacturer’s installation
of the Climate Control Center. To set the temperature at your
comfort level, simply depress and release the UP or DOWN
push-button until the desired temperature is shown in the LCD
readout area of the Comfort Control Center.
E. Zone Selector Button.
A ZONE is also established at the time of installation of your
Comfort Control Center. If you have one air conditioner, you
will have one ZONE. If your vehicle has more than one cool-
ing/heating system, depending on the manufacturing installa-
tion, you may have 2, 3 or 4 ZONES. Zones are dened and
preset by your installer/manufacturer. A zone is an area of cool-
ing/heating which is controlled independently within that area,
and regulated at the Comfort Control Center. A typical example
of a two zone application would be a vehicle with two air con-
ditioning systems, one in the front area (living room, kitchen)
and one in the back section (bedroom and bath). The front area
could be established as ZONE 1 and the back sect-
ion ZONE 2. You can select the desired temperature and fan
speeds for each zone independently, thereby keeping your bed-
room cooler than the front portion of the vehicle. To determine
the number of established zones in your vehicle, depress the
ZONE push-button. ZONE 1 will be the rst ZONE to appear
in the LCD readout. The ZONE number selected will begin to
ash and will ash for approximately 30 seconds or until an-
other ZONE has been selected. Continue to depress and release
the ZONE button until you see ZONE 1 reappear.
F. ON/OFF Switch.
The ON/OFF switch is located on the lower right hand edge of
the Comfort Control Center. Move the lever from side to side
to change status.
OPERATING THE DUO-THERM COMFORT CONTROL
CENTER
A. Fan Only Mode Of Operation
1. Begin by placing the power switch on the lower right hand
edge of the Control Center on the ON position. To do this,
simply move the lever to the right.
2. Momentarily depress and release the MODE push- button
until the FAN ONLY indicator on the Liquid Crystal Dis-
play (LCD) is illuminated.
3. Momentarily depress and release the FAN push-button
until the desired fan speed indicator (LOW, MED, HIGH,
AUTO) is illuminated. If your vehicle is equipped with a
heat pump your selection choice will be LOW, HIGH or
AUTO.
4. After approximately 5 seconds, the selected fan speed will
come on. The MODE and FAN speed you have selected
will remain shown in the LCD area of the Control Center
until you change your selection.
5. If your vehicle contains more than one ZONE, depress the
ZONE push-button to select ZONE 2, and repeat proce-
dures from step two above. Repeat entire procedure for
each additional zone.
1. Momentarily depress and release the MODE push-button
until the COOL indicator on the LCD is illuminated.
2. Depress and release the FAN push-button to select your
desired fan speed (LOW, MEDIUM, HIGH or AUTO). If
your vehicle is equipped with a heat pump your selection
choice will be LOW, HIGH or AUTO.
3. Depress and release the UP push-button to increase the
temperature or the DOWN push-button to decrease the de-
sired temperature. The nal selected SET-POINT will be
displayed in the LCD area of the Comfort Control Center.
4. After a delay of approximately 2 minutes the air condi-
tioner’s compressor will come on and the cooling process
will begin. Once the room temperature reaches the selected
SET-POINT, the compressor will cycle off. Once the Com-
fort Control Center senses the need for cooling, the com-
pressor will restart in approximately two minutes.
B. Cooling Mode Operation
A. Liquid Crystal Display
B. Mode Selector
C. Fan Speed Selector
D. Temperature Selector
E. Zone & Stage Selector
F. On/Off Switch
A. Continue to operate in the single selected fan speed or
B. Cycle OFF and ON with the compressor if the AUTO
fan speed has been selected.

13
5. If your vehicle contains more than one ZONE, depress the
ZONE push-button to select ZONE 2, and repeat proce-
dures from Step 1. Repeat entire procedure for each ad-
ditional zone.
C. Heat Pump Operation
1. Momentarily depress and release the MODE push-button
until the HEAT PUMP indicator on the LCD is illuminat-
ed.
2. If you have not previously set your fan speed, you may
do so by depressing and releasing the FAN push-button to
select the desired fan speed.
3. Depress and release the UP push-button to increase the
temperature or the DOWN push-button to decrease the de-
sired temperature. The nal selected SET-POINT will be
displayed in the LCD area of the Comfort Control Center.
4. After a delay of approximately 2 minutes the heat pump’s
compressor will come on and the heating process will be-
gin. Once the room temperature reaches the selected SET-
POINT, the compressor will cycle off. Once the Comfort
Control Center senses the need for heating, the compressor
will restart in approximately two minutes. At this point, the
fan will either:
A. Operate in the single selected fan speed or,
B. Cycle OFF and ON with the compressor if the AUTO
fan speed has been selected.
5. If your vehicle contains more than one ZONE, depress the
ZONE push-button to select ZONE 2, and repeat proce-
dures from Step 1 above. Repeat entire procedure for each
additional zone.
1. Momentarily depress and release the MODE push-button
until the FURNACE indicator on the LCD is illuminated.
2. The A/C fan does not operate in the FURNACE mode.
3. Depress and release the UP push-button to increase the
temperature or the DOWN push-button to decrease the de-
sired temperature. The nal selected SET-POINT will be
displayed in the LCD area of the Comfort Control Center.
4. The Duo-Therm air conditioning system will not operate
when the Comfort Control System is in the FURNACE
mode. Furnace operation over rides all other modes and
zones when selected. For cooling, change the MODE to
COOL.
5. If your vehicle contains more than one ZONE, depress the
ZONE push-button to select ZONE 2, and repeat proce-
dures from Step 1 above. Repeat entire procedure for each
additional zone.
Special Features built into the Heat Pump Comfort Control Sys-
tem
Aux. Heat
When in the HEAT PUMP mode, if the outside ambient tem-
perature is measured to be below 32° F. (+/-2) and the vehicle is
equipped with a furnace connected to the Comfort Control Cen-
ter, the control will automatically select the FURNACE opera-
tion and the HEAT PUMP will shut down. When this happens,
the AUX HEAT and the HEAT PUMP indicators on the LCD
will illuminate. Once the outside ambient temperature is mea-
sured above 38° F. (+/-2) , the control will return to the HEAT
PUMP operation and shut down the furnace if it is connected to
the Comfort Control Center.
Important: If vehicle is not equipped with a furnace no heat
will be available below 32° F. (+/-2). IF vehicle is equipped
with a furnace and it is connected to its own thermostat, it must
be manually turned ON and OFF for operation.
Defrost Cycle
compressor only no fan, this is the DEFROST cycle. During
the defrost cycle the hot refrigerant is sent to the outside coil to
melt the frost and ice. This also will build heat in the refriger-
ant. The refrigerant ow will then be returned to normal and,
after a 30 second delay will continue until the temperature is
greater than 42° F. (+/-2) or until the temperature becomes less
than 32° F. (+/-2), at which time the furnace will activate. Dur-
ing the defrost cycle, the DEFROST indicator on the LCD shall
be illuminated.
D. Furnace Mode
1. Momentarily depress and release the MODE push- button
until the HEAT STRIP indicator on the LCD is illuminat-
ed.
2. The fan will operate in LOW, MED or AUTO. You will not
be able to select HIGH speed when in the HEAT STRIP
mode. Depress and release the FAN push- button to se-
lect desired speed. If your vehicle is equipped with a heat
pump, your selection choice will be LOW and AUTO.
3. Depress and release the UP push-button to increase the
temperature or the DOWN push-button to decrease the
temperature. The nal selected SET-POINT will be dis-
played in the LCD area of the Comfort Control Center.
4. The electric heat strip will cycle ON and OFF per the tem-
perature SET-POINT displayed. The fan will either:
A. Continue to operate in the selected fan speed or,
B. Cycle OFF and ON with the heat strip if the AUTO fan
speed has been selected.
5. If your vehicle contains more than one ZONE, depress the
ZONE push-button to select ZONE 2, and repeat proce-
dures from Step 1 above.
E. Heat Strip Mode
Repeat entire procedure for each additional zone. The tem-
perature rise across the heat strip should be 5° to 7° de-
grees. If the temperature in the coach is 50° degrees the
temp coming out of the unit will be approximately 55° to
57°. On the hand this will feel cool and the user may not
think the unit is working.
This cycle is active during HEAT PUMP operation and allows
the heat pump to operate down to 32° F. (+/-2). When the out-
side ambient temperature is less than 42° F.. (+/-2) and greater
than 32° F. (+/-2), a defrost timing cycle will begin. The defrost
timing cycle will allow operation of the heat pump for 25 min-
utes. The fan will then be shut off, the refrigerant ow reversed
and run for 4-1/2 minutes

14
E. OPT. AUTOMATIC GENERATOR START (AGS)
On vehicles equipped with an optional AGS kit the vehicle
generator will automatically start when any zone calls for
cooling/heating and will shut off when all zones reach set
point.
1. Put the power switch in the ON position.
2. Momentarily depress and release the ZONE push-button
until AGS indicator appears on the LCD.
3. Momentarily depress and release the MODE push-but-
ton to select AGS status.
COMFORT CONTROL CENTER SPECIAL CONTROL FEA-
TURES
A. Auto Fan: When AUTO FAN is selected, the fan speed will
be determined by the mode you are in.
1. Cool Mode:
In the COOL mode, which is the air conditioning mode, the
fan will automatically select the speed depending upon the
difference between the temperature SET-POINT and the
room temperature. When that difference is:
8° or more The fan will operate on HIGH
4° to 8° The fan will operate on MED
4° or below The fan will operate on LOW
2. Cool Mode (Heat Pump)
If your vehicle is equipped with a Duo-Therm Heat Pump,
the fan will automatically select the fan speed depending
upon the difference between the temperature SET-POINT
and the room temperature. When the difference is:
8° or more The fan will operate on HIGH
Less than 8° The fan operates on LOW
3. Heat Pump Mode
When HEAT PUMP mode is selected, the fan will start
running on the LOW speed.
4. Heat Strip Mode
When HEAT STRIP mode is selected, the fan will start
running on the LOW speed.
5. Fan Only Mode
In the FAN ONLY mode, the fan will start running on the
LOW speed.
B. Refrigerant Compressor Time Delay
A time delay of approximately two minutes occurs any
time the compressor is required to begin the cooling or heat
pump cycle.
C. POWER INTERRUPTION
In the event that power to the air conditioner or control is
interrupted, the system will restart with the same settings
you have previously set.
D. ZONE CONTROL
The Duo-Therm Control Center will operate cooling and
heating appliances which your vehicle manufacturer has
designed to heat or cool different areas (ZONES) of your
RV. The Comfort Control Center will advise you if your
vehicle has multiple ZONES, by showing ZONE 1, 2 3
or 4 illuminated in the LCD readout. In the event your ve-
hicle has multiple zones designed, you have the freedom
of selecting the MODE of operation for each zone inde-
pendently. To change from one zone to another, depress
the ZONE push-button. Each time you depress and release
this push-button, the indicator will change the zone data
displayed. The zone number ashing indicates zone being
programmed. The zone number will ash for approximate-
ly 30 seconds unless another zone is selected or program-
ming has been completed. At this time the number will
stop ashing and the display light will go out. When all
zones have been programmed, the zones in operation will
be underlined. To program each zone, simply repeat the
programming steps shown in the operation section of this
manual.
Important: When shore power is avail-
able, AGS must be switched to the off position.
Important: The Comfort Control Center will pre-
vent operating FURNACE and COOL or FUR-
NACE and HEAT PUMP at the same time.
1.4 CCC 2
This type of air conditioner controls can be ducted or have an
air distribution box with wall T-Stat. The Comfort Control 2
has been designed to easily operate all the air conditioning and
heating appliances found in the vehicle from one location. In
order to familiarize you with the operation of the Comfort Con-
trol 2, the following diagram along with the accompanying text
will explain all the functional characteristics of the system.
The CCC 2 thermostat is equipped with an Oversized LCD Dis-
play with SMX Blue Lite Technology (a display you can read day
or night without turning on the lights) that identies the mode of
operation (OFF, Cool, Heat Pump, Fan, Heat Strip, Auto, & Fur-
nace or Aqua), temperature set-point, zone identication (1, 2, 3,
4), fan speed (Auto, Low, Med, High), program 1 and 2, inside
temperature, clock, ºF / ºC, compressor delay, lter maintenance.
The modes of operation viewed in the LCD will vary depending
on the systems installed.
A. Liquid Crystal Display
B. Operations
To turn ON the CCC 2 thermostat when the back light is off,
rst press any button to wake up the CCC 2 thermostat. Then
press and release the ON/OFF button. The LCD will display the
last programmed settings. To turn OFF the CCC 2 thermostat
press the ON/OFF button and release. Only the time of day will
display when the CCC 2 thermostat is in the OFF condition.
1. ON/OFF

15
2. Clock Setting
Press the CLOCK button to initiate the clock setting sub-
menu on the CCC 2 thermostat. When in this menu, the
hour digits will ash rst. The hour can be adjusted using
the or buttons. Press the CLOCK button again and
the minute digits will ash, allowing the minute setting to
be adjusted using the or buttons. Press it a third
time and the AM or PM icon will ash, allowing the AM
or PM setting to be adjusted using the or buttons.
Press it one more time to store the new time in memory and
exit the clock setting sub-menu.
3. Inside Temperature
4. Temperature format ºF / ºC
Press and hold the INSIDE TEMP button and the LCD will
display the current inside temperature recorded at the CCC
2 Thermostat (or at the optional remote indoor temperature
sensor) instead of the temperature set-point. The LCD will
also display “IN” to indicate that the inside temperature
is being displayed. When the INSIDE TEMP button is re-
leased, the LCD will return to the programmed temperature
setpoint.
Press the ºF / ºC button to switch between Fahren
heit and Centigrade format. ºF indicates Fahrenheit
and ºC indicates Centigrade.
5. Zone Selection
Press the Zone button to cycle the LCD display through
the available zone selections; Zone 1, Zone 2, Zone 3,
and Zone 4. Only the available zones installed within
system will display. Zones are established at the time of
the installation of Dometic CCC 2 thermostat. A zone is
an area of cooling/heating which is controlled indepen-
dently by the CCC 2 thermostat. The CCC 2 thermostat
allows for four zones (Air Conditioner/Heat Pump) to be
set up and run independent of each other. If you have
one air conditioner/heat pump installed, you will have
one zone. If the RV has more than one cooling/heating
system, you may have 2, 3, or 4 zones. Your CCC 2
thermostat will operate cooling and heating appliances
that your vehicle manufacturer/dealer has designed/in-
stalled to cool or heat specic areas (zones) of your RV.
The CCC 2 thermostat will advise you of the number of
zones in your RV. The zones are displayed 1, 2, 3, or 4
in the LCD readout. In the event your vehicle has mul-
tiple zones designed, you have the freedom of selecting
different modes of operations for each zone. To change
from one zone to another, press the ZONE push-button
on the CCC 2 thermostat. Each time the button is pressed
and released the indicator will change the zone data dis-
played. When the zones have been programmed, the
zones in operation will be displayed.

16
6. Mode Selection
Press the MODE button and the LCD will display the rst
available mode. Each successive press will advance to the
next available mode. Continue to press the MODE button
until the desired mode appears. Depending on the systems
installed, your choices will be OFF, COOL, AUTO, HP,
FURN or AQUA, HS, and FAN.
6. Fan Speed
Press the FAN button to select the desired fan speed. Each
successive press will advance to the next available speed.
Your selections will be Auto, LOW, MED, and HIGH. The
fan will run continuously during LOW, MED, and HIGH
fan settings. The fan will cycle on and off with the ther-
mostat on AUTO setting. When auto fan is selected the fan
speed will vary depending on the difference between the
temperature set-point and the room temperature. When the
difference is:
8º or more The fan operates on HIGH
5º to 7º The fan operates on MED
4º or less The fan operates on LOW
7. Temperature Set-Point
Press the or button to change the temperature set-
point. The temperature set-point is indicated by two digits
on the LCD. Press to increase and to decrease the
temperature set-point. The maximum set-point for the sys-
tem is 90º F. The minimum set-point is determined by the
active operating mode. For heating, the minimum is 40º F.
and minimum for cooling is 55º F.
C. Mode Descriptions
“OFF” - Off Mode
Displays OFF mode in a zone.
“COOL” - Cool Mode
In the COOL mode the system will cycle the compressor
ON and OFF based on the room air temperature and the
temperature set-point on the CCC 2 thermostat. When the
system calls for cooling there will be a delay of approxi-
mately two minutes. During this delay, the hour glass icon
will be displayed in the LCD. In auto fan, the fan will turn
ON rst followed by the compressor in approximately 15
seconds. In this mode there are 4 fan speed selections:
LOW: The fan operates continuously at low speed. The
compressor cycles On and OFF.
MED: The fan operates continuously at medium speed.
The compressor cycles ON and OFF.
HIGH: The fan operates continuously at high speed. The
compressor cycles ON and OFF.
AUTO: When auto fan is selected the fan speed will vary
depending on the difference between the temperature set-
point and the room temperature. In auto fan the compres-
sor and the fan will cycle ON and OFF with the thermo-
stat. See “Fan” on page 15 for information on auto fan.
The compressor shuts off rst followed by the fan in ap-
proximately 15 seconds.
“HP” - Heat Pump Mode
In the HP mode the system will cycle the compressor ON and
OFF based on the room air temperature and the temperature set-
point on the CCC 2 thermostat. When the system calls for heat-
ing there will be a delay of approximately two minutes. During
this delay, the hour glass icon will be displayed in the LCD. In
auto fan, the compressor will turn ON rst followed by the fan
in approximately 15 seconds. In this mode there are 4 fan speed
selections:
LOW: The fan operates continuously at low speed. The com-
pressor cycles On and OFF.
MED: The fan operates continuously at medium speed. The
compressor cycles ON and OFF.
HIGH: The fan operates continuously at high speed. The com-
pressor cycles ON and OFF.
AUTO: When auto fan is selected the fan speed will vary de-
pending on the difference between the temperature set-point and
the room temperature. In auto fan the compressor and fan will
cycle ON and OFF with the thermostat. The compressor shuts
off rst followed by the fan in approximately 15 seconds.
“HS” - Heat Strip Mode
In the HS mode the system will cycle the heat strip ON and
OFF based on the room air temperature and the temperature
set-point on the CCC 2 thermostat. In this mode there are 4 fan
speed selections:
LOW: The fan operates continuously at low speed. The heat
strip cycles On and OFF.
MED: The fan operates continuously at medium speed. The
heat strip cycles ON and OFF.
HIGH: The fan operates continuously at high speed. The heat
strip cycles ON and OFF.
AUTO: The fan operates in low speed and will cycle ON and
OFF with the thermostat.
“FAN” - Fan Mode
In FAN mode there are 4 fan speed selections:
LOW: The fan operates continuously at low speed.
MED: The fan operates continuously at medium speed.
HIGH: The fan operates continuously at high speed.
AUTO: The fan will be OFF.
“FURN” / “AQUA” - Furnace or Aqua Mode (Factory setting
is “FURN”)
To change the setting from “FURN” to “AQUA” or visa versa,
simultaneously press the up and down buttons. The LED
will display the selected option. In the FURN/AQUA mode the
system will cycle the RV’s furnace/aqua ON and OFF based on
the room air temperature and the temperature set-point on the
CCC 2 thermostat. The system can be congured to operate us-
ing an ON/OFF differential of either 1 degree F. or 2 degree F.
This feature is programmed during the system initialization. To
set the 1 degree differential, simultaneously press PROGRAM
button and up button (“dIF1” will appear in the display
while the buttons are pressed).

17
To set the 2 degree differential, simultaneously press the PRO-
GRAM button and the down button (dIF2” will appear in
the display while the buttons are pressed). In this mode there are
4 fan speed selections:
LOW: The fan operates continuously at low speed.
MED: The fan operates continuously at medium speed.
HIGH: The fan operates continuously at high speed.
AUTO: The fan is OFF.
“AUTO” - Auto Change Over Mode
In the AUTO mode the system will automatically change the
mode of operation from cool to heat or from heat to cool. In or-
der for this mode to operate, the zone being programmed must
contain either a heat pump, heat strip or furnace heating source.
When in the AUTO mode, all pre-programmed operations for
the heat pump, heat strip, and furnace will apply. Auto Change
Over Cooling: If the room temperature rises above the tempera-
ture set-point by 2 degrees, the air conditioner will turn ON
until the room temperature reaches the temperature set-point
at which time the air conditioner will cycle off. Auto Change
Over Heating: If the room temperature goes below the tempera-
ture set-point by 2 degrees, the available heat source will be
cycled ON until the room temperature reaches the temperature
set point at which time it will cycle OFF. If more than one heat
source is available on this zone, the priority for selecting the
heat source will be heat pump (rst), furnace (second), and heat
strip (third).
Zone Control
Zones are established at the time of the installation of your Do-
metic CCC 2 thermostat. A zone is an area of cooling/heating
which is controlled independently by the CCC 2 thermostat.
The CCC 2 thermostat allows for four zones (Air Conditioner/
Heat Pump) to be set up and run independent of each other.
If you have one air conditioner/heat pump installed, you will
have one zone. If your RV has more than one cooling/heating
system, you may have 2, 3, or 4 zones. Your CCC 2 thermostat
will operate cooling and heating appliances that your installer
has designed to cool or heat specic areas (zones) of your RV.
The CCC 2 thermostat will advise you of the number of zones in
your RV. The zones are displayed 1, 2, 3, or 4 in the LCD read-
out. In the event your vehicle has multiple zones designed, you
have the freedom of selecting different modes of operations for
each zone. To change from one zone to another, press the ZONE
push-button on the CCC 2 thermostat. Each time the button is
pressed and released the indicator will change the zone data dis-
played. When the zones have been programmed, the zones in
operation will be displayed.
Program 1 & 2
The Dometic CCC 2 thermostat can store two operating pro-
grams. Each program can be set on individual zones with dif-
ferent mode and time settings for each zone. For each event the
user can program the operating mode, fan speed, temperature
set-point, and the time of day for the event.
1. Select the zone to be programmed.
2. Select program 1 by pressing the PROGRAM button.
“PROG 1” icon will blink on the LCD display.
3. Press the CLOCK button to set the time of day for
program to start.
4. Press the MODE button to select the mode of opera
tion.
5. Press the FAN button to select the fan speed.
6. Press the PROGRAM button to save the “PROG” 1
settings. LCD will now show
“PROG 2”. To set program 2, repeat steps 3 - 5.
Press the Program button again to save programs in memory.
Depending on the time of day, program 1 or 2 will begin im-
mediately. For instance, if program 1 is set to begin at 10:00
AM and the time of day is 10:30 AM, program 1 will begin im-
mediately. On the other hand, if program 1 is set to 10:00 AM
and program 2 is set to begin at 6:00 PM and the time of day is
7:00 PM, program 2 will begin immediately.
When program 1 or 2 is operating, the “PROG 1 or 2” icon
will be displayed in the LCD. The zone will continue to oper-
ate in the programmed setting until the program is manually
cancelled. To cancel the program operation, press and hold the
PROGRAM button for 3 seconds. The zone will be restored to
normal operation.
CANbus Interface
The CANbus interface is designed to communicate between
the Dometic CCC 2 thermostat and a CAN (Controller Area
Network) protocol generator. Refer to the CANbus installation
instructions for more information on installation and operation
of the CANbus.
EXT Stage Select - Two Air Conditioner/Heat Pump Units (Se-
lect Models) On 1 Zone
This system can be congured to run two air conditioner/heat
pump units using the same temperature set-point for controlling
the comfort level in one zone.
D. Special Features

18
One unit is designated as the primary stage and the other unit is
designated as the secondary stage. The power module boards in
both units will use the same DIP switch selection for the Zone
(for example, both will be set to Zone 2). On the unit designated
“secondary” the power module board DIP switch identied as
“Ext Stage” must be set to the ON position in order to congure
the power module board for the on-demand secondary stage
operation (in this example Zone 2 and Ext Stage DIP switches
are in the ON position). In this stage conguration, the CCC 2
thermostat temperature set-point will be used for both the pri-
mary and the secondary stage air conditioner/ heat pump. Only
one indoor temperature sensor is required for this conguration
and it must be installed in the power module board congured
as the primary control. The turn ON time for the compressors
and fans will be controlled to ensure that compressors on the
system start one-at-a-time. A minimum delay of 20 to 30 sec-
onds is required between compressor starts.
Auto Generator Start (AGS)
On RV’s equipped with an optional AGS Kit, the vehicle gen-
erator will automatically start when any zone calls for cooling
and will shut off when zones reach set point. The Auto Genera-
tor Start (AGS) function will be implemented by an individual
power module board congured for this function by setting the
GEN Start DIP switch ON. On the AGS power module board
a relay shall be used to provide a start signal to the generator.
The normally open relay contacts are utilized and the closure
of these contacts provides the signal to start the generator. The
AGS relay shall be activated when any zone or stage requires
cooling, heat pump, or heat strip operation. When a zone calls
for heating, cooling or , the AGS relay shall be closed, followed
by a time delay to allow the generator to warm up after which
time the output relay will be activated on the zone that initiated
the heating, cooling request. When the heat/cool requests in all
zones have been satised, the AGS relay will open and the gen-
erator will shut-down.
Defrost Cycle (Heat Pump Models Only)
To avoid excessive frost formation on the outside coil and to
obtain maximum performance when the outside temperature is
less than 42º F. and greater than 30º F. (-1 °C), a defrost cycle
will be initiated. While operating in this temperature range the
compressor continuous run time is limited to 25 minutes. When
this time is accumulated, the fan will shut off, the refrigerant
ow will be reversed, and the compressor will continue to run
for 4.5 minutes. During this 4.5 minute period, the LCD will
toggle between HP and Defrost. The refrigerant ow will then
be reversed and after a 30 second delay the fan will resume op-
eration. This cycle will remove any frost formation on the out-
side coil. This cycle will repeat itself until the outside tempera-
ture is greater than 42º F. If the outside temperature becomes
less than 30º F. the heat pump will shut OFF and the auxiliary
heat (if provided) will turn on.
Auto Fan
When “AUTO” fan is selected, the fan speed will vary depend-
ing on the difference between the temperature set-point and the
room temperature. In “AUTO” fan, the compressor and fan will
cycle ON and OFF with the thermostat.
When the difference is:
8 °F / °C or more The fan operates on HIGH
5 to 7 °F / °C The fan operates on MED
4 °F / °C or less The fan operates on LOW
E. CCC 2 LCD Error Codes
When the system determines that one of the faults listed below
has occurred an error code will be displayed in the LCD for the
zone in which the error occurred. During normal operation, a
blinking zone number indicates a fault has occurred. The error
code is displayed in place of the
temperature set-point.
E1 Loss of communication between the CCC 2 thermostat and
all system power module boards. System will shut down. Loss
of communication between the CCC 2 thermostat and an indi-
vidual system power module board. The LED will display error
code E1 and the zone number that lost communication. Any
additional zones that lose communication will blink in addition
to the current zone.
E2 Open circuit or out-of-range Indoor Temperature Sensor.
All heat, cool, and dehumidify operation will be locked out.
Manual fan operation can continue.
E3 Shorted Indoor Temperature Sensor. All heat, cool, and de-
humidify operation will be locked out. Manual fan operation
can continue.
E4 Open circuit or out of range Outdoor Temperature Sensor
(Select Models). Heat pump and dehumidication operation
will be locked out. Air conditioner, furnace, heat strip, and fan
operation can continue to operate.
E5 Open circuit or out of range Freeze Sensor (Select Models).
Air conditioner and dehumidication operation will be locked
out. Heat pump, furnace, heat strip, and fan operation can con-
tinue to operate but displays the last temperature set-point.
E6 Open circuit Humidity Sensor (Select Models). Air condi-
tioner and dehumidication operation will be locked out. Heat
pump, furnace, heat strip, and fan can continue to operate.
E7 Loss of 120 VAC power to all power module boards on the
system. The system will shut down.
E8 Invalid zone conguration. The heat pump and heat strip
DIP switches are both set to the ON position in one
zone. Heat pump, heat strip, air conditioner, and dehumidify
operation will be locked out in the affected zone.

19
System Initialization
A system initialization will need to be performed by the install-
er after the system is installed.
• Make sure the Single Zone LCD thermostat is in the Off con-
dition.
• Press the “+” button and, while holding it, also press and hold
the On/Off Mode button for three seconds. LCD will show ―
― . Press the On/Off Mode button again to turn system off.
This completes the initialization.
Your Dometic Single Zone LCD thermostat has been pre-
programmed. Review settings below and adjust the settings
to your personal comfort level. Any time System Initiza-
tion is performed the Single Zone LCD T-stat will go to
default settings.
Heating
68 °F / 20 °C
Cooling
72 °F / 22 °C
Fan Speed Auto
Mode Off
Furnace Differential
2 °F
Programming & Operations
On/Off
To turn On the Single Zone LCD thermostat, press the On/Off
Mode button. The LCD will be activated. To turn Off the Single
Zone LCD thermostat press the On/Off Mode button and toggle
through the modes until the On/Off green LED is on. The LCD
will go out and the green LED will remain on for approximately
15 seconds, then go out.
Temperature Format ºF / ºC
Simultaneously press the “+” and “―“ buttons to toggle be-
tween Fahrenheit and Centigrade format. ºF indicates Fahren-
heit and ºC indicates Centigrade.
1.5 Single Zone Control
This type of air conditioner controls can be ducted or have an air
distribution box with wall T-Stat. The Single Zone Control has
been designed to easily operate the air conditioning and heating
appliances found in the vehicle from one location. In order to
familiarize you with the operation of the Single Zone Control,
the following diagram along with the accompanying text will
explain all the functional characteristics of the system.
The Single Zone LCD thermostat is equipped with both a liquid
crystal display (LCD) that identies the temperature set-point,
fan speed (Auto, Low, High), and F/C and green LEDs that indi-
cate the mode of operation (Off, Fan, Cool, Furnace, Heat Pump
or Heat Strip*). The
modes of operation available will vary depending on the system
installed in your RV. * Select models.
Features
• Liquid Crystal Display and Green LED Mode Indicators
• Auto Fan
• Indoor Temperature Display
• °F / °C Display
• Air conditioner can provide additional indoor air
circulation during furnace operation.
E9 Invalid zone conguration. The dehumidier DIP switch and
either the heat pump or heat strip DIP switches are set to the ON
position in one zone. Heat pump, heat strip, air conditioner, and
dehumidify operation will be locked out in the affected zone.
Inside Temperature
To display the Inside Temperature, the Single Zone LCD ther-
mostat must be in the Off Mode. Press either the “+” or “―”
button to display the Inside Temperature.

20
Quick Reference To Control Buttons
Mode Selection
Press the On/Off Mode button to advance through the available
modes. Each successive press will advance to the next avail-
able mode. The green LED will indicate the mode selected. De-
pending on the systems installed, your choices will be Off, Fan,
Cool, Furnace, Heat Pump or Heat Strip.
Fan Speed
Press the On/Off Mode button until the fan green LED is lit.
The LCD will show “Lo” (Low), “Hi” (High) or “Au” (Auto).
Press the “+” or “―” button to select the desired fan speed.
Temperature Set-Point
Press the “+” or “―” button to change the temperature set-
point. The temperature set-point is indicated by two digits on
the LCD. Press the “+” to increase and the “―” to decrease the
temperature setpoint. The maximum set-point for the system is
90º F. The minimum set-point is determined by the active op-
erating mode. For heating, the minimum is 40º F and minimum
for cooling is 55º F.
Mode Description
“Off” - Off Mode
When selected, the LCD will be blank and the Off green LED
will turn on for 15 seconds, then it will turn off.
“Cool” - Cool Mode
In the Cool mode the system will cycle the compressor On and
Off based on the room air temperature and the temperature set-
point on the Single Zone LCD thermostat. The fan will turn on
rst followed by the compressor in approximately 2 minutes. In
this mode there are 3 fan speed selections:
Lo - (LOW): The fan operates continuously at low speed. The
compressor cycles ON and OFF.
Hi - (HIGH): The fan operates continuously at high speed. The
compressor cycles ON and OFF.
Au - (AUTO): When auto fan is selected the fan speed will vary
depending on the difference between the temperature set-point
and the room air temperature. In auto fan the compressor and
the fan will cycle On and Off with the thermostat.
/