Sony SmartWatch 2 User guide

Category
Tablets
Type
User guide

This manual is also suitable for

User guide
SmartWatch 2
SW2
Contents
Getting started..............................................................................3
Introduction........................................................................................3
Overview............................................................................................3
Charging............................................................................................3
Turning on and off..............................................................................4
Setting up your SmartWatch 2...........................................................4
Wrist strap..........................................................................................6
Learning the basics......................................................................7
Using the touchscreen.......................................................................7
Using the keys...................................................................................8
Home screen......................................................................................8
Status and notifications.....................................................................8
Clock screen......................................................................................8
Basic settings.............................................................................10
Basic settings...................................................................................10
Date and time...................................................................................10
Setting a screen lock.......................................................................10
Resetting and restarting...................................................................10
Using your SmartWatch 2..........................................................12
Viewing event notifications..............................................................12
Calling..............................................................................................12
Messaging........................................................................................13
Music...............................................................................................13
Support and maintenance.........................................................15
Updating your SmartWatch 2..........................................................15
Support website...............................................................................15
Important information................................................................16
Protecting your SmartWatch 2 from water......................................16
Legal information.............................................................................17
2
This is an Internet version of this publication. © Print only for private use.
Getting started
Introduction
With SmartWatch 2, you can keep track of what happens on your Android™ device
without taking it out of your pocket or bag. When a call, message or other notification
comes in, your SmartWatch 2 vibrates. When your SmartWatch 2 is not connected to
your Android™ device, SmartWatch 2 works as a regular watch, and some
applications on your SmartWatch 2 are still available.
Overview
1. Light sensor
2. Power key
3. Actions key
4. Home key
5. Back key
6. Touchscreen
7. NFC detection area
8. Port for charger/USB cable
Charging
Before using your SmartWatch 2 for the first time, you need to charge it for
approximately 30 minutes. Sony chargers/USB cables are recommended.
3
This is an Internet version of this publication. © Print only for private use.
To charge your SmartWatch 2
1
Plug one end of the USB cable into the charger or into the USB port of a
computer.
2
Plug the other end of the cable into the Micro USB port of your SmartWatch 2.
A charger may not be included at purchase in all markets.
Turning on and off
To turn on or off your SmartWatch 2
Press and hold down until the SmartWatch 2 vibrates.
Setting up your SmartWatch 2
The quickest way to get started with your SmartWatch 2 is by connecting it to your
Android™ device using NFC. If your Android™ device does not support NFC, you
can connect using the standard Bluetooth
®
pairing method in your Android™
device’s settings.
4
This is an Internet version of this publication. © Print only for private use.
Setting up using NFC
To set up using NFC
To save data costs, make sure that your Android™ device is connected to a Wi-Fi
®
network.
1
Android™ device: Make sure that the NFC function is turned on and that the
screen is active and unlocked.
2
SmartWatch 2: To turn on your SmartWatch 2, press and hold down .
3
Place the Android™ device over the back of your SmartWatch 2 so that the
NFC detection area of each device touch each other. If you already have an
updated Smart Connect application, your device automatically jumps to step 6.
4
Android™ device: Follow the instructions that appear on the screen to install
or update the Smart Connect application from Google Play™.
5
To connect, place the Android™ device over the back of your SmartWatch 2
so that the NFC detection area of each device touch each other.
6
Android™ device: Follow the instructions on the screen to install the
SmartWatch 2 application from Google Play™. SmartWatch 2 then restarts
automatically to finish setting up.
Setting up using the Bluetooth
®
function
If your Android™ device does not support NFC, you can connect using the standard
Bluetooth
®
pairing method in your Android™ device’s settings.
To set up using the Bluetooth
®
function
To save data costs, make sure that your Android™ device is connected to a Wi-Fi
®
network.
1
Android™ device: Make sure that you have the Smart Connect application,
which is available on Google Play™, installed on your Android™ device.
2
Android™ device: Make sure that the Bluetooth
®
function is turned on.
3
SmartWatch 2: To turn on your SmartWatch 2, press and hold down .
4
Android™ device: Scan for Bluetooth
®
devices, then select SmartWatch 2 in
the list of available devices under Settings > Bluetooth.
5
Android™ device: Follow the instructions on the screen to install the
SmartWatch 2 application from Google Play™. SmartWatch 2 then restarts
automatically to finish setting up.
5
This is an Internet version of this publication. © Print only for private use.
Adding features to your SmartWatch 2
Install additional applications for your SmartWatch 2 to add more features. For
example, you can use your SmartWatch 2 to control the music player in your
Android™ device.
To install an application from your Android™ device
1
Drag the status bar downwards, then tap SmartWatch 2.
2
Select an application in the list. To search for an application which is not in the
list, tap Search for applications, then follow the instructions that appear on the
screen.
3
When Google Play™ opens, tap install.
4
Follow the instructions that appear on the screen to install the application. An
icon of the application is shown on the screen of SmartWatch 2 after the
installation is completed.
Some applications require additional setup from within the SmartWatch 2 application on your
Android™ device.
Wrist strap
You can use any standard 24 mm (0.9 inch) wrist strap with your SmartWatch 2.
To change the wrist strap
Use a screwdriver to push down on the spring bars to detach and attach a
wrist strap.
Be careful not to scratch your SmartWatch 2 when you are using a screwdriver.
6
This is an Internet version of this publication. © Print only for private use.
Learning the basics
Using the touchscreen
Tapping
Open or select an item.
Mark or unmark a checkbox or option.
Touching and holding
Activate an item-specific menu.
Swiping
Swipe up or down a list.
Swipe left or right, for example, between Home screen panes.
7
This is an Internet version of this publication. © Print only for private use.
Using the keys
Power
Switch between the Home screen and the clock screen
Back
Go back to the previous screen within the application or close the application.
Home
Go to the Home screen.
Actions
Open a list of options available in the current screen or application.
Home screen
The Home screen contains all the applications on your SmartWatch 2. You can
arrange the application icons on the Home screen alphabetically or by most to least
used.
To go to the Home screen
Press
.
To browse the Home screen
Swipe left or right.
To open an application from the Home screen
Swipe left or right to find the application, and then tap the application.
When SmartWatch 2 is disconnected from your Android™ device, some applications are
unavailable and the icons are then shown in grey.
To arrange applications on the Home screen
1
From the Home screen, tap
.
2
Select an option.
Status and notifications
The status bar shows you what's going on in your SmartWatch 2. It shows, for
example notification icons, the battery status and connection status.
Status and notification icons
The following status and notification icons may appear on the screen of your
SmartWatch 2:
Battery status
The battery is charging.
The Bluetooth® function is activated and SmartWatch 2 is connected to
your Android™ device.
The Bluetooth® function is activated and SmartWatch 2 is disconnected
from your Android™ device.
New notifications
Home screen pane indicator
Clock screen
SmartWatch 2 shows the clock screen if you do not use it for a short while, so you
can use it as a standalone watch.
8
This is an Internet version of this publication. © Print only for private use.
There are several different watch faces to choose between. You can also create a
watch face in your own style.
To go to the clock screen
Briefly press .
The clock screen backlight turns on if you press briefly.
To exit the clock screen
Press twice.
To choose a watch face
1
From the Home screen, find and tap
.
2
Tap Watchfaces, then swipe left or right to view the watch faces available.
3
Tap the watch face you want to use.
To edit the watch face from your Android™ device
1
Drag the status bar downwards, then tap SmartWatch 2 > Edit watchfaces.
2
Tap
beside the watch face that you want to edit. To add a new watch face,
tap .
3
To add a new watch or a widget on the watch face, tap Watches or Widgets
and select an option.
4
To move an item on the watch face, drag and drop it to the desired location.
5
Tap
. The watch face is saved automatically.
9
This is an Internet version of this publication. © Print only for private use.
Basic settings
Basic settings
View and change settings from the Settings menu on your SmartWatch 2 directly.
To open the settings menu
From the Home screen, find and tap .
To adjust the screen brightness
1
From the Home screen, find and tap
.
2
Find and tap Display > Brightness.
3
Drag the slider to adjust the brightness.
Set a lower brightness to save battery power.
To enable or disable the vibrate mode
1
From the Home screen, find and tap
.
2
Find and tap Vibrate.
3
Drag the slider to enable or disable vibrate mode.
Date and time
Your SmartWatch 2 automatically syncs date and time with your Android™ device,
but you can choose to set time and date manually instead.
To set date and time manually
1
From the Home screen, find and tap
.
2
Find and tap Date & time > Set date & time.
3
Unmark the Sync with device checkbox if it is marked.
4
Tap Set date or Set time.
5
Swipe up or down to adjust the date or time.
6
Tap
.
Setting a screen lock
You can set a PIN code to lock the screen on your SmartWatch 2.
It is very important that you remember your PIN. If you enter the PIN incorrectly
several times, you have to follow the instructions on your SmartWatch 2 to perform a
factory data reset, and this deletes all data on your SmartWatch 2.
To create a screen unlock PIN
1
From the Home screen, find and tap
.
2
Find and tap Security > Pin, then tap .
3
Enter a four-digit PIN, then tap
.
4
Confirm the four-digit PIN, then tap .
To disable the screen unlock PIN
1
From the Home screen, find and tap
.
2
Find and tap Security > None.
3
Enter your PIN, then tap
.
Resetting and restarting
You can reset your SmartWatch 2 to its factory default settings. This deletes all
personal data on your SmartWatch 2. This action is sometimes necessary if your
SmartWatch 2 stops functioning properly.
10
This is an Internet version of this publication. © Print only for private use.
You can also force your SmartWatch 2 to shut down in situations where it hangs or
won't restart normally. When you restart your SmartWatch 2 after forcing it to shut
down, no settings or personal data is deleted.
To perform a factory data reset
1
From the Home screen, find and tap
.
2
Find and tap Reset SmartWatch.
3
To confirm, tap
.
To force your SmartWatch 2 to shut down
Press and hold down until your SmartWatch 2 turns off.
11
This is an Internet version of this publication. © Print only for private use.
Using your SmartWatch 2
Viewing event notifications
Once you have installed them, many of your SmartWatch 2 apps send notifications
that you can view on your SmartWatch 2. When a notification arrives, SmartWatch 2
vibrates and the application appears on the screen. If SmartWatch 2 is disconnected
from your Android™ device, you can only view notifications which were received
before disconnecting. See
Adding features to your SmartWatch 2
on page 6.
You can receive the following kinds of notifications from your Android™ device on
the screen of your SmartWatch 2:
Missed calls
Text messages
Emails
Updates from social networking services, such as Facebook™ and Twitter™
Calendar event reminders
Gmail
For some applications, such as Facebook™, you have to first log in to the service in the
SmartWatch 2 application on your Android™ device.
To view an event notification
When a notification arrives, tap the application icon on the Home screen.
Calling
When you are using a wireless Bluetooth
®
headset, you can use SmartWatch 2 as a
remote to handle phone calls easily. To make calls from your SmartWatch 2, you
must install the Call application for SmartWatch 2. See
Adding features to your
SmartWatch 2
on page 6.
You can make a call from your SmartWatch 2 by manually dialling a phone number,
by tapping a number saved in your contact or favourite list, or by tapping the phone
number in your call log view.
To make a call by dialling
1
From the Home screen, find and tap
.
2
Tap .
3
Enter the number of the recipient and tap .
To make a call from the Contacts
1
From the Home screen, find and tap
.
2
Tap
.
3
Tap the first letter of the name of the contact.
4
Find and tap the contact.
5
Tap
.
Receiving calls
To answer a call
Tap .
The answer function only appears in SmartWatch 2 when it is connected to a Sony Android™
device. For non-Sony Android™ devices, answer the call from your headset or Android™
device.
To decline a call
Tap
.
12
This is an Internet version of this publication. © Print only for private use.
To mute your Android™ device when a call is coming in
Tap .
You can only mute the ringtone emitted by your Bluetooth
®
headset by tapping the mute
button on your Android™ phone or tablet.
To reject a call with a predefined message
1
When a call arrives, tap Reject with message.
2
Select a message, then tap
.
Ongoing calls
To change the ear speaker volume during a call
Tap or .
Using the call log
You can use the call log to check your missed, received and dialled calls, and to
call the listed numbers directly.
Call log icons
Missed call
Received call
Dialled call
To view your call log
1
From the Home screen, find and tap .
2
Tap
.
To call a number from your call log
1
From the Home screen, find and tap
.
2
Tap , then select the number that you want to call.
3
Tap > .
Messaging
To read your text messages on your SmartWatch 2, you need to install the
Messaging application for SmartWatch 2. See
Adding features to your SmartWatch 2
on page 6. You can also use SmartWatch 2 to initiate a call to the sender, or to reply
with a predefined message or emoticons.
To reply to a message
1
From the message you want to reply to, tap
> .
2
Tap
and select a predefined message, or tap and select an emoticon.
3
To send the message, tap .
To call a message sender
1
From the Home screen, find and tap
.
2
Tap the message that you want to reply to with a call.
3
Tap
> .
Music
Once you've installed the Music application for your SmartWatch 2, you can use
SmartWatch 2 to control most music player applications in different Android™
devices. See
Adding features to your SmartWatch 2
on page 6.
13
This is an Internet version of this publication. © Print only for private use.
To play a song
1
From the Home screen on your SmartWatch 2, find and tap .
2
Tap .
To adjust the audio volume
When music is playing, tap
or .
To move between tracks
Swipe left or right.
14
This is an Internet version of this publication. © Print only for private use.
Support and maintenance
Updating your SmartWatch 2
Update your SmartWatch 2 to the most recent software version to get optimal
performance and the latest enhancements.
To update the Smart Connect application from your Android™ device
1
From your Home screen, tap
.
2
Find and tap Smart Connect, then tap > App info.
3
Tap > Check for updates.
4
If an update is available, follow the instructions that appear on the screen.
To minimise data charges, make sure that your Android™ device is connected to a Wi-Fi®
network.
To update the SmartWatch 2 application from your Android™ device
1
From your Home screen, tap .
2
Find and tap Play Store.
3
In the list of installed applications, find and tap SmartWatch 2.
4
If an update is available, follow the instructions that appear on the screen.
To minimise data charges, make sure that your Android™ device is connected to a Wi-Fi®
network.
Support website
To view the support website from your Android™ device
1
From the Home screen on your SmartWatch 2, find and tap .
2
Find and tap Support > Support site. The support website is opened on your
Android™ device.
15
This is an Internet version of this publication. © Print only for private use.
Important information
Protecting your SmartWatch 2 from water
To maximise the water resistance of your SmartWatch 2, the cover for the micro USB
port must be firmly closed.
Avoid exposing your SmartWatch 2 to environments with excessive dust or moisture.
Normal wear and tear along with damage to your SmartWatch 2 can reduce its ability
to resist dust or moisture.
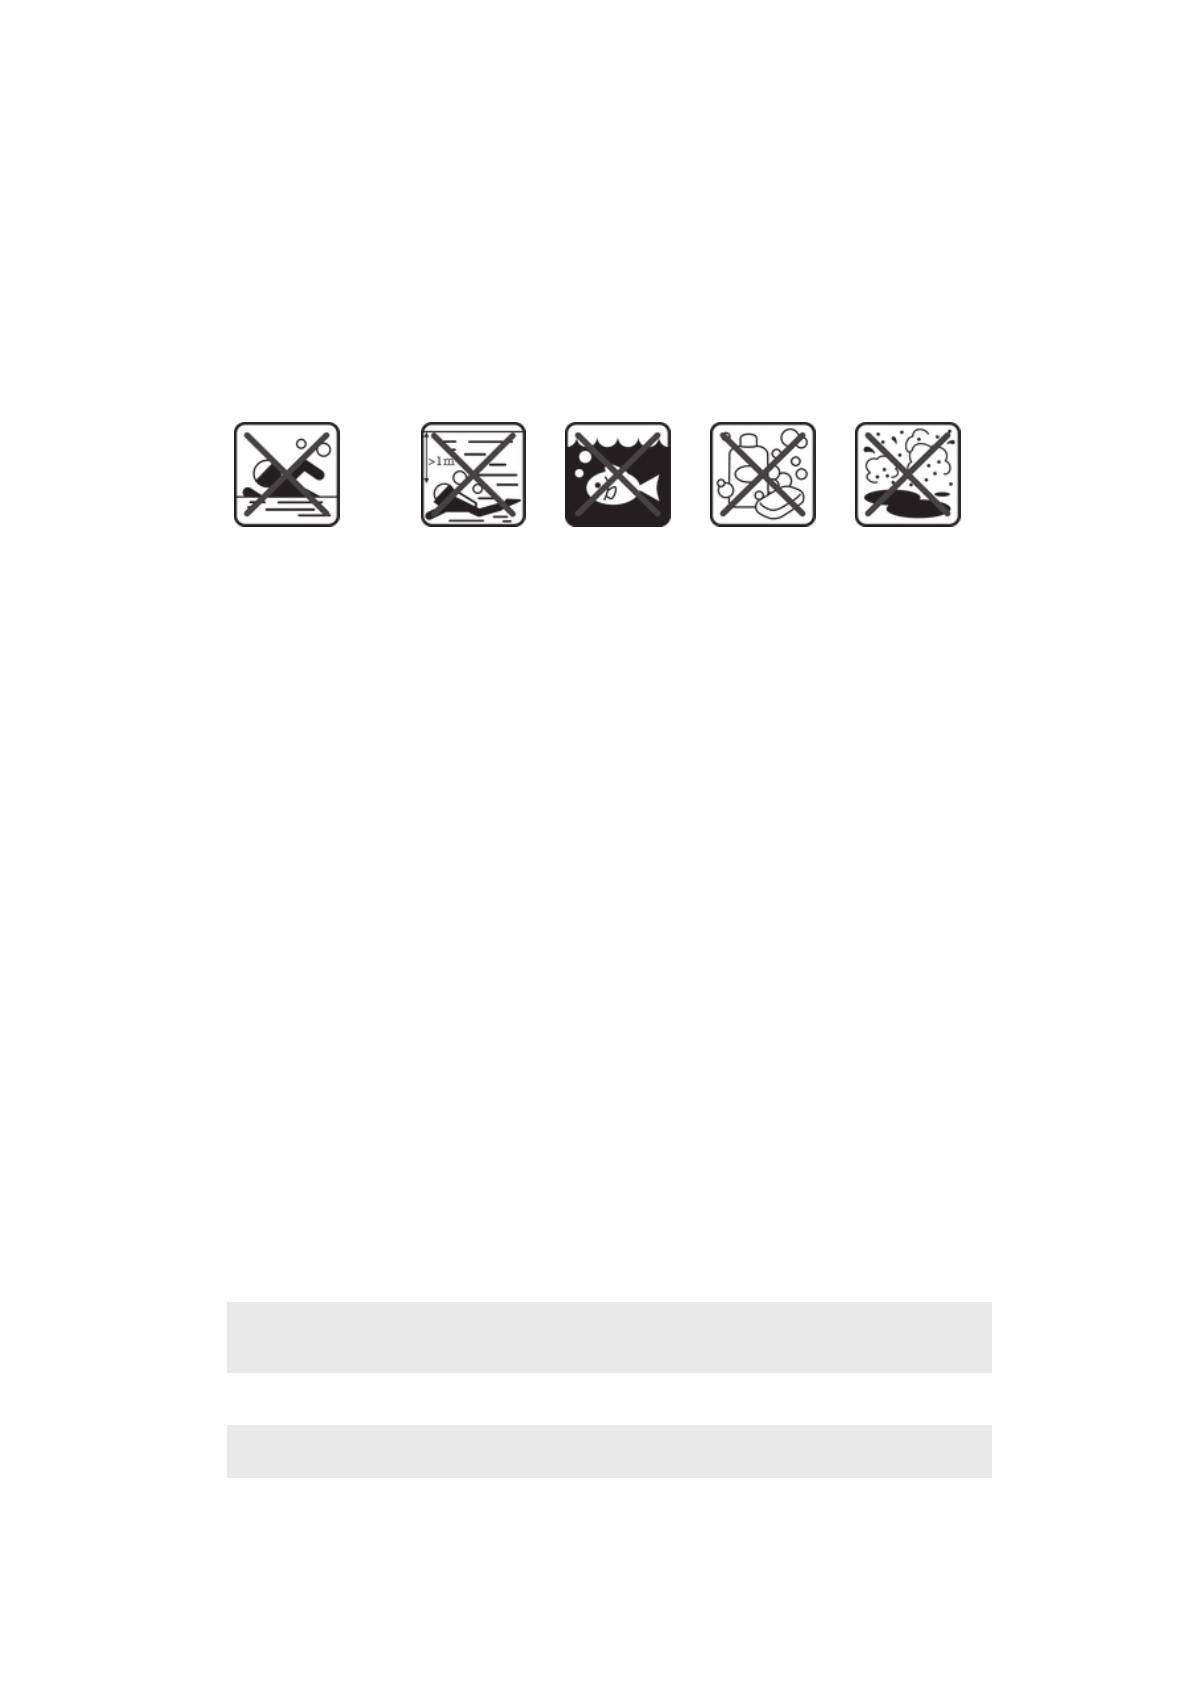
Do not use your SmartWatch 2 in the following conditions:
Swimming pool Diving Salt water Other liquid
chemicals
Sand/mud
Your SmartWatch 2 is waterproof and dust resistant in compliance with the Ingress
Protection ratings IP57 (see details below). Always firmly attach the micro USB port
cover to ensure the water and dust resistance of the device. If liquid is detected
inside the device, for example, underneath the cover, your warranty will be void.
Never submerge your device in salt water or let the micro USB port come in contact
with salt water. Also, never expose the device to any liquid chemicals, or to moist
environments with extreme high or low temperatures. The waterproof ability of the
micro USB port is not guaranteed in all environments or conditions. After using the
device in water, dry off the areas around the micro USB port cover.
All compatible accessories, including chargers and micro USB cables, are not
waterproof and dust resistant on their own.
Your warranty does not cover damage or defects caused by abuse or improper use
of your device. If you have any further questions about the use of your products, refer
to our Customer support service for help.
IP (Ingress Protection) rating
Your SmartWatch 2 has an IP rating, which means it has undergone certified tests to
measure its resistance levels to both dust and water. The first digit in the two-digit IP
rating indicates the level of protection against solid objects, including dust. The
second digit indicates how resistant the device is to water. The higher the numbers,
the higher the respective protection.
Your SmartWatch 2 is waterproof and dust resistant in compliance with the Ingress
Protection ratings IP57 (see details below). These ratings mean that your device is
dust resistant and is protected against the effects of submersion. You can therefore
use the device in dusty environments, when your fingers are wet, and in extreme
weather conditions, for example, when it’s snowing or raining, or when humidity
levels are high. See the table below for more details.
Resistance to solid objects and dust
Resistance to water
IP0X. No special protection IPX0. No special protection
IP1X. Protected against solid objects > 50 mm in
diameter
IPX1. Protected against dripping water
IP2X. Protected against solid objects > 12.5 mm in
diameter
IPX2. Protected against dripping water when tilted
up to 15 degrees from normal position
IP3X. Protected against solid objects > 2.5 mm in
diameter
IPX3. Protected against spraying water
16
This is an Internet version of this publication. © Print only for private use.
IP4X. Protected against solid objects > 1 mm in
diameter
IPX4. Protected against splashing water
IP5X. Protected against dust; limited ingress (no
harmful deposit)
IPX5. Protected against water jet spray
IP6X. Dust tight IPX6. Protected against heavy jet spray
IPX7. Protected against the effects of immersion
IPX8. Protected against submersion
Legal information
SonySW2
Prior to use, please read the
Important information
leaflet separately provided.
This User guide is published by Sony Mobile Communications AB or its local affiliated company, without any
warranty. Improvements and changes to this User guide necessitated by typographical errors, inaccuracies of
current information, or improvements to programs and/or equipment, may be made by Sony Mobile
Communications AB at any time and without notice. Such changes will, however, be incorporated into new
editions of this User guide.
All rights reserved.
©Sony Mobile Communications AB, 2013
Publication number: 1277-5616.2
Interoperability and compatibility among Bluetooth
®
devices varies. Device generally supports products
utilizing Bluetooth spec. 1.2 or higher, and Headset or Handsfree profile.
Sony is the trademark or registered trademark of Sony Corporation. Bluetooth is the trademark of the
Bluetooth (SIG) Inc. and is used under license. All other marks are the property of their respective owners. All
rights reserved.
All product and company names mentioned herein are the trademarks or registered trademarks of their
respective owners. Any rights not expressly granted herein are reserved. All other trademarks are property of
their respective owners.
Visit
www.sonymobile.com
for more information.
All illustrations are for illustration only and may not accurately depict the actual accessory.
Declaration of Conformity forSW2
We, Sony Mobile Communications AB of
Nya Vattentornet
SE-221 88 Lund, Sweden
declare under our sole responsibility that our product
Sony type RD-0050
and in combination with our accessories, to which this declaration relates is in
conformity with the appropriate standards EN 300 328:V1.7.1, EN 301 489-17:V2.1.1,
EN 301 489-3:V1.4.1 and EN 60 950-1:2006 +A11:2009+A1:2010 following the
provisions of, Radio Equipment and Telecommunication Terminal Equipment
directive 1999/5/EC.
Lund, July 2013
Anders Grynge
Director, Head of Global Type Approval
We fulfil the requirements of the R&TTE Directive (1999/5/EC).
17
This is an Internet version of this publication. © Print only for private use.
FCC Statement
This device complies with Part 15 of the FCC rules. Operation is subject to the following two
conditions: (1) This device may not cause harmful interference, and (2) This device must
accept any interference received, including interference that may cause undesired operation.
Any change or modification not expressly approved by Sony may void the user's authority to operate the
equipment.
This equipment has been tested and found to comply with the limits for a Class B digital device, pursuant to
Part 15 of the FCC Rules. These limits are designed to provide reasonable protection against harmful
interference in a residential installation. This equipment generates, uses and can radiate radio frequency
energy and, if not installed and used in accordance with the instructions, may cause harmful interference to
radio communications. However, there is no guarantee that interference will not occur in a particular
installation.
If this equipment does cause harmful interference to radio or television reception, which can be determined by
turning the equipment off and on, the user is encouraged to try to correct the interference by one or more of
the following measures:
Reorient or relocate the receiving antenna.
Increase the separation between the equipment and receiver.
Connect the equipment into an outlet on a circuit different from that to which the receiver is connected.
Consult the dealer or an experienced radio/TV technician for help.
AVISO IMPORTANTE PARA MÉXICO
La operación de este equipo está sujeta a las siguientes dos condiciones: (1) es
posible que este equipo o dispositivo no cause interferencia perjudicial y (2) este
equipo o dispositivo debe aceptar cualquier interferencia, incluyendo la que pueda
causar su operación no deseada.
Para consultar la información relacionada al número del certificado, refiérase a la
etiqueta del empaque y/o del producto.
Industry Canada Statement
This device complies with RSS-210 of Industry Canada.
Operation is subject to the following two conditions: (1) this device may not cause interference, and (2) this
device must accept any interference, including interference that may cause undesired operation of the device.
This Class B digital apparatus complies with Canadian ICES-003.
Cet appareil numérique de la classe B est conforme à la norme NMB-003 du Canada.
Avis d’industrie Canada
Le présent appareil est conforme aux CNR d'Industrie Canada applicables aux appareils radio exempts de
licence.
L'exploitation est autorisée aux deux conditions suivantes: (1) l'appareil ne doit pas produire de brouillage, et,
and (2) l'utilisateur de l'appareil doit accepter tout brouillage radioélectrique subi, même si le brouillage est
susceptible d'en compromettre le fonctionnement.
18
This is an Internet version of this publication. © Print only for private use.
1 / 1

Sony SmartWatch 2 User guide

Category
Tablets
Type
User guide
This manual is also suitable for

Ask a question and I''ll find the answer in the document

Finding information in a document is now easier with AI

Ask the document