Page is loading ...

2018+ Jeep JL Wrangler LED Sidemarker
Installation Guide
4
Thank you for your purchase of this unique product for your Jeep JL
Wrangler! With this plug-and-play LED Sidemarker, you will be able
to upgrade your factory sidemarker to a brighter, more modern
appearance on the road. This product is a direct replacement for
your factory sidemarker.
Tools Needed: needle-nose pliers, pick tool, 10mm socket, 8mm socket,
T27 Torx bit, trim removal tool, razor blade
See inside for further instructions.
Scan the QR code to link to our installation video online!
NEED MORE HELP?
We’ve taken the time to test our products on your vehicle.
We can guarantee compatibility and tment the rst time. No
guessing game! If you need more help with installation, watch
our step-by-step video to walk you through the process.
(314) 205-3033 WWW.DIODEDYNAMICS.COM 1
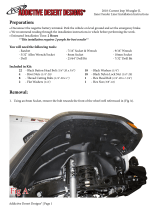
1. Remove the four tree clips holding the
fender liner in place inside the wheel well
using a plastic trim removal tool.
Tip: if you have trouble removing any of the
tree clips, start to remove it with the plastic trim
removal tool and then use needle-nose pliers to
remove it fully.
10. Test the LED Sidemarker for function
and then resecure the DRL bracket by
reinstalling the three T27 bolts and two
10mm bolts.
11. Resecure the fender liner by reinstalling
the four tree clips, two 8mm bolts, and one
10mm bolt.
12. Using the included push rivet, replace
the one-time push rivet you removed from
the side of the vehicle.
Note: the included replacement push rivets
are reuseable.
Tip: we recommend removing the pin from
the rivet and using a screwdriver, knife, or
razor blade to hollow out the inside of the rivet
slightly to allow the pin to slide in smoothly.
Repeat the steps on the other side of the
vehicle to complete the installation.
DD5068 Jeep JL Sidemarker Clear (set) DD5069 Jeep JL Sidemarker Amber (set)
DD5070 Jeep JL Sidemarker Smoked (set)
This installation guide is for the following SKU:
PP0073

See back for further instructions.
2(314) 205-3033 WWW.DIODEDYNAMICS.COM 3
2. Using a pick tool, remove the push rivet
near the sidemarker on the side of the
vehicle. Insert the pick tool into the center
of the push rivet and apply pressure to
release it. Then using the pick tool, pull the
rivet out.
Note: this is a one-time use rivet and will be
replaced with the push rivet included with the
kit.
3. Remove the Philips head rivet directly
underneath the DRL using a plastic trim
removal tool.
4. Remove the two 8mm bolts and one
10mm bolt holding the fender liner in place.
5. Pull the fender liner back to gain access
to the DRL/sidemarker bracket. Remove
the three T27 bolts and loosen the two
10mm bolts holding the bracket in place.
6. To gain access to the sidemarker, pull
back on the fender liner and pull the DRL
bracket down and out to release it.
7. Disconnect the factory sidemarker wiring
harness. To do so, use a pick tool to gently
separate the connectors.
8. Loosen the bolt holding the factory
sidemarker in place using a T27 Torx bit.
9. Remove the factory sidemarker and
install your new Diode Dynamics LED
Sidemarker. Secure the bolt you previously
loosened using a T27 Torx bit. Connect the
wiring harness to the factory connector.
/


