Page is loading ...

Installation Instructions
Questions, problems, missing parts? Before returning to your retailer, call our customer
service department at 1-888-509-3438, 8:00 am - 5:00 pm, EST, Monday - Friday.
You may also contact us anytime at customerservice@novalis-intl.com

Manufactured by Novalis Intl. | P: 888-509-3438 | E: techsupport@novalis-intl.com | Revised on: 11.22.21 | Page 2
TABLE OF CONTENTS
Tools Needed...............................................................................................................................................................3
Important Information...................................................................................................................................................4
Floor Substrate Preparation.........................................................................................................................................5
Floor Installation Instructions........................................................................................................................................6
Wall Substrate Preparation...........................................................................................................................................7
Wall Installation Instructions........................................................................................................................................8
Care and Maintenance.................................................................................................................................................9
Warranty.......................................................................................................................................................................10

Manufactured by Novalis Intl. | P: 888-509-3438 | E: techsupport@novalis-intl.com | Revised on: 11.22.21 | Page 3
TOOLS NEEDED
PART DESCRIPTION
A Knee Pads
B Safety Glasses
C Cut-Resistant Safety Gloves
D HEPA-Filtered Vacuum
E Dust Mask
F Paint Roller & Floor/Wall Primer
PART DESCRIPTION
G Three-Section Wall Roller with Extendable
Handle (~9 in. Wide) or
Three-Section 100 lb. Floor Roller
H Pencil
I Speed Square
J Tape Measure
K Utility Knife with Blades
L 6-foot and 1-foot Straight Edge or Level
TOOLS NEEDED
A
B
E
GHI
F
C
D
JK
L
PRIMER

Manufactured by Novalis Intl. | P: 888-509-3438 | E: techsupport@novalis-intl.com | Revised on: 11.22.21 | Page 4
IMPORTANT INFORMATION
Limitations:
Style Selections Peel & Stick Vinyl is a luxury vinyl oor and wall tile that is designed to be installed in
residential indoor applications only. Style Selections must be installed over an approved substrate that is
properly primed with a suitable primer - failure to do so could result in adhesion issues. Avoid prolonged
exposure to direct sunlight or other heat sources where temperatures will exceed 90° F (32° C), as damage or
deformation may occur. Use non-rubber backed entrance matting at all outdoor entrances, as this will improve
air quality and reduce maintenance. If required or concerned, immediately contact the technical department at
1-888-509-3438 or [email protected] for assistance.
Warning:
All local, state, and federal regulations must be followed; this includes the removal of in-place asbestos (oor
covering and adhesive) and any lead-containing material. The Occupational Safety and Health Administration
(OSHA) has exposure limits for people exposed to respirable crystalline silica; this requirement must be followed. Do
not use solvent or citrus-based adhesive removers. When appropriate, follow the Resilient Floor Covering Institute’s
(RFCI) Recommended Work Practice for Removal of Existing Floor Covering and Adhesive. Always wear safety
glasses and use respiratory protection or other safeguards to avoid inhaling any dust. The label, installation, and
maintenance instructions along with the technical data sheet, limited warranty and any appropriate Safety Data
Sheet (SDS) of all products must be read, understood, and followed before installation commences. If the substrate
or suboor fails for any reason, then the oor covering limited warranty is void.
Site Conditions & Storage:
The tile, adhesive and accessories must be stored in dry indoors conditions between 40° F - 90° F (4° C - 32° C).
Do not store outside (even in containers) and do not stack pallets. The installation area must be fully enclosed and
weather tight. Protect the adhesive and tile from excessive temperature uctuations. Use permanent or temporary
HVAC systems to control the site condition. The temperature must be between 60° F to 80° F (16° C to 27° C)
and constant ( ±5° F) for 48-hours before, during and after the installation. The ambient relative humidity must be
between 35% and 65% and 10° F above dew point, with temperatures rising – dew point calculators are available on
the Internet. Failure to ensure these conditions are met could aect adhesion and product stability.
Documentation:
Record and le the measured and observed site conditions and test results, including all photographs and
corrective measures. Maintaining this documentation, along with the original invoice and any labor receipts throughout
the warranty period, is recommended, as this will be required in the unlikely event of a claim.

Manufactured by Novalis Intl. | P: 888-509-3438 | E: techsupport@novalis-intl.com | Revised on: 11.22.21 | Page 5
FLOOR SUBSTRATE PREPARATION
Radiant Heating Substrates:
When installing oor covering over a substrate that contains a radiant heating system, ensure the radiant heat does
not directly contact the oor covering and is set at the correct “in-service” temperature for 48-hours prior, during and
after the installation. The radiant heat may be gradually increased or decreased to maintain the correct “in-service”
site conditions.
Note: Ensure the temperature of the radiant heating system does not exceed 85°F (29°C).
Flatness:
Check all substrates for atness - all areas should be smooth and at. The recommended atness tolerance is < 1/8-
in. gap (2 x U.S. quarters) underneath a 6-ft. straight level and < 1/16-in. gap (1 x U.S. quarter) under a 1-ft. level.
Make any necessary and appropriate adjustments to the substrate before installation.
Concrete Substrates:
All concrete must be clean and free of contaminates. If required, using a moisture-resistant leveling or patching
compound, following the product instructions. Do not install if hydrostatic pressure is visible, present or suspected. If
a chemical adhesive remover has been used, contact the technical department.
All concrete slabs must be (and remain) surface dry and at least 28-days old. Refer to the primer manufacturer’s
instructions regarding concrete substrate preparation.
Wood Substrates:
All wooden suboors and substrates must be dry and in compliance with all federal, state and local building codes,
have at least 18-in. of well-ventilated air space below. If necessary, install an underlayment grade plywood with a
minimum thickness of 1/4-in. on the surface. The underlayment must be installed in the opposite direction to the
suboor, following the product instructions. Refer to the primer manufacturer’s instructions regarding wood substrate
preparation.
Note: Plywood is porous, therefore the seams may telegraph through any exible resilient ooring, due to the natural
expansion and contraction from humidity changes. This is not covered by the product limited warranty.
Gypsum Substrates:
All gypsum substrates must be smooth, at, dry, structurally sound, rmly bonded to the suboor and free of
contaminates. Refer to the primer manufacturer’s instructions regarding gypsum substrate preparation.
Unsuitable Substrates:
These include, but are not limited to: any oating or loose oor coverings, hardwood, carpet, cushion vinyl, rubber,
cork, foam, asphalt tile; any substrate with visible mold, mildew, or fungi and any substrate in wet areas, such as
inside showers and saunas; substrates that have been coated with a varnish or oil-based, enamel, paint, primer-
sealer or stain-blocker; and substrates made of Masonite™, chipboard, wafer board, berboard, particleboard,
construction-grade plywood, CDX, OSB (including AdvanTech™), Lauan, cement board or any non-underlayment
grade panels must be removed and replaced or covered with an underlayment grade plywood. Do not use pressure-
treated or re-retardant plywood. Do not install directly over adhesive residue. Do not install in recreation vehicles,
campers or boats.
Note: Electing to install over any existing oor covering releases the manufacturer from any responsibility regarding
the suitability and continued performance of the product, including any resulting eect on the new oor covering,
such as indentations and adhesive failure.
Hard-Surface Substrates:
All hard-surface tile, such as ceramic, porcelain or marble tile, must be patched with a moisture-resistant leveling
or patching compound, following the product instructions. All grout lines must be lled, smooth and ush with the
surface of the tile, in order to prevent telegraphing and adhesion issues.
Other Subfloors/Substrates:
These may be acceptable. However, they must be smooth, at and remain dry, without contaminates and be
structurally sound.

Manufactured by Novalis Intl. | P: 888-509-3438 | E: techsupport@novalis-intl.com | Revised on: 11.22.21 | Page 6
FLOOR INSTALLATION INSTRUCTIONS
Priming & Cleaning:
Clean the substrate using a HEPA ltered vacuum, then apply the rst coat of a suitable latex-based ooring primer
(not included), following the product instructions. The selected primer must be designed for use with self-adhering
vinyl ooring. Once the rst coat of the primer has dried, apply a second coat of primer in a perpendicular direction
to the rst coat and allow to dry. Clean the primed substrate directly before ooring installation using a HEPA ltered
vacuum.
Acclimation:
Depending on the temperature of the oor covering, an extended acclimation period may be required. Check the
temperature of the oor covering using a non-contact, infrared thermometer - the oor covering must be at the same
temperature as the required site conditions (± 2° F) before installation.
Grouting:
If the product has a micro-beveled edge, the ooring may be grouted. During installation, leave a consistent gap
around all four sides of the tile or plank – the gap should be created using appropriate tile spacers and should be
1/16-in., 1/8-in. or 3/16-in. wide. Remove the spacers just before rolling and grout the joints using a exible grout
specically made for vinyl oor covering. Follow the product instructions regarding its application and cleaning.
Note: Any grout residue left on the surface will eect product maintenance and is not covered under the warranty.
Layout:
Determine the ideal installation pattern and direction. Measure the width of each end of the area, then calculate and
mark your starting line with a pencil, which should be near the center of the room. Calculate the width of the last row –
if it is less than half the width of the oor covering, adjust your starting line by half the width of the ooring. Make sure
all pencil markings are bold and clear so that they can be seen through the primer - do not use a pen or permanent
marker. It is recommended that plank end joints be staggered randomly by at least 8 in. to avoid an undesirable “stair
stepped” or “H joint” pattern. Tiles are recommended to be installed either in a brick-bond or a 1/3rd o-set pattern.
Cutting:
To cut the oor covering, measure and mark the surface with a pencil, then carefully score the surface a few times
using a sharp utility knife along the side of a speed square. Snap the piece downwards to complete cut.
Installation:
Mix oor covering from several boxes to ensure a consistently random appearance. During the installation, inspect
each piece for visible defects, including damage, gloss, color, or shade variations. Do not install any oor covering
with visible defects or damage, as removal, suboor repair and replacement labor costs will not be covered.
Remove the release paper on the bottom of the oor covering and discard immediately in a trash can or bag. Follow
the layout and starting line and carefully position each piece accordingly, keeping all joints snug without compressing
the material. Check to ensure the starting row is straight - the acceptable straightness tolerance is within 1/16-in. for
lengths over 20-ft. or 1/32 in. for lengths under 20-ft.
After the rst installation section is completed, roll the entire area slowly, across the width then length, using a using
a wall/laminating three-section roller with extendable handle and your body weight or a 100 lb. three-section roller.
Failure to roll correctly may result in bond failure. Repeat this process for the remainder of the installation. Remove
all adhesive from the surface using a small amount of 70% Isopropyl alcohol and a clean cloth.
Protection:
For furniture, use only polyurethane, silicon or felt glides (replaced > 3-times a year), keeping them clean and grit-
free – all glides should be ≥ 1-in.2, especially on heavy furniture. Use chair mats underneath rolling chairs or soft
“W-type” wheels. Use non-rubber-backed entrance matting at all outdoor entrances, as this will improve air quality
and reduce maintenance. Do not drag heavy or sharp objects directly across the surface - use hard surface “sliders”
(available at Lowe's). For areas that may be subjected to standing water on the surface, such as bathrooms with
a bath or shower, the perimeter of the installation must be properly sealed using a 100% silicon caulk to prevent
water from getting beneath the ooring. To avoid excessive fading or discoloration from direct sunlight exposure, use
appropriate window treatments.

Manufactured by Novalis Intl. | P: 888-509-3438 | E: techsupport@novalis-intl.com | Revised on: 11.22.21 | Page 7
WALL SUBSTRATE PREPARATION
Flatness:
Check all substrates for atness - all areas should be smooth and at. The recommended atness tolerance is < 1/8-
in. gap (2 x U.S. quarters) underneath a 6-ft. straight level and < 1/16-in. gap (1 x U.S. quarter) under a 1-ft. level.
Make any necessary and appropriate adjustments to the substrate before installation.
Drywall Substrates:
All drywall substrates must be smooth, at, dry, structurally sound, rmly anchored to studs and free of contaminates.
All seams, holes, cracks, and other voids in all existing drywall substrates must be lled with an appropriate gypsum-
based patch or joint compound and sanded smooth. New or repaired drywall must be primed using a suitable PVA
primer and allowed to fully dry/cure before installation.
New plaster walls and paint must be at least 30 days old, to allow for proper curing. Clean new plaster with diluted
vinegar and water (1-1) and allow to dry.
Existing painted walls must be lightly sanded using ne sandpaper or steel wool, then wiped clean with a damp cloth
and allowed to dry prior to installation. Dirt and grease must be removed by washing with a suitable detergent and
warm water, then be allowed to dry.
Unsuitable Substrates:
Do not install tile over wallpaper, wall coverings, wall panels, aking paint, adhesives or any other unstable and/or
unsuitable material. These include, but are not limited to: hardwood, rubber, cork and foam; any substrate with visible
mold, mildew, or fungi and any substrate in wet areas, such as inside showers and saunas; substrates that have been
coated with a varnish or oil-based, enamel, paint, primer-sealer or stain-blocker; and substrates made of Masonite™,
chipboard, wafer board, berboard, particleboard, mahogany-based plywood, construction-grade plywood, CDX,
OSB (including AdvanTech™), Lauan, berglass-reinforced plastic panels (FRP), cement board, CMU, brick and
mortar. Any non-underlayment grade panels must be removed and replaced or covered with a suitable product. Do
not use pressure-treated or re-retardant plywood. Do not install directly over adhesive residue. Do not install in
recreation vehicles, campers or boats.
Note: Electing to install over any existing wall covering releases the manufacturer from any responsibility regarding
the suitability and continued performance of the product, including any resulting eect on the new oor covering,
such as indentations and adhesive failure.

Manufactured by Novalis Intl. | P: 888-509-3438 | E: techsupport@novalis-intl.com | Revised on: 11.22.21 | Page 8
WALL INSTALLATION INSTRUCTIONS
Acclimation:
Depending on the temperature of the product, an extended acclimation period may be required. Check the temperature
of the product using a non-contact, infrared thermometer - the product must be at the same temperature as the
required site conditions (± 2° F) before installation.
High-Heat Equipment & Electrical Connections:
Do not install within 4-in. (10-cm) of any heat source, such as boilers, wall-mounted exchangers or radiators
and baseboard heating systems. Ensure that open ranges and cook-tops are at least 8-in. (20-cm) away from
the installation. Ensure all enclosed ovens, stoves, toasters, toaster ovens, fryers, and other high-heat cooking
equipment are at least 2-in. (6-cm) away from the installation.
The power supply to all electrical outlets, light switches and other electrical xtures in the installation area should be
turned o at the main junction box so that all outlet and light switch cover plates can be safely removed. All tiles must
be cut to t around all junction boxes so that all cut edges are covered by the cover plate. Any associated electrical
work must be performed by a qualied electrician.
Layout:
Determine the ideal installation pattern and direction - it is recommended that the installation pattern be balanced,
with equal tile sizes around the entire perimeter. Measure the width of each end of the area, then calculate and mark
your starting line with a pencil, which should be near the center of the wall. Calculate the width of the last row – if it is
less than half the width of the tile, adjust your starting line by half the width of the tile. Make sure all pencil markings
are bold and clear so that they can be seen - do not use a pen or permanent marker. It is recommended that plank
end joints be staggered randomly by at least 8 in. to avoid an undesirable “stair stepped” or “H joint” pattern. Tiles
are recommended to be installed either in a brick-bond or a 1/3rd o-set pattern.
Cutting:
To cut the oor covering, measure and mark the surface with a pencil, then carefully score the surface a few times
using a sharp utility knife along the side of a speed square. Snap the piece downwards to complete cut.
Installation:
Mix tile from several boxes to ensure a consistently random appearance. During the installation, inspect each piece
for visible defects, including damage, gloss, color, or shade variations. Do not install any oor covering with visible
defects or damage, as removal, suboor repair and replacement labor costs will not be covered.
Remove the release paper on the bottom of the tile and discard immediately in a trash can or bag. Follow the layout
and starting line and carefully position each piece accordingly, keeping all joints snug without compressing the
material. Check to ensure the starting row is straight - the acceptable straightness tolerance is within 1/16-in. for
lengths over 20-ft. or 1/32 in. for lengths under 20-ft.
After the rst installation section is completed, roll the entire area slowly, across the width then length, using a using
a three-section wall roller with extendable handle and your body weight. Failure to roll correctly may result in bond
failure. Repeat this process for the remainder of the installation. Remove all adhesive from the surface using a small
amount of 70% Isopropyl alcohol and a clean cloth.
When nished, replace any wall trim, cove base, or moldings. If hanging pictures or other objects on the wall after
installation, pre-drill through the tile to avoid damage.

Manufactured by Novalis Intl. | P: 888-509-3438 | E: techsupport@novalis-intl.com | Revised on: 11.22.21 | Page 9
CARE & MAINTENANCE
Regular Cleaning:
Wipe, dust-mop or vacuum the material to remove any dirt or grit – do not use a vacuum with a beater bar. Damp-mop
or wipe the material as often as required using a clean cloth, a at microber mop or a spray mop or a at microber
spray mop. We recommend a pH neutral, lm-free and streak-free cleaner concentrate (diluted with potable water),
available at Lowe's. Make sure to change the cloth or mop pad as often as required.
Precautions:
Do not perform any maintenance procedures on wall installations for 72-hours. Remove all metal objects before
conducting maintenance and prohibit foot trac until the oor is dry. Do not use dust mops treated with oils or
silicones, acetone, strong alkaline cleaning agents, multi-surface cleaners, vinegar/ammonia/ citrus oil solutions,
scouring powder, strong solvents, or abrasive cleaning pads, as these can damage the ooring. Do not wet mop
or allow cleaning solutions to puddle or pool on the surface of the material. The application of a oor-nish is not
recommended and will change the maintenance protocol.

Manufactured by Novalis Intl. | P: 888-509-3438 | E: techsupport@novalis-intl.com | Revised on: 11.22.21 | Page 10
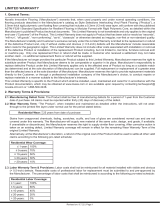
LIMITED WARRANTY
1. General Terms:
Novalis US, LLC. (“Manufacturer”) warrants that, when used properly and under normal operating conditions, the products
described in the Manufacturer’s catalog as Style Selections Peel and Stick Luxury Vinyl Wall and Floor Tile (“Product”), a glue
down vinyl tile. The Product is a Luxury Vinyl oor covering (LVT/LVP) that is pre-coated with a hot-melt adhesive. The Product
will conform to the published Product technical documents. All installation outside of these parameters shall void this Limited
Warranty.
This Limited Warranty is not transferable and only applies to the original end-user (“Customer”) of the Product. This Limited
Warranty does not apply to Product that has been sold or resold as “seconds”, “mill-run”, “o goods”, “non-conforming”, “as-is”,
“closeouts” or otherwise denoted as irregular, non-rst or non-standard quality.
The Manufacturer’s liability and Customer’s exclusive remedy under this Limited Warranty is limited to the replacement or refund
of the defective Product and, only if without visible and obvious (> 0.5-inch) defects will the Manufacturer include reasonable
labor costs for the geographic region. This Limited Warranty does not include other costs associated with installation or removal
of the defective Product or installation of the replacement Product including, but not limited to, lost time, furniture removal and/
or overtime pay. Only one replacement oor or refund shall be made. A Customer who received a settlement may not make
another claim - no additional replacement oors or refund will be supplied.
If the Manufacturer no longer provides the particular Product subject to this Limited Warranty, Manufacturer reserves the right to
substitute another Product that Manufacturer deems to be comparable or superior in its place. Manufacturer’s responsibility to
replace defective Product under this Limited Warranty applies only to the aected area of Product so long as a suitable match
(as determined and at the sole discretion of Manufacturer) can be supplied. Full replacement or replacement of a greater area
than the aected area is at the sole discretion of Manufacturer. Manufacturer reserves the right to provide replacement materials
directly to the Customer, or through a professional installation company of the Manufacturer’s choice, to conduct repairs or
replace materials in a manner suitable to the Manufacturer’s interests.
This Limited Warranty is specic to the Product which shall be installed, used, maintained and cared for in accordance with the
Product documentation, which may be obtained at www.lowes.com or are available upon request by contacting techsupport@
novalis-intl.com or 1-888-509-3438.
2. Warranty Terms & Provisions:
2.1. Manufacturing Defect Term: The Product shall be free of manufacturing defects for a period of 1-year from the Customer
date of purchase. All claims must be reported within thirty (30) days of discovery of the defect.
2.2. Wear Warranty Term: “The Product”, when installed and maintained as detailed within the instructions, will not wear-
through to the printed lm layer under normal use for 15 years from date of purchase.
2.3. Wear Warranty Provisions: Stains from unapproved chemicals, fading, scratches, scus, and loss of gloss are considered
normal use and are not covered under this warranty. The Manufacturer will supply new material of the same color, design,
and grade, if available; if unavailable or discontinued, the Manufacturer reserves the right to supply similar oor covering.
After corrective action is taken on an existing defect, Limited Warranty coverage will remain in eect for the remaining Wear
Warranty Term of the original Limited Warranty.
Alternatively, at the Manufacturer’s discretion, a refund of the original cost of the Product shall be used to settle all other valid
claims according to the following pro-rated schedule:
Residential Wear Coverage:
≤ 2 years: 100%
≤ 10 years: 70%
> 10 years: 50%
> 15 years: 0%
2.4. Labor Warranty Term & Provisions: Labor costs shall not be reimbursed for all material installed with visible and obvious
(> 0.5-inch) defects. Reasonable costs of professional labor for replacement must be submitted to and pre-approved by
the Manufacturer. The percentage of labor costs that shall be reimbursed is according to the following pro-rated schedule:
Residential Labor Coverage:
≤ 2-years: 100%
≤ 10-years: 50%
> 10-years: 0%
2.5. Waterproof Warranty: The Product will not be materially impaired when exposed to wet or damp cleaning, surface spills
and/or tracked in water for the length of the Wear Warranty. This does not include water emergencies.
2.6. Petproof Warranty: The Product surface coating provides scratch and stain resistance (such as feces, urine and/or vomit)
from domestic household pets, such as cats and dogs, provided that pet claws are routinely cut and led.

Manufactured by Novalis Intl. | P: 888-509-3438 | E: techsupport@novalis-intl.com | Revised on: 11.22.21 | Page 11
3. Warranty Terms & Provisions:
This Limited Warranty does not apply to nor cover nonconformities that are caused by, result from or arise in connection
with any of the following conditions:
• Non-Compliance with applicable Product requirements and technical data. Any Product that has been subjected
to site conditions, substrate conditions, installation methods, maintenance procedures and/or conditions of use that are
not in strict conformity with the associated Technical Data Sheets, Installation Instructions, Maintenance Documents and
any other relevant technical documents.
• Non-Compliance with applicable industry guidelines. Substrate preparation must be performed in accordance with
all related ACI, ASTM, NWFA and RFCI guidelines.
• Installation of Product with any third-party adhesive not explicitly recommended or approved by Novalis US, LLC. The
use of unapproved adhesives excludes any warranty coverage of adhesive performance is-sues, including but not
limited to bond strength, shrinkage, expansion, peaking, ledging, curling, doming and/or the ability of the adhesive
to control the dimensional stability of the oor covering. This also excludes any associated material and labor costs
associated with third-party adhesives.
• Installation of Product with unapproved installation materials, methods or tools, including but not limited to the
recommended underlayment type, repair products and all accessories.
• Cracking, warping, delamination, curling, or other phenomena caused by excessive heat sources, such as prolonged
direct sunlight, radiators, self-cleaning ovens and high-heat equipment.
• Fading or discoloration of the surface due to excessive UV/IR exposure.
• Stains from tracked carpet dyes, fertilizers, coal, tar, driveway sealers, oil, permanent markers, or other such contaminates.
• Substrate failure, movement or imperfections, including improper atness, smoothness or damage.
• Hazing or nish-related issues caused by the grout and or residue when used with the Product.
• Heavy static loads (>1,500 lbs.) and heavy point loads, such as foot trac with stiletto heels, spikes or skates, dropped
items, improper oor protectors and furniture feet/rests or oor protection and furniture feet/rests that do not make
adequate at contact with the oor covering.
• Heavy rolling loads (> 1,500 PSI) with metal wheels, hard H-type wheels or any other wheel types that do not make
adequate, at contact with the oor covering.
• Damage caused by mechanical issues, intentional abuse, misuse, negligence, structural damage, seismic activity,
ooding, res, and other emergencies, natural disasters or any circumstances beyond the reasonable control of the
Seller.
• Damage or excessive wear caused by improper maintenance dirt, grit, and abrasive debris from not using appropriate
walk-o mats at all outdoor entrances.
• Any resulting health issues or property damage resulting from organic growth resulting from any type of water trapped
beneath the oor covering and the latent organic material found within it, which may sponsor organic growth, such as
mold, mildew, and fungi.
• Normal shade, color, gloss/sheen, or embossing texture variation, including variations between installed ooring and
physical ooring samples or printed marketing materials.
• Excessive moisture and alkalinity from the suboor or substrate.
• Excessive topical water caused by broken or leaking plumbing, structural leaks, sink overow, ooding, weather
conditions and other water emergencies.
• Installations removed or replaced prior to inspection by an authorized Novalis representative.
4. Slip Resistance Warning:
Walking is an enormously complex activity involving many muscles, bones and nerves, as well as kinesthetic sensory information.
There are several signicant factors that directly aect slip resistance properties, such as the type, texture and surface structure
of oor covering, surface contaminates, type of shoe soles and the walker’s weight, age, gait, tness level, awareness, and
vision. There are no published requirements or acceptable limits for Static Coecient of Friction (SCOF) or Dynamic Coecient
of Friction (DCOF) values within the resilient ooring industry, though there may be for other ooring types. While independent
test results are available, that does not purport to address any safety concerns of slip resistance, the accuracy of all test
methods, safety thresholds, or the measuring apparatus’ (tribometers). This includes factors outside of the reasonable control of
the Manufacturer, such as Product maintenance. No warranty for any slip resistance properties can be provided.
Note: Walking on any vinyl oor covering in socks or similar is not recommended, especially on stairs.
5. Warranty Claims:
If, within the applicable warranty period identied in Article 2.1 and 2.2, the Customer discovers any problems or defects in the
Product that may be covered by this Limited Warranty, the Customer must notify the distributor or the Manufacturer directly at
1-888-509-3438 (option 2) or [email protected]. All claims must include a completed claim form, along with any associated
photos, invoices, pre-installation testing reports and all independent inspection reports conducted after problems or defects are
observed or suspected.

Manufactured by Novalis Intl. | P: 888-509-3438 | E: techsupport@novalis-intl.com | Revised on: 11.22.21 | Page 12
All claims must be reported within thirty (30) days of discovery of the problem or defect. If Manufacturer determines that the
Product is covered by this Limited Warranty, then Manufacturer shall, at its sole option, replace the nonconforming Product or
refund the appropriate percentage of the purchase price and labor cost paid for each defective Product for the aected area,
per the associated pro-rated schedule. No warranty claims will be processed if received more than thirty (30) days after the
applicable warranty period has ended.
Manufacturer or its designated representative shall have the right to examine the Product and the ooring, including the right
to test the ooring and/or substrate at the installation site, with respect to any Product that is the subject of a warranty claim.
Any removal of installed Product prior to such examination will void any and all warranties. Manufacturer may require additional
testing or verication of any tests conducted or obtained by the Customer.
4. Warranty Disclaimer:
The warranties set forth herein are exclusive and in lieu of all other warranties or representations, express or implied,
arising by law or custom, including the implied warranties of merchantability and tness for a particular purpose. No
agent, sales representative, dealer, distributor, contractor, installer, architect or designer has the authority to increase
or alter seller’s obligations under this warranty. This Limited Warranty does give you specic legal rights; you may also
have other rights, which may vary from state to state.
4. Limitation of Liability:
The aggregate cumulative total liability of Manufacturer hereunder, whether for breach of warranty or contract,
indemnication, tort (including negligence), or otherwise, shall not exceed the original purchase price of the
nonconforming Product. Manufacturer assumes no liability for labor costs in the installation or replacement of any
Product with visible and obvious (> 0.5-inch) defects. In no event shall Manufacturer be liable to Customer or any other
person for loss of revenue, prot or any consequential, incidental, exemplary or punitive damages directly or indirectly
arising from the use of the Product, from breach of any warranty or from any other cause, whether or not Manufacturer
has been informed of the possibility of such damages.
/


