D10 SMART /
D10 TURBO SMART /
D20 SMART
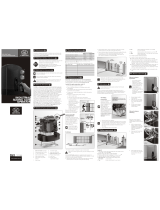
QUICK GUIDE
Centurion Systems (Pty) Ltd
www.CentSys.com
2. Important Safety Instructions
4. General Description
5. Product Identication
6. Technical Specications 9. Manual Override
10. Installation Preparation
7. Preparation of Site
8. Cabling Requirements
1. Introduction
This guide is designed specically for installers who are familiar with the
installation of standard sliding gate operators, but do not know the specics of
the D10 SMART / D10 Turbo SMART / D20 SMART.
The D10 SMART is a heavy duty sliding gate operator designed to open and
close industrial sliding gates weighing up to 1000Kg.
The D10 Turbo SMART is perfectly suited for sites with lighter gates
requiring a high number of operations per day, and can reach almost double
the speed of the standard D10 SMART for increased security. However, it is
not suitable for gates weighing more than 250kg, as the inertia generated by
heavier loads might prove detrimental to the gearbox at such high speeds.
Refer to Table 2 under Section
6. - “Technical Specications”
for derating
speeds on heavier gates.
A die-cast aluminium gearbox, coupled to a powerful 24V DC motor and
switch-mode charger, makes the D10 SMART / D10 Turbo SMART the
automatic choice for townhouse complexes and oce parks.
The system operates o two 12V / 7.2 - 8Ah batteries housed inside the
operator using a switch-mode charger to maintain the battery in a fully-
charged state. The batteries provide critical power failure protection.
A non-contact Hall Eect Sensor ensures reliability and positional accuracy.
The Hall Eect Sensor is highly resistant to dust, oil, dirt and insect ingress,
thereby ensuring that the D10 SMART / D10 Turbo SMART opens and
closes gates reliably and accurately.
For industrial sites with large, heavy gates and high trac volumes, the D20
SMART oers a powerful and reliable automation solution that can move
gates weighing up to 2000kg.
This formidable operator has been designed to withstand the most demanding
operating conditions and work dependably in any environment thanks to its
rugged die-cast aluminium gearbox and potent DC motor. In addition, its
sophisticated electronics and motor control circuitry ensure that it moves
smoothly with pinpoint stopping, further adding to the unit’s reliability and
longevity. Complementing its tough mechanical build, award-winning SMART
technology makes the D20 SMART as intelligent as it is solid.
1. DX Control Card
2. Accessory Tray
3. 12V 7.2Ah Battery
1
4. Lower Battery Tray
5. Gearbox Trim
6. Camlock
7. Camlock Cover
8. Release Handle
9. Switch-mode Charger 27.4V 1.8A
10. 12V 7.2Ah Battery
1
This icon indicates warning, caution or attention! Please
take special note of critical aspects that MUST be adhered to
in order to prevent injury.
Always recommend the tment of additional safety equipment such
as safety edges and safety beams, for additional protection against
entrapment or other mechanical risks.
Check that no pipes or electrical cables are in the way of the intended
installation.
Check that enough space is available for the gate operator, specically
for the release handle and the removal of the Gearbox Trim
Check for loose, sandy soil if installing a foundation, as the soil
condition may require a larger foundation.
Never t the operator on the outside of the gate, where the public has
access to it.
Install the gate operator only if:
• It will not pose a hazard to the public
• There is sucient clearance to a roadway and/or public thoroughfares
• The installation meets all municipal and/or local authority requirements
once completed
• The gate mass and application are within the operator specications
• The gate is in good working order, meaning:
• it opens freely;
• it does not move on its own if left in any position;
• it can be installed to have sucient clearance between moving parts
when opening and closing to reduce the risk of personal injury and
entrapment
• P
ushbuttons or key-switches, when required, must be positioned so that
the gate is in line-of-sight of the user
Legend
1. MAINS SUPPLY CABLE: 90V - 240V AC mains cable via double-pole
mains isolator-switch (3 core L.N.E. 1.5mm2 SWA)1,2
2. Optional intercom cable from motor to dwelling
(n1 + 6 core3 0.22mm2 multi-strand shielded cable)
3. Optional intercom cable from motor to entry panel
(n2 0.22mm2 multi-strand shielded cable)
4. Optional but recommended infrared safety beams
(3 core 0.22mm2 multi-stranded)4
5. Optional access control device (3 core 0.22mm2 multi-stranded)
6. Optional pedestrian key-switch (2 core 0.22mm2 multi-stranded)
OR
7. Optional keypad (3 core 0.22mm2 multi-stranded)4
8. Optional external radio receiver (3 core 0.22mm2 multi-stranded)5
9. Optional pillar lights (3 core LNE SWA, size according to power
requirements)6
10. Optional ground loop for free-exit
(1 core 0.5mm2 multi-stranded – silicone coated)7
SLIDING GATE OPERATORS
Please refer to the full installation manual in the MyCENTSYS
Pro mobile application for the full safety instructions. Follow the
instructions under Section 13 of this Quick Guide to download the
MyCENTSYS Pro mobile application.
Please do not proceed with the installation until you have read
and fully understand the Safety Instructions.
3. Icons used in this manual
This icon denotes variations and other aspects that should be
considered during installation.
This icon indicates tips and other information that could be
useful during the installation.
Before mounting the rack to the gate, ensure that the
D10 SMART / D10 Turbo SMART / D20 SMART is in Manual
Override. Follow the instructions below.
The measurements given below are based on the rack
supplied by Centurion Systems (Pty) Ltd, and are to be used
as guidelines only.
Ensure that all the standard considerations for a quality
gate installation are adhered to as detailed in our
detailed installation manual.
Call Centurion Systems (Pty) Ltd . South Africa
Head Oce: +27 11 699 2400
Call Technical Support: +27 11 699 2481
from 07h00 to 18h00 (UTC+2)
www.centsys.com.au
Call: 1300 CENTSYS (1300 236 879)
After Hours International Technical Support Call Centre
+27 11 699 2481 (16:00 to 02:00 - Australian Eastern Time)
E&OE Centurion Systems (Pty) Ltd reserves the right to change any
product without prior notice
All product and brand names in this document that are accompanied by
the ® symbol are registered trademarks in South Africa and/or other
countries, in favour of Centurion Systems (Pty) Ltd, South Africa.
The CENTURION and CENTSYS logos, all product and brand names in
this document that are accompanied by the TM symbol are trademarks of
Centurion Systems (Pty) Ltd, in South Africa and other territories; all rights
are reserved.
We invite you to contact us for further details.
www.centsys.com
Connect with us on:
facebook.com/centurionsystems
YouTube.com/centurionsystems
@askcenturion
centurion.systems
Subscribe to the newsletter:
www.centsys.com/subscribe
Doc number: 1271.D.01.0003_1
SAP Code: DOC1271D0103
D10
SMART
D10 Turbo
SMART
D20
SMART
Input voltage 90V - 240V AC +/-10% @ 50Hz1
Maximum number of
operations per day 7502,5
Motor power supply Battery-driven
(Standard Capacity - 2x 12V 7.2Ah)
Current consumption
(motor at rated load) 8A 10A 9A
Motor push force -
starting 40kgf 24kgf 52kgf
Motor push force -
rated 30kgf 18kgf 39kgf
Gate mass - maximum 1000kg 250kg62000kg
Gate length - maximum 50m 50m 25m
Gate speed
(varies with load)
Up to
26m/min3
Up to
45m/min6
Up to
18m/min3
Operations in standby
(7.2Ah Batteries)
Operating Mode
Power
saving
15m/
min
15kgf
Normal
26m/
min
15kgf
Power
saving
15m/
min
9kgf
Normal
45m/
min
9kgf
Power
saving
15m/
min
20kgf
Normal
18m/
min
20kgf
Half day2,4,5 118 63 189 130 101 55
Full day2,4,5 93 50 150 104 80 45
1. Can operate o a solar supply; consult your local dealer for assistance
2. Based on a motor push force of less than 50% of rated
(Starting and Running forces)
3. Gate opening and closing speeds can be congured to run slower depending
on the requirements of individual installations
4. Can increase battery capacity for longer standby times
5. Based on 4m gate, excluding all accessories
6. Refer to the table below for D10 Turbo SMART’s recommended gate
speed for specied gates masses
1. If a D10 Turbo SMART is used on a gate over 250Kg, the speed must be
reduced according to the table above
to ensure that the gate can be safely stopped in an emergency.
2. Centurion Systrems (Pty) Ltd recommends the use of a D10 SMART for gates
weighing over 500KG.
1. Includes 3mm clearance required between rack and pinion
2. Distance between bottom of the Foundation Plate and bottom edge of the Rack
Tooth
n1 means the number of cores required by an intercom
n2 means the number of cores required by an intercom
1. Possibly increase cable thickness if pillar lights are installed.
2. Type of cable must adhere to municipal bylaws but typically SWA (steel wire
armoured) cable is recommended. The armouring provides excellent
screening, which gives better protection against lightning – earth one end of
the screening.
3. Allows for all features such as pedestrian opening, status LED, etc., to be
operated from the intercom handset inside the dwelling. Number of cores and
type of cable could vary depending on brand of access control system being
used.
4. Wireless accessories are available. Please refer to www.censys.com for further
information.
5. For optimum range, an external receiver can be mounted on the wall.
6. Requires an external relay
7. Consult manufacturer of loop detector for specic details.
1. Batteries are not supplied with the D10 SMART / D10 Turbo SMART /
D20 SMART.
TABLE 1
TABLE 2
FIGURE 1
RECOMMENDED SPEED AND GATE MASSES FOR
D10 TURBO SMART1
Max Speed (m/min) Gate Mass (Kg)
45 250
41 300
36 400
32 500
29 6002
27 7002
25 8002
24 9002
23 10002
1
10
2
9
3
8
4
7
5
6
Test the starting force of the gate to ensure that the gate is within the
operator specications as per Figure 2. Use a pull scale in both directions
to determine the maximum amount of pull force required to set the gate
in motion.
Determine the running force of the gate by continuing to pull on the scale
with just sucient force to keep it running. Read and note the maximum
value in kgf (kilogram-force) shown on the scale.
Guide-rollers must ensure that the gate is held vertically through the entire
length of the gate travel. For improved safety, t additional support posts to
prevent gate from falling over if guide-rollers fail.
To disengage (Manual Override) the
motor, ensure that the Camlock is in
the “unlocked” position, and pull the
Release Handle to a 90° position.
The Motor will then be placed in a
temporary state of disengagement.
In the event of a power failure,
it may be required to lock the
cover in place whilst “latching” the
manual release (i.e. manual release
permanently enabled).
This helps prevent theft of the unit,
or its components, and provides full
protection from the elements.
With the release handle in the open
position, slide the Override Cam
located on the inside of the handle
towards the gearbox, and a “click”
can be heard once it has located
correctly.
Return the handle to the closed,
or locked, position. This allows
continued manual operation of the
gate while ensuring that the cover
remains securely locked in place.
See Figure 7.
To re-engage the D10 SMART /
D10 Turbo SMART /
D20 SMART (i.e. take the operator
out of latched Manual Override),
push the Release Handle Override
Cam to the right and then slide it
towards the Camlock. See Figure 8.
To ensure that the operator does not protrude into the driveway, install the
base plate at least ush with the driveway entrance.
It is typical to mount the rack above or underneath the pinion as shown in
illustrations below.
Ensure that the gate cannot be lifted o the motor pinion with
the anti-lift bracket tted.
FIGURE 3
FIGURE 4
FIGURE 5
Starting and Running Forces
Typical anti-lift arrangements
Manual Override Latching
Endstops
FIGURE 2
FIGURE 6
FIGURE 7
FIGURE 8
Pull Scale
GAP
<5mm
GAP
<5mm
GAP <5mm
GAP
<5mm
Additional
support post
Guide-rollers
and Anti-Lift
Bracket
Side view of gate and dierent
Guide-roller options
Opening and closing endstops are mandatory and must be tted
to prevent death or accidental injury as the operator uses and
conrms these limits during operation.
Endstop
Endstop
Ø16mm
H1 H2
5
6
4
1
2
3
8
9
9
10
7
Release
Handle
Override
Cam
Release Handle
Override Cam
Release Handle
Release
Handle
Camlock
Release
Handle
CamlockGearbox
The principles of installation on a Steel Rack is to position it in
the middle of the output pinion with the operator fully forward
on the slots.
The Pinion Guard needs to be rotated 180 degrees if the
rack below the pinion is desired for ONLY the D10 SMART and
D20 SMART, and not the D10 Turbo SMART.
D10 SMART - Steel Rack
FIGURE 9
5mm
25mm
91mm
121mm1,2
176mm1
25mm
(Typical
Steel
Rack
Width)
Welded at bar
Concrete Foundation
(Recommended
to allow for
adjustment)
Minimum space from
edge of Foundation
Plate to reference
point of edge that
protrudes the
furthest.
(Section 7.1.1.)
Foundation Plate
50mm
5mm
25mm
25mm
(Typical
Steel
Rack
Width)
51mm1,2
Foundation
Plate
Raised
Concrete
Foundation
(Recommended
to allow for
adjustment)
50mm
Minimum space from
edge of Foundation Plate
to reference point of
edge that protrudes the
furthest.
(Section 7.1.1.)
ISO 9001:2015