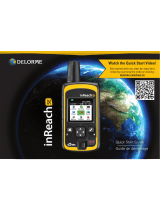
Garmin inReach User manual

Type
User manual

This manual is also suitable for

DELORME
for smartphones and mobile devices for Earthmate
®
PN-60w
User Manual
inReach
WARNING: Messaging, tracking and SOS functions require an active Iridium satellite subscription. Always test your
device before you go.
This manual is provided as a convenience. GARMIN IS NOT RESPONSIBLE FOR THE ACCURACY OF THIS MANUAL
AND DISCLAIMS ANY LIABILITY ARISING FROM THE RELIANCE THEREON.
Contents
Getting Started ..........................................................................................................................................................3
Welcome...........................................................................................................................................................3
Whats in the Box .............................................................................................................................................3
inReach Interface .............................................................................................................................................. 3
Set Up Your inReach Account ...........................................................................................................................4
Satellite Reception ............................................................................................................................................5
Using the inReach .....................................................................................................................................................6
Power ...............................................................................................................................................................6
Tracking ............................................................................................................................................................ 6
Message ..........................................................................................................................................................6
SOS ..................................................................................................................................................................7
Locate ...............................................................................................................................................................8
Signal LED ........................................................................................................................................................8
Using the inReach with a PN-60w ............................................................................................................................9
Pair the inReach and PN-60w ...........................................................................................................................9
Sync Account Info ............................................................................................................................................. 9
inReach LEDs ................................................................................................................................................. 10
Messages .......................................................................................................................................................10
Tracking ........................................................................................................................................................... 12
SOS .................................................................................................................................................................14
History ............................................................................................................................................................ 16
inReach GPS ................................................................................................................................................... 16
Using the inReach with an Android Mobile Device ................................................................................................. 17
Pair the inReach and Android Device .............................................................................................................. 17
Sync Account Info ...........................................................................................................................................17
inReach LEDs ................................................................................................................................................. 18
Maps ............................................................................................................................................................... 18
Messages .......................................................................................................................................................19
Tracking ...........................................................................................................................................................21
SOS .................................................................................................................................................................22
History ............................................................................................................................................................23
inReach GPS ...................................................................................................................................................24
Using the inReach with an iOS Mobile Device ........................................................................................................25
Pair the inReach and iOS Device ....................................................................................................................25
Sync Account Info ........................................................................................................................................... 25
inReach LEDs .................................................................................................................................................26
Maps ............................................................................................................................................................... 26
Messages .......................................................................................................................................................27
Tracking ........................................................................................................................................................... 29
SOS .................................................................................................................................................................29
History ............................................................................................................................................................31
inReach GPS ................................................................................................................................................... 31
Updated 04/30/12
Safety and Legal Information ...................................................................................................................................32
Safety Information ..........................................................................................................................................32
Legal Information ............................................................................................................................................33
inReach Service ..............................................................................................................................................34
Additional Information ..................................................................................................................................... 34
Specications ..........................................................................................................................................................35
Resources ................................................................................................................................................................36
3DeLorme inReach User Manual | Getting Started
Getting Started
Welcome
The inReach™ two-way satellite communicator with GPS keeps you in reach wherever you gowhether you want to
share your trip, check in with loved ones, or send an SOS in an emergencyyou’re always in reach.
Use the inReach for mobile devices with the Earthmate
®
app on your compatible phone or tablet to take full
advantage of two-way messaging and DeLorme maps.
For information about compatible devices, visit delorme.com/inreach.
Use the inReach for Earthmate
®
PN-60w to experience all the PN-60w has to offer, with the addition of two-way
messaging.
Use either inReach alone to send your location to explore.delorme.com; send predened messages that include
your location to your contacts, Facebook, or Twitter; or send an SOS in an emergency.
Whats in the Box
Your inReach package contains:
inReach with pack clip and lanyard
Micro USB cable for rmware updates
2 lithium AA batteries
Quick Start Guide
inReach Interface
Tracking
Message
SOS
LEDs
Power
Signal LED
Battery compartment
Antenna
SOS Button Lock
4 Getting Started | DeLorme inReach User Manual
Batteries
The battery compartment is on the bottom of the inReach. Inside the battery compartment, you’ll nd a label with your
device’s IMEI number and authorization code; you’ll need this when you activate your inReach at explore.delorme.com.
To insert the batteries
Remove the cover by unscrewing the D-ring screws, insert two lithium AA batteries according to the polarity symbols,
and then replace the cover.
Low battery warning
When the batteries are low (approximately 10% of their power remains), the Power LED will ash red once every three
seconds. When power loss is imminent, the Power LED ashes red every 1.5 seconds.
Two AA batteries are required for use. You can use lithium, alkaline or NiMH batteries. The default battery
prole setting is for lithium batteries, which provide the best performance.
If you are not using lithium batteries, you should change the battery prole to ensure battery performance is
correctly calculated.
To change the battery prole
The inReach is optimized to use lithium batteries. If you use alkaline or NiMH batteries or if you switch back to lithium
after using alkaline or NiMH batteries, you must change your battery prole to ensure battery performance is correctly
calculated.
1. Press and hold the Power and Message buttons at the same time to cycle the device through the three battery
proles.
» You can do this as you power on the inReach or at any time when it is already powered on.
» The Power and Message LEDs ash once for lithium, twice for alkaline, and three times for NiMH.
» The most recently used prole ashes rst. For example, if you have never changed the battery prole, when
you press the buttons, the LEDs will ash once.
2. Continue to press and hold the buttons to advance to the other battery proles, and release the buttons when you
reach the battery prole you want to use.
Micro USB Port
The micro USB port is located in the battery compartment. This is used to update the device (this happens
infrequently). If an update is required, you will be notied and instructions will be provided.
Set Up Your inReach Account
Create an account and activate the inReach
Before you start using the inReach, you must set up an account at explore.delorme.com. During the account setup
process, you will choose your inReach service plan and add information about your emergency contacts. Once you
log in to your account, you should add your contacts to the Address Book and customize the predened inReach
messages in the Message Book so you can better use the inReach in standalone mode.
Click the Help link at the top of explore.delorme.com for help with using the website.
If you will be using the inReach with an Earthmate
®
PN-60w, see Using the inReach with a PN-60w on page
9 for information about syncing your account info with your device. See the Help page on explore.delorme.com
for detailed information.
If you will be using the inReach with a smartphone or mobile device, you will need to download the free Earthmate
app and sync it with your explore.delorme.com account.
5DeLorme inReach User Manual | Getting Started
» For Android devices, go to the Google Play store. For more information about using the app with an Android
device, see Using the inReach with an Android Mobile Device on page 17.
» For iPhone
®
, iPod
®
, and iPad
®
, go to the iTunes
®
App Store. For more infomation about using the app with an iOS
device, see Using the inReach with an iOS Mobile Device on page 25.
Satellite Reception
The inReach requires a clear view of the sky to acquire a GPS x and transmit your messages over the Iridium
®
satellite
network. This process should take less than one minute, but it could take more time if the line of sight is obstructed.
For the best reception when wearing the inReach, attach it to a backpack strap on your upper body or place it in a
pocket at the top of a backpack. If you attach the pack clip to your belt, some of the signal may be blocked by your
body and could prevent proper transmission of messages and tracking points.
6 Using the inReach | DeLorme inReach User Manual
Using the inReach
You can use the inReach as a standalone device when you don’t want to use it with a compatible device. You can also
interact with the inReach directly when it is connected to a compatible device.
Power
To turn the inReach on, press and hold the Power button until the Power LED ashes green and then release the
button. When the inReach is powered on, the Power LED will ash green once every three seconds.
To turn the inReach off, press and hold the Power button until the Power LED ashes rapidly and then release the
button.
When power is low, the Power LED ashes red once every three seconds. See Batteries on page 4 for more
information.
When there is not enough power to send any messages or tracking points, the Power LED ashes red every 1.5
seconds. See Batteries on page 4 for more information.
Tracking
The Tracking button allows you to send your location to explore.delorme.com when you are using the inReach in
standalone mode. When you are moving, your location is sent every 10 minutes. When you are stationary, your location
is sent every four hours; if you move more than 100 meters, tracking at 10 minute intervals resumes.
To start tracking, press and hold the Tracking button until the Tracking LED ashes and then release the button.
The LED will ash green once every three seconds while tracking until you cancel tracking or turn off the inReach.
To stop tracking, press and hold the Tracking button until the Tracking LED ashes rapidly and then release the
button.
You can also use tracking when connected with an Earthmate PN-60w (see page 12) or mobile device (see page
21 for Android and page 25 for iOS). In addition, tracking can be initiated from explore.delorme.com by anyone
who can log in to your account. See the Help at explore.delorme.com for more information.
Message
Use the Message button to send predened inReach messages that you created on explore.delorme.com. You can
create up to three messagesit’s a good idea to make a note of the messages in the proper order and take it with you.
The message is sent to contacts you designated on explore.delorme.com when you created the message.
To send predened message one, press and hold the Message button until the Message LED ashes once and
then release the button. The Message LED will ash once every three seconds until the message is sent.
To send predened message two, press and hold the Message button until the Message LED ashes twice and
then release the button. The Message LED will ash twice every three seconds until the message is sent.
To send predened message three, press and hold the Message button until the Message LED ashes three
times and then release the button. The Message LED will ash three times every three seconds until the message
is sent.
Notes
The LED ashes for choosing the message will cycle in order until you release the Message button to make a
selection.
7DeLorme inReach User Manual | Using the inReach
Message LED
Sending a messageThe Message LED ashes green once every three seconds when you send a message
(including SOS messages); it stops ashing when the message has been sent. You should also watch the Signal
LED to ensure you have a good signal; see page 8 for more information.
New messageThe Message LED ashes green twice every 1.5 seconds when a message has been sent to
you. You can view incoming messages on a connected device.
To dismiss the new message indicator, press and release the Message button. You can also dismiss the message
by viewing it on a connected device.
SOS
IMPORTANT! Use SOS only in an emergency. Do not test SOSall SOS activations are real and a false activation
could result in charges to you.
The inReach cannot be powered off while an SOS message is being sent or cancelled.
Use the SOS button to send an emergency message to search and rescue when you are using the inReach in
standalone mode. You can also use the SOS button on the inReach when it is paired with a compatible device. Your
location will be relayed to search and rescue and they will dispatch emergency services and notify the emergency
contacts listed on your account at explore.delorme.com account. Your location will automatically update until you
cancel the SOS.
Your location will be sent to search and rescue as follows:
First ten minutes, every sixty seconds
Ten minutes to one hour, every ten minutes
One hour to eight hours, every 15 minutes
Eight hours to 24 hours, every 60 minutes
After the rst ten minutes, if you are stationary, your location is sent every thirty minutes; the transmission rate is
slowed to preserve battery life.
If your position changes by more than 100 meters, your location will be sent again. If you don’t need to move for safety
reasons, stay where you are to preserve battery life and to make it easier for search and rescue to locate you.
Note If you do not have a clear view of the sky, the SOS messages will be stored and then sent as soon as you have
a good signal. The Signal LED will ash green when you have a good signal; it will ash red when you do not have a
good signal; see page 8 for more information.
To send an SOS message
1. Press and slide the SOS button lock to the left.
2. Press and hold the SOS button until the SOS LED begins to ash and then release the button. The SOS LED
ashes green once every three seconds. In addition, the Message LED ashes green once every three seconds
while the message is being sent.
When the SOS and Message LEDs begin ashing green more rapidly (every 1.5 seconds), it indicates that your
SOS message was received by an emergency responder and they are acknowledging your message.
To conrm that you know search and rescue has received your message, press and immediately release the SOS
button. The SOS LED resumes ashing green every three seconds.
If you are unable to conrm that you know your message was received, help will still be sent.
To cancel an SOS message
1. Press and hold the SOS button until the SOS LED ashes rapidly and then release the button.
This sends a message to search and rescue to let them know that the emergency has been resolved and
assistance is no longer needed.
2. Press and slide the SOS button lock to the right.
8 Using the inReach | DeLorme inReach User Manual
When you cancel SOS, the SOS LED ashes rapidly and then stops. The Signal and Message LEDs ash until the
cancellation message has nished sending.
IMPORTANT! You must cancel SOS to stop search and rescue from sending help. Turning off the inReach device or
a connected device or taking out the batteries will NOT tell search and rescue to stop the rescue. If you replace the
batteries when an SOS is in progress, press and hold the SOS button again to update your location.
For more information about GEOS Search and Rescue, visit geosalliance.com.
Locate
Anyone who has your explore.delorme.com account login information can send a tracking point request from the
website to the inReach to determine the location of the inReach. When the inReach receives the request, it sends
a tracking point (a total of two tracking points are used). If you are using the inReach as a standalone device, your
inReach will automatically respond. If you are using the inReach with your PN-60w or mobile device you will be notied
of the request. See the Help on explore.delorme.com for more information.
Signal LED
The Signal LED indicates the status of the connection between the inReach and the GPS or Iridium satellites. Green
ashes indicate that messages or tracking points are being sent. Red ashes indicate that you don’t have a good signal
and messages or tracking points aren’t being sent.
The Signal LED ashes green once every three seconds when the inReach is sending a message of any type.
The LED will stop ashing when the message is sent, unless the inReach is tracking in standalone mode. When
tracking in standalone mode, the Signal LED ashes continuously to indicate the status of the GPS satellites.
The Signal LED ashes red once every three seconds when the inReach is having trouble sending or conrming
a message. The Signal LED will ash red until the message is successfully transmitted or cancelled. If the LED is
ashing red, try moving to a new location to get a better view of the satellites.
9DeLorme inReach User Manual | Using the inReach with a PN-60w
Using the inReach with a PN-60w
When you pair your DeLorme inReach with the DeLorme Earthmate PN-60w, you have the best of both worldsa
powerful, rugged handheld GPS device and the ability to send and receive messages wherever you gowhether you
want to share your trip, check in with loved ones, or send an SOS in an emergency.
Note To use the inReach with a PN-60w, you must ensure the rmware on the PN-60w is updated to the latest
version. You can update the rmware through Earthmate Sync in Topo North America or visit support.delorme.com.
Quick Tips
To select somethingfor example, a check box, an on-screen button, or a drop-down list— or to open the on-
screen keyboard to enter text, use the arrow keypad to highlight the item and then press ENTER.
To exit a list or screen, press QUIT. To exit the on-screen keyboard, highlight OK and press ENTER.
For detailed help on using the PN-60w, see the DeLorme Earthmate PN-60 User Manual available at
manuals.delorme.com.
Pair the inReach and PN-60w
Before you can use the inReach and PN-60w together, you must rst pair them. Pairing connects the inReach and
PN-60w wirelessly. Open the inReach Page on the PN-60w.
You need pair the devices only once. After you have successfully paired the devices, they will connect when
both devices are powered on and near each other.
1. Press MENU, select Pair DeLorme inReach, and press ENTER.
2. With the inReach powered off, press and hold its Power button until the Power LED ashes green. Then, press
ENTER on the PN-60w.
To unpair the devices, from the inReach Page on the PN-60w, go to MENU > Unpair DeLorme inReach.
Note The wireless antenna settings for the PN-60w are found under Settings > Wireless.
Sync Account Info
Log in to your account on explore.delorme.com and view your inReach details. Connect the PN-60w to your computer,
and then click the red Sync PN-60w button at the upper right corner of the website to send contactsincluding
Facebook and Twitter—Quick Text messages, and MapShare information to your device. Syncing allows you to send
contacts and messages from explore.delorme.com to your PN-60wcontacts you have added to the
PN-60w are not synced back to explore.delorme.com.
Note You will be prompted to install the DeLorme GPS Browser Plugin the rst time you sync. During the initial
process, you will need to close your browser.
10 Using the inReach with a PN-60w | DeLorme inReach User Manual
inReach LEDs
The inReach LEDs reect what you are doing on the PN-60w inReach Page. See the Using the inReach section
starting on page 6 for more information.
Messages
The Messages page displays a list of conversations. The number of unread messages is indicated in the page
header and the conversations with unread messages are indicated with a green dot. All sent and received messages
are available at explore.delorme.com and on the History page on the device. See History on page 16 for more
information.
Messages that you send and receive while the inReach and PN-60w are connected are indicated with a message icon
on the PN-60w Map Page. To view the message details from the map, use the arrow keypad to pan to the message
icon and press ENTER.
When you have a new message, an unread message indicator appears on the Map Page. Once you have read the
messages, the indicator is dismissed. You can also dismiss the message indicator by pressing and releasing the
Message button on the inReach.
Create Messages
Create messages (of up to 160 characters) and send them to the contacts that you synced from explore.delorme.com
or add new addresses directly to the PN-60w.
The predened Quick Text messages you set up at explore.delorme.com and synced to your PN-60w are
available in the drop-down list on the Compose Message page, or you can create a new message.
Post to Facebook and Twitter. Link your accounts at explore.delorme.comFacebook and Twitter will appear in
your address book and each has its own conversation thread. You can post to your own Facebook wall or Twitter
account; you will not receive comments or replies on the PN-60w.
Post messages to your MapShare page. You must rst set up MapShare on explore.delorme.com and sync your
PN-60w. MapShare will appear in your address book and it has its own conversation thread.
Create messages on your PN-60w when you aren’t connected to your inReach. When you are connected, the
message will be sent.
To send a new message
1. From the inReach Page, select Messages, and then select New Message.
2. With the address text box highlighted, press ENTER to open the keyboard.
Start entering a name. Matches from your contact list will appear. Select OK to add the name shown or to see all
11DeLorme inReach User Manual | Using the inReach with a PN-60w
possible matches when multiple matches exist, and then select the address to use. Select OK to enter another
address. Select OK twice to exit.
OR
Enter the entire email address or mobile phone number and press ENTER. An address that has not been synced
from explore.delorme.com to the PN-60w is subtracted from the 160-character composed message allotment.
Select OK to enter another address. Select OK twice to conrm the addresses.
OR
Select the address book to the right of the text box and scroll through your contacts. To select a contact, highlight
it and press ENTER. Press QUIT to exit the list.
3. To select a Quick Text message that you synced from explore.delorme.com, select the Compose Text Message
drop-down list and select the message.
OR
To type a new message, select Type message here and press ENTER. Then, type the message. The number of
characters remaining displays in the Compose Message area.
4. Select Send.
To reply to a conversation
1. From the inReach Page, select Messages.
2. Select the conversation that you want to reply to. Select Reply, and then enter your message.
3. Select Send.
Message Sending
The message sending icon spins until the message is sent. Once the message has been sent, the location icon is
displayed If the failed message icon appears, the message has not been sent. Make sure the PN-60w and inReach
are connected and that you have a clear view of the sky. Attempts to send a failed message will continue until you have
a good signal. If after 15 minutes the message has not been sent, you will be prompted to continue sending or cancel
the message.
On the inReach, the Signal and Message LEDs ash while the message is being sent. The Signal LED indicates the
status of the connection to the satellites. See page 8 for more information.
Message Details
The details page displays information about the message. From the Messages page, select a conversation thread to
view the messages, and then select a message to view its details. You can also view message details from History;
see page 16 for more information.
12 Using the inReach with a PN-60w | DeLorme inReach User Manual
To Do this
View the message location on
the map
Select View.
Route to the message location
Select Route. See the DeLorme Earthmate PN-60 User Manual (manuals.
delorme.com) for more info about routing.
Mark a waypoint at the message
location
Select Mark. See the DeLorme Earthmate PN-60 User Manual (manuals.
delorme.com) for more info about waypoints.
Delete the message Go to MENU > Delete message.
Reference Points
A reference point is a location that is somewhere other than your current location. You can use the PN-60w to send a
map location, geocache, or waypoint as a reference point message using the inReach. From the details page for the
point, go to MENU > Send Point/Geocache/Waypoint with inReach. See the Earthmate PN-60 User Manual at
manuals.delorme.com for more information.
Message Responses
When you send a message, the method used for sending determines how the recipient can respond.
Text/SMS message Recipients receive a text message. They can reply to the message directly. The carriers text
messaging rates apply in addition to your inReach account messages. The text message also includes a link to a
map of your location.
EmailRecipients receive an email with a link. The recipient can use the link to go to a website where they can
view your location on a map and reply to you via the website. They cannot reply directly to the email.
inReachOther inReach users receive a message on their PN-60w or in the Android Earthmate app. They can see
your message on their map and can also view the map from the message details page.
Incoming Messages
When you have new messages:
The inReach icon on the Home Page displays the number of unread messages.
A sound plays when you receive a message. To control sound settings, go to
Settings > Sound > Message.
In the Messages page list, the header indicates the number of unread
messages and a green dot indicates the conversations with unread messages.
On the Map Page, the number of unread messages is displayed
You can add someone who sends you a message to your address book or edit
an existing address book entry to add a new source. From the conversation
thread, go to MENU > Add Sender as New Contact/Add Sender to Existing
Contact.
Tracking
When you use the inReach’s tracking feature with your PN-60w, you can set the interval for sending tracking points to
the map at explore.delorme.com. The tracking points recorded while the PN-60w and the inReach are paired are visible
on the PN-60ws Map Page and you can view information about them in the inReach History page. Regular tracking
points are yellow pins and SOS tracking points are red pins.
13DeLorme inReach User Manual | Using the inReach with a PN-60w
If you set up a MapShare page on explore.delorme.com, you can send a link to share your travels. The MapShare page
has options you can customize, so you can allow people to send you messages, send a request to view your current
location, or just view the tracking points and messages you send to MapShare.
Anyone who has your explore.delorme.com account login information can send a location or tracking request from the
website to the inReach. When the inReach receives the request, it sends one tracking point for a location request (a
total of two tracking points are used) or turns on tracking for a tracking request. If you are using the inReach with your
PN-60w, you will be notied of the request. See the Help page on explore.delorme.com for more information.
Handing off Tracking
When your PN-60w and inReach are connected, you can start tracking on the PN-60w and then power it off to save
battery lifethe inReach will begin tracking in standalone mode. No tracking points will be recorded on your PN-60w
when it is powered off, but tracking points will be visible on explore.delorme.com and on your MapShare page.
Alternatively, if you start tracking on the inReach and then power on your PN-60w, you can monitor tracking on the
PN-60w.
You can also stop tracking on either device when they are connected.
To start tracking from the PN-60w
The tracking interval determines how often tracking points are sent via the inReach to explore.delorme.com and
your MapShare page. To save battery life, select a longer interval so that fewer tracking points are sent while you
are moving. When you are stationary, tracking points are sent every four hours; if you move more than 100 meters,
tracking resumes at the interval you set.
1. Make sure your inReach is powered on and connected before you begin. From the inReach Page, select Tracking.
2. To change the tracking interval, click Edit.
3. From the When moving, send every drop-down list, select a time interval and then press QUIT to exit the interval
setup page.
4. On the Tracking Setup page, if you want to send a link to your MapShare page, select Share. Then enter or add
addresses to your message and click Send. The message thread displayspress QUIT to exit.
5. On the Tracking Setup page, select Start Tracking. The Tracking Details page displays. On the inReach, the Signal
and Tracking LEDs ash. If tracking points fail to send successfully, you will be notied.
6. To stop tracking, select Stop Tracking.
14 Using the inReach with a PN-60w | DeLorme inReach User Manual
SOS
IMPORTANT! Use SOS only in an emergency. Do not test SOSall SOS activations are real and a false activation
could result in charges to you.
The inReach cannot be powered off while an SOS message is being sent or cancelled.
The SOS feature uses the inReach to send a message to search and rescue in a critical or life-threatening emergency.
With the PN-60w, you can type a message giving search and rescue details about your situation and they can reply to
you. They will dispatch emergency services and notify the emergency contacts you listed on your account at explore.
delorme.com account. Your location will automatically update until you cancel the SOS.
Your location will be sent to search and rescue as follows:
First ten minutes, every sixty seconds
Ten minutes to one hour, every ten minutes
One hour to eight hours, every 15 minutes
Eight hours to 24 hours, every 60 minutes
After the rst ten minutes, if you are stationary, your location is sent every thirty minutes; the transmission rate is
slowed to preserve battery life.
If your position changes by more than 100 meters, your location will be sent again. If you don’t need to move for safety
reasons, stay where you are to preserve battery life and to make it easier for search and rescue to locate you.
You can monitor the SOS on the Tracking page. From there you can also cancel the SOS or send a message to search
and rescue. The tracking points and messages are also visible on the Map Page.
Note If you do not have a clear view of the sky, the SOS messages will be stored and then sent as soon as you have a
good signal.
LEDs
The SOS LED ashes green while the SOS is in progress.
The Signal LED ashes green when messages are being sent; it will ash red when you do not have a good signal
(see page 8 for more information).
The Message LED ashes green while any SOS message (including a cancellation message) is being sent. See
page 7 for more information.
Handing off SOS
When your PN-60w and inReach are connected, you can start the SOS on the PN-60w and then power it off to save
battery lifethe inReach will send the SOS in standalone mode. No SOS tracking points or messages will be recorded
on your PN-60w when it is powered off, but both will be visible on explore.delorme.com.
15DeLorme inReach User Manual | Using the inReach with a PN-60w
Alternatively, if you start SOS on the inReach and then power on your PN-60w, you can monitor SOS tracking and send
and receive messages from search and rescue.
To send an SOS message
1. Make sure your inReach is powered on and connected.
2. From the inReach Page, select SOS and then select Emergency.
3. Press ENTER to select Compose SOS. The recipient is search and rescuethis cannot be changed.
4. If possible, type a message providing details about your emergency. If you cannot type a message, the default
message will be sent.
5. Select Send SOS. The countdown timer displays for 10 seconds. To cancel the SOS before it’s sent, press QUIT.
6. The SOS conversation thread will appear. Select Reply to send another message to search and rescue or to
respond to them.
To cancel an SOS message
Select Cancel SOS. This sends a message to search and rescue to let them know that the emergency has been
resolved and assistance is no longer needed. You will receive a reply acknowledging the cancellation.
On the inReach, the Signal and Message LEDs ash until the SOS messages have nished sending. The SOS
message thread will close once the cancellation has been processed.
You can also cancel the SOS on the inReach; see page 7 for more information.
IMPORTANT! You must cancel SOS to stop search and rescue from sending help. Turning off the inReach device or
a connected device or taking out the batteries will NOT tell search and rescue to stop the rescue. If you replace the
batteries when an SOS is in progress, press and hold the SOS button again to update your location.
For more information about GEOS Search and Rescue, visit geosalliance.com.
Addresses
The address book displays a list of contacts you have synced from explore.delorme.com as well as any contacts you
add to the address book on the PN-60w. Note that contacts you add or delete or edits you make on the PN-60w are
not synced back to explore.delorme.comyou should update explore.delorme.com with any changes you make on
your device that you want to keep and then sync again.
You cannot add, edit, or delete Facebook, Twitter, or MapShare contacts on the PN-60w. You must add them to
explore.delorme.com and sync them to the device.
To view a contacts details
From the inReach Page, select Addresses, and then select the contact.
To add a contact
1. From the inReach Page, select Addresses, and then select New Contact.
2. Complete the contact’s information by selecting each eld to open the on-screen keyboard.
3. To add elds, press MENU, select Add additional elds, and select the type of eld to add. Then, enter the
information.
4. Press QUIT to exit.
To edit a contact
1. From the inReach Page, select Addresses, and then select the contact to view its details.
2. Select the eld to edit OR to add a eld, press MENU, select Add additional elds, and select the type of eld to
add. Then, enter the information.
3. Press QUIT to exit.
16 Using the inReach with a PN-60w | DeLorme inReach User Manual
To delete a contact
1. From the inReach Page, select Addresses, and then select the contact.
2. Go to MENU > Delete contact.
History
The History page displays a chronological list of activity by day.
To view the details for a day, select it. Select View All to view all message and tracking points on the map, or
select an individual point to view its details.
To export all history, from the History page, go to MENU > Export History and then save the .gpx le to the
internal memory or an SD card in the device.
To export the history for a specic day, select the day to view its details, and then go to MENU > Export History
for Day and save the .gpx le to the internal memory or an SD card in the device.
To delete all history, from the History page, go to MENU > Delete All History.
To delete the history for a specic day, select the day to view its details, and then go to MENU > Delete History
for Day.
inReach GPS
The inReachs internal GPS will be used for location information in outgoing messages when the GPS of a connected
PN-60w is disabled.
When the connected PN-60w’s GPS is disabled:
The inReachs location is not transmitted back to the PN-60w.
Tracking points (both normal and SOS) do not appear on the connected PN-60w. The points are sent to explore.
delorme.com.
Text messages are not indicated with the location icon on the connected PN-60w even though a position is
associated with them. Text messages are geolocated on explore.delorme.com.
If you need to display location for messages and tracking points on a connected PN-60w, you must enable GPS on the
PN-60w.
17DeLorme inReach User Manual | Using the inReach with an Android Mobile Device
Using the inReach with an Android Mobile Device
When you pair your DeLorme inReach with your Android phone or tablet, you can send and receive messages
wherever you go. You can share your trip, check in with friends and family, or send an SOS in an emergency.
Android version 2.1 and above is supported; 2.2 or above is recommended.
To get started, go to Google Play and download the free Earthmate app to your Android device.
The main menu in the Earthmate app gives you options to pair the inReach, view Help, sync with your account on
explore.delorme.com, update settings, and exit the app. Additional options are available on each page. Go to the menu
within the app to see the options.
Note To close the Earthmate app, go to MENU > Exit.
Pair the inReach and Android Device
You must pair your inReach with your Android device to use them together.
Your devices Bluetooth must be turned on to pair with the inReach. You will be prompted to turn on Bluetooth in
your devices settings if you don’t have it on already.
If you see your inReach device appear in the list and the searching message is still active, tap Back to dismiss the
message and then tap the device name.
Some Android device’s require that you conrm the Bluetooth connection. Check the notications window on your
phone if it doesn’t appear to be connecting.
If you have problems pairing, try initiating the process through your mobile device’s settings rather than through
the app.
You need pair the devices only once. After you have successfully paired the devices, they will connect when
both devices are powered on and near each other.
To pair the devices, tap MENU > Pair and follow the instructions.
If you turn off your mobile device to save battery life or close the Earthmate app, the inReach will continue any tracking
or SOS messaging that is in progress.
Sync Account Info
Log into explore.delorme.com to make sure your account contacts and Quick Text messages are up to date. If you
want to post messages to Facebook, Twitter, or your MapShare page, you must set that information up before you
sync.
18 Using the inReach with an Android Mobile Device | DeLorme inReach User Manual
To sync account info
Tap MENU > Sync to sync account info from explore.delorme.com with your phone. The rst time you sync, you will
be prompted to enter your explore.delorme.com account info. Note that contacts and quick text messages you add to
explore.delorme.com are synced to your phone but contact info you add to your phone is not synced back to explore.
delorme.com.
inReach LEDs
The inReach LEDs reect what you are doing in the Earthmate app. See Using the inReach section starting on page
6 for more information.
Maps
Downloading Maps
The rst time you use the map, you will be prompted to download the DeLorme World Reference Data base map. It is
recommended that you download the maps when you have a Wi-Fi connection because of the le size. An SD card is
required to download maps.
You can download highly-detailed DeLorme topographic maps for North America. Tap the map download icon to
select a region for download.
Tap a region you have already downloaded to delete it.
Map Controls and Settings
See the app’s Map Help topic for information about map controls and settings. To change map settings, go to MENU >
Settings > Map (MENU > Settings from the Map page).
Reference Points
A reference point is a location that is somewhere other than your current location. To get information about a place on
the map, long press the location on the map. The reference point icon appears. Tap the icon to view details about
the point, send a message that includes the reference point, or delete the reference point. When you send a reference
point as a message, it is saved on the map.
To view another point, long press another place on the map.
  • Page 1 1
  • Page 2 2
  • Page 3 3
  • Page 4 4
  • Page 5 5
  • Page 6 6
  • Page 7 7
  • Page 8 8
  • Page 9 9
  • Page 10 10
  • Page 11 11
  • Page 12 12
  • Page 13 13
  • Page 14 14
  • Page 15 15
  • Page 16 16
  • Page 17 17
  • Page 18 18
  • Page 19 19
  • Page 20 20
  • Page 21 21
  • Page 22 22
  • Page 23 23
  • Page 24 24
  • Page 25 25
  • Page 26 26
  • Page 27 27
  • Page 28 28
  • Page 29 29
  • Page 30 30
  • Page 31 31
  • Page 32 32
  • Page 33 33
  • Page 34 34
  • Page 35 35
  • Page 36 36
  • Page 37 37
  • Page 38 38

Garmin inReach User manual

Type
User manual
This manual is also suitable for

Ask a question and I''ll find the answer in the document

Finding information in a document is now easier with AI