Page is loading ...

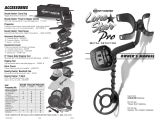
Super Advanced Digital System
High Powered, More Depth!
Audio-Centering Pinpointing.
Owners’s
Manual
High Performance Digital Metal Detector
with Ultra Deep 10" Search Coil
www.kellycodetectors.com
1085 Belle Avenue, Winter Splrings, FL 32708
407-699-8700

112
The MP
X
Digital is a high powered metal detector designed for the
serious treasure hunter. Using special advance circuitry, automatic
operation along with the ability to see further in the ground the
MP
X
will achieve depths at up to 20% deeper, through the use of surface
mount technology. This
MP
X
series also uses more power in the
searchcoil which in turns “pushes” the signal deeper in the ground.
Exclusive Features of the MP
X
:
• State-of-the-art surface mount technology.
• 20% more depth then the standard model.
• More power in the searchcoil that pushes the
signal deeper.
FEATURES —
1. Use the Target ID to learn what you’ve found.
The detected objects are shown on the large LCD meter.
You can determine immediately whether the objects are
worth digging, or not.
2. Use the Bar Graph LCD to locate your target fast!
3. Fully automatic with no tuning or ground balancing
required.
4. State-of-the-art adjustable Icon Target identification
system.
5. Unique Tone for Targets.
When an object is being detected, a unique tone correspond-
ing to the target will be heard. Therefore you don’t have to
keep watching the LCD display while searching.
6. Auto-low battery voltage indication.
The Battery Icons will be displayed on the LCD when the
battery voltage goes below the proper value. In this case,
the batteries should be replaced at once.
GLOSSARY OF TERMS
Air Test - A sensitivity test performed by
outwardly moving various sized metal
samples under the metal detector search-
coil to measure the distance limit of detec-
tion. This test is not always an accurate
indicator of ground depth penetration
capability. (see Bench Test)
Alkaline - A class of battery characterized
by the ability to sustain longer periods
of current drain and greater storage life
when compared to the standard carbon-
zinc type.
Bench Test - An air test to determine at
what discriminate settings various metal
samples are rejected or accepted. The test
is conducted in a non-metallic area.
Cache - Any intentionally buried or se-
creted hoard of valuables.
Conductivity - The measure of a metal
target's ability to allow eddy current gen-
eration on its surface.
Control Housing - A metal or plastic box
which holds circuit boards, indicators, me-
ter, controls and power supply.
Depth Penetration - The greatest mea-
sure of metal detector ability to transmit an
electromagnetic field into the soil matrix
and produce a target signal.
Discrimination - Adjustable circuitry
which ignores or nulls audio responses
from a specific conductivity range allow-
ing positive responses to be heard from
metals higher in conductivity above the
discriminate control setting. Designed
primarily to eliminate audio response from
trash metals.
Double Blip - A signal characteristic com-
mon to elongated ferrous targets such as
nails detected in the all-metal non-motion
mode.
Faint Signal - A sound characteristic of
targets that are sometimes deeply buried
or very small in size.
False Signal - An erroneous signal cre-
ated by automatic retuning overshoot,
ground voids or highly mineralized hot
rocks.
Ferrous - Descriptive of any iron or iron
bearing material.
Metal - Metallic substances; iron, foil,
nickel, aluminum, gold, brass, lead, cop
-
per, silver, etc.
Metal Detectorist - A person operating
a metal detector in the field. This name is
preferred by many over Treasure Hunter.
Mineralized Ground - any soil that
contains conductive or non-conductive
components.
Motion Discriminator - A detector type
that requires searchcoil motion to activate
its simultaneous ground balance and dis-
criminate functions.
Non-Ferrous - Not of iron. Metals of the
precious class (i.e. gold, silver, copper,
etc.)
Pinpointing - Finding the exact target
location with respect to a searchcoil's des-
ignated center. Accomplished by interpret-
ing the centers of audio response width in
perpendicular direction or scans.
Searchcoil - A circular (can be other
shapes) plastic housing containing single
or multiple transmit and receive windings
in a specific orientation or configuration to
emit and receive signals from ground and
targets. (also called loop or coil).
Searchcoil Cable - An electrostatically
shielded cable of conductors (wires) which
convey signals to/from the searchcoil or
control housing.
Sensitivity - The measure or capacity of
a metal detector to perceive changes in
conductivity within the detection pattern.
Generally, the more sensitivity a detector
can smoothly provide, the more depth it
will achieve.
Signal - An audio response or visual in-
dication alerting the operator that a target
has been detected.
Slow Motion - A description of searchcoil
speed required to operate the motion dis-
criminate mode.
Sweep - the motion one employs in mov-
ing the coil.

310
ASSEMBLY —
The detector is shipped fully assembled in one carton. Only two
adjustments are necessary, and no tools are required.
1. Turn the search coil to the scanning position. It may be nec-
essary to loosen the knobs securing the coil and then tighten them
again. Make sure that the knobs are tightened (by hand) securely
after the search coil is positioned.
2. Install (2) 9 volt batteries and then the detector will be ready
for use. (See page 8.)
CONTROL PANEL —
DEPTH
LEVEL/SENSITIVITY INDICATOR
(See Page 8)
LOW
BATTERY
INDICATOR
(See Page 2 & 8)
SENSITIVITY
INCREASE
OR
DECREASE
(See Page 5)
POWER
ON/OFF
(See Page 4)
PINPOINT
DISCRIMINATION
CONTROL
(See Page 6)
TARGET ID
ICONS
(See Page 6)
INSERT ROD
TO JOIN TOGETHER
COIL KNOBS
*1/8" HEADPHONE
JACK
LOCATED ON
BACK PANEL
(See Page 8)
MIND YOUR MANNERS
Filling holes and obeying NO TRESPASSING Signs are but 2 require-
ments of a dedicated metal detector hobbyist. A sincere request that
Kellyco makes to every user of a detector is that each place searched be
left in a better condition that it was found. Thousands of individuals and
organizations have adopted this formal.
Metal Detector Operators Code of Ethics:
• I will respect private and public property, all historical and archaeological
sites and will do no metal detecting on these lands without proper permis-
sion.
• I will keep informed on and obey all laws, regulations and rules governing
federal, state and local public lands.
• I will aid law enforcement officials whenever possible.
• I will cause no willful damage to property of any kind, including fences,
signs and buildings and will always fill holes I dig.
• I will not destroy property, buildings or the remains of ghost towns or other
deserted structures.
• I will not leave litter or uncovered items lying around. I will carry all trash
and dug targets with me when I leave each search area.
• I will observe the golden rule, using good outdoor manners and conduct-
ing myself at all times in a manner which will add to the stature and public
image of all people engages in the field of metal detection.
Warning!
Any metal detector may detect underground power lines, explosives or
other items which when struck could cause personal injury. When search
-
ing for treasure with your detector, observe these precautions:
Do not hunt in an area where you believe there may be shallowly buried
underground electric lines or pipes.
Do not hunt in a military zone where bombs or other explosives may be
buried.
Avoid striking any line known to be or suspected to be carrying electrical
power.
Do not disturb any pipeline, particularly if it could be carrying flammable
gas or liquid.
Use reasonable caution in digging toward any target, particularly in areas
where you are uncertain of underground conditions.
SPEAKER
AUDIO

TARGET ID GUIDE —
At the top of the control panel is an easy to read graph indicating
targets for use with the Target Icons on the lower scale of the LCD.
4
OPERATION OF CONTROLS —
Power ON and OFF Button
Press the POWER BUTTON ONCE to turn the MP
X
ON.
NOTE: Pressing the POWER BUTTON TWICE will turn the
MP
X
OFF
9
IN THE FIELD TIP FOR USING YOUR MP
X
—
2. The MP
X
is an Ultra Slow Motion Metal De-
tector. When using this detector the coil must be
in motion to detect any target. A sweep speed
of about 2 feet per second is perfect. You can
hunt as fast as you want or your pace dictates.
3. The coil is water resistant and can
be used around water, however be
careful not to get water into the control
housing.
4. Correct arm
position. Adjust
the lower stem
so that your arm
is hanging in a
comfortable posi-
tion by your side
with the coil
about 1 inch off
the ground.
1. Always keep the bottom of the coil
level with the ground. Try to maintain coil
1 inch off the ground at all times. You do not
need to scrub the ground with the coil.
USING THE HEADPHONE JACK —
To bypass the built-in audio speaker you can simply plug in any 1/4 inch stereo head-
phone jack and now you will only get audio from the headset. By using the headset
you will be able to hear the fainter targets. Another benefit of using headphones is
that it will decrease the battery usage in the audio circuit. Always use headphones
designed for metal detector use.
Installing the Batteries: Remove the battery compartment cover and
install two (2) 9-volt batteries. Make the correct connections between the new batter-
ies and ensure the battery snaps are plugged in. Replace the battery cover.
PUSH DOOR TAB IN TO REMOVE
BATTERY DOOR COVER
(Back of Control Box)
1/4" HEADPHONE JACK
*Automatic Low Battery Indicator: When you see 1 or even 2 low battery icons,
it's time to replace one or both of the batteries.
2
FEET
PER
SECOND

USING THE MP
X
5 SEGMENT LCD
FOR DEPTH READING —
58
OPERATION OF CONTROLS —
Sensitivity Control Buttons
SENS
UP
SENS
DOWN
METER
SHOWING
SENS
LEVEL
HIGH SENSITIVITY
MEDIUM SENSITIVITY
LOW SENSITIVITY
The sensitivity control is used to
adjust the MP
X
sensitivity to chang-
ing ground conditions. Operating
the MP
X
in the maximum setting
may result in erratic operation due
to heavy mineralization in your
present search area. Reducing
the sensitivity to show 2 to 4 bars
will help in most cases. Areas that
contain high minerals are salt water
beaches, many areas high in iron,
volcanic islands or any soil that is
high in mineral content.
Tip: Start out with maximum sen-
sitivity and if the MP
X
operates in a
stable manner then leave it alone.
If you are getting False Signals,
or, you get a tone and nothing is
there, then decrease the sensitivity
1 notch at a time till you achieve
stable operation.
This feature is fully automatic and requires no tuning on the opera-
tors part. When a target is detected, you will see 5 LCD light indica
-
tor illuminate on the screen
on both the left and right of
center. This feature will en
-
able you to do two things.
First you can determine
if a target is close to the
surface by observing how
many bars are illuminated.
One (1) bar on both sides
would indicate a deeper
target, and five (5) bars on
both sides would indicate a
shallow target.
SHALLOW
TARGETS
DEEPER
TARGETS
*LOW
BATTERY
ICONS
USING ACP CONTROL
(Audio Centering Pinpointing)
The MP
X
incorporates a very
precise ACP Pinpointing Con-
trol that will accuracy locate any
target when you're ready to dig.
Once you have located a buried
target and have identified that
target in the slow motion mode
you start by moving the coil away
from the target area with the coil
about 1/2 inch off the ground.
Now you simply push and hold in
the pinpoint button on the
MP
X
and slowly move the search coil
over the target area until you get
the highest audio pitch and the
loudest sound (volume level) at
this point you are centered over
the target. What you are hear
-
ing is the new ACP technology
working to make pinpointing as
effortless as possible.
Note: The deeper the target
the softer or lower the sound
or volume will be.
TIP: Practice pinpointing with
a coin lying on top of the
ground so you can see how
the ACP works.
ACP or (Audio Centering Pinpointing) CONTROL —
LOWEST
AUDIO
PITCH
LOWEST
AUDIO
PITCH
HIGHEST AUDIO PITCH
(Dead Center)

You can adjust the sensitivity at any time, directly by pressing the
or
cursor on the control panel. The status of the sensitivity
will be displayed at the moment that you are pushing the
or
touch pad.
TARGET IDENTIFICATION ICON SCALE –
When a target is detected by the
MP
X
, the target Icon corresponding
to the detected metal will cause that Icon to “flash” momentarily for
about 4 seconds. You can easily determine the types of detected
metals according to the Icon location on the Target Identification
Icon Scale.
76
Icons will
“FLASH” for
4 seconds
when target
is detected.
TARGET ID SCALE
Using the Discrimination Control to eliminate or tune out "Junk"
and unwanted targets.
PUSH the UP touch
pad for LESS dis
-
crimination (Audio
response and
target Icon)
NOTE: When pushing the down touch
pad the eliminated Icon (or Target) will
not show up on the “LCD” screen. (No
audio response and target Icon.)
PUSH the DOWN
touch pad for
MORE
discrimination
When using the down
touch pad for discrimina
-
tion you will no longer get an au
-
dio response or target Icon indi
-
cator on that target. If you want to
hear the audio and see the Icon
response, you can simply push
the up touch pad to decrease the
discrimination.
SEVEN (7) TONE AUDIO TARGET IDENTIFICATION SYSTEM –
By utilizing a seven (7) tone audio identification system you will
quickly learn each tone and the target or targets it represents. The
highest tone will in many cases indicate a larger coin or larger non
iron object. The lowest tone will in most cases indicate an iron target
has been detected. The remaining five (5) tones in the middle will
indicate different size coins, rings and most nickels. Remember you
need to sample some coins and rings to see what tone is produced
by the audio Identification system of the
MP
X
. Continual use and
practice will put these seven (7) tones to memory.
Note about Audio Tone Identification Systems: You will notice
that multiple targets of the same likeness or conductivity will pro
-
duce the same tone. This is normal in this type of Audio system, this
is where your experience will pay off.
The top of the control panel has an easy to read graph indicating
the conductive zone of three metal groups. Iron, gold and silver. You
use the graph as an instant reference point of each detected icon
target below.
The lower Icon Symbols
are as follows:
Starting from the left, (these only appear when the MP
X
is on).
1
st
Icon: iron or small nails.
2
nd
Icon: bottle cap or some foils.
3
rd
Icon: pull tab or nickel.
4
th
Icon: gold ring range.
5
th
Icon: dime.
6
th
Icon: US dollar or quarter.
7
th
Icon: 50 cent coin or larger item.
____________________________
____________________________
____________________________
____________________________
____________________________
____________________________
LOWEST TONE
HIGHEST TONE
1
2
3
4
5
6
7
By listening to the target tone and watching the “flashing” icon you
can quickly identify most buried targets.
Note: When any target is being detected, the corresponding icon
will flash for several seconds, along with its unique tone.
/