Grizzly H7949 Owner's manual

Category
Nail Gun
Type
Owner's manual

This manual is also suitable for


WARNING: NO PORTION OF THIS MANUAL MAY BE REPRODUCED IN ANY SHAPE
OR FORM WITHOUT THE WRITTEN APPROVAL OF GRIZZLY INDUSTRIAL, INC.

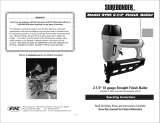
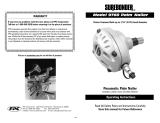
MODEL H7949/H7950/H7951
NAILER
OWNER'S MANUAL
H7949 2
1
/2"
COIL NAILER
H7950 2
3
/4"
COIL NAILER
H7951
ROOFING NAILER
4HISMANUALPROVIDESCRITICALSAFETYINSTRUCTIONSONTHEPROPERSETUP
OPERATIONMAINTENANCEANDSERVICEOFTHISMACHINEEQUIPMENT
&AILURETOREADUNDERSTANDANDFOLLOWTHEINSTRUCTIONSGIVENINTHIS
MANUALMAYRESULTINSERIOUSPERSONALINJURYINCLUDINGAMPUTATION
ELECTROCUTIONORDEATH
4HEOWNEROFTHISMACHINEEQUIPMENTISSOLELYRESPONSIBLEFORITS
SAFEUSE4HISRESPONSIBILITYINCLUDESBUTISNOTLIMITEDTOPROPER
INSTALLATIONINASAFEENVIRONMENTPERSONNELTRAININGANDUSAGE
AUTHORIZATIONPROPERINSPECTIONANDMAINTENANCEMANUALAVAILABILITY
ANDCOMPREHENSIONAPPLICATIONOFSAFETYDEVICESBLADECUTTERINTEG
RITYANDTHEUSAGEOFPERSONALPROTECTIVEEQUIPMENT
4HEMANUFACTURERWILLNOTBEHELDLIABLEFORINJURYORPROPERTYDAMAGE
FROMNEGLIGENCEIMPROPERTRAININGMACHINEMODIFICATIONSORMISUSE
3OMEDUSTCREATEDBYPOWERSANDINGSAWINGGRINDINGDRILLINGAND
OTHERCONSTRUCTIONACTIVITIESCONTAINSCHEMICALSKNOWNTOTHE3TATE
OF#ALIFORNIATOCAUSECANCERBIRTHDEFECTSOROTHERREPRODUCTIVE
HARM3OMEEXAMPLESOFTHESECHEMICALSARE
s ,EADFROMLEADBASEDPAINTS
s #RYSTALLINESILICAFROMBRICKSCEMENTANDOTHERMASONRYPRODUCTS
s !RSENICANDCHROMIUMFROMCHEMICALLYTREATEDLUMBER
9OURRISKFROMTHESEEXPOSURESVARIESDEPENDINGONHOWOFTENYOU
DOTHISTYPEOFWORK4OREDUCEYOUREXPOSURETOTHESECHEMICALS
7ORKINAWELLVENTILATEDAREAANDWORKWITHAPPROVEDSAFETYEQUIP
MENTSUCHASTHOSEDUSTMASKSTHATARESPECIALLYDESIGNEDTOFILTER
OUTMICROSCOPICPARTICLES
Safety Instructions For Pneumatic Tools
1. KEEP ALL SAFETY DEVICES IN
PLACE
2. REMOVE ADJUSTING KEYS AND
WRENCHES
      
    

3. KEEP WORK AREA CLEAN


4. DO NOT USE IN DANGEROUS
ENVIRONMENT
      
     
    

5. KEEP CHILDREN AND VISITORS
AWAY.    
      

6. MAKE WORKSHOP CHILD
PROOF     

7. DO NOT FORCE TOOL.   


8. USE THE RIGHT TOOL.  


9. DO NOT USE UNDER THE
INFLUENCE OF DRUGS OR
ALCOHOL.
For Your Own Safety Read Instruction Manual
Before Operating This Equipment
The purpose of safety symbols is to attract your attention to possible hazard-
ous conditions. This manual uses a series of symbols and signal words which
are intended to convey the level of importance of the safety messages. The
progression of symbols is described below. Remember that safety messages by
themselves do not eliminate danger and are not a substitute for proper accident
prevention measures.
Indicates a potentially hazardous situation which, if
not avoided, MAY result in minor or moderate injury.
It may also be used to alert against unsafe practices.
Indicates a potentially hazardous situation which, if
not avoided, COULD result in death or serious injury.
Indicates an imminently hazardous situation which, if
not avoided, WILL result in death or serious injury.
This symbol is used to alert the user to useful infor-
mation about proper operation of the equipment.
SAFETY
NOTICE


10. USE PROPER AIR HOSE  
       


11. WEAR PROPER APPAREL.
    
     

    


12. ALWAYS USE ANSI APPROVED
SAFETY GLASSES.   

    
    

13. ALWAYS WEAR ANSI APPROVED
HEARING PROTECTION.
14. SECURE WORK.    



15. MAINTAIN TOOLS WITH CARE.
    
    
   

16. REDUCE THE RISK OF
UNINTENTIONAL STARTING. 
      
     

17. DISCONNECT TOOLS 
   

18. DO NOT OVERREACH. 
     

19. USE THE RECOMMENDED
ACCESSORIES.  
   


20. CHECK FOR DAMAGED PARTS
BEFORE USING.   
     
    
     


21. NEVER LEAVE UNATTENDED
TOOL CONNECTED TO AIR.

      

22. NEVER ALLOW UNTRAINED
USERS TO USE THIS TOOL
WHILE UNSUPERVISED.
23. IF YOU ARE UNSURE OF THE
INTENDED OPERATION, STOP
USING THE TOOL.  

    

Safety Instructions For Pneumatic Tools


1. HAND INJURIES:   
     
      
     
   

2. COMBUSTIBLE GASES: 
    
    
    . 
    

3. SAFE HANDLING:  
      
    


      
      
    
     

4. AIR HOSE:    
      
      
     
   
      

Additional Safety Instructions for Nailers
5. COMPRESSED AIR RATING: 


6. CHECK VALVE: 
     

7. CLEANING:    
 

       

8. OPERATING QUESTIONS:  
     
    
    


9. MAINTENANCE: 

   
    
     



Operating this nailer can propel
objects into the air, causing imme-
diate eye damage. To protect your-
self, always wear American National
Standards Institute (ANSI) approved
safety glasses or goggles when oper-
ating this equipment. In addition, the
intensity of sound made by this nailer
at discharge can reach 90 decibels.
To protect your hearing, always wear
ANSI approved ear protection when
operating this nailer.
Never point this nailer at yourself or
another person! Always pay attention
to the direction this nailer is pointed.
Use this tool with respect and caution
to lessen the possibility of operator or
bystander injury. Ignoring this warning
may result in serious personal injury.
Nailer accidents routinely happen
while moving the gun to another loca-
tion, such as up ladders, to another
room, or even another job site. Always
disconnect the gun immediately after
use and never transport the gun while
connected to the air—even if the air
compressor is disconnected from its
power source!
No list of safety guidelines can be
complete. Every shop environment is
different. Always consider safety first,
as it applies to your individual working
conditions. Use this and other tools
with caution and respect. Failure to
do so could result in serious personal
injury, damage to equipment or poor
work results.
Read the manual before operation.
Become familiar with these nailers,
their safety instructions, and opera-
tion before beginning any work.
Serious personal injury may result if
safety or operational information is
not understood or followed.


INTRODUCTION








     

       








       
   
   
    
 
    
     


   


    


Foreword
Contact Info



 




Model H7949
Specifications
Model H7951
Specifications



 




Model H7950
Specifications



 






SETUP
Figure 1.
Unpacking
    
      
      
please imme-
diately call Customer Service at (570) 546-
9663for advice.

      
Otherwise, filing a freight
claim can be difficult.
     
  

Inventory


Model H7949/H7950/H7951 Inventory
(Figure 1)
A. 
B. 
C. 
D. 
E.  
F. 



Compressed Air
System
   
      
    

       
      

   
Figure 2
       




       
     

Quick
Connector
Quick
Coupler
Air Hose
Quick
Coupler
Quick
Connector
Lubricator
Filter
Regulator
Air
Compressor
Your
Tool
Figure 2. 

        
     
 
    

Exceeding the maximum permissible
operating pressure may damage the
seals, gaskets and hammer mecha-
nism of your nailer. DO NOT allow
your air compressor to exceed the
recommended pressure when con-
nected to this nailer or serious per-
sonal injury may result!


Testing Safety Nose
Mechanism
      
      


       
       

       
     

5.     
     
     


       
    

      
    
  


6.     


       
    

      
     
   
   
     
   

The safety mechanism is a mechanical
device that can fail. Never rely on this
mechanism as an excuse to point the
nailer at yourself or any bystanders.
Serious injury may occur.
To verify that the safety nose is working
correctly:
1.    

2        
Page 8
3.       
     

4. 
Point the nailer away from you and
others when connecting the air supply.
The nailer can cycle and discharge a
nail when the air supply is connected.
Ignoring this warning may result in
serious personal injury.


OPERATIONS
Model H7949/H7950
Loading Nails

Page 4
To load nails in your nailer:
1.    

Point the nailer away from you and
others when connecting the air supply.
The nailer can cycle and discharge a
nail when the air supply is connected.
Ignoring this warning may result in
serious personal injury.
2. 
Figure 3
Figure 3.



3.      
      

Figure 4
Note: The plate must be set at the
proper height or the nails will not feed
smoothly into firing position.
Figure 4.




4.       
      
Figure 5
Figure 5.






5.        
      
Figure
6
Figure 6.



6. 
Model H7951
Loading Nails

Page 4
To load nails in your nailer:
1.    

Point the nailer away from you and
others when connecting the air supply.
The nailer can cycle and discharge a
nail when the air supply is connected.
Ignoring this warning may result in
serious personal injury.
2.       
Figure 7

Figure 7.



Figure 8.






3. 
       

Figure 8
4.        
       
Figure 9

Figure 9.

5. 




Rotating Exhaust
Cover


To rotate the exhaust cover:
1. 
      
Figure 10
Figure 10.

2.       
      

3. 
Unloading Nails
To remove unused nails:
1.    

2.   

3.      
Page 8

4.      






Using the Nailer

         
     

To operate your nailer:
1.       

2. 




3.     

Note: Deflection is caused when
grain irregularities, knots or foreign
objects inside the wood cause the
nail to change its path, resulting in
the nail puncturing the surface of the
workpiece.
Besides damaging your workpiece,
deflection can cause injury if your free
hand is securing the workpiece in the
location that the nail deflects.
5. 

     

   
      

Page 12
4.      
      
       
       
    Figure
11
Figure 11.
Read the manual before operation.
Become familiar with these nailers,
their safety instructions, and opera-
tion before beginning any work.
Serious personal injury may result if
safety or operational information is
not understood or followed.


    

To clear a jammed nail from the dis-
charge area:
1.    

2. 
3. 
     
Figure 13
Clearing Jammed
Nails
Figure 13.

Figure 12.
Adjusting Depth
To adjust the nail depth:
      

Figure 12
4.       

Figure 14


1.    

2.      







3.       
      
    

Figure 14.




Replacing
Pistons/O-Rings




      
     
      
    

      


4.        



5.         
      
       
       
       
      

6.       
     

7.       
     
      

8.     

9.    
       
     

10.       




Note: DO NOT force the piston into
the cylinder! If the piston 'hangs' in the
cylinder, double check the fit between
piston and O-ring and imake sure the
cylinder is clean.
11.        


To replace a piston and O-ring(s):
1.    

2. 
3.      


Always disconnect the air supply
from the nailer whenever servicing!
During maintenance, a nailer con-
nected to air may fire accidentally,
causing serious personal injury!


CLEANING & LUBRICATING
Cleaning

 
   







Lubricating
     
      
     
         
  Figure 15    

       
     
       
     

      

     




Figure 15. 

Never use gasoline to clean this tool.
Use extreme caution when using any
solvent cleaner. Always clean the tool
in a well-ventilated area and never if
sparks or open flames are present.
Remember that electrical machinery
can produce sparks during normal
operation. Ignoring this warning can
cause serious personal injury or even
death!


H7949 PARTS BREAKDOWN
&
'
(
)
*
+
,
-
.
&%
&&
&'
&(
&)
&*
&+
&,
&-
&.
'%
'&
''
'(
')
'*
'+
',
'-
'.
'.
(%
(&
('
((
((
()
()
(*
(*
(+
(,
(-
(.
)%
)&
)'
)(
))
)*
)+
),
)-
).
*%
*&
*&
*'
*(
*)
**
*+
*,
*-
*.
+%
+&
+'
+(
+)
+*
++
++
++
+,
+-
+.
,%
,&
,'
,(
,)
,*
,+
,,
,-
,.
-%
-&
-'
-(
-)
-*
-+
-,
--
-.
.%
.&
.'
.(
.)
.*
.+
.,
Cdih]dlc/.-CV^aZg8VhZ!&%%>cXajYZYEcZjbVi^XD^a!&%&=ZmLgZcX])bb!
&%'=ZmLgZcX]*bb!&%(E^hidcGZeV^g@^i!&%)BVX]^cZAVWZa#


H7949 PARTS LIST
PAGE 1 OF 2
REF PART # DESCRIPTION REF PART # DESCRIPTION
1 PFH55M FLAT HD CAP SCR M6-1 X 20 40 PH7949040 STEPPED PIN
2 PH7949002 FRONT BRACKET 41 PH7949041 O-RING
3 PH7949003 EXHAUST COVER 42 PH7949042 FEED PISTON
4 PH7949004 EXHAUST FILTER 43 PH7949043 O-RING
5 PH7949005 EXHAUST FILTER PLATE 44 PH7949044 SPRING
6 PSB38M CAP SCREW M5-.8 X 25 45 PH7949045 SPRING
7 PH7949007 CAP 46 PH7949046 FEED PISTON STOP
8 PH7949008 SPRING 47 PH7949047 SPRING COLLAR
9 PH7949009 WASHER 48 PH7949048 O-RING
10 PH7949010 O-RING 49 PH7949049 STEPPED PIN
11 PH7949011 PISTON HEAD VALVE 50 PH7949050 RATCHET
12 PH7949012 O-RING 51 PH7949051 SPRING
13 PH7949013 SEAL 52 PH7949052 DOOR
14 PH7949014 PLAIN WASHER 53 PH7949053 NAIL SUPPORT
15 PH7949015 PISTON STOPPER 54 PH7949054 SPRING
16 PH7949016 O-RING 55 PH7949055 SET SHAFT
17 PH7949017 PISTON 56 PH7949056 SLIDE ROD
18 PH7949018 DRIVER 57 PH7949057 MAGAZINE
19 PH7949019 CYLINDER 58 PSBS09M BUTTON HD CAP SCR M5-.8 X 12
20 PH7949020 O-RING 59 PSB15M CAP SCREW M5-.8 X 20
21 PH7949021 CYLINDER RING 60 PLN02M LOCK NUT M5-.8
22 PH7949022 COLLAR 61 PH7949061 MAGAZINE COVER
23 PH7949023 O-RING 62 PRP42M ROLL PIN 3 X 20
24 PH7949024 GASKET 63 PH7949063 RUBBER INSERT
25 PH7949025 BODY 64 PH7949064 SAFETY LEVER
26 PH7949026 PAD 65 PH7949065 DUST COVER
27 PH7949027 O-RING 66 PW03M FLAT WASHER 6MM
28 PH7949028 BOTTOM BUMPER 67 PSBS06M BUTTON HD CAP SCR M5-.8 X 12
29 PH7949029 O-RING 68 PH7949068 NOSE COVER
30 PH7949030 NOSE 69 PH7949069 PALLET TIP
31 PSB02M CAP SCREW M6-1 X 20 70 PH7949070 SIDING TIP
32 PH7949032 STEPPED PIN 71 PH7949071 DECKING TIP
33 PH7949033 RETAIN RUBBER 72 PRP97M ROLL PIN 3 X 30
34 PH7949034 RETAIN RUBBER 73 PH7949073 TRIGGER VALVE CAP
35 PH7949035 CHECK PAWL 74 PH7949074 O-RING
36 PH7949036 SPRING 75 PH7949075 PLUNGER
37 PH7949037 STEPPED PIN 76 PH7949076 SPRING
38 PH7949038 PROTECTOR 77 PH7949077 O-RING
39 PH7949039 FEED PAWL 78 PH7949078 O-RING


H7949 PARTS LIST
PAGE 2 OF 2
REF PART # DESCRIPTION REF PART # DESCRIPTION
79 PH7949079 PILOT VALVE 92 PH7949092 CONTACT TRIP BLOCK
80 PH7949080 O-RING 93 PH7949093 ADJUSTING BOLT
81 PH7949081 BALL PIN 94 PH7949094 COVER
82 PH7949082 TRIGGER VALVE HOUSING 95 PH7949095 O-RING
83 PH7949083 O-RING 96 PH7949096 RUBBER GRIP
84 PH7949084 O-RING 97 PH7949097 ADJUSTING NUT
85 PH7949085 TRIGGER PLATE 98 PH7949098 NAILER CASE
86 PH7949086 TRIGGER 100 PH7949100 INCLUDED PNEUMATIC OIL
87 PRP98M ROLL PIN 3 X 16 101 PAW04M HEX WRENCH 4MM
88 PH7949088 SLIDE SHAFT 102 PAW05M HEX WRENCH 5MM
89 PH7949089 SPRING 103 PH7949103 PISTON REPAIR KIT
90 PH7949090 TRIP GUIDE 104 PH7949104 MACHINE LABEL
91 PH7949091 SPRING
1 / 1

Grizzly H7949 Owner's manual

Category
Nail Gun
Type
Owner's manual
This manual is also suitable for

Ask a question and I''ll find the answer in the document

Finding information in a document is now easier with AI

Ask the document