Page is loading ...

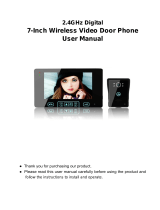
USER MANUAL
Thank you for purchasing our products.
The company is not responsible for any safety accidents caused by abnormal
operation of the product.
Please carefully read this User's Guide(in particular, precautions for safety) before
using this product .
COLOR VIDEO DOOR PHONE
Model no.: IMATB4H

7
12
1
3
5
5
8
9
13
6
Version1.1
6. Installation
9. System setting
1. Warning and Caution
Index
10. Specification
2. The function and name of each part
7. Buttons function
8. Operation guide
3. Features and main function
4. Package contents
5. Wiring diagram

Do not put the plug in the
socket simultaneously.
It may generate abnormal
heat or cause a fire.
Do not connect to other
products while in use.
It may cause breakdown.
Do not forcibly bend the cord
or put a heavy object on the
product.
It may cause a fire.
Do not use water, thinner or
a detergent used to wash oil
products when you wash the
exterior.
Make sure to wash it by using
a dry cloth to prevent any
breakdown or electric shock.
Do not install the product in a
humid place.
It may cause an electric
shock or a fire.
Do not forcibly pull out the
cord from the socket.
If the cord is damaged, it
may cause a fire or an
electric shock.
Do not put the plug in the
socket with a wet hand.
It may cause an electric
shock.
Do not disassemble, repair
or modify the product.
It may cause a fire, an electric
shock or an injury due to
malfunction of the product.
Do not use AC circuit breaker.
It may cause an electric shock.
warning
warning
1. Warning and caution
Make sure to follow the instructions to prevent any danger or property losses.
Warning
Death or serious
injury is expected.
It indicates prohibition of contact.
It indicates disassembly.
It indicates dos and don’ts.
It indicates prohibition.
It indicates that the plug should be pulled out from the
socket.
Page1

NO
NO
NO
NO
The socket holes
are lager than
usual.
If the socket holes are larger
than normal, do not put the
plug.
It may cause an electric shock
or a fire.
Make sure that dust or foreign
substances are not gathered
on the product.
Make sure to prevent foreign
substances from entering the
product.
It may cause a breakdown.
Do not put a heavy object on
the product.
It may cause a breakdown.
Do not disassemble the
product.
Avoid direct rays of the sun or
heating devices at a time of
installation.
Install the product in a flat and
stable place.
Otherwise, it may not function
properly.
Pull the plug if the product is
not used for a long time.
If the product generates
strange sound, make sure to
pull the plug immediately and
contact service center.
CAUTION
Caution
A injury or property
losses are expected.
It indicates prohibition of contact.
It indicates disassembly.
It indicates dos and don’ts.
It indicates that the plug should be pulled out from the
socket.
It indicates prohibition.
Page2

Answer/Hang up
Choose/Adjust
Power switch
On/Off
1
2
3
4
5
6
No.
Back button
Left button
Right button
Handset
Menu button
Item
Function description
7
8
9
10
11
Enter system settings/Confirm
Unlock button
Answer button
Monitor button
Indicator light
Microphone
Choose/Adjust
Back/Hang up
Unlock
Answer/Call
Monitor
Power indicator light
Page 3
2. The function and name of each part
1
2 3 4 5
10
9
8
7
6
11
2.1 Front view

4
3
PWR1
VD1
DATA
GND
AD1
GND
PWR2
VD2
AD2
CCTV2
CCTV1
GND
GND
DATA
GND
VD
AD
GND
VCC
Port 1 Port 2
Port 3 Port 4
PWR1
VD1
DATA
GND
AD1
GND
PWR2
VD2
AD2
CCTV2
CCTV1
GND
GND
DATA
GND
VD
AD
GND
VCC
Port 1
Port 2
Port 3
Port 4
For connecting IMARJ
3
Speaker 2
4
Microphone
For connecting slave monitor
For connecting power supply
1
Speaker 1
1
2
Ports
2
2.1 Rear view
Ports detail
Page 4

Page 5
MODEL LIST
3. Features and main function
4. Package contents
4.3" color digital LCD, high definition
Talk hands free or with handset, meet different people’s favor
Friendly interface, simple operation
12 polyphonic ring-tones switch freely
3.1 Features
3.2 Main function
Unlock
Broadcast function
Monitor listening
Call transfer
Real-time monitoring to doorbell or CCTV camera
Make internal call to other monitors
Brightness, contrast, volume, display model and color adjustable

A D 1
DATA
GND
PWR
VD1
IMARJ
A D 1
DATA
GND
PWR
VD1
IMARJ
A D 1
DATA
GND
PWR
VD1
IMARJ
A D 1
DATA
GND
PWR
VD1
IMARJ
A D 1
DATA
GND
PWR
VD1
IMARJ
5. Wiring Diagram
Page 6
IMAPS
PWR1
VD1
DATA
GND
AD1
Port 1
IMAMD
V-OUT V-IN
M4
M3
M2
M1
IMAMD
V-OUT V-IN
M4
M3
M2
M1
5 wires
5 wires
5 wires
5 wires
5 wires
Cat-5
Cat-5
Cat-5
Cat-5
Cat-5
Cat-5
Cat-5
Cat-5
Wel co me
RF
M1
M2
M3
M4
ON
1 2
The DIP switch in
the last IMAMD
should set to be ON.

1.Refer to relevant wiring diagram for the system you have chosen and ensure you
have the correct cable.
2.Determine Monitor positions and heights:
-suggest to install at 1.5~1.6Meters;
-suggest distance between indoor monitor and doorbell is at least 350 mm;
3.Ensure no power supply connection before installation finished
4.Take off the bracket from the back of the monitor.
5.Install the bracket on the wall
6.Connect cables as per the wiring diagram indicated.
7.Fix the monitor onto the bracket.
8.Power on the monitor when the system wiring finished.
6. Installation
150cm
Page 7

Page 8
Buttons Functions
【Menu button】
Press this button to wake up the screen and display the system Settings menu in
standby mode.
Can able to enter into lower menu by adjusting left/right button to choose and
confirm any function
【Left button】
Press this button in the "Setting" menu, can browse though the menu;
Adjust function in each sub menu
【Right button】
Press this button in the "Setting" menu, can browse though the menu;
Adjust function in each sub menu
【Monitor button】
Press this button to watch door station. Press it again can swtich to other monitoring
Long
installed.
press will enable the listening mode(Only works when slave monitors are
【Answer button 】
Press this button to answer the call,
Short press can make internal call to other monitors, long press can make
broadcast in standby mode.(Only works when slave monitors are installed.)
【Unlock button】
The tenant can press this button to turn on the electric lock and let the visitor in.
[note] When there is an image, it can be unlocked!
In each sub menu, press this button to return to the main interface and be in
standby mode.
Press this button in the sub menu to return to the upper-level menu interface.
7. Buttons function
button】【Back
сhannel.

8. Operation guide
DEVICE ADDRESS set
ROOM NO. set
Press to go to system settings, press or to go to DEVICE
ADDRESS. Press to select the item, press or to set the
master monitor to be ROOM 1. For slave monitors, please set the address
to be ROOM 2/3/4.
This item will only appear when the monitor is installed in the apartment
system. Long press on door station, then input password(default
000000) to enter system settings, press to go to DEBUG, press any
number button to enter debug setting, press any number button to enable
DEBUG MODE. Long presss until the screen shows SYSTEM
SETUP.
Then go to the monitor system settings, press or to go to
ROOM NO. setting, press to enter it to change the ROOM NO.
Remark: The ROOM NO. could only be modified when the door station
screen shows SYSTEM SETUP.
#
#
#
Talking volume adjust
At the state of monitoring/ringing/talking/making intercom/broadcasting,
press or to enter volume adjustment interface. press or
again to adjust the talking volume,
Brightness/color/contrast/display model adjust
At the state of monitoring/ringing/talking/making intercom/broadcasting,
Page 9

station, and press can open the door.
Remark:
In apartment system, the user can only monitor the apartment door station
whose address is set as 1(DR1 port, master door station).
Incoming call answer
When a visitor presses door station, all the indoor monitors in the same
apartment will chime, the LCD will show “INCOMING CALL”. Press
or pick up the handset to talk with the visitor, press button can
unlock the door for the visitor.
press or to enter volume adjustment interface. Press can
switch to BRIGHT/CONT/COLOR/display model interface, press or
to adjust as the user wants.
“Don’t disturb” function
You can use SYSTEM SETTINGS menu to turn “DO NOT DISTURB”
function on or off. If enable this function, there will be no chime during
ringing/intercom/broadcast.
Monitor door station/CCTV camera
At standby state, press button to monitor Door station 1, press
again, change the viewing screen to another video channel. When
monitoring Door station channel, press can talk with people in front
of the door
Page 10

If there are slave monitors in the same apartment
Internal call among monitors
.
If you want to make internal call to another monitor in the same
apartment, press at standby state. If there are more than 1 slave
monitors in the same apartment, you need to press or to select
target room no., then press or to confirm the call. The user in
another room can pick up handset or press to answer the call, or
press to hang up.
Broadcast function
At standby state, long press button, the screen will show BROADCAST
REQUEST, the monitor in other rooms will show BROADCASTING . Now you
can make broadcast .
Remark: At broadcast state, it’s only one-way talk. The listener can not
talk to the caller.
At standby state, long press button to start the monitor listening function.
If you have more than 2 indoor monitors ,there would be option rooms for
Monitor listening
choosing on screen, press or to choose the target indoor intercom
and press to confirm.
Note:
a: When monitoring, the user can hear the sound from the being monitored
room,but the people at the be-monitored intercom room can not hear the voice
Page 11
from monitoring intercom room.
b: Monitor listening function is only available when BE MONITORED function
in the target monitor is enabled. Please check the system setting menu to see

how to enable the CAN BE MONITORED function.
Page 12
In standby status ,short- press button to enter system setting menu.
9. System setting
No. Setting items Options Notes
1
2 CHIME VOLUME Default 03, 01 - 07 adjustable.
3 RING TYPE
Door1 ring type 01 by default, 00-11 optionals
Door2 ring type 02 by default , 00-11 optionals
Intercom ring type 03 by default , 00-11 optionals
4 DO NOT DISTURB
Off by default, at the ringing, intercom between monitors,
broadcast status, the LED indicator will flicker when turn
on “DO NOT DISTURB” function.
5
CAN BE
MONITORED
Off by default, it can be monitored by other indoor
intercoms in the system when turn on this function.
6 DEVICE ADDRESS Room1/2/3/4
Master monitor must be set as ROOM
1, and the option will be yellow if two
monitors set the same address.
7
8
RESTORE
DEFAULT
Restore the system to default settings.
CHIME TIME Default
30seconds
, (10 - 60 seconds adjustable)
RING REPEAT
Default ENABLE. If disable it, the monitor will only
ring once when be called.

No. Items Content
1 LCD Screen 4.3inch digital screen
2 Resolution 480 x272
3 Intercom function Hands free / Handset
5 Audio frequency 300mVp-p (1KHz,300 Ohm load)
6 Audio Distortion <3%
7 Frequency Range 400-3.5K
8 Intercom distance
30m(RVV4*0.5),100m
(RVV2*0.5+SYV75-3 )
9 Video 1Vp-p 75OHM(Input)
10 Button Touch buttons
11 Outdoor panel Support 2 (5PIN*1,4PIN*1)
12 CCTV Support 2 channels
13 Ringtones 12 Polyphonic ringtones
15 Operating voltage DC14.5V /0.8A
16 Power Consumption 5W(Max),0.3W(Standby)
17 Operating temperature -10℃ - +40℃
18 Storage Temperature -30℃ - +60℃
10. Specification
Page 13

The parameters of product are subject to changes without prior notice.
/