Page is loading ...

Tecnologic ‘KR’ Series
UK Quick Programming Guide
This guide should be used alongside the full engineering manual, appropriate to the instrument being
used, where more detailed information can be found (download manual from www.t-uk.co.uk).
Programming the Instrument
Tecnologic controllers are supplied with default programmable settings that may be suitable for your
application. However we recommend that you go through the programming process, as incorrect
programming could compromise its performance.
There are four possible ways of programming the KR range of controllers:
1. Quick setting - using 8 numbers derived from a parameter option list shown later in this
document. If the options you require are not shown you will need to use either the basic
or full menu options.
2. Basic menu – Most standard options can be programmed here in a simple sequential
parameter list.
3. Full menu - All programming options are here, split into sub-menus.
4. Via software or memory KEY015-E – Key plugs into controller and PC via USB.
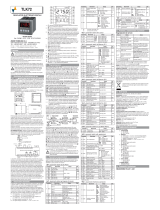
Key
U button is used for navigation between
menus. Holding down for 1 second will take
you back one step. Holding down for 2
seconds will take you out of configuration.
P button used for entering or moving to the
next parameter.
Up & down buttons used for increasing or
decreasing values.
Programming level pass
numbers
300
- Quick setting using a 2 x 4 digit code.
81
- Basic menu with 10 second time out
function.
40
– Full menu
Note: To reset instrument to factory default
settings, press P for 5 seconds and dial in -481.
Press P to confirm
U
P
Unit 1 Farnborough Business Centre, Eelmoor Road, Farnborough, GU14 7XA
T: 01252 377600 F: 01252 377601 E: sales@tecnologicuk.co.uk

Quick Setting Configuration Codes
The controller configuration (Input type, Control mode Alarms and Auxiliary functions) can be made
by entering two 4-digit codes. You can work out the 2 relevant configuration codes using the tables
below.
To work out code 1
To work out code 2
Cod1
L
M
N
O
Control Mode
OP1
OP
2
OP
3
OP
4
N
O
ON/OFF heating = H
H
AL1
AL2
AL3
0
0
NU
AL1
AL2
H
0
1
ON/OFF cooling = C
C
AL1
AL2
AL3
0
2
NU
AL1
AL2
C
0
3
ON/OFF with neutral
zone (H/C)
H
C
AL2
AL3
0
4
H
AL1
AL2
C
0
5
C
H
AL2
AL3
0
6
NU
H
AL2
C
0
7
C
AL1
AL2
H
0
8
NU
C
AL2
H
0
9
PID heating =H
H
AL1
AL2
AL3
1
0
NU
AL1
AL2
H
1
1
PID cooling =C
C
AL1
AL2
AL3
1
2
NU
AL1
AL2
C
1
3
PID double action (H/C)
H
C
AL2
AL3
1
4
H
AL1
AL2
C
1
5
C
H
AL2
AL3
1
6
NU
H
AL2
C
1
7
C
AL1
AL2
H
1
8
NU
C
AL2
H
1
9
Input Type & Range
L
M
TC J
-50...+1000°C
0
0
TC K
-50...+1370°C
0
1
TC S
-50...+1760°C
0
2
TC R
-50...+1760°C
0
3
TC T
-70...+400°C
0
4
Infrared J
-50...+785°C
0
5
Infrared K
-50...+785°C
0
6
PT100 / PTC KTY81-121
-200... +850°C/ -55...+150°C
0
7
PT1000 / NTC 103-AT2
-200... +850°C/ -55...+110°C
0
8
Linear 0...60mV
0
9
Liner 12...60mV
1
0
Linear 0...20mA (this selection forces out 4=TX)
1
1
Linear 4...20mA (this selection forces Out 4=TX)
1
2
Linear 0...5V
1
3
Linear 1...5V
1
4
Linear 0...10V
1
5
Linear 2...10V
1
6
TC J
-58...+1832°F
1
7
TC K
-58...+2498°F
1
8
TC S
-58...3200°F
1
9
TC R
-58..+3200°F
2
0
TC T
-94..+752°F
2
1
Infrared J
-58..+1445°F
2
2
Infrared K
-58..+1445°F
2
3
PT100 / PTC KTY81-121
-328...+1562°F/ -67...+302°F
2
4
PT1000 / NTC 103-AT2
-328...+1562°F/ -58...+230°F
2
5
Cod2
P
Q
R
S
Alarm 3
R
Alarm 2
Q
Alarm 1
P
Not used
0
0
0
Sensor break
1
1
1
Absolute
High
2
2
2
Low
3
3
3
Absolute High/Low
External High/Low
4
4
4
Internal High/ Low
5
5
5
Deviation
Deviation High
6
6
6
Deviation Low
7
7
7
Band
External Band
8
8
8
Internal Band
9
9
9
Auxiliary functions activation
S
None
0
Wattmeter (instantaneous power
expressed in W)
1
Wattmeter (energy expressed in Wh)
2
Absolute worked time (expressed in days)
3
Absolute worked time (expressed in hrs)
4
Entering the codes
Press ‘P’ and then enter the pass code, 300.
Press ‘P’ again. You can now enter in code 1.
Press ‘P’ and enter code 2 in.
The screen will then flash is code is accepted or
not.

Navigating the basic level programming guide
This is a blueprint guide for changing all the parameter settings on the instrument within the 81 basic
menu.
Note: Some parameters will disappear and/or additional parameters will appear depending on
settings selected. If the advanced menu is required use the 40 pass code & select appropriate menu
using the ‘U’ key. Please refer to the main manual.
Start/ Configure.
Power up unit. tEST will flash
Press & hold .
Dial in ‘81’ & press P to confirm.
With power to unit press P for 5
seconds.
‘Pass’ is displayed along with ‘0’
Use and arrow to
select required setting
within chosen parameter.
Press P to confirm.
Unit then accepts the chosen
setting and moves on to next
parameter in menu. (Repeat
above for all required parameters)
To exit programming press and
hold U to return to displayed
temperature.
To skip a parameter
press P to move onto
next one.
Unit will display first parameter in
menu, i.e. SEnS
81 Basic parameter menu
Display
Parameter name/
description
Manual
ref.
SEnS
Sensor/ input type
[1]
dP
Decimal point position
[2]
unit
Engineering Unit
[5]
o1F
Output function 1
[13]
o2F
Output function 2
[18]
o3F
Output function 3
[21]
o4F
Output function 4
[24]
cont
Control type
[55]
Auto
Auto tuning for PID
parameters
[56]
Pb
Proportional band value
(°C)
[61]
ti
Integral time
[62]
td
Derivative time
[63]
Fuoc
Fuzzy overshoot control
[64]
tcH
Heating output cycle
time
[65]
SPLL
Min. adjustable set
point value
[76]
SPHL
Max. adjustable set
point value
[77]
SP
Control set point
[78]
AL1t
Alarm 1 type/function
[27]
AL2t
Alarm 2 type/function
[35]
AL3t
Alarm 3 type/function
[43]
di.cL
Display colour
[122]
io4.F
Input/ Output 4 function
[9]
Unit 1 Farnborough Business Centre, Eelmoor Road, Farnborough, GU14 7XA
T: 01252 377600 F: 01252 377601 E: sales@tecnologicuk.co.uk
/