Page is loading ...

Keep this Product ID Number and use when contacting Customer Service:
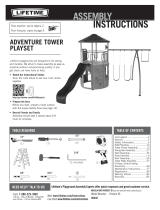
OWNER’S MANUAL
MODEL N° 90231
OWNER’S MANUAL
COPY

2
Save this owner’s manual for future reference and in the event that
the manufacturer has to be contacted.
**U.S. and Canada customers ONLY**
IF ASSISTANCE IS NEEDED,
DO NOT CONTACT THE STORE!
CALL OUR CUSTOMER SERVICE DEPARTMENT at
1 (800) 225-3865
HOURS: 7:00 a.m. to 5:00 p.m. Monday through Friday (Mountain Standard Time)
**Call us or visit our Web site for Saturday hours**
Lifetime Products, Inc.
10#PYt'SFFQPSU$FOUFS#MEH%$MFBSGJFME6UBI
**For customers outside the U.S. or Canada, please contact the store for assistance.**
REGISTER YOUR LIFETIME PRODUCT TODAY!
-*'&5*.&4130.*4&50:06
We invite you to read our privacy policy at www.lifetime.com
REGISTER today!
There are benefi ts to registering your Lifetime product. With our new online product registration form,
it’s fast and easy! Register with us at www.lifetime.com and enjoy these great benefi ts:
t3FDFJWFFYDMVTJWFNPOFZTBWJOHPGGFSTGSPN#VZ-JGFUJNFDPNPVSPOMJOFTUPSFBTXFMM
as NEW product notifi cations and special closeout promotions!
t*OUIFVOMJLFMZFWFOUPGBQSPEVDUSFDBMMPSTBGFUZNPEJmDBUJPOXFXJMMOPUJGZZPV
t3FHJTUFSJOHZPVSQSPEVDUHVBSBOUFFTZPVXBSSBOUZTFSWJDF*GZPVEPOPUSFHJTUFSZPVS
QSPEVDUZPVSXBSSBOUZSJHIUTXJMMOPUCFEJNJOJTIFE#VUZPVXJMMOFFEUPQSPWJEFBTBMFT
receipt to verify your product purchase date before warranty service will be provided.
Maintaining your privacy is our long-standing policy at Lifetime. And you can rest as-
sured that Lifetime will not sell or provide your personal data to other third parties, or
allow them to use your personal data for their own purposes.
*/4536$5*0/$ 12/28/2011
COPY

3
Most injuries are caused by misuse and/or not following instructions. Use caution when using this product.
To ensure safety, do not attempt to assemble this product without reading and
GPMMPXJOHBMMJOTUSVDUJPOTDBSFGVMMZ$IFDLUIFFOUJSFCPYBOEJOTJEFBMMQBDLJOH
materials for parts and/or additional instruction material. #FGPSFCFHJOOJOHBTTFNCMZ
identify and inventory all parts and hardware using the parts and hardware lists and
identifi ers in this document. Proper and complete assembly, use and supervision
BSFFTTFOUJBMGPSQSPQFSPSJFOUBUJPOBOEUPSFEVDFUIFSJTLPGBDDJEFOUPSJOKVSZ"
IJHIQSPCBCJMJUZPGTFSJPVTJOKVSZFYJTUTJGUIJTQSPEVDUJTOPUJOTUBMMFENBJOUBJOFE
and/or operated properly. Failure to comply with any of the warnings in this
JOTUSVDUJPONBOVBMNBZSFTVMUJOTFSJPVTQFSTPOBMJOKVSJFTTVDIBTDVUTCSPLFO
CPOFTOFSWFEBNBHFQBSBMZTJTCSBJOJOKVSZPSEFBUI'BJMVSFUPDPNQMZNBZBMTP
result in property damage. Please heed all warnings and cautions.
'"*-63&50'0--085)&4&8"3/*/(4.":3&46-5*/4&3*064*/+63:031301&35:
DAMAGE AND WILL VOID WARRANTY.
t*GVTJOHBMBEEFSEVSJOHBTTFNCMZVTFFYUSFNFDBVUJPO
t5XPDBQBCMFBEVMUTBSFSFDPNNFOEFEGPSUIJTPQFSBUJPO
t$IFDLCBTFEBJMZGPSMFBLBHF-FBLTNBZDBVTFQSPEVDUUPGBMM
t"TTFNCMFUIFQPMFTFDUJPOTQSPQFSMZ'BJMVSFUPEPTPDPVMEDBVTFUIFQPMF
sections to separate during play or transport.
SAFETY INSTRUCTIONS
BEFORE BEGINNING ASSEMBLY
Keep the hardware bags and their contents separate. If any parts
are missing, call our Customer Service Department.
Identify and inventory all parts and hardware using the parts and
hardware lists and identifi ers in this document.
5FTUmUBMM#PMUTCZJOTFSUJOHUIFNJOUPUIFJSSFTQFDUJWFIPMFT*G
OFDFTTBSZDBSFGVMMZTDSBQFBXBZBOZFYDFTTQPXEFSDPBUJOH
buildup from inside the holes. Do not scrape away all of the
QPXEFSDPBUJOH#BSFNFUBMNBZSVTU:PVNBZOFFEUPQPVOE
TPNF#PMUTJOUPQMBDFXJUIBIBNNFSPSNBMMFU

TOOLS AND PARTS REQUIRED FOR THIS ASSEMBLY
*Two adults required to
complete assembly*
Only adults should set up the product. Do not allow children
in the setup area until assembly is complete.
Electric Drill
Phillips Screwdriver
(1)
7/16” Wrench
(2)
(1)
Pliers
Rubber Mallet
(1)
1/2” Wrench
(2)
(1)
9/16” Wrench
(2)
w8SFODI
(2)
3/16” Allen
Wrench
(2, included)
Wood Block
(1) Included
(7 80 lb bags)
1/2” x 3’ Rebar
(1)
Shovel
Tape Measure
Cement Mix
(1)
(1)

5
This area is located at the top,
left-hand corner of the page
and indicates which tools
and hardware are needed to
complete the assembly steps
on a page.
Note:
!
Refer to the following areas throughout the instructions
to assist in the assembly process:
This area is usually located in the
bottom, left-hand corner of a step
and indicates that special attention
is needed to perform a particular
part of a step.
These areas are usually located in
the bottom, right-hand corner of a
step and indicate that damage to
the product or serious injury may
occur if the caution or warning is
not heeded.
WARNING
ASSEMBLY GUIDES
TOOLS AND HARDWARE REQUIRED FOR THIS PAGE
CAUTION

6
PARTS LIST
HARDWARE LIST
ID Item Description Qty
BCO Pole Assembly Hardware
ADS wYw4DSFX 2
"#; Yw4FMG5BQQJOH4DSFX 2
AAF w8BTIFS 2
"## w$FOUFSMPDL/VU 2
"#& wYw)FY#PMU 2
"#3 wYw4QBDFS 2
CIH %PNFE$PVOUFSTJOL8BTIFST 2
ID Item Description Qty
"-) Top Pole 1
"-' Middle Pole 1
"-& #PUUPN1PMF 1
".: #BDLCPBSE#SBDLFU 2
DFD 6#PMU4VQQPSU#SBDLFU 1
AJI #BDLCPBSE 1
"-. Pole Cap 1
"-9 Rim 1
",; Net 1
"-% Plastic Guard 1
AKF Gas Spring 1
AJO #FMMPXT 1
".9 ;JQ5JF 2
AMW 8PPE#MPDL 1
AKC 4IPSU&YUFOTJPO"SN 2
",# -POH&YUFOTJPO"SN 2
"+9 Corner Frame Pad 2
AJQ Center Frame Pad 1
"-- 1PMF#SBDLFU 1
AKI Handle 1
AMN Trigger 1
"-4 3FBS-JGUFS"SN 2
AKP )FJHIU4UJDLFS 1
AMT 8BSOJOH4UJDLFS"QQMJFEUP.JEEMF1PMF 1

7
HARDWARE LIST
ID Item Description Qty
BCS Backboard & Rim Assembly Hardware
AAM wYw5BQ#PMU 2
DFE wYw)FY#PMU 4
"#, w/ZMPDL'MBOHF/VU 4
"## w$FOUFSMPDL/VU 4
"#% 5/16” Washer 2
"#' 7/16” Rubber Washer 2
AAJ w)FY5/VU 2
AAV 5/16” Jam Nut 2
AOW Spring Retainer Plate 1
AJW Compression Spring 2
"1; w6#PMU 1
BCR Backboard to Pole Assembly Hardware
%'# wYw)FY#PMU 2
AAD wYw)FY#PMU 2
DGA wYw4QBDFS 2
""9 w$FOUFSMPDL/VU 4
"#/ wYw4QBDFS 4
BCT Handle Assembly Hardware
AAH Cotter Pin 1
AAI Clevis Pin 1
"$9 wYw)FY#PMU 1
AAO w/ZMPDL/VU 1
""9 w$FOUFSMPDL/VU 2
"#. wYw4QBDFS 2
"## w$FOUFSMPDL/VU 2
AQE Release Pin 1
"#" wYw)FY#PMU 2
AAW wYw)FY#PMU 1
AKH (SFBTF1BDLFUOPUTIPXO 1
AAD wYw)FY#PMU 1
"#5 wYw4QBDFS 1
BCU Frame Pad Assembly Hardware (HH00700)
ADP Yw4FMG%SJMMJOH'MBU4DSFX 10

8
Parts shown at 10% of Actual Size
PARTS IDENTIFIER
ALHY
Top Pole
"-'Y
Middle Pole
ALEY
#PUUPN1PMF
43 ”
3/8
43 ”
3/8
21 1/8”
AKCY
4IPSU&YUFOTJPO"SN
25 7/8”
AKBY
-POH&YUFOTJPO"SN
"+9Y
Corner Frame Pad
"+2Y
Center Frame Pad
ALSY
3FBS-JGUFS"SN
",'Y
Gas Spring
AKIY
Handle
AMNY
Trigger
8BSOJOH4UJDLFS
31”
43 ”
3/8

9
AKZY
Net
"-9Y
Rim
"+*Y
#BDLCPBSE
Parts shown at 5% of Actual Size
Parts shown at 10% of Actual Size
PARTS IDENTIFIER
"+0Y
#FMMPXT

10
Parts shown at 25% of Actual Size
PARTS IDENTIFIER
ALMY
Pole Cap
ALDY
Plastic Guard
ALLY
1PMF#SBDLFU
".9Y
;JQ5JF
AKPY
)FJHIU4UJDLFS
AMYY
#BDLCPBSE#SBDLFU
%'%Y
6#PMU4VQQPSU
#SBDLFU
AMWY
8PPE#MPDL

11
HARDWARE IDENTIFIER
POLE ASSEMBLY HARDWARE
Hardware shown at Actual Size
POLE TO BASE ASSEMBLY HARDWARE
Hardware shown at Actual Size
ADSY
wYw4DSFX
ABZY
Yw4FMG5BQQJOH4DSFX
ABBY
w$FOUFSMPDL/VU
""'Y
w8BTIFS
ABEY
wYw)FY#PMU
ABRY
wYw4QBDFS
BTSY
w#BSSFM/VU
AAEY
wYw)FY#PMU
AAOY
w/ZMPDL
Nut
BZPY
wYw4IPVMEFS#PMU
ABDY
5/16” Washer
CCLY
w"MMFO8SFODI
CIHY
%PNFE$PVOUFSTJOL8BTIFS

12
HARDWARE IDENTIFIER
BACKBOARD TO RIM ASSEMBLY HARDWARE
Hardware shown at Actual Size
Hardware shown at 25% of Actual Size
"+8Y
Compression Spring
APZY
w6#PMU
AOWY
Spring Retainer Plate
ABDY
5/16” Washer
"#'Y
7/16” Rubber Washer
AAMY
wYw5BQ#PMU
ABKY
w/ZMPDL'MBOHF/VU
AAVY
5/16”Jam Nut
%'&Y
wYw#PMU
ABBY
w$FOUFSMPDL/VU
""+Y
w)FY5/VU

13
HARDWARE IDENTIFIER
HANDLE ASSEMBLY HARDWARE
Hardware shown at Actual Size
AAOY
w/ZMPDL
Nut
ABBY
w$FOUFSMPDL
Nut
ABAY
wYw)FY#PMU
6 1/2”
(Not actual length)
""9Y
w$FOUFSMPDL/VU
AAWY
wYw)FY#PMU
6 1/2”
(Not actual length)
BACKBOARD TO POLE ASSEMBLY HARDWARE
Hardware shown at Actual Size
""9Y
w$FOUFSMPDL/VU
%'#Y
wYw)FY#PMU
ABNY
wYw4QBDFS
(Not actual length)
7 1/2”
7 1/16”
(Not actual length)
AADY
wYw)FY#PMU
DGAY
wYw4QBDFS

HARDWARE IDENTIFIER
HANDLE ASSEMBLY HARDWARE (CONTINUED)
Hardware shown at Actual Size
ADPY
Yw4FMG%SJMMJOH'MBU4DSFX
ABMY
wYw4QBDFS
ABTY
wYw4QBDFS
'3".&1"%"44&.#-:)"3%8"3&
Hardware shown at Actual Size
/PUF5IFwYw)FY#PMU"$9BOEUIFw
Nylock Nut (AAO) will not be used in this assembly.
Note: Only eight of the 10 Screws will be used.
AAIY
Clevis Pin
"$9Y
wYw)FY#PMU
AQEY
Release Pin
AAHY
Cotter Pin
7 1/16”
(Not actual length)
AADY
wYw)FY#PMU

15
GROUND PREPARATION
HARDWARE REQUIRED
SEC
1
PARTS REQUIRED
TOOLS REQUIRED
Part shown at 10% of Actual Size
ALEY
#PUUPN1PMF
1/2” x 36” Rebar
Shovel
Tape Measure
Cement Mix
YMC#BHT
Level
/0)"3%8"3&3&26*3&%'035)*44&$5*0/

16
TOOLS AND HARDWARE REQUIRED FOR THIS PAGE
Dig a round hole 24” deep and 18” in diameter. If you live in an area
where frost heaves may pose a problem, consult your local building
inspector to determine the proper hole depth. The edge of the hole
should be fl ush with the edge of the playing surface.
SEC
1.1
Note: A Ground Sleeve is available as an alternative to cementing
the Pole into the ground. Please contact Customer Service or visit
Lifetime.com online for more information.
!
/0)"3%8"3&3&26*3&%'035)*41"(&
.JYCBHTPGDPODSFUF4BWFCBHPGDPODSFUFNJYUPVTF
MBUFSJOUIFBTTFNCMZ1PVSUIFNJYFEDPODSFUFJOUPUIFIPMFVOUJMJUJT
fi lled to the level of the playing surface.
w
18”

17
TOOLS AND HARDWARE REQUIRED FOR THIS PAGE
ALE
w
.BLFBNBSLJODIFTGSPNUIFEJNQMFEFOEPGUIFBottom Pole
(ALE) (do not scratch the powder coating).
SEC
1.2
Slide the dimpled end of the Bottom Pole (ALE) into the cement up to
UIFJODINBSL1PTJUJPOUIFQPMFOFYUUPUIFQMBZJOHTVSGBDF
SEC
1.3
/0500-403)"3%8"3&3&26*3&%'035)*41"(&

18
TOOLS AND HARDWARE REQUIRED FOR THIS PAGE
The slots in the Bottom Pole (ALE) must be parallel to the playing surface.
*GOFDFTTBSZJOTFSUBTUSBJHIUPCKFDUBSVMFSXJSFFUDUISPVHIUIF
TMPUTJOUIF#PUUPN1PMF3PUBUFUIFQPMFVOUJMUIFTUSBJHIUPCKFDUJT
parallel to the playing surface.
SEC
Note: Use a Level to make sure the Bottom Pole is standing vertical. Form
the cement into a downward slope away from the pole to allow water runoff.
Failure to do so may result in premature rusting of the Pole.
!
Playing Surface
/0500-403)"3%8"3&3&26*3&%'035)*41"(&

19
TOOLS AND HARDWARE REQUIRED FOR THIS PAGE
*OTFSUUIFwYw3FCBSOPUJODMVEFEJOTJEFUIFBottom Pole (ALE)
TPJUJTBCPVUwGSPNUIFUPQPGUIFQPMF$IFDLUIFQPMFTFWFSBM
UJNFTXJUIJOUIFmSTUIPVSUPNBLFTVSFUIBUBMMTJEFTBSFWFSUJDBMBOE
UIBUUIFJODINBSLSFNBJOTMFWFMXJUIUIFTVSGBDF
SEC
1.5
Note: Allow 1-4 hours for the concrete to set before continuing.
!
1/2” x 36” Rebar
/0)"3%8"3&3&26*3&%'035)*41"(&
Rebar

20
TOOLS AND HARDWARE REQUIRED FOR THIS PAGE
.JYUIFSFNBJOJOHCBHPGDPODSFUF'JMMUIFBottom Pole (ALE) with
DPODSFUFVOUJMJUKVTUCFMPXUIFTMPUTOFBSUIFUPQPGUIFQPMF%POPU
PWFSmMM5BNQUIFDPODSFUFEPXOJOUIF#PUUPN1PMFXJUIBCSPPN
IBOEMFUPSFNPWFBJSQPDLFUT$MFBOBMMDPODSFUFPGGUIFPVUTJEFPG
the pole. Allow the concrete to set for at least 72 hours before installing the rest
of the system onto the Bottom Pole.
SEC
1.6
Cement Level
Inside Pole
Rebar
Note: STOP HERE! The concrete must cure for at least 72 hours (3 days) before
installing the rest of the system. In humid climates or wet weather, allow additional
time for the concrete to cure. Do not proceed until the curing process is complete.
!
/0)"3%8"3&3&26*3&%'035)*41"(&
/