Trendnet RB-TEW-732BR Owner's manual

Category
Routers
Type
Owner's manual

This manual is also suitable for

© Copyright 2012 TRENDnet. All Rights Reserved.
TRENDnet User’s Guide
Table of Contents
i
© Copyright 2012 TRENDnet. All Rights Reserved.
TRENDnet User’s Guide
Table of Contents
ii
Contents
Product Overview ........................................................................... 3
Package Contents .......................................................................................................... 3
Features ......................................................................................................................... 3
Product Hardware Features........................................................................................... 4
Application Diagram ...................................................................................................... 5
Basic Router Setup .......................................................................... 6
Creating a Home Network ............................................................................................. 6
Router Installation ......................................................................................................... 7
Connect additional wired devices to your network ..................................................... 10
Wireless Networking and Security ................................................. 10
How to choose the type of security for your wireless network .................................. 10
Secure your wireless network ..................................................................................... 11
Connect wireless devices to your router ..................................................................... 13
Connect wireless devices using WPS ........................................................................... 14
Basic wireless settings ................................................................................................. 15
Steps to improve wireless connectivity ....................................................................... 16
Advanced wireless settings .......................................................................................... 17
Access Control Filters .................................................................... 17
Access control basics ................................................................................................... 17
MAC address filters ................................................................................................. 17
Domain/URL Filters ................................................................................................. 18
Protocol/IP filters .................................................................................................... 19
Advanced Router Setup ................................................................. 21
Access your router management page ........................................................................ 21
Change your router login password ............................................................................ 21
Set your router date and time ..................................................................................... 22
Manually configure your Internet connection ............................................................ 22
Clone a MAC address ................................................................................................... 23
Change your router IP address .................................................................................... 23
Set up the DHCP server on your router ....................................................................... 24
Set up DHCP reservation ............................................................................................. 25
Enable/disable UPnP on your router ........................................................................... 25
Allow/deny VPN connections through your router ..................................................... 26
Allow/deny multicast streaming.................................................................................. 26
Identify your network on the Internet ........................................................................ 26
Allow remote access to your router management page ............................................. 27
Open a device on your network to the Internet .......................................................... 27
DMZ ......................................................................................................................... 27
Virtual Server .......................................................................................................... 28
Special Applications ................................................................................................ 29
Add static routes to your router .................................................................................. 31
Router Maintenance & Monitoring ............................................... 31
Reset your router to factory defaults .......................................................................... 31
Router Default Settings ............................................................................................... 32
Backup and restore your router configuration settings .............................................. 32
Upgrade your router firmware .................................................................................... 33
Restart your router ...................................................................................................... 34
Check connectivity using the router management page ............................................. 34
Check the router system information ......................................................................... 34
View your router log .................................................................................................... 35
Configure your router log ............................................................................................ 36
© Copyright 2012 TRENDnet. All Rights Reserved.
TRENDnet User’s Guide
Table of Contents
ii
View your router packet statistics ............................................................................... 37
View wireless devices connected to your router ......................................................... 38
Router Management Page Structure ............................................. 39
Technical Specifications................................................................. 40
Troubleshooting ............................................................................ 41
Appendix ...................................................................................... 42
© Copyright 2013 TRENDnet. All Rights Reserved.
TRENDnet User’s Guide
TEW-732BR
3
Product Overview
TEW-732BR
Package Contents
In addition to your router, the package includes:
Multi-Language Quick Installation Guide
CD-ROM (User’s Guide)
Network cable (1.5 m / 5 ft.)
Power adapter (5V DC, 1A)
If any package contents are missing or damaged, please contact the retail store, online
retailer, or reseller/distributor from which the product was purchased.
Features
TRENDnet’s N300 Wireless Router, model TEW-732BR, offers proven 300 Mbps
wireless n networking to share files, play games, and surf the internet.
Embedded GREENnet technology reduces power consumption by up to 50%. For
your security this router comes pre-encrypted. OpenSource compatible
firmware facilitates user-based customization.
Ease of Use
Easy Setup
Get up and running in minutes with the intuitive guided setup
One Touch Connection
Securely connect to the router at the touch of the Wi-Fi Protected Setup (WPS)
button
Security
Pre-Encrypted
For your security the router is pre-encrypted with a unique password
Parental Controls
Control access to specific websites
Performance
N300 Wireless
Proven 300 Mbps Wireless N
Ethernet Ports
Ethernet ports to hardwire up to four devices
Wireless Coverage
Whole home wireless coverage with MIMO antenna technology for average size
homes
OpenSource
OpenSource compatible firmware facilitates user-based customization
Quality of Service (QoS)
Advanced QoS prioritizes video and audio transmissions
© Copyright 2013 TRENDnet. All Rights Reserved.
TRENDnet User’s Guide
TEW-732BR
4
Compatibility
Compatible with older Wireless G devices
Energy Savings
Embedded GREENnet technology reduces power consumption by up to 50%
IPv6
IPv6 network support
*Maximum wireless signal rates are referenced from IEEE 802.11 theoretical specifications. Actual
data throughput and coverage will vary depending on interference, network traffic, building
materials and other conditions.
Product Hardware Features
Rear View
LAN Ports: Connect Ethernet cables (also called network cables) from your router
LAN ports to your wired network devices.
WAN Port: Connect an Ethernet cable from your router WAN port to your modem.
Reset Button: Use an item such as a paperclip to push and hold this button for 5
seconds and release to reset your router to its factory defaults.
Power Port: Connect the included power adapter from your router power port and
to an available power outlet.
Reset Button
LAN Ports
WAN Port
Power Port
WPS Button
© Copyright 2013 TRENDnet. All Rights Reserved.
TRENDnet User’s Guide
TEW-732BR
5
WPS (Wi-Fi Protected Setup): Push and hold this button for 3 seconds to activate
WPS. The button LED is blinking blue when WPS is activated.
On/Off Power Switch (EU only): Push the router On/Off power switch to turn your
router “On” (Inner position) or “Off” (Outer position).
Front View
Power LED: This LED indicator is solid green when your router is powered on.
Otherwise if this LED indicator is off, there is no power to your router.
WAN (Link/Activity) LED: This LED indicator is solid green when your router WAN
port is physically connected to the modem Network port (also called network port)
successfully with a Network cable. The LED indicator will be blinking green while
data is transmitted or received through the WAN port of your router.
Application Diagram
The router is installed near the modem (typically supplied by your ISP “Internet Service Provider”)
and physically connected to it from the router’s Internet port to the modem’s network port which
connects to the Internet. 2.4GHz wireless signals from the router are broadcasted to wireless
clients such as laptops (with wireless capability).
Power LED
Internet LED
© Copyright 2013 TRENDnet. All Rights Reserved.
TRENDnet User’s Guide
TEW-732BR
6
Basic Router Setup
Creating a Home Network
What is a network?
A network is a group of computers or devices that can communicate with each other. A
home network of more than one computer or device also typically includes Internet
access, which requires a router.
A typical home network may include multiple computers, a media player/server, a
printer, a modem, and a router. A large home network may also have a switch,
additional routers, access points, and many Internet-capable media devices such as TVs,
game consoles, and Internet cameras.
Modem: Connects a computer or router to the Internet or ISP (Internet Service
Provider).
Router: Connects multiple devices to the Internet.
SwitchConnect several wired network devices to your home network. Your router
has a built-in network switch (the LAN port 1-4). If you have more wired network
devices than available Ethernet ports on your router, you will need an additional
switch to add more wired connections.
How to set up a home network
1. For a network that includes Internet access, you’ll need:
Computers/devices with an Ethernet port (also called network port) or wireless
networking capabilities.
A modem and Internet service to your home, provided by your ISP (modem
typically supplied by your ISP).
A router to connect multiple devices to the Internet.
2. Make sure that your modem is working properly. Your modem is often provided by
your Internet Service Provider (ISP) when you sign up for Internet service. If your
modem is not working contact your ISP to verify functionality.
3. Set up your router. See “How to setup your router” below.
4. To connect additional wired computers or wired network devices to your network,
see “
Connect additional wired devices to your network” on page 10.
5. To set up wireless networking on your router, see “
Secure your wireless networkon
page 11.
How to setup your router
Refer to the Quick Installation Guide or continue to the next section “
Router
Installation” on page 7 for more detailed installation instructions.
Where to find more help
In addition to this User’s Guide, you can find help below:
http://www.trendnet.com/support
(documents, downloads, and FAQs are available from this Web page)
© Copyright 2013 TRENDnet. All Rights Reserved.
TRENDnet User’s Guide
TEW-732BR
7
Router Installation
Before you Install
Many Internet Service Providers (ISPs) allow your router to connect to the Internet
without verifying the information fields listed below. Skip this section for now and if
your router cannot connect to the Internet using the standard installation process, come
back to this page and contact your ISP to verify required ISP specification fields listed
below.
1. Obtain IP Address Automatically (DHCP)
Host Name (Optional)
Clone Mac Address (Optional)
2. Fixed IP address
WAN IP Address: _____. _____._____._____
(e.g. 215.24.24.129)
WAN Subnet Mask: _____. _____._____._____
WAN Gateway IP Address: _____. _____._____._____
DNS Server Address 1: _____. _____._____._____
DNS Server Address 2: _____. _____._____._____
3. PPPoE to obtain IP automatically
User Name: _________
Password: ________________
Verify Password: ________________
4. PPPoE with a fixed IP address
User Name: _________
Password: ________________
Verify Password: ________________
IP Address: ____. _____._____._____ (e.g. 215.24.24.129)
5. PPTP or Russian PPTP
Type (Dynamic IP or Static IP)
My IP Address: _____. _____._____._____
(e.g. 215.24.24.129)
Subnet Mask:_____. _____._____._____
Gateway:_____. _____._____._____
Server IP: _____. _____._____._____
PPTP Account: ________________
PPTP Password: ________________
Retype Password: ________________
6. L2TP or Russia L2TP
Type (Dynamic IP or Static IP)
My IP Address: _____. _____._____._____
(e.g. 215.24.24.129)
Subnet Mask:_____. _____._____._____
Gateway:_____. _____._____._____
Server IP: _____. _____._____._____
L2TP Account: ________________
L2TP Password: ________________
Retype Password: ________________
7. Russia PPPoE
Type (Dynamic IP or Static IP)
User Name: _________
Password: ________________
Verify Password: ________________
IP Address: ____. _____._____._____ (e.g. 215.24.24.129)
© Copyright 2013 TRENDnet. All Rights Reserved.
TRENDnet User’s Guide
TEW-732BR
8
Hardware Installation
1. Verify that you have an Internet connection when connecting your computer directly
to your modem.
2. Turn off your modem.
3. Disconnect the Network cable from your computer to your modem.
4. Using a Network cable, connect the WAN port on the router to your modem.
5. Using another Network cable, connect your computer to one of the four LAN ports on
the router.
6. Plug in the power adapter, connect it to the router’s power port, and then push the
On/Off Power Switch to the “On” position (pushed in).
7. Turn on your modem.
8. Verify that the following front panel LED indicators on your router: Power (Solid
Green), WAN (Solid/Blinking Green).
LAN Ports
WAN Port
Power Port
© Copyright 2013 TRENDnet. All Rights Reserved.
TRENDnet User’s Guide
TEW-732BR
9
Setup Wizard
1. Open your web browser (e.g. Internet Explorer, Firefox, Safari, Chrome, or Opera) and
the installation wizard will automatically appear. Click Next to continue.
2. Your router will scan for Internet connection and type.
3. Once the router detects Internet connection your installation is complete. Verify your
settings and click Finish to complete installation.
4. Open a new tab on your web browser and enter in a website (e.g.
www.trendnet.com) to verify that you have an Internet connection.
5. For added security, the router is pre-encrypted with its own unique wireless network
security key. You can find the unique network security key and pre-assigned network
name (SSID) on a sticker on the front of the router and on a label on the back of the
router. If you would like to change the wireless security settings refer to “
Secure your
wireless network” section on page 11.
© Copyright 2013 TRENDnet. All Rights Reserved.
TRENDnet User’s Guide
TEW-732BR
10
Connect additional wired devices to your network
You can connect additional computers or other network enabled devices to your
network by using Ethernet cables to connect them to one of the available LAN ports
labeled 1,2,3,4 on your router. Check the status of the LED indicators (1, 2, 3, or 4) on
the front panel of your router to ensure the physical cable connection from your
computer or device.
Note: If you encounter issues connecting to your network, there may be a problem
with your computer or device network settings. Please ensure that your computer or
device network settings (also called TCP/IP settings) are configured to obtain IP
address settings automatically (also called dynamic IP address or DHCP) and to
Obtain DNS Server address settings automatically.
Wireless Networking and Security
How to choose the type of security for your wireless network
Setting up wireless security is very important. Leaving your wireless network open and
unsecure could expose your entire network and personal files to outsiders. TRENDnet
recommends reading through this entire section and setting up wireless security on your
new router.
There are a few different wireless security types supported in wireless networking each
having its own characteristics which may be more suitable for your wireless network
taking into consideration compatibility, performance, as well as the security strength
along with using older wireless networking hardware (also called legacy hardware).
It is strongly recommended to enable wireless security to prevent unwanted users from
accessing your network and network resources (personal documents, media, etc.).
In general, it is recommended that you choose the security type with the highest
strength and performance supported by the wireless computers and devices in your
network. Please review the security types to determine which one you should use for
your network.
Wireless Encryption Types
WEP: Legacy encryption method supported by older 802.11b/g hardware. This is
the oldest and least secure type of wireless encryption. It is generally not
recommended to use this encryption standard, however if you have old 802.11 b or
802.11g wireless adapters or computers with old embedded wireless cards(wireless
clients), you may have to set your router to WEP to allow the old adapters to
connect to the router. Note: This encryption standard will limit connection speeds to
54Mbps.
WPA: This encryption is significantly more robust than the WEP technology. Much
of the older 802.11g hardware was been upgraded (with firmware/driver upgrades)
to support this encryption standard. Total wireless speeds under this encryption
type however are limited to 54Mbps.
WPA-Auto: This setting provides the router with the ability to detect wireless
devices using either WPA or WPA2 encryption. Your wireless network will
automatically change the encryption setting based on the first wireless device
connected. For example, if the first wireless client that connects to your wireless
© Copyright 2013 TRENDnet. All Rights Reserved.
TRENDnet User’s Guide
TEW-732BR
11
network uses WPA encryption your wireless network will use WPA encryption. Only
when all wireless clients disconnect to the network and a wireless client with WPA2
encryption connects your wireless network will then change to WPA2 encryption.
NOTE: WPA2 encryption supports 802.11n speeds and WPA encryption will limit
your connection speeds to 54Mbps
WPA2: This is the most secure wireless encryption available today, similar to WPA
encryption but more robust. This encryption standard also supports the highest
connection speeds. TRENDnet recommends setting your router to this encryption
standard. If you find that one of your wireless network devices does not support
WPA2 encryption, then set your router to either WPA or WPA-Auto encryption.
Note: Check the specifications of your wireless network adapters and wireless
appliances to verify the highest level of encryption supported.
Below is brief comparison chart of the wireless security types and the
recommended configuration depending on which type you choose for your wireless
network.
Security Standard
WEP WPA WPA2
Compatible Wireless
Standards
IEEE 802.11a/b/g
(802.11n devices
will operate at
802.11g to
connect using
this standard)
IEEE 802.11a/b/g
(802.11n devices
will operate at
802.11g to connect
using this
standard)
IEEE 802.11a/b/g/n
Highest Performance
Under This Setting
Up to 54Mbps Up to 54Mbps Up to 3000Mbps*
Encryption Strength Low Medium High
Additional Options Open System or
Shared Key,
HEX or ASCII,
Different key
sizes
TKIP or AES,
Preshared Key or
RADIUS
TKIP or AES,
Preshared Key or
RADIUS
Recommended
Configuration
Open System
ASCII
13 characters
TKIP
Preshared Key
8-63 characters
AES
Preshared Key
8-63 characters
*Dependent on the maximum 802.11n data rate supported by the device (150Mbps, or
300Mbps)
Secure your wireless network
Wireless > Security
After you have determined which security type to use for your wireless network (see
How to choose the security type for your wireless network” on page 11), you can set up
wireless security.
1. Log into your router management page (see “
Access your router management page
on page 21).
2. Click on Wireless, and click on Security.
3. Click on the Authentication Type drop-down list to select your wireless security type.
© Copyright 2013 TRENDnet. All Rights Reserved.
TRENDnet User’s Guide
TEW-732BR
12
Selecting WEP:
If selecting WEP (Wired Equivalent Privacy), please review the WEP settings to configure
and click Apply to save the changes.
WEPChoose Open System or Shared Key.
Note: It is recommended to use Open System because it is known to be more
secure than Shared Key.
ModeChoose HEX or ASCII.
Note: It is recommended to use ASCII because of the much larger character set
that can be used to create the key.
WEP Key Choose the key length 64-bit or 128-bit.
Note: It is recommended to use 128-bit because it is more secure to use a key that
consists of more characters.
Key 1-4
o This is where you enter the password or key needed for a computer to connect to
the router wirelessly
o You can define up to 4 or 4 keys. Only one key can be active at a given time. Most
users simply define one key.
o Choose a key index 1, 2, 3, or 4 and enter the key.
o When connecting to the router, the client must match both the password and the
Key number. (e.g. if you have activated Key 2 with a password of 12345, then the
client must select: Key 2 (entering Key 1, 3, or 4 will block the ability to connect)
and enter password 12345)
Selecting WPA, WPA-Auto, or WPA2 (WPA2 recommended):
First, from the Authentication Type row, select WPA, WPA-Auto, or WPA2.
Then from the PSK/EAP row, select either PSK or EAP
PSK stands for Preshared Key
EAP stands for Extensive Authentication Protocol, also called Remote
Authentication Dial-In User Service or RADIUS).
Note: EAP requires an external RADIUS server, PSK only requires you to create a
passphrase.
The following section outlines options when selecting PSK (Preshared Key Protocol),
o Select a Cipher Type. When selecting WPA security, it is recommended to use
TKIP.
o When selecting WPA-Auto security, it is recommended to use AES.
o When selecting WPA2 security, it is recommended to use AES.
WEP Key Format
HEX ASCII
Character set 0-9 & A-F, a-f only Alphanumeric (a,b,C,?,*, /,1,2, etc.)
64-bit key length 10 characters 5 characters
128-bit key length 26 characters 13 characters
© Copyright 2013 TRENDnet. All Rights Reserved.
TRENDnet User’s Guide
TEW-732BR
13
Create your Wireless security Passphrase (password or key):
Passphrase: Enter the passphrase.
This is the password or key that is used to connect your computer to this router
wirelessly
Confirmed Passphrase: Re-enter the passphrase.
Note: 8-63 alphanumeric characters (a,b,C,?,*, /,1,2, etc.)
The following section outlines options when selecting EAP (Extensive Authentication
Protocol),
EAP (Extensible Authentication Protocol) is also called Remote Authentication Dial-In
User Service or RADIUS.
Select a Cipher Type
o When selecting WPA security, it is recommended to use TKIP.
o When selecting WPA-Auto security, it is recommended to use AES.
o When selecting WPA2 security, it is recommended to use AES.
RADIUS Server ½: Configure the RADIUS server settings.
Note: RADIUS Server 2 is optional and can be configured as a backup if there are any
issues with RADIUS Server 1.
o IP: Enter the IP address of the RADIUS server. (e.g. 192.168.10.250)
o Port: Enter the port your RADIUS server is configured to use for RADIUS
authentication.
Note: It is recommended to use port 1812.
o Shared SecretEnter the shared secret used to authorize your router with your
RADIUS server.
Connect wireless devices to your router
A variety of wireless network devices can connect to your wireless network such as:
Gaming Consoles
Internet enabled TVs
Network media players
Smart Phones
Wireless Laptop computers
Wireless IP cameras
Each device may have its own software utility for searching and connecting to available
wireless networks, therefore, you must refer to the User’s Manual/Guide of your
wireless client device to determine how to search and connect to this router’s wireless
network.
See the “Appendix” on page 42 for general information on connecting to a wireless
network.
© Copyright 2013 TRENDnet. All Rights Reserved.
TRENDnet User’s Guide
TEW-732BR
14
Connect wireless devices using WPS
WPS (Wi-Fi Protected Setup) is a feature that makes it easy to connect devices to your
wireless network. If your wireless devices support WPS, you can use this feature to
easily add wireless devices to your network.
Note: You will not be able to use WPS if you set the SSID Broadcast setting to Disabled.
There are two methods the WPS feature can easily connect your wireless devices to
your network.
Push Button Configuration (PBC) method
o RECOMMENDED Hardware Push Button method–with an external button located
physically on your router and on your client device
o WPS Software/Virtual Push Button - located in router management page
PIN (Personal Identification Number) Method - located in router management page
Note: Refer to your wireless device documentation for details on the operation of
WPS.
Recommended Hardware Push Button (PBC) Method
Note: it is recommended that a wireless key (passphrase or password) is created
before connecting clients using the PBC method. If no wireless key is defined when
connecting via PBC, the router will automatically create an encryption key that is 64
characters long. This 64 character key will then have to be used if one has to
connect computers to the router using the traditional connection method.
To add a wireless device to your network, simply push the WPS button on the wireless
device you are connecting(consult client device User’s Guide for length of time), then
push and hold the WPS button located on your router for 3 seconds and release it. A
blue LED on your router WPS button will flash indicating that the WPS setup process has
been activated on your router. (See “
Product Hardware Features” on page 4)
For connecting additional WPS supported devices, repeat this process for each
additional device.
PBC (Software/Virtual Push Button)
Wireless >WiFi Protected Setup
In addition to the hardware push button located physically on your router, the router
management page also has push button which is a software or virtual push button you
can click to activate WPS on your router.
1. Log into your router management page (see “
Access your router management page
on page 24).
2. Click on Wireless, and click on WPS.
3. To add a wireless device to your network, simply the push the WPS button on the
wireless device (consult wireless device’s User’s Guide for length of time), you are
connecting, then in your router management page next to Push Button
Configuration, click Start PBC.
4. You will receive a message counting down indicating the WPS process is activated on
your router.
5. You will receive a success message indicate that the wireless device successfully
connected using WPS.
PIN (Personal Identification Number)
Wireless >WiFi Protected Setup
© Copyright 2013 TRENDnet. All Rights Reserved.
TRENDnet User’s Guide
TEW-732BR
15
If your wireless device has WPS PIN (typically an 8-digit code printed on the wireless
device product label or located in the wireless device wireless software utility), you can
use this method.
1. Log into your router management page (see “
Access your router management page
on page 21).
2. Click on Wireless, and click on WPS.
3. Next to Client PIN Number, enter the WPS PIN of the wireless device you are
connecting and click Start PIN.
Note: You may need to initiate the WPS PIN on your wireless device first when using this
method. Refer to your wireless device documentation for details on the operation of
WPS.
Basic wireless settings
Wireless > Basic
This section outlines available management options under the Basic Wireless sub tab.
1. Log into your router management page (see “
Access your router management page
on page 21).
2. Click on Wireless, and click on Basic.
3. To save changes to this section, click Apply when finished.
Wireless
o Enabled turns on the wireless networking on your router (by default it is
enabled).
o Disabled turns off wireless networking on your router.
Note: It is recommended to leave the wireless setting to Enabled unless you do not
plan on connecting any wireless computers or devices to your network.
SSID: This acronym stands for Service Set Identifier and is the name of your wireless
network. It differentiates your wireless network from others around you. By
default, the router is preconfigured with it’s unique wireless network
namebroadcast TRENDnet732 as the wireless network name. If you choose to
change the SSID, change it to a name that you can easily remember.
Auto Channel: In North America, this router can broadcast on 1 of 11 Channels (13
in Europe and other countries). Selecting Auto Channel enables the router to
automatically select the best Channel for wireless communication.
Channel: To manually set the channel on which the router will broadcast, uncheck
Auto Channel, then click the drop-down list and select the desired Channel for
wireless communication. The goal is to select the Channel that is least used by
neighboring wireless networks.
802.11 Mode: Select the appropriate mode for your network.
o 2.4GHz 802.11b/g/n mixed mode: Select this mode for the best compatibility.
This mode allows older 802.11b and 802.11g wireless devices to connect to the
router in addition to newer 802.11n devices.
o 2.4GHz 802.11b/g mixed mode: This mode only allows devices to connect to the
router using older and slow 802.11b or 802.11g technology and it thereby
reduces the router’s maximum speed to 54Mbps (typically not recommended).
o 2.4GHz 802.11n only mode: This mode only allows newer 802.11n devices to
connect to your router. This mode does ensure the highest speed and security for
your network, however if you have older 802.11g wireless clients, they will no
longer be able to connect to this router.
o 2.4GHz 802.11g only mode: This mode only allows devices to connect to the
router using older and slow 802.11g technology (typically not recommended).
o 2.4GHz 802.11b only mode: This mode only allows devices to connect to the
router using older and slow 802.11b technology (typically not recommended).
© Copyright 2013 TRENDnet. All Rights Reserved.
TRENDnet User’s Guide
TEW-732BR
16
Note: Please check the specifications on your wireless devices for the highest
wireless capability supported first before applying these settings. If you are unsure,
it is recommended that you keep the default setting (2.4GHz 802.11b/g/n mixed
mode) for the best compatibility.
When applying the 802.11 mode setting, please keep in mind the following:
Wireless devices that support 802.11n are backwards compatible and can connect
wirelessly at 802.11g or 802.11b.
Connecting at 802.11b or 802.11g will limit the capability of your 802.11n
supported wireless devices from obtaining higher performance and data rates.
Allowing 802.11b or 802.11g devices to connect to an 802.11n capable wireless
network may degrade the wireless network performance below the higher
performance and data rates of 802.11n.
Wireless devices that only support 802.11b or 802.11g will not be able to connect
to a wireless network that is set to 802.11n only mode.
Wireless devices that only support 802.11b will not be able to connect to a wireless
network that is set to 802.11g only mode.
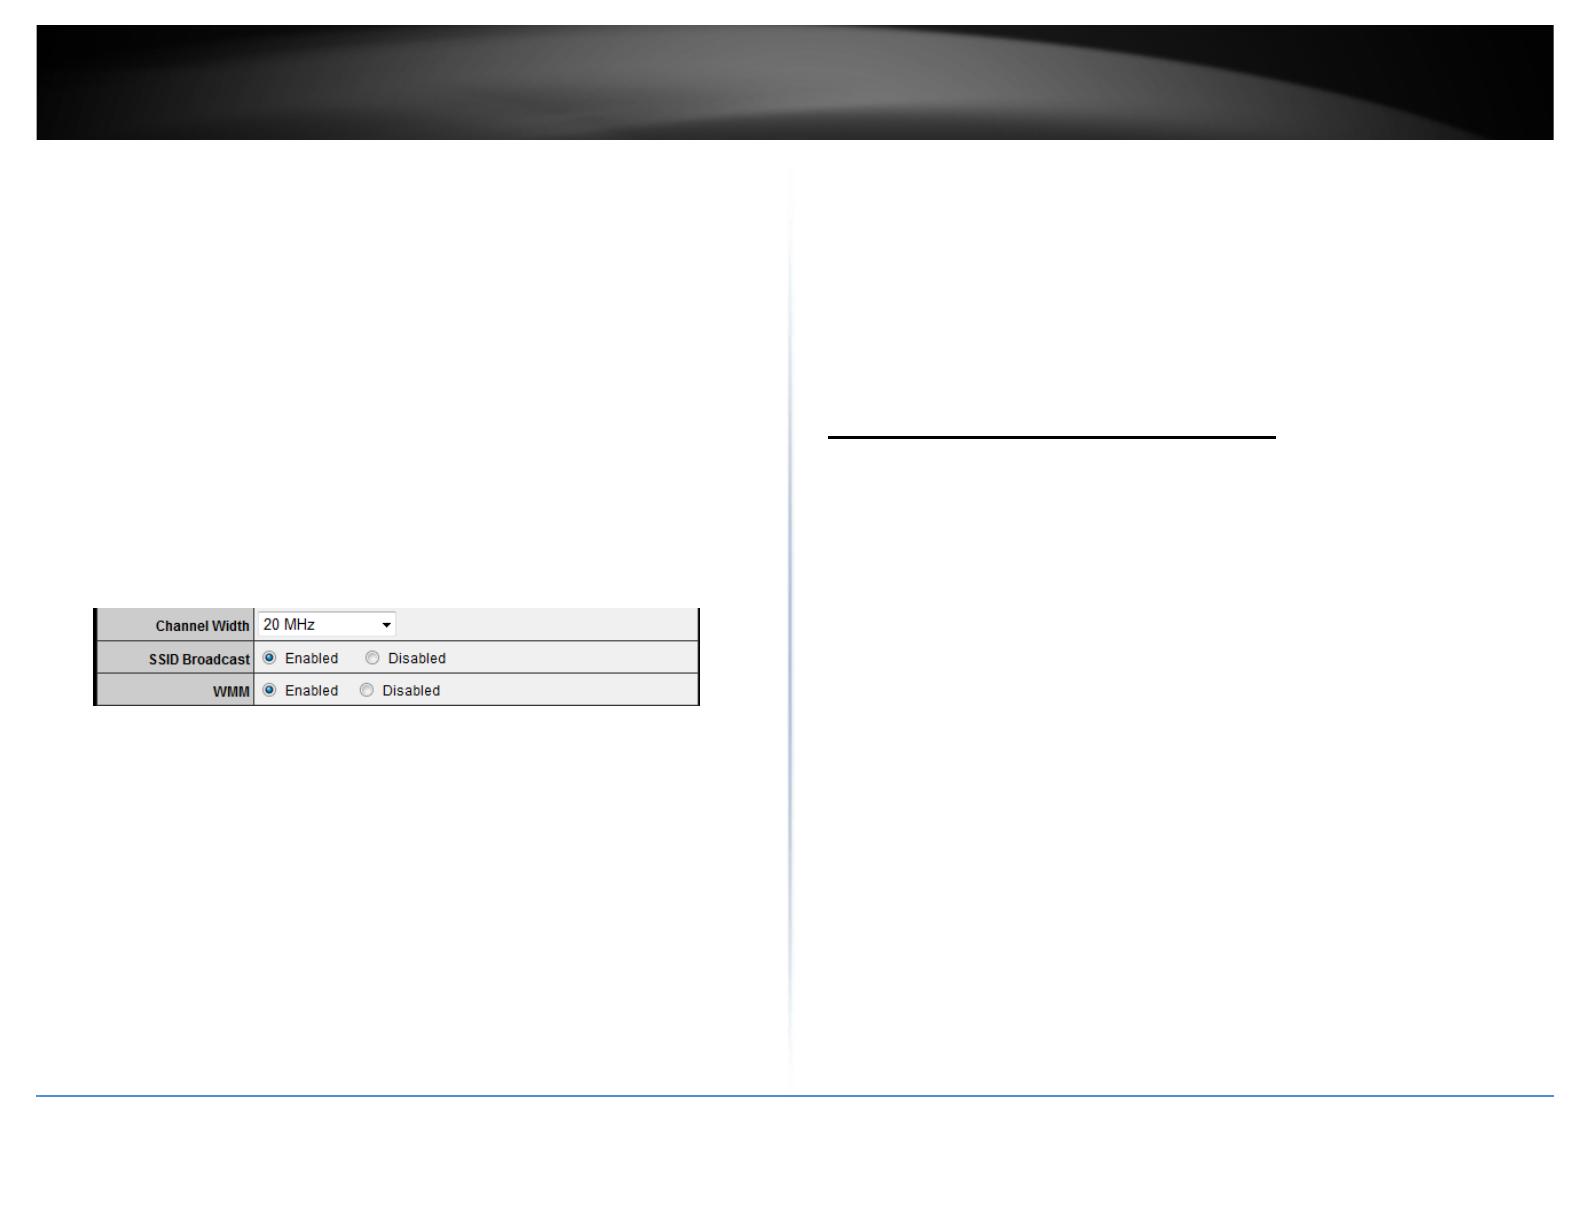
Channel Width: This setting only applies to wireless devices connecting at 802.11n.
Select the appropriate channel width for your wireless network.
o 20 MHz: This mode operates using a single 20MHz channel for wireless devices
connecting at 802.11n. This setting may provide more stability than Auto 20/40
MHz for connectivity in busy wireless environments where there are several
wireless networks in the area.
o Auto 20/40 MHz: This mode can automatically switch between using a single
20MHz channel or 40MHz (two 20MHz channels). When 40MHz is active, this
mode is capable of providing higher performance only if the wireless devices
support the 40MHz channel width. Enabling 20/40MHz typically results in
substantial performance increases when connecting to an 802.11n client.
SSID Broadcast
o Enabled allows wireless devices to search and discover your wireless network
name (also called SSID) broadcasted by your router.
o Disabled turns off the ability for wireless devices to find your network. It is still
possible for wireless devices to be configured to connect to your wireless
network.
Note: Setting this option to Disabled, will disable WPS functionality.
WMM: Wi-Fi Multimedia is a Quality of Service (QoS) feature which prioritizes
audio and video data packets. This feature requires the wireless device to also
support WMM. Click Enabled (recommended) or Disabled to turn this feature on or
off on your router.
Steps to improve wireless connectivity
There are a number of factors that can impact the range of wireless devices. Follow
these tips to help improve your wireless connectivity:
1. Keep the number of obstructions to a minimum. Each obstruction can reduce the
range of a wireless device. Position the wireless devices in a manner that will
minimize the amount of obstructions between them.
a. For the widest coverage area, install your router near the center of your home,
and near the ceiling, if possible.
b. Avoid placing the router on or near metal objects (such as file cabinets and metal
furniture), reflective surfaces (such as glass or mirrors), and masonry walls.
c. Any obstruction can weaken the wireless signal (even non-metallic objects), so
the fewer obstructions between the router and the wireless device, the better.
d. Place the router in a location away from other electronics, motors, and
fluorescent lighting.
e. Many environmental variables can affect the router’s performance, so if your
wireless signal is weak, place the router in several locations and test the signal
strength to determine the ideal position.
2. Building materials can have a large impact on your wireless signal. In an indoor
environment, try to position the wireless devices so that the signal passes through
less dense material such as dry wall. Dense materials like metal, solid wood, glass
or even furniture may block or degrade the signal.
3. Antenna orientation can also have a large impact on your wireless signal. Use the
wireless adapter’s site survey tool to determine the best antenna orientation for
your wireless devices.
© Copyright 2013 TRENDnet. All Rights Reserved.
TRENDnet User’s Guide
TEW-732BR
17
4. Interference from devices that produce RF (radio frequency) noise can also impact
your signal. Position your wireless devices away from anything that generates RF
noise, such as microwaves, radios and baby monitors.
If possible, upgrade wireless network interfaces (such as wireless cards in computers)
from older wireless standards to 802.11n. If a wirelessly networked device uses an older
standard, the performance of the entire wireless network may be slower. If you are still
experiencing low or no signal consider repositioning the wireless devices or installing
additional access points.
Advanced wireless settings
Wireless > Advanced
These settings are advanced options that can be configured to change advanced
wireless broadcast specifications. It is recommended that these settings remain set to
their default values unless you are knowledgeable about the effects of changing these
values. Changing these settings incorrectly can degrade performance.
Beacon Interval: A beacon is a management frame used in wireless networks that
transmitted periodically to announce the presence and provide information about
the router’s wireless network. The interval is the amount time between each
beacon transmission. Default Value:100 milliseconds (range: 20-1000)
RTS Threshold: The Request To Send (RTS) function is part of the networking protocol.
A wireless device that needs to send data will send a RTS before sending the data in
question. The destination wireless device will send a response called Clear to Send
(CTS). The RTS Threshold defines the smallest data packet size allowed to initiate
the RTS/CTS function. Default Value: 2346 (range: 0-2347)
Fragmentation Threshold: Fragmentation in wireless networks is the process of
breaking down data communications into smaller data packets in order to improve
data efficiency when transferring or receiving data between wireless devices. The
fragmentation threshold defines the maximum size of the data packets that are
broken down. Default Value: 2346 (range: 256~2346, even numbers only)
DTIM Interval: A Delivery Traffic Indication Message (DTIM) is an informational
message that is sent as part of a beacon by an access point (your wireless router) to
a wireless client (wireless device or connecting station) in sleep mode to provide an
alert that data is awaiting delivery. The DTIM Interval (also called Data Beacon Rate)
is the amount of time between DTIM transmissions included in part of a beacon.
Default Value: 1 (range: 1-255)
Access Control Filters
Access control basics
Access > Filter
MAC address filters
Access > Filter > MAC Filters
Every network device has a unique, 12-digit MAC (Media Access Control) address. Using
MAC filters, you can allow or deny specific computers and other devices from using this
router’s wired or wireless network.
1. Log into your router management page (see “
Access your router management page
on page 21).
2. Click on Access, click on Filter, and click on MAC Filters.
© Copyright 2013 TRENDnet. All Rights Reserved.
TRENDnet User’s Guide
TEW-732BR
18
3. Add the MAC addresses to the MAC Table first before applying the MAC filter
function.
Note: MAC filter can be configured to allow access to the listed MAC address and
deny all others unlisted or vice versa. The recommended function is to choose to
only allow access to the MAC addresses listed and deny all others unlisted because it
is easier to determine the MAC addresses of devices in your network then to
determine which MAC addresses you do not want to allow access.
Name: Enter a name for the MAC address entry.
MAC Address: Enter the 12-digit MAC address.(e.g. 00-11-22-AA-BB-CC)
Note: You can check the Dynamic DHCP List for the MAC addresses of the devices on
your network, see “
Setup the DHCP server on your router” on page 27 or refer to
your computer or device documentation to find the MAC address.
Click Add to save the new MAC address entry to the MAC Table. After clicking Add, the
MAC address entry will appear in the list below. Repeat for each device.
Add: Saves a new MAC address entry.
To modify an existing MAC address entry, click on the entry in the MAC Table. When
selected, the entry will be highlighted.
Delete: Removes an existing MAC address entry.
Update: Modifies an existing MAC address entry.
Cancel: Discard changes to an existing MAC address entry.
4. Review the MAC Filter options.
Disabled: disables MAC address filter.
Only Allow computers/devices with MAC addresses listed below to access the local
network (LAN/WLAN), web management, and the Internet.
Only Deny computers/devices with MAC addresses listed below to access the local
network (LAN/WLAN), web management, and the Internet
Note: Do not configure this setting until you have added the MAC addresses to the
MAC Table first. The recommended option is to only Allow access to the MAC
addresses listed and deny all others unlisted.
Click Apply to save the changes.
Domain/URL Filters
Access > Filter > Domain/URL Blocking
You may want to allow or block computers or devices on your network access to specific
websites (e.g.
www.trendnet.com, etc.), also called domains or URLs (Uniform Resource
Locators). You may also enter a keyword (e.g. instead of complete URL to generally
allow or block computers or devices access to websites that may contain the keyword in
the URL or on the web page.
© Copyright 2013 TRENDnet. All Rights Reserved.
TRENDnet User’s Guide
TEW-732BR
19
1. Log into your router management page (see “Access your router management page
on page 21).
2. Click on Access, click on Filter, and click on Domain/URL Blocking.
3. Review the Domain/URL blocking options.
Disableddisables domain/URL blocking
Allow users to access all domains listed. (Deny access to all other unlisted websites)
Deny users to access all domains listed. (Allow access to all other unlisted websites)
Click Apply to save the changes.
4. Under Domain Blocking click on Allow or Deny. The Domains List will then appear.
Enter the Website/URL/domain (e.g.www.trendnet.com) or keyword (e.g. trendnet) to
allow or block access and click Add to add this to the domains list. The entry will be
listed below. Repeat for each additional website or keyword added.
Cancel - Discard changes to the domains list.
Delete -Delete an existing website/URL/domain or keyword entry, click on the entry
in the Domains List. When selected, the entry will be highlighted. Click Delete to
remove it from the list.
5. Go back to the Domain Blocking section and confirm you want to Allow or Deny
access to the Domains List. It is generally easier to manage a list of Domains for which
access is denied.
6. In Domain Blocking click on Apply to save the selected settings.
Protocol/IP filters
Access > Filter > Protocol/IP Filters
You may want to block computers or devices on your network access to specific ports
(used or required by a specific application) to the Internet.
1. Log into your router management page (see “
Access your router management page
on page 21).
2. Click on Access, click on Filter, and click on Protocol/IP Filters.
To simplify configuration, there is a list of commonly used pre-defined Protocol/IP Filters
to modify otherwise, you can choose to manually add a new Protocol/IP Filter.
  • Page 1 1
  • Page 2 2
  • Page 3 3
  • Page 4 4
  • Page 5 5
  • Page 6 6
  • Page 7 7
  • Page 8 8
  • Page 9 9
  • Page 10 10
  • Page 11 11
  • Page 12 12
  • Page 13 13
  • Page 14 14
  • Page 15 15
  • Page 16 16
  • Page 17 17
  • Page 18 18
  • Page 19 19
  • Page 20 20
  • Page 21 21
  • Page 22 22
  • Page 23 23
  • Page 24 24
  • Page 25 25
  • Page 26 26
  • Page 27 27
  • Page 28 28
  • Page 29 29
  • Page 30 30
  • Page 31 31
  • Page 32 32
  • Page 33 33
  • Page 34 34
  • Page 35 35
  • Page 36 36
  • Page 37 37
  • Page 38 38
  • Page 39 39
  • Page 40 40
  • Page 41 41
  • Page 42 42
  • Page 43 43
  • Page 44 44
  • Page 45 45
  • Page 46 46
  • Page 47 47
  • Page 48 48

Trendnet RB-TEW-732BR Owner's manual

Category
Routers
Type
Owner's manual
This manual is also suitable for

Ask a question and I''ll find the answer in the document

Finding information in a document is now easier with AI