Euromaid GG54RCW User manual

Category
Ovens
Type
User manual

This manual is also suitable for

price, quality, performance
Front Control Models
White F54CW F54EW F54RW F54GW FD54CW FD54EW FD54RW
S/Steel F54CS
F54ES
F54RS F54GS
FRR54W FRC54W GG54RRW GG54RCW
FD54CS FD54ES FD54RS
Rear Control Models
White R54CW R54EW R54RW
540mm Separate Grill Upright Cooker
USER MANUAL
Conditions of use .........................................................................................................................3
Safety precautions ....................................................................................................................... 3
Other important safety information ............................................................................................3
Warnings for use of grill, oven, and appliance hob ..................................................................4
Disposal of packaging ...............................................................................................................4
Installation, cleaning and servicing ...........................................................................................5
Product description .....................................................................................................................6
First time use of the appliance ...................................................................................................9
Using the oven ...........................................................................................................................10
Using the grill ..............................................................................................................................14
Using the hotplates of your cooker ..........................................................................................15
Using the hotplate gas burners ................................................................................................17
Fitting oven accessories and cleaning .................................................................................... 18
Solving problems ........................................................................................................................22
Installing cooker – power connections ....................................................................................23
Installing the gas cooker ...........................................................................................................24
Testing the operation of the gas cooker .................................................................................. 26
Installing your new cooker.........................................................................................................27
Technical specifications ............................................................................................................30
Notes ...........................................................................................................................................33
Contents
Safety precautions
• Thisapplianceisnotintendedforusebypersons
(includingchildren)withreducedphysical,sensory
ormentalcapabilities,orlackofexperience
andknowledge,unlesstheyhavebeengiven
supervisionorinstructionconcerninguseofthe
appliancebyapersonresponsiblefortheirsafety.
• Warning–ensurethatnodownwardpressureis
appliedtotheovendoorwhenopen.Inparticular,
DONOTALLOWachildtoclimbontoopenoven
door
• Warning-accessiblepartscanbecomehotduring
use,especiallytheovendoor.Toavoidburns,
youngchildrenMUSTBEKEPTAWAY.
• Youngchildrenshouldbesupervisedtoensurethey
donotplaywiththisappliance.
• Duringusethisappliancebecomeshot.Care
shouldbetakentoavoidtouchinghotexternaland
internalsurfaceswheninuse.Useovengloves.
• Thecooktopareaincludingtheentirehobwill
becomeveryhotwheninuse.CareMUSTBE
TAKENwhenusingthispartoftheappliance.
• Installcooker,shelvingandttingsinaccordance
withthisManual.
• Ensureallspeciedvents,openingsandairspaces
arenotblocked.
Accordingtotheelectricalsafetyregulations
theapplianceequipmentmustbeproperly
earthed.
Donotusecorrosivecleanerse.g.oven
cleanersthatcontaincausticsoda.
Thisappliancemustnotbeusedasaspace
heater.
Donotobstructtheventilationslotsonfront
orbackofappliance.
Donotremoveanylabelsoruseabrasive/
corrosivecleanerson.
WerecommendthatyoureadtheinstructionsinthisManualcarefullybeforeuseforthebestperformanceandto
extendthelifeofyourappliance,asitwillprovideyouwithalltheinstructionsyourequiretoensureitssafeinstallation,
useandmaintenance.AlwayskeepthisManualclosetohandsinceyoumayneedtorefertoitinthefuture.Thank
you.
Conditions of use
Thisapplianceisintendedtobeusedfordomesticuse,notcommercialuse.
• Toensureyoursafety,allelectricappliancesshould
onlybeinstalledorservicedbyqualiedpersons.If
thesupplycordisdamaged,itmustbereplaceda
serviceagentorsimilarlyqualiedpersoninorderto
avoidahazard.
• ImportantNotice-ThisUprightCookermust
bettedsecurelyusingthesupplDonotspray
aerosolsinthevicinityofthisappliancewhileitisin
operation.
• Donotstoreammablematerialsintheapplianceor
nearthisappliance.
• Donotoperateanygasapplianceifthesmellofgas
persists.
• Donotmodifythisappliance.
• Appliancemustbeinstalledaccordingtocurrent
lawsandregulationsbyqualiedtradesmen/
Installers.
• GasmodelsareNOTAPPROVEDforinstallationin
marinecraft,caravansormobilehomes.
TheManufacturersandImporters/Distributors
andRetailersshallnotbeliabletoanylegalliability,
personalinjuryandpropertydamagedueto
incorrectoperationorincorrectInstallation.
Euromaid 540mm Upright Cooker CONDITIONS OF USE 3
Other important safety information
4 Euromaid 540mm Upright Cooker WARNINGS FOR USE OF GRILL, OVEN, AND APPLIANCE HOB
Warnings for use of grill, oven, and
appliance hob
Grill warnings
• DONOTleavegrillonunattended.
• DONOTcoverthegrilltraywirerackwithfoil.
• Tryingtogrillfoodmorethan25mmthickunder
grillcanbearehazard.Trimexcessfatfromfatty
meats,suchasporkandlamb.
• Fatleftonagrilltrayisarehazard!Keepgrillclean
andturnoffgrillimmediatelyafteruseandleave
draweropenforafewminutestocoolgrillarea.
Oven warnings
• DONOTpushdownorapplyanyweightonopen
ovendoor.
• DONOTplacedishesonopendoorofoven
• DONOTlineovenwithfoilorplaceanythingonthe
bottomoftheovenwhilebakingtoavoidpermanent
damage,astrappedheatwillcrackorcrazethe
enamelooroftheovencavityliner.
• Useofoliveoilandotherpoly-unsaturatedoils
(vegetableoils)whenroastinguncoveredfood
causesdepositsinsidetheovenwhicharevery
difculttoremove.
• Ifyouhaveanuprightcookerwithagasoventhat
doesnotlightwithinaboutin5-8seconds,allow1
minuteforgastodisperseclearbeforetryingagain.
Hotplate and burner warnings
• DONOTallowpotstoboildry,asdamageto
hotplatemayresult.
• DONOToperatehotplatesorburnerswithouta
pot,frypanetc.
• DONOTallowcookwaretooverhanghobonto
adjacentbenchtops,thiswillcausescorchingto
thebenchtopsurface.
• Gasmodels:Ensureburnercapsandcrownsare
intheircorrectpositiontoavoiddamagetothese
parts
Ceramic hotplate warnings
• DONOTplaceheatresistantmats,wirematsor
aluminumfoilunderpotsorpans.
• DONOTcookfooddirectlyontheceramicglass
surface.
• DONOTuseroundbottomwoksorsimilarutensils
whichcouldleadtooverheatingofhotplatesand
possibledamagetothecookingsurface.Cookware
usedshouldhavecompletelyatbases.
• Ensurecookwarestatesitissuitableforuseon
ceramicglass.Somealuminiumandcopperbased
cookwarecancauseminorpittingoftheceramic
glasssurface.
• DONOTusetheceramiccooktopasextrabench
spaceorasacuttingboard.
• AVOIDdroppingheavyobjectsontotheceramic
glasssurfaceasdamagecanoccur
• Immediatelycleanglasswhensugaryliquidshave
spilteg.stewedfruit,jam,meltedsugar.
Disposal of packaging
Pleaserecyclethecardboard,andalsoanypolystyrenepackagingwherepossible.
• Anauthorisedpersonmustinstallthisappliance.
(CerticateofCompliancetoberetained).
• Beforeusingtheappliance,ensurethatallpacking
materialsareremovedfromtheappliance.
• Inordertoavoidanypotentialhazard,the
InstallationInstructionsmustbefollowed.
• Inordertoavoidaccidentaltippingoftheappliance
(forexample,byachildclimbingontotheopen
ovendoor),theantitiltbracketandstabilitybolt
mustbeinstalledpropoerlyandsecurelytotheoor.
• Wheretheapplianceisinstallednexttocabinets,
thecabinetmaterialmustbecapableof
withstanding85º.
• Onlyauthorisedpersonnelshouldcarryout
servicing(CerticateofCompliancetoberetained).
• WARNING-Alwaysensuretheapplianceis
switchedoffbeforecleaningoranymaintenanceis
carriedoutsuchaschangingoflightglobes.
• DONOTuseabravisetypecleanerorcausticsoda-
basedcleaners.Usingwarmsoapywaterafterthe
appliancehascooledsomewhat,followedbyadry
clothissuitable.
• DONOTusesharpmetalscraperstocleanoven
doorastheycanscratchthesurface,whichmay
resultinshatteringoftheglass.
• DONOTusesteamcleanersasamethodtoclean
thisappliance.
• Alwayscleantheapplianceimmediatelyafterany
foodspillage.
• Tobeservicedonlybyanauthorizedperson.
• Appliancesrequiringconnectionto220-240Vand
mustbeearthed.
• GasmodelsareNOTAPPROVEDforinstallationin
marinecraft,caravansormobilehomes.
Installation, cleaning and servicing
Euromaid 540mm Upright Cooker INSTALLATION, CLEANING AND SERVICING 5
Description of cooker with separate grill
and rear controls
1.Hob(Solid,coilandceramic)
2.Heatshield(coilelementmodelsonly)
3.Telescopicrunner
4.Grilldrawer
5.Ovenshelf(2supplied)
6.Enamelledovenbakingtray(1supplied)
7.Oveninnerdoorglass
8.Ovendoor
9.Controlpanel
10.Grillelement(insidecompartment)
11.Grilltraywirerackinsert(reversibletoadjustheight)
12.Enamelledgrilltray(1supplied)
13.Fan&elementcover
14.Ovenrearfanforcedelement
15.Hiddenovenbaseelement
16.Rearadjustableantislipfeet(2)
17.Antitiltoorbracket
18.Kickpanel(stabilityboltlocatedbehindkickpanel)
19.Frontadjustableantislipfeet(2)
6 Euromaid 540mm Upright Cooker PRODUCT DESCRIPTION
Product description (Rear Control Models)
Description of cooker with separate grill
and front controls
1.Hob(Solid,coil,ceramicandgas).Gasmodel
suppliedwithcastirontrivetsandWOKadapter.
2.GasModel-Wokburner(1)(highlighted)with
removablecap,distributor,otherburners(2xsemi
rapid,1xauxiliiary).
3.Controlpanel
4.Telescopicrunner
5.Grilldrawer
6.Ovenshelf(2supplied)
7.Enamelledovenbakingtray(1supplied)
8.Oveninnerdoorglass
9.Ovendoor
10.Rearsplashback(1supplied)
11.Grillelement(insidecompartment)
12.Grilltraywirerackinsert(reversibletoadjustheight)
13.Enamelledgrilltray(1supplied)
14.Fan&elementcover
15.Ovenrearfanforcedelement
16.Hiddenovenbaseelement
17.Rearadjustableantislipfeet(2)
18.Antitiltoorbracket
19.Kickpanel(stabilityboltlocatedbehindkickpanel)
20.Frontadjustableantislipfeet(2)
7 Euromaid 540mm Upright Cooker PRODUCT DESCRIPTION
Product description (Front Control Models)
4.Grilltemperaturecontrolknob
• Adjustsgrillingtemperature.
5.Oventemperaturecontrolknob
• Adjustsoventemperature.
6.Functionswitchcontrolknob
• Setsovenfunction/mode.
7.120MinuteRingerTimer(Somemodelsttedwith3
buttonclockwithdigitaldisplay)
• Sets“reminder”alarmcount-downtime,orif
ovenisbeingused,thecookingtimeuntiloven
switchesOFF.
NOTE:Thegasburnercontrolknobshavetobe
helddownforapproximately5secondstoignite.
Grill
Oven Function
Timer
2 3
4 5 6
7
1
Description of gas cooktop model front
panel controls only
1. Hotplateelements/burnerscontrolknobs
• Setselementsorburnerscookingtemperature.
2.Grillindicatorlamp
• Comesonwhengrillisbelowsettemperature,
cyclesonandoffduringgrilling.
3.Ovenindicatorlamp
• Lampisonwhenovenelementisheatingup
oven,thencyclesonandof.
Gas F54GW/F54GS
Grill
Oven Function
Timer
Grill Oven
Function
Grill
Oven Function
Timer
Grill
Oven Function
Product description (control panels)
Controls
Euromaid 540mm Upright Cooker PRODUCT SPECIFICATION 8
/ R54EW / R54ES
/ R54RW / R54RS / GG54RRW
/ R54CW / R54CS / GG54RCW / FRC54W
/ FRR54W
Fitting oven shelves
• Ensureshelforientationiscorrect(referpicture).
• Theshelfhasasafetybarttedtoreducetherisk
ofdishesslidingofftheshelf,thisistherearofthe
shelf
• Slideintoovenatanangleuntilraisedbackofshelf
ispastthestoponsiderunners.
• Lowerfrontofshelfandpushinuntilstopis
reached.
• NOTE:Thetopledgeisnotashelfposition
Oven shelf positions
• Themainovenhas5shelfpositionstochossefrom.
Position1isthepositionatthebottomoftheoven
andposition5islocatedatthehighestpointofthe
oven
• The5positionsideracksystemcanhouseboththe
standardovenshelvesandbakingtray.
Preparing your appliance for the
first time
• Pleasewipeouttheoveninteriorpriortooperation
withwarmsoapywaterandpolishdrywithasoft
cleancloth.
• Newappliancescanhaveanodourduringrst
operationfromcomponentsmanufacturedwiththe
aidofoils.Itisrecommendedto‘runin’youroven
beforeyoucookforthersttime.Runtheanempty
ovenat180°Cforapproximately1to2hours.
Ensurethattheroomiswellventilated.
• Pleaseinstallovenfurnitureasoutlinedinthe
“FittingOvenAccessoriesandCleaning”section.
• Ifyourapplianceisttedwithsolidhotplates,turn
heatsettingtohighfor3minutestofullyharden
thecoating.Whencooled,applyathincoatingof
cookingoiltosealthesurface.
• Thegrillelementmayhaveoilsleftonthegrillduring
manufacture.Beforeyoucookonthegrillforthe
rsttime,turnonfor15minuteswith10mmof
waterinthebottomofthegrilldish.
120 Minute Timer models
Ifyouruprightcookeristtedwitha120minutetimer
youmustselectacookingtimeorturntheknob
clockwisetothe‘ ’symboltooperate.Ifeitherof
thesearenotselectedtheovenwillnotheat.
Digital Timer with 3 buttons
Ifyouhavepurchasedamodelttedwitha3button
programmabletimer,youmustsetthetimeofday
beforeyoucanoperateyourappliance.
• Aftertheappliancehasbeenelectricallyconnected
“00.00”willbedisplayedandthe“ ”willash.
• Tosetthetimeofday,pressthe“–”or“+”buttons.
15secondsafterthelastchange,the“ ”will
disappear,conrmingthetimehasbeenset.
NOTE:Theclockhasa24-hourdisplay
Euromaid 540mm Upright Cooker FIRST TIME USE OF THE APPLIANCE 9
First time use of the appliance
Timer
Level 5
Level 4
Level 2
Level 3
Level 1
BottomElementwithFan(Pizza)Cooking“
Thebottomheatingelementandthefancomeon.
Suitableforpastries,pizzas,cakesandpuddingsin
bakingtinsormoulds
Donotuselowestshelfposition
Fan-forcedCooking“
Therearcircularheatingelementandthefancomeon
tomakeheatdistributedmoreuniformlythroughoutthe
oven.Idealforcookingonmorethanonelevelatatime.
Thismodeisidealforgeneralpurposecookingsuchas
bakingcakes,mufnsandroastingmeat.Cookion
multipleshelfpositionsatthesametime.
DefrostingMode“
Onlythefanoperates.Itislocatedonthebackof
theoven,causingmakestheairtocirculateatroom
temperaturearoundthefood.Thisisrecommendedfor
thedefrostingofalltypesoffood,butinparticularfor
delicatetypesoffoodwhichdonotrequiresubsequent
cooking,suchasforexample:icecreamcakes,cream
orcustarddesserts,fruitcakes.Byusingthismode,the
defrostingtimeisapproximatelyhalved.
2) Oven Temperature (thermostat) Knob
• Selectionofcookingtemperatureiscarriedout
byturningtheknobclockwisetotherequired
temperature,between60ºCtoMAX.
• Iftheapplianceiselectricthe“ovenindicatorlamp”
willcomeonwhentheovenisheatingup.When
itgoesoutitmeansthatitreachestherequired
temperature.Theovenindicatorlampgoing‘on&
off’duringuseisthennormal.Thismeansthatoven
temperatureisbeingconstantlymaintainedatthe
selectedlevel.
Oven safety warnings
• Alwaysfollowtheinstructionsforputtingtheshelves
andsideracksintotheoven,toavoidaccidents.
• DONOTlinetheovenwithfoil,itwilldamagethe
enamelcoating.
• DONOTplacecookwareoranythingelseonthe
bottomofovenastrappedheatwilldamagethe
ovenenamelcoating.
• DONOTtouchthehotsurfacesorheatingelements
insidetheoven.
• DONOTusetheovendoorasashelf.
• DONOTpushdownorsitontheopenovendoor.
• DONOTplaceshelvesontopofuppermostshelf
runnerastherearenostopsforshelfwithdrawal.
Operation
Set: 1) Oven Function 2) Temperature
3) Cooking time
1) Oven Function Knob
Descriptionofeachovenfunction(mode)
Lamp“
Thelampoftheovenison.Noheatingelementsareon.
Conventionalcooking/nofan
(useshiddenbottomelement)“
Suitableforcakes,biscuits,slowcookingandideal
forblindbaking.Goodforslowcookingatlower
tempeartures(below150degreescelcius).
Donotuselowestshelfpositionasbaseoffoodcan
burnasitisclosetotheelement.
Using the oven
Function
Oven
10 Euromaid 540mm Upright Cooker USING THE OVEN
Starting-upprocedure
Afterpoweron,thescreenwilldisplay“00:00”and
”clockindicatorwillbeon.
Timeofdaysettingprocedure
NOTE:Digital clock is displayed in 24 hour format
When“ ”clockindicatorandhourindicationare
ashing,press“+”upkeyor“–”downkeytoselecta
numbervaluefrom(0-23)forthehourtime,thenpress
”setkeytochangetotheminutesetting.Whilst
ashingpress‘+‘upkeyor‘-“downkeytoselecta
numbervaluefrom(0-59)fortheminutetime.The
“ ”clockindicatorwillremainashingfor15
secondsoncethetimeissetandneitherofthe“+”up
keyor“–”downkeysandpressedagainwhilstashing
.
Durationtimersettingprocedure
Press“ ”selectionbutton3timesuntil“ ”heating
indicatorisashing,thenpress“+”upkeyorthe“–”
downkeytoselectthecookingdurationtimeinhours.
Thenpressthe“ ”selectionbuttontoenterthe
cookingdurationtimeinminutessetting.The
“ ”heatingindicatorwillremainashingfor15
secondsoncethecookingdurationtimeissetand
neitherofthe“+”upkeyor“–”downkeysare
pressedagainwhilstashing.
Alternativelypressthe“ ”selectionbuttonandthe
ovenwillstartcookingimmediately
Ifdurationtimersettingdoesneedtoexceed59
minutestheninitiallythe“ ”selectionbuttonshould
bepressed4timesinsteadof3tobypassthehour
durationselection.
Audible‘EndofCooking’buzzer
Thebuzzerwillsoundforup60secondsattheendof
thecookingtimedurationthathasbeensethasbeen
reached.The“00:00”displayand“ ”heating
indicationwillashforthisperiodunlessthe“
”selectionbuttonispressed.Theclockwillreturnto
thetimeofdaydisplaywheneitheroftheabovetow
actionsoccur.
Remarks
• Ifyoupress“+”upkeyor“–”downkeyformore
than3seconds,thevaluewillchangequickly.
• WhensettingtheTimeofDayorDurationTimerthe
“:”doesnotblinkalthoughwillblinkwhenineither
eithernormalTimeofDaymodeorDurationTimer
isdisplayed.
3) Set Cooking Time
120MinuteRingerTimerwith“OvenON/OFF”
• OperatingovenwithoutTimer-Turnknob
counterclockwiseto“ ”symbol.Theovenwill
operatewithuseofthetimerfunction.
• OperatingovenusingtheTimer-Tosetthetimer,
simplyturntheknobclockwisetotherequired
numberofminutes.Thetimerwillautomaticallyshut
downtheovenafterthesetminutesandthetimer
willringatthesametime.
•
NOTE:Foranytimebelowfteenminutesturntheknob
pastthefteenthenturnitbacktotherequirednumber
ofminutes.Whenthetimerreturnstozero,thetimer
givesashortring.
ProgrammableClock(somemodelsonly)
1 Heatingindication
2 Clockindication
3 Hourindication
4 Secondindication
5 Minuteindication
6 Up
7 Set
8 Down
Using the oven
Euromaid 540mm Upright Cooker USING THE OVEN 11
1
2
3 4 5
6 7 8
Timer
Oven cooking guide
Thefollowingcookingguideisintendedasaroughguideonly.Youmayberequiredtosetoven10-20degreesabove
orbelowthisguidetogettheresultyouwant.Alsoadjustmentsmaybeneededtothecookingtimetosuitpersonal
expectations.IfyouarenewtousingaFanForcedovenItisadvisabletomaketheseadjustmentsuntilyougetto
knowthewayyoorovenperforms.Iffollowingcookbookrecipesorpre-packagedgoodsyoushouldreadcarefully
theircookingtimesguidelines.
Forbestresultswhenbaking,preheatyourovenfor15-20minutes.
Food
Conventional Oven / Pizza Fan forced mode
Time in
minutes
Temperature (ºC) Oven shelf
position
Temperature(ºC) Oven shelf
position
Plainorfruitscones 200 Any 10-15
Rolledbiscuits 170 2-3 150 Any 10-15
Spoonedbiscuits 190 2-3 180 Any 12-15
Shortbreadbiscuits 160 2-3 150 Any 30-35
Hardindividualmeringues 110 2 100 Any 90
Softindividualmeringues 180 2 165 Any 15-20
Pavlova 110 2 100 Any 75
Pattycakes 190 2-3 170 Any 15-20
Sponge 180 2-3 170 Any 20-30
Plainbuttercake 180 2 170 Any 25-40
Richfruitcake 140 2 130 Any 180
Shortcrustcornishpasty 180-200 2* 160 Any 40-45
Shortcrustcustardtart 180-220 2* 170-200 Any 20-30
Creampuffs 210 2 200 Any 25-30
Yeastbread 210 2* 200 Any 25-30
Pizza 215 2* 205 Any 12-20
*Whenusingyoucoulduseposition3oftheoven
Meat/Poultry/Fish Fan Forced - Rec. Temp (ºC) Minutes per kilogram
Beef
Rare 180 35-40
Medium 180 45-50
Welldone 180 55-60
Lamb
Medium 180 40
Welldone 180 60
Veal 170 60
Pork 200 60
Chicken 180 45-60
Duck 180 60-70
Turkey 180
40–45(lessthan10kg)
35–40(morethan10kg)
Fish 160-170 20
Using the oven
12 Euromaid 540mm Upright Cooker USING THE OVEN
Understanding cooking problems
Problem Causes What to do
Unevencooking
Incorrectshelfposition Selectshelfthatputsfoodincentreofoven
Oventraytoolarge Removeoventray.Usesmallertraysordishes
Traysnotincentre Puttraysincentre
Ovenfancausingunevenbrowningorsmall
cakestoleanover
Rotatefoodduringcooking,oruseConventional
Mode(i.e.nofan)
Bakedproductstoo
brownontop
Ovennotpreheated Preheattheoven
Bakingtinstoolarge(diameter)forrecipe Usecorrectsizetins
Fan-forcedmodewithoventemperaturetoo
high
Checkrecipe.Reduceoventemperatureby
10–20ormore
Cookingtimetoolong Nexttime,shortencookingtime
Bakingtinsnotevenlyspaced Staggerbakingtinsatleast3cmbetweentinsand
theovenwalls
Itemstobecookedarenotevenlysizedor
spacedontrays
Makeintosamesizeandshapeandspread
evenlyovertrays
Bakedproductstoo
brownonbottom
Bakingtinstoolarge(diameter) Usecorrectsizetins
Bakingtinsaredarkmetalorglass Changetoshiny,lighttinsorlowerthe
temperatureby10°-20C
Foodtoolowinoven Cookoneshelfhigher
Ovendooropenedtoofrequentlyduring
baking
Don’topentheovendooruntilatleasthalfthe
cookingtimehaspassed
Bakingtemperaturetoohigh Lowerthetemperature
Oventrayblockingheat(belowthermostat) Usehighershelfpositionforoventray
Cakeshaveacracked
thickcrust
Bakingtemperaturetoohigh Lowerthetemperature
Foodtoolowinoven Cookoneshelfhigher
Cakebatterovermixed Mixjustlongenoughtocombinetheingredients
Bakingtintoodeeporwrongsize Checksizeoftinanduserecommendedsize
Bakingtinsdark Changetoshinylighttins
Bakedproductsarepale,
atandundercooked
Bakingtemperaturetoolow Raisethetemperature
Foodtoolowinoven Cookoneshelfhigher
Bakingtimetooshort Increasecookingtime
Incorrectbakingtinsize Usecorrectsizetin
Cakesfallenincentre
Bakingtemperaturetoolow Raisethetemperature
Bakingtimetooshort Increasecookingtime
Proportionsofingredientsincorrectforrecipe Checkrecipe
Openingdoortooearlyduringbaking Donotopendooruntilthelastquarterof
cookingtime
Roastmeatandpotatoes
notbrowninginfanoven
Poorhotaircirculation Elevatefoodontoaracktoallowaircirculation
Oventemperatureistoolow Increasetemperatureto200-220
Notlongenoughinoven Continuecookingforanother15+minutes
NOTE:Condensationonovendoorisnormal,especiallywhenkitcheniscold
Alsospacingandsizeoffoodontraysandthenumberofbakingdishesintheovencanaffectaircirculation.
Using the oven
Euromaid 540mm Upright Cooker USING THE OVEN 13
Using the grill
• Ensuregrillwirerackisturnedoverto‘high’position
intheenamelgrilltrayfortoast,foodlessthan
20mmthick,orturnedoverto‘low’positionfor
food20-30mmthick.
• Turnthegrillcontrolknobtoadjustthetemperature
togetthedesiredresult.Eg,toast4or5,meat6or
7.
• Ensurethattheenamelledgrilltrayispositioned
correctlyonthepinslocatedonthetelescopic
siderunners.Insertthegrillrackinsert,choosing
heightlevelrequiredforfoodbeinggrilled,intothe
enamelledgrilltrayandclosethegrilldrawerfully.
• Preheatthegrill.After3minutes,openthegrill
drawerandplacefoodontogrillrackinsert.
• Closethegrilldrawer.
• Intheprocessofgrilling,slideoutthegrilldrawer
every1minutetocheckprogressoftoast,every
2-3minutesformeats..
Handling grilling problems
Problem Causes What to do
Grilledmeats
burnton
outsideand
rawincentre
Meattoo
closetogrill
Useinvertedwirerack
insertand/orreduce
temperaturesetting
Excessgrill
smoke
Build-upof
fatsingrill
Cleangrillenamelled
trayandwirerackafter
everyuse
Trimfatfrommeatprior
tocooking
Grilledsteaks
andchops
curling
Cutslitsintofatwith
knifetowardsmeator
removeallfatpriorto
grilling
Grill safety warnings
• Alwaysturnoffthegrillimmediatelyafteryouhave
nishedcookingandpulldraweroutorremove
grilltrayotherwisefatleftinthetrayinthehotgrill
compartmentwillcontinuetosmokeorcouldcatch
re.
• Washgrilltray&grillinsertaftereveryuse.
• Grillinsertrackcanbeinverted…..toprovide2
differentsettingsforthedistancefromtopoffoodto
thegrillelement.
• DONOTlinethegrillrackwithfoil.
• DONOTleavethegrillunattendedandcheck
progressofcookingevery1–2minutes(especially
bread).
• DONOTtrytogrillplacefoodmorethan25mm
thick.Foodmaycatchre.Trimexcessfatfrom
fattytypemeatstoreduceanyriskofre.
• Donotstoreammablematerialsnearthegrill.
Grill information
• Thegrillfunctionissuitablefortendercutsof
meat,steak,chops,sausages,sh,bread,cheese
toastiesandotherquick-cookingfoods.
• Preheatfor3minutes.
• Placefoodoncethegrillchamberafetrpre-heating
isnished
• Thegrilldrawerdoormustbeclosedduringgrilling.
Using the grill
14 Euromaid 540mm Upright Cooker USING THE GRILL
Grill
Using the hotplates of your electric
cooker
Checkthehotplatesonyourcookeragainstthe
diagramsbelowbeforeyouuseyourcookerfortherst
time.
Radiant hotplates
• Thehigh-speedradianthotplatesheatrapidlyfrom
acoldstart.
• Theradiantelementscanbeunpluggedandthe
trimringscanberemovedforcleaningthespillage
bowls
Hotplates safety warnings
• DONOTusepotsandpanswhichareunsteady,as
thesecouldoverbalance.
• DONOTusematsorheatdiffusersontopof
hotplates.Thesewillcauseatemperaturebuild-up
whichcandamagethecooktop.
• DONOTturnonhotplatesifthereisnopotorpan
onhotplateoriftheydonotcontainfoodorliquids
inthem.
• DONOTletcookingpotsoverhangsidesorfrontof
hobastheycanradiatetoomuchheatontocontrol
knobsorbenchtopsurfaces.
Ceramic hotplates
• DONOTuseiftheceramicglasstopiscrackedor
broken.
• DONOTleavealuminiumfoilonthehotceramic
hotplates(permanentdamagewilloccur)
NOTE:Storedheatinthehotplatecanbeusedfor
thelastfewminutesofcooking.Simplyturnoffthe
control.
Choosing Cooking Pots
Lookatthisdiagrambelowwhichshowsyouwhich
cookingpotandpanstouseonthehotplatesand
whichonesthatshouldnotbeused.
• Alwaysusepotsandpanswithatbottoms.
Unevenorthinbottomswillwasteenergyandcook
slowly.
• Alwaysusepotsandpanswhichareslightlylarger
thanthehotplate.Smallpanswasteenergy.
• Alwaysputdrypotsandpansonthehotplates.
• Donotusepotsandpanswhicharetoolarge.Pans
whichoverhangthehotplatemorethan50mmcan
damagethehoborsurroundingsurfaces.
Using the hotplates of your cooker
Euromaid 540mm Upright Cooker USING THE HOTPLATES OF YOUR COOKER 15
Ceramic hotplates
• DONOTusethecooktopiftheglassiscracked.
Contacttheservicedepartmentimmediatelyto
havethisrepaired.
• Theceramiccooktopismadefromceramicglass,
atough,durablematerialthatwithstandsheating
andcoolingwithoutbreaking.
• However,itmustberememberedthatasitisglass,
itmaybreak.
• Thesmoothglasssurfacehasapatterntoshow
wheretheelementsundertheglassarelocated.
• Whenahotplateison,thehotsurfacewarning
lightwillcomeon.Afterswitchingoff,thislight
willcontinuetoglowuntilthetemperatureofthe
hotplatedropsbelow60°C.
Care of ceramic glass surface
• Ensurethatspillsfromsugarysubstancesare
cleanedassoonaspossibleafterspillageassugar
candamagetheceramicglasssurfaceovertime.
• Aglassscrapershouldbeusedtoremoveburnt
onandverystubbornspillscreatedduringcooking,
Warmsoapywater,followedbywipingwithadry
softclothisnefordailycleaning.
• Periodiccare,approximatelyonceamonth,should
becarriedontheceramicglasssurface.We
recommendtheuseofHillmark‘Cerapol’ceramic
cooktopcleanertoremovestubbornstains.
• Tomaintainandprotecttheceramicglasssurface
overtimeHillmark‘Ceraseal’ceramiccooktop
protectorisrecommended.Thissiliconbased
productcreatesathinlmoftheceramicglass
surface.
• Scratchescanappearontheglasssurfacealthough
donoteffecttheuseofthecooktop.
Solid hotplates
• Thestrongsolid-casthotplatesgivewidecontact
forfast,efcientcooking.
• Thehotplatesaresealedallaroundwhichmeans
thatspiltliquidsdonotgounderthehotplates.
Before first use
• Thetopsurfaceofthehotplatesaresealedwitha
heatresistantcoating.Beforeusingforthersttime
thehotplatesshouldbeheatedforashortperiod
withoutapantohardentheprotectivecoating.
• Turntheheatsettingtohighforapprox.3minutes
tofullyhardenthecoating.Whenthehotplateshave
cooledapplyathincoatingofcookingoiltothe
hotplatetosealandprotectthesurface.
Care of the hotplates
• Ensurethatspillsfromoilandwaterarecleaned
oncehotplatesarecoolenoughtodoso.Ifwater
remainsonthehotplates,rustspotsmayappear
overtime.
• Overtime,thehotplatescandiscolourfromspills
duringcooking.WerecommendtouseHillmark
‘ShineOn’hotplateprotector,onaregularbasis
toextendthelifeofthehotplatesandreducethe
riskofrustingasthisformsaprotectivewaterproof
coatingonthehotplates.Thiscanbepurchased
frommajorhardwareoutletsandsupermarkets.
Using the hotplates of your cooker
16 Euromaid 540mm Upright Cooker USING THE HOTPLATES OF YOUR COOKER
Hotplate Ignition
Tolightthesehotplates:
1. Choosethehotplateyouwanttouse.
2. Pushinburnercontrolknobandrotateto“ ”.
3. Holdcontrolknobfor2-3seconds,themrelease
androtateknobtoadjusttheameheight.Ifame
goesout,theknobwasnotheldinforsuffcient
time;repeatstep2.
Burner
1. Wokburner
• Usedforfastheating.
• UsedwithWOK,largesizepotsandpans.
• ForroundedbottomwoksuseWOKadapter.
2. SmallBurner
• Usedforsimmering.
• Usedwithsmallpotsandpans.
3. Semi-rapidBurner
• Usedfornormalcooking.
• Usedwithmiddlesizepotsandpans.
Toconservegas,placethepancentrallyovertheburner
andadjusttheamesothatitdoesnotgopastthe
edgesofthecookware.
The hob control knobs
Thesymbolsonthecontrolknobsmeanthefollowing:
Nogasow
Maximumgasow
Minimumgasow
Alloperatingpositionsmustbesetbetweenthe
maximumandminimumowsettings,andnever
betweenthemaximumsettingandtheclosedposition.
Introduction to the burner
A Burnercap
B Ignitionplug
C Thermocouple
D Wokburnercap
Using the hotplate gas burners
Euromaid 540mm Upright Cooker USING THE HOTPLATE BURNERS OF YOUR GAS COOKER 17
Solid hotplates
• Fornormalcleaninguseamoistcloth.
• Forverydirtyhotplatesuseanycommercial
cleanser.
• Aftercleaning,removeanycleanserremainingand
drythehotplatecompletelybyrunningtheelement
forashortperiod.
• Overtime,thehotplatescandiscolourfromspills
duringcooking.WerecommendtouseHillmark
‘ShineOn’hotplateprotector,onaregularbasis
toextendthelifeofthehotplatesandreducethe
riskofrustingasthisformsaprotectivewaterproof
coatingonthehotplates..
• Permanentheat-discolourationofthetrimringis
normal.
Ceramic hotplates
• Removeallspiltfoodwiththerazorbladescraper
suppliedwhilethehotplateisstillwarmturnedoff)–
NOTHOT.
• Ifaluminiumfoil,plasticitemsorfoodswithahigh
sugarcontentmeltontoglass,usetherazorblade
scrapertoremoveimmediatelybeforethehotplate
hascooled,otherwisepittingofthesurfacemay
occur.Highsugarcontentfoodsincludejam,fruit,
carrots,tomatoesandpeas.
• Whentheceramichotplatehascooled,wipeclean
withdishwashingdetergentonadampcloth.
NOTE:Donotuseabrasivespongesorscourers,
ovenspraysorstainremoversonceramic
hotplates.Thesemaydamage,scratchorstainthe
ceramiccooktop.Anypitting,stainingorscratching
willnotbecoveredbywarranty.
Safety warnings about cleaning
• Alwaysmakesurethatthecookeristurnedoff
beforecleaning.
• Alwayscleancookerimmediatelyafteruse.
• Useofsteamcleanersisprohibitedtocleanthis
applaince.
• Donotusecaustic-basedcleaners.Thesewill
damagealuminumparts,andremoveenamelgloss.
Cleaning the enamel
• Keepenamelcleanbywipingitwithasoftcloth
dippedinwarmsoapywater.
• Rubdifcultstainswithanylonscourerorcreamed
powdercleanser.
• Donotuseabrasivecleaners,drypowdercleaners,
steelwoolorwaxpolishes.
• Ifyouuseanovencleaner,thenfollowthe
instructionsontheproductcarefully.
Cleaning the control panel
• Makesurecontrolknobsareinoffposition.
• Cleanthecontrolpanelbywipingitwithasoftcloth
dippedinwarmsoapywaterandsqueezeddry.
• Takecarewhencleaningaroundknobstoensure
printingoncontrolpanelisnotremoved,thiscan
occurifabrasivecleanersareused,therefore,
shouldnotusedatall.
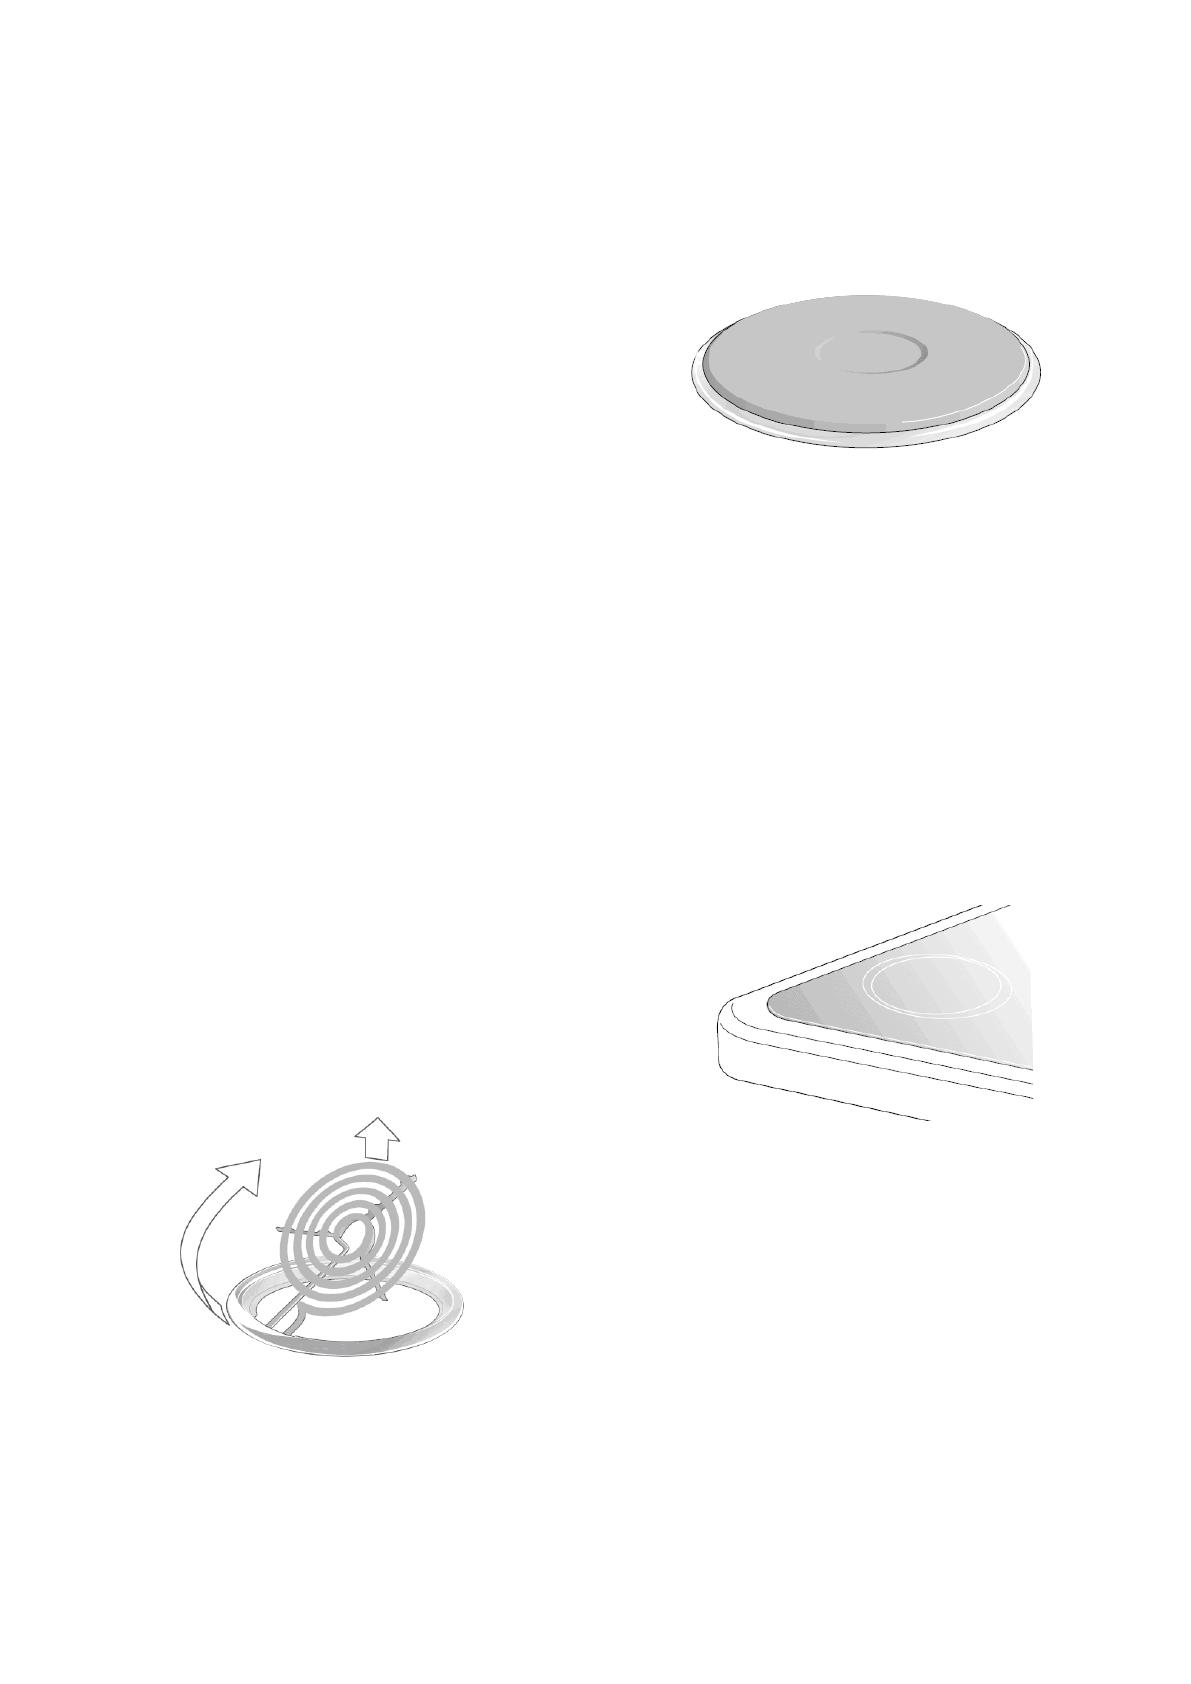
Cleaning the electric cook top
Radiant hotplates
Thesecoiledhotplatesareselfcleaning.Tocleanthe
trimrings,liftfrontofelementandremovetrimring.
Thenwashinwarm,soapywater.Tocleanthespillage
bowl,liftelementandpulloutofsocket.Remove
spillagebowlandwashinwarmsoapywater
DONOTPUTELEMENTSINWATER!
Fitting oven accessories and cleaning
18 Euromaid 540mm Upright Cooker FITTING OVEN ACCESSORIES AND CLEANING
Euromaid 540mm Upright Cooker FITTING OVEN ACCESSORIES AND CLEANING 19
Refitting the burner crowns and caps
• Theburnercrownmustbettedcorrectlyintothe
burnercupordamagewilloccurduringoperation.
• Todothis,ensurethatthe2ribsoneithersideof
thesparkplugholearepositionedintothe2slots
ontheburnercup.(Seegure2).
• Theburnercapissimplypositionedoverthetopof
theburnercrown.
NOTE:Whentheburneriscorrectlytteditwillsit
levelonthehob.
Ifignitionisdifcultorfailsaftercleaning,orthe
amesarenotevenaroundtheburner,theneither
burnerpartsarenotdry/partshavenotbeen
positionedcorrectlyorincorrectcapistted.
Cleaning the grill compartment
• Lifttheenamelledgrilltrayout.
• Cleanthesidesanbottomofcompartmentwithhot
soapywater.
Ifstrongeractionisneededuseanonabrasive
cleanerappliedwithanylonscourer.
Cleaning the Oven
• Openthedoorfully.
• Removeovenshelvesandsideracks.
• Cleaninhotsoapywater.
• Thoroughlydrywithasoftclothtoremoveexcess
waterthatmaybepresent.
Cleaning the Gas Hob
Removing the trivets (Refer Figure 1)
• Thetrivetslocateintherecessedareaofthehob.
• Theycanberemovedforcleaningbycarefullylifting
themfromthehob.
• Cleanbywashinginwarmsoapywater.Dry
thoroughly.
• Takecarewhenreplacingthetrivetsasdropping
themontothehobmaydamagetheenamelled
surface.
Removing the burner partss (Refer Figure 2)
• Theburnercapsandcrownsareremovablefor
cleaning.
• Flameportblockageshouldberemovedbymeans
ofamatchstickorbrush.
• Ifthecaps,crownsandcupsareheavilysoiled,use
anon-abrasivecleaningcompound.
• Donotcleanthemwithabrasiveorcaustictype
cleaners,orputinadishwasherastheywillbe
damaged.
Fitting oven accessories and cleaning
Figure1
Figure2
20 Euromaid 540mm Upright Cooker FITTING OVEN ACCESSORIES AND CLEANING
Cleaning the oven door / How to remove the oven doors
Foramorethoroughclean,youcanremoveanddisassembletheovendoor.Proceedasfollows:
• Openthedoortothefullextent(g.1)
• OpentheleverAcompletelyontheleftandrighthinges(g.2)
• Holdthedoorasshownin(g.3)approximatley30degreeangleupwards
• Gentlyclosethedoor(g.3)untilleftandrighthingeleversA(g.2)arehookedtopartB(g.2)ofthedoor
• WithdrawthehingehooksfromtheirlocationfollowingarrowC(g.4)
• Restthedooronasoftsurface,toreduceriskofdamagetothedoor
• Toreplacethedoor,repeattheabovestepsinreverseorder
Removing the Inner Pane of Glass
• TripleGlazedovendoor:Removethetopframe(G)byunscrewingthe2screws,locatedontheleftandrightsides
• Gentlypullouttheinnerpaneofglass(g.2).Alsoremovethecentrepaneofdoorglass,notshownhere.
• Cleantheglasspaneswithanappropriatecleaner.Drythoroughly,andplaceonasoftsurface.
• Nowyoucanalsocleantheinsideoftheouterglass.
Cleaning the door glass
• Cleantheglassdoorusingnon-abrasiveproductsorspongesanddryitwithasoftcloth.
• Donotusetheovenwithouttheinnerdoorpanesttedcorrectly.Whenre-ttinginnerglassdoorpanesensure
theygobackinfacingthesamewaytheycameout.Thedoorsarecoatedwithaveryslightreectivecoatingto
reecttheheatbackintotheovencavityandkeeptheouterdoorcoolertotouch.
• Donotuseharshabrasivecleanersorsharpmetalscraperstocleantheovendoorglasssincetheycanscratch
thesurface,whichmayresultinshatteringoftheglass.
Fitting oven accessories and cleaning
  • Page 1 1
  • Page 2 2
  • Page 3 3
  • Page 4 4
  • Page 5 5
  • Page 6 6
  • Page 7 7
  • Page 8 8
  • Page 9 9
  • Page 10 10
  • Page 11 11
  • Page 12 12
  • Page 13 13
  • Page 14 14
  • Page 15 15
  • Page 16 16
  • Page 17 17
  • Page 18 18
  • Page 19 19
  • Page 20 20
  • Page 21 21
  • Page 22 22
  • Page 23 23
  • Page 24 24
  • Page 25 25
  • Page 26 26
  • Page 27 27
  • Page 28 28
  • Page 29 29
  • Page 30 30
  • Page 31 31
  • Page 32 32
  • Page 33 33
  • Page 34 34

Euromaid GG54RCW User manual

Category
Ovens
Type
User manual
This manual is also suitable for

Ask a question and I''ll find the answer in the document

Finding information in a document is now easier with AI