Dogberry Collections m-sold-6006-drft-none Installation guide
- Category
- Fireplaces
- Type
- Installation guide
This manual is also suitable for

*If you are unsatisfied with this dogberry product for any reason contact us at 888-801-3393 or
customerservice@dogberrycollections.com
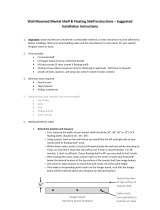
Solid Mantel Shelf – Suggested Installation Instructions
1. Important: wood mantels are considered a combustible material, so heat clearances must be adhered to. Before installing,
check your local building codes and the manufacturer's instructions for your specific fireplace insert or stove.
2. Parts included (see image at right)
• (1) solid mantel shelf
• (3) hanger bolts (for attaching to wall studs - NOT brick or drywall)
• (2) hex nuts
• (1) 9/16” drill bit
• (1) 3/8” drill bit (for drilling into wall studs - NOT brick or drywall)
3. Minimum tools required
• Pencil or pen
• Tape measure
• Wrench (crescent or socket)
• Drill
4. Optional tools (not required, but may be helpful)
• Stud finder
• Level
• Hammer
• Construction adhesive
5. INSTALLATION (in order)
• Determine location on wall and drill holes
o First, measure the length of your mantel shelf (probably 36”, 48”, 60” or 72”)
o Using a pencil, mark on the wall where you would like the left and right side of your mantel shelf to be.
o Within those marks, locate 3 studs (2x4 boards) inside the wall you will be mounting to. If you can only
find 2 studs that will suffice, but 3 studs are recommended.
o After locating the studs, make a pencil mark on the center of each stud located 3” below the desired
location of the top surface of the mantel shelf (see image below).
o Important: Use a tape measure or level to double check that wall marks are at the same vertical height.
Ensuring these marks are at the same height will simplify installation. However, differing horizontal
distances between studs in the wall will not matter.
o Using 3/8” bit provided, drill (3) holes 4” deep into the wall where you made marks. Holes should be
drilled straight. After drilling holes, remove the 3/8” bit from your drill and set aside (do NOT use again).
3”
desired location
of top surface of
mantel shelf
studs in the wall
3/8” diameter
holes, 4” deep

*If you are unsatisfied with this dogberry product for any reason contact us at 888-801-3393 or
customerservice@dogberrycollections.com
• Attach the hanger bolts to the wall
o Find the hanger bolt that already has (2) hex nuts attached.
o Place coarse-thread end of hanger bolt into the first hole in your wall, and twist clockwise to tighten.
• Tighten by hand until it becomes too difficult to tighten by hand.
• Using a crescent wrench or socket wrench, continue tightening hanger bolt into wall until only 4”
of bolt remains visible.
• Tip: In order to tighten with a wrench, both hex nuts must stay together and you should only
tighten the nut on the outside (see diagram below).
o After the first hanger bolt is fully attached to the wall, remove hex nuts and attach them to the second
hanger bolt.
o Repeat process of attaching all remaining hanger bolts to wall.
• Drill holes into back of mantel shelf
o Measure the distance between the hanger bolts you just attached to your wall.
o Using a pencil, make corresponding marks on the back side of your mantel shelf 3” below the top surface.
You can choose which side of the mantel shelf you prefer as the top or bottom surface.
o Using 9/16” bit provided, drill holes 4.5” deep into the back side of the mantel shelf (where you made
marks). Holes should be drilled straight.
• Final Step: Mount the mantel shelf to the hanger bolts (this step is easiest with 2 people)
o Slide mantel shelf over hanger bolts.
• Optional: you may choose to apply construction adhesive inside the holes prior to sliding mantel
shelf over hanger bolts (though this is not required).
o Adjustments may be required to successfully complete this step. See tips below if your mantel shelf does
not slide on easily the first time.
o Tips for mounting:
• First, try to wiggle one or both sides of the mantel shelf while trying to slide it on the hanger
bolts. If you are doing this by yourself, wiggle one side at a time and alternate sides. If there are
two people (much easier), you can wiggle both sides together.
• If you notice that any of your hanger bolts are not attached to the wall straight, tap the bolts
with a hammer to correct the straightness. Then try again to slide the mantel shelf on the
hanger bolts.
• You may also use a scrap piece of wood (not provided) as a strike plate to tap the mantel shelf
onto the hanger bolts. Place the strike plate against the face of the mantel shelf and tap with a
hammer until it slides on the hanger bolts.
3”
top surface of
mantel shelf
9/16” diameter
holes, 4.5” deep
coarse thread
fine thread
This end into holes in wall.
Apply wrench only to this
outside nut when tightening
hanger bolt into wall.
-
 1
1
-
 2
2
Dogberry Collections m-sold-6006-drft-none Installation guide
- Category
- Fireplaces
- Type
- Installation guide
- This manual is also suitable for
Ask a question and I''ll find the answer in the document
Finding information in a document is now easier with AI
Related papers
Other documents
-
Elements M700-60-WT Installation guide
-
Ekena Millwork MANURW06X08X36PE Installation guide
-
 Vdomus 8541858451 Installation guide
-
 House of Fara 59048 Installation guide
-
Ford FD1500 Installation guide
-
 Blue Hawk 55427 User manual
-
 Dogberry MRUST6005SLVWNONE Installation guide
-
 Pearl Mantels RPS48515D Installation guide
-
 Pearl Mantels NC-48 GRAYWASH Installation guide
-
Builders Choice MTTRKO54 Installation guide


