Page is loading ...

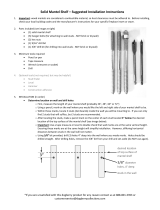
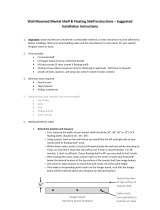
Suggested Installation Instructions
(for Wall Mounted Mantel Shelf & Floating Shelf)
1. IMPORTANT:
• Please read completely through these installation instructions before you begin to install your product.
• Wood mantels are considered a combustible material, so heat clearances must be adhered to. Before
installing, check your local building codes and the manufacturer's instructions for your specific fireplace
insert or stove.
• Installation on brick, stone or concrete walls require masonry screws and masonry drill bits (NOT included),
and a hammer drill is recommended. Consult with your local contractor or hardware store for the correct
hardware and equipment to use. For brick chimneys, drilling is usually done in the mortar between bricks.
2. Parts included
• (1) mantel shelf
• (1) hanger board (narrow unfinished board)
• (4) short screws (3 screws if floating shelf)
• (3) long screws for attaching to wall studs (not for brick or drywall)
• (2) sets of bolts, washers, and wing nuts (only if mantel ordered includes corbels)
3. Minimum tools required
• Pencil or pen
• Tape measure
• Phillips screwdriver
4. Optional tools (not required, but recommended)
• Stud finder
• Level
• Drill
• 1/16” drill bit for pre-drilling holes
5. INSTALLATION (in order)
• Determine location and measure
o First, measure the width of your mantel or shelf (mantels should be 36”, 48”, 60” or 72”; floating
shelves should be 24”, 36” or 48”).
o Using a pencil, mark on the wall where you would like the left and right side of your mantel shelf to
be.
o Within those marks, locate 3 studs (2x4 boards) inside the wall you will be mounting to. For
mantels and shelves 48” or longer, attaching to 3 studs is recommended. For mantels and shelves
less than 48” long, attaching to 2 studs is sufficient.
o After locating the studs, make a pencil mark on the center of each stud located ¾” below the
desired location of the top surface of the mantel shelf (see image below).
o Use a level or tape measure to check that wall marks are at the same height.
o Then make corresponding pencil marks on the hanger board, such that the hanger board will be
centered above your fireplace (or desired location).
¾”
desired location
of top surface of
mantel or shelf
make marks
corresponding to
location of studs
hanger board
(centered above fireplace)

• Attach the hanger board to the wall
o Partially drive the long screws into the hanger board.
• If using a drill and 1/16” drill bit (recommended): first pre-drill holes in the marks you
made on the hanger board, and then partially drive the screws into those holes.
• Or if using a Phillips screwdriver: partially drive the long screws directly into the marks you
made on the hanger board.
o After the long screws are partially driven into the hanger board, hold the hanger board up to the
wall aligned with the marks you previously made. Drive the long screws completely into the studs,
until the head of each long screw is flush with the surface of the hanger board.
• Attach corbels to the mantel shelf (NOTE: skip this step if your mantel does not include corbels)
o Locate the 2 pre-drilled holes on the bottom surface of the mantel shelf.
o Using the sets of bolts, washers, and wing nuts, attach the corbels to the bottom of the mantel
shelf.
o The pre-drilled holes are intentionally larger than the bolts. This allows you to fine tune the
position of your corbels prior to tightening the wing nut.
• Mount the mantel shelf to the hanger board (NOTE: this step is easiest with 2 people)
o Locate the 4 pre-drilled holes on the top surface of the mantel shelf.
o Hang the mantel shelf on the hanger board so that the pre-drilled holes are facing up, and so that
the back of the mantel shelf is tight against the wall (a second person is helpful to maintain
pressure against the wall). Depending on the size of your mantel shelf, you may be able to adjust
the mantel left or right as desired.
o Final step: using a Phillips screwdriver (or drill), drive the small screws straight down through the
pre-drilled holes in the top surface of the mantel shelf.
WARNING: This product can expose you to Formaldahyde (gas),
Carbon Black (airborne, unbound particles of respirable size),
N-methylepyrrolidine, Cumene, Ethylene glycol (ingested), and
Toluene which is known to the State of California to cause cancer,
birth defects or other reproductive harm.
For more information go to: www.p65warnings.ca.gov
/


