Page is loading ...

1. Post Caps (6)
- 10600
2. Arches (4) - 10702-1
3. Arch Rafters (6) - 10757
4. Left Posts (2) - 10760-1
5. Side Panel Top Horizontal Rails (2) - 10751-1
6. Side Panel Bent Vertical Spindles (46.6 in. / 118.4 cm.) (4) - 10762-1
7.
Side Panel Middle Straight Vertical Spindles (45.5 in. / 115.6 cm.) (2) - 10763-1
8. Side Panel Middle Horizontal Rails (2) - 10754-1
9. Right Posts (2) - 10761-1
10. Side Panel Bottom Horizontal Rails (2) - 10755-1
11. Ground Mounting Extensions (4) - 10845
12. 5/8 in. (16 mm) Self-Augering Screws (48) - 20016
Tools You Will Need
• Cordless Drill
• Level
• Stool or Short Ladder
• Shovel
• Cement (For Installation)
Assembly Time
• Approximately 30 minutes (2 People)
General Information
Read Instructions through carefully before beginning assembly.
• When assembling components, place on a non-abrasive surface
(i.e. shipping box) to avoid scratching.
• We recommend an area
approx 10 ft. x 8 ft. (3 m x 2.5 m ) for unobstructed assembling.
• You should not need to use excessive force when assembling components.
Please read through before starting assembly.
IMPORTANT: CHECK THE INSIDE OF YOUR POSTS FOR ALL MATERIALS.
Check Box for These Contents
In the event of missing or defective parts please call our customer service dept. at 1 800 282 9346 (Mon. to Fri. 8:00 AM to 4:00 PM EST).
(UK Tel:
(44) 2038 687160 (Mon. to Fri. 1:00 PM to 10:00 PM GMT).
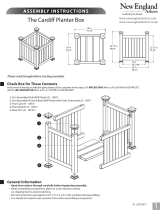
ASSEMBLY INSTRUCTIONS
The Dublin Arbor / Arch
1
42 in.
(107 cm)
18 in.
(46 cm)
82 in.
(208 cm)
46 in. (117 cm)
12
Not to Scale
8
7
6
5
2
3
1
11
10
45 in.
(114 cm)
9 in. (23 cm)
21 in.
(53 cm)
4
9
V3.2/072517
www.newenglandarbors.com
www.newenglandarbors.co.uk

STEP ON E
2
Slide post caps into position as illustrated. Push firmly until arches
bottom
out inside the post caps
.
Join arches together as illustrated.
Fasten four 5/8 in. (16 mm.) screws in each post cap at top
of
arches as illustrated (Fig. 1), and repeat for other arch. Fasten
two
screws 5/8 in. (16 mm.) in top portion of post caps at
bottom of arch (Fig. 2), and repeat for other arch.
Insert arch rafters (6) into the holes on the arches until they
bottom out inside the arches. There are “locking tabs” located at
each end of the rafters that once inserted into the holes will lock
into place.
The Dublin Arbor / Arch
Assemble the Arch System
3
3
4
1
1
Fig. 2
2
Fig. 1
2
PLEASE NOTE:
Arch rafters have locking tabs located at both ends. Once
inserted and pushed into the routered holes they will lock
into place permanently.
4
www.newenglandarbors.com

3
T
he Dublin Arbor / Arch
6
7
8
9
6
7
8
Lay out the side panel bottom horizontal rail and insert the middle
STRAIGHT vertical spindle (slightly shorter than outer vertical
spindles that will be bent into place).
Insert the two vertical spindles (slightly longer than middle vertical
spindle) that will be bent into place.
Slide the Side Panel Middle Horizontal Rail over the three vertical
spindles to about the middle of the vertical spindles.
Position the Side Panel Top Horizontal Rail and Insert the middle
vertical spindle.
Tension bend into place the two outer vertical spindles. The
assembled side panel will need to be held together until it is
inserted into the post.
Lay out one LEFT post (as identified) horizontally with holes facing
up and insert the assembled side panel by aligning the horizontal
rails with the holes on the post.
Lay out one RIGHT post (as identified) horizontally with holes
facing up and insert the assembled side panel and post into.
Fasten the side panel to the posts by using 5/8 in. (16 mm) screws
into the posts as illust
rated. Ensure that all horizontal rails on side
panel “bottom out” inside the posts prior to screwing together.
Repeat as necessary for other side panel.
1
2
ST EP T WO
Assemble the Side Panels
3
4
5
1
2 3
4
5
www.newenglandarbors.com

4
North America Toll Free Phone: 1 800 282 9346
United Kingdom Tel: (44) 2038 687160
www.newenglandarbors.com
www.newenglandarbors.co.uk
STEP THREE
Connect Arch System to Side Panels
Set out both side panels 42 in. (107 cm) opening between
inside
of posts.
Place the assembled arch over the side panels and push down until
the post tops bottom out inside the post caps. You will need a
helper for this step.
1
2
3
2
3
42 in.
107 cm.
Move the arbor to its final location (you will need a helper). When
you are satisfied with the location, mark the locations of the posts,
then move the arbor aside and lay it carefully on its side. Excavate 4
holes approx. 10” (25 cm) deep. Carefully move the arbor back into
position and level it both vertically and horizontally.
Backfill the holes with the excavated soil to cover the extensions .
1
A Into Earth (temporary Installation)
2
Similar to the above steps, move the arbor to its final location.
When you are satisfied with the location, mark the locations of
the posts, then move the arbor aside and lay it carefully on its side.
Excavate 4 holes approx. 18” (46 cm) deep, 6“ (15 cm) diameter.
Fill the holes with wet cement flush to the ground. You will need
2 bags of pre-mix concrete (purchase separately). Carefully move
the arbor back into position.
Support the arbor and level over the holes with bricks, stones or
blocks of wood under the bottom rail of the side panel. The post
bottoms should insert themselves approximately 1” (1.5 cm) into
the concrete. Allow the concrete to set.
1
2
3
B Into Earth With Concrete Footing
A
1
10" (25 cm)
6"
(15 cm)
2
Level
Level
Slide the four ground mounting extensions into the bottom
of each posts until it bottoms out and secure with two
screws, one on the outer side of the post and one on the
inner side as shown.
1
Fasten the assembled arch s
ystem to the posts by installing two
5/8 in. (16 mm.) screws into the two pre-drilled holes provided on
the bottom of each post
cap as illustrated
.
STEP FOUR
Arbor I nstallation
Arbors must be well secured to prevent tipping over from wind load,
etc. We have provided four ground mounting extensions for
securing the arbor in a temporary application like a wedding, etc.
These extensions are not
designed to permanently mount your
arbor.
If you are installing your arbor on concrete or a wood deck, visit
your
hardware store to purchase the appropriate galvanized
bracketing hardware.
Ground Mounting Extension Installations
1
1
B
18" (46 cm)
6" (15 cm)
/