Page is loading ...

How-To
Timberchic® is designed to be used by any DIYer. However, there are different levels of DIYers. Some won’t
need our instructions, some will read our instructions and say “easy enough” and others will read our
instructions and sas “huh?”. No matter what level DIYer you are, we are always available to answer your
questions and walk you through any project.
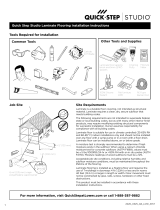
Tools You Will Need:
Pencil
Chalk Line
Level
Rubber J-Roller
Miter Saw (either hand saw or electric)
Utility Knife
Black Dot Stickers (provided)
Timberchic is real wood and can be cut or shaped with any woodworking tools.
Ordering
You will need to calculate the amount of square footage of your project. (Area = width x height) We
recommend adding 5% for waste. Determine whether you need any outside corners or end caps. If at
any time you are unsure of your calculations or how to handle a particular area, please give us a call
and we will walk you through the process.
Preparing the Wall
The wall surface needs to be clean (free and debris and loose drywall), smooth (sand down any bumps)
and flat (within 1/4” over 4’). Any wall repairs requiring joint compound need to be primed or painted.
Remove any fixtures attached to the wall (outlet covers, light switch covers, wall sconces, etc.).
Layout
If your ceiling and floors are level and parallel, then this step is a no-brainer. If they are not, you will have
some decisions to make. The following steps will navigate your through this process.

http://mock3.alliancedigitalnet-
Step 1
Measure the distance between your floor and ceiling at both ends of the wall. If these are within
1/4”, then your floor and ceiling are adequately parallel.
Step 2
Place a level along your ceiling. If your ceiling is fairly level, you can use your ceiling as the
reference point for laying out your starting line.
Ceiling
Floor
96” 96”
If Step 1 and 2 has determined that your floor and ceiling are parallel and level, then proceed
to Step 3, otherwide read through Steps 3-6, then go to “Troubleshooting Crooked Rooms”.

96” ÷ 5” = 19.2 rows
or
18 Rows of 5”
1 Row of 3”
1 Row of 3”
+
+
Step 3
Measure the distance between your floor and ceiling. Take this distance and divide it by the width of
your Timberchic® plank.
Example: If your floor to ceiling distance is 96” and your Timberchic® plank width
is 5”, 96 ÷ 5 = 19.2 That means you will have 19.2 rows of planks, or 19 full rows of 5”
and 1 row of .2 of 5”, which is 1” (5” x .2 = 1”)
Step 4
Determine the width of your starting and finishing row.
Example: A 1” row is too narrow and not optimal for finishing a room. Ideally we
would like to have a row no less than 1/2 the width of a nominal row. Another way of
expressing 19 rows of 5” and 1 row of 1” is 18 rows of 5” with 6” leftover (5” + 1” = 6”).
Divide 6” in half and that is the width of the starting and finishing rows. Start with a 3”
row along the ceiling, 18 full rows in the middle and finish with a 3” row along the floor.

Step 5
Measure down from your ceiling on both ends of the wall, the width of your starting row plus any
multiple of the width of your Timberchic® plank, so you can easily reach the mark.
Example: If your ceiling height is 96”, measure down 23” on both ends of the wall and
make a mark. 23” is the height of your first 3” row and the next four 5” rows
([3” +(4)5”] = 23”). 96” - 23” = 73” from the floor which should be an easy height to reach.
Step 6
Using your marks, chalk a line on the wall. This is your starting line.
Ceiling
Floor
23” 23”
Starting Line

Ceiling
Floor
Step 7
Start applying two rows of planks to the wall along both sides of the starting line.
Step 8
Continue to fill the wall with planks using the techniques discussed below.
Applying the Planks
Timberchic® is thin for several reasons - minimize waste, maximize yield and most importantly, so it
will conform to the substrate. Because it is thin and a reclaimed material, care should be taken when
handling the product. Once it is adhered to the wall, Timberchic® is a durable, real wood wall application.
All measuring, cutting and test fitting of planks must be done prior to removing the tape film. After tape
film has been removed, avoid touching the tape and protect from dust and debris.
If the plank has an open knot, for optimal appearance we recommend using the supplied black dot
stickers behind the knot. Place the plank in its desired location before removing tape liner. Mark any
open knots with a pencil. Remove the plank and place black dot sticker over the pencil mark.
When you are ready for final placement of a plank, remove tape liner. Align the plank along the
reference line or adjacent plank with a slight angle so only the referenced edge is touching. Check
alignment of the ends of the plank, make necessary adjustments and lightly press the plank into place.
Confirm the fit before applying pressure to the plank with a rubber J-roller. The adhesive is pressure
sensitive, which means the more pressure that you apply, the better the bond. Extra attention shoud be
paid to the edges and ends of the plank.
Butt joints in adjacent rows should be staggered the width of the plank, at a minimum.

Ceiling
Floor
Outside Corners and End Caps
We recommend using Outside Corners when you will be applying Timberchic® to both walls adjacent to
the corner. We recommend using End Caps when you will by applying Timberchic® to only one
wall adjacent to the corner. In either event, apply the trim to the corner before applying the planks.
Ceiling
Floor
/