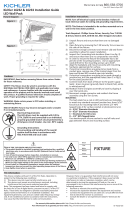
INSTALLATION INSTRUCTIONS
LED-1503
LED Wall Light
PRECAUTIONS:
Read these instructions carefully before attempting to install the fixture, and keep for future reference. Before beginning
installation or service, disconnect the power by turning off the circuit breaker. Turning the power off by using the light
switch is not sufficient to prevent electrical shock. All work should be performed by a qualified electrician. This fixture is
for outdoor use and should not be used in areas with limited ventilation or high ambient temperatures. This product must
be installed in accordance with the applicable installation codes and ordinances by a person familiar with the construction
and operation of the product and the hazards involved.
IMPORTANT: In order to comply with established electrical code, the installer must seal the area around the mounting
plate and the wall with silicone sealant to provide a watertight seal.
AVERTISSEMENT:
S’assurer que toute alimentation possible est COUPE’E avant de commencer l’installation ou l’entretien.
Tout le ca’blage doit e’tre fait par un e’lectrician vertifi’e.
INSTALLATION:
Direct wall mounting to a recessed box:
1. Remove the rear mounting plate by loosening the two allen head screws from the side of the plate on the rear of
the fixture.
2. Fasten the mounting plate to the recessed outlet box.
3. Splice the outlet box wires to the leads from the fixture, matching black to black (hot), white to white (neutral), and
green to green (ground).
4. Push the splices into the outlet box.
5. Align the fixture against the mounting plate. Be careful to not pinch the wire leads.
6. Secure the fixture by tightening the two allen head screws to lock the mounting plate.
7. For wet locations, caulk between the rear housing and the mounting surface to prevent water from entering the
fixture from behind.
8. The LED light engine is preinstalled and prepositioned. DO NOT OPEN the unit. DO NOT TOUCH THE
SURFACE OF THE LEDS.
CAUTION: This fixture must be mounted in the LENS DOWN position.
WIRING:
LED units should be operated from 120V to 240V. No additional tap wires are provided.
Photocontrol is optional. With photocontrol, supply 120V only.
TROUBLE SHOOTING CHECKLIST: If the light does not work.
Check your power source. Check electrical connections.
/
