Page is loading ...

Thermal Transfer Printers
ZD200 Series
User’s Guide
212090-001 Rev. A

2
ZEBRA and the stylized Zebra head are trademarks of Zebra Technologies Corporation, registered in many
jurisdictions worldwide. All other trademarks are the property of their respective owners. ©2019 Zebra
Technologies Corporation and/or its affiliates. All rights reserved.
Information in this document is subject to change without notice. The software described in this document
is furnished under a license agreement or nondisclosure agreement. The software may be used or copied
only in accordance with the terms of those agreements.
For further information regarding legal and proprietary statements, please go to:
COPYRIGHTS:www.zebra.com/copyright
WARRANTY:www.zebra.com/warranty
END USER LICENSE AGREEMENT: www.zebra.com/eula
SOFTWARE:www.zebra.com/linkoslegal
Terms of Use
Proprietary Statement
This manual contains proprietary information of Zebra Technologies Corporation and its subsidiaries
(“Zebra Technologies”). It is intended solely for the information and use of parties operating and
maintaining the equipment described herein. Such proprietary information may not be used, reproduced,
or disclosed to any other parties for any other purpose without the express, written permission of Zebra
Technologies.
Product Improvements
Continuous improvement of products is a policy of Zebra Technologies. All specifications and designs are
subject to change without notice.
Liability Disclaimer
Zebra Technologies takes steps to ensure that its published Engineering specifications and manuals are
correct; however, errors do occur. Zebra Technologies reserves the right to correct any such errors and
disclaims liability resulting therefrom.
Limitation of Liability
In no event shall Zebra Technologies or anyone else involved in the creation, production, or delivery of the
accompanying product (including hardware and software) be liable for any damages whatsoever
(including, without limitation, consequential damages including loss of business profits, business
interruption, or loss of business information) arising out of the use of, the results of use of, or inability to
use such product, even if Zebra Technologies has been advised of the possibility of such damages. Some
jurisdictions do not allow the exclusion or limitation of incidental or consequential damages, so the above
limitation or exclusion may not apply to you.
Publication Date
May 2019

3
About
This guide is for integrators and operators of the Zebra ZD200 Series desktop printers. Use this guide to
install, change configuration, operate, and physically support the product.
Other online resources are available to support this printer include:
• “How To” videos
• Product specifications
• Accessories, supplies, parts, and software links
• Various setup and configuration guides
• Programmer’s manuals
• Software to connect and use your product
• Firmware
• Fonts
• Utilities
• Knowledge base and support contacts
• Warranty and repair links
Use this link to get to your Online printer support resources:
• ZD200 Series Thermal Transfer Printer — www.zebra.com/zd200t-info
Zebra OneCare Printer Service and Support
For maximum productivity, we can help your business ensure its Zebra printers are Online and ready for
business. See the descriptions of the Zebra OneCare service and support options available for your
printers Online at this link: www.zebra.com/zebraonecare

About
4
Document Conventions
The following graphic icons are used throughout the documentation set. These icons and their associated
meanings are described below.
Caution • If the precaution is not heeded, the user could receive minor or moderate injury.
Eye Injury Caution • If the precaution is not taken, the user’s eyes could be damaged. EXAMPLE: Wear protective
eyewear when installing or removing E-rings, C-clips, snap rings, springs, and mounting buttons. These are under
tension and could fly off.
Electrical Shock Caution • If the precaution is not taken, the user could receive an electrical shock. EXAMPLE: Turn
off (O) the printer and disconnect it from the power source before performing the following procedure.
Hot Surface Caution • If the precaution is not taken, the user could be burned. EXAMPLE: The printhead may be hot
and could cause sever burns. Allow the printhead to cool.
Product Damage Caution • If the precaution is not taken, the product could be damaged. EXAMPLE: Unplugging the
computer without properly shutting it down may corrupt the data on your hard drive.
ESD Caution • If the precaution is not taken, the product electronics could be damaged by an electrostatic discharge.
EXAMPLE: Observe proper electrostatic safety precautions when handling static-sensitive components such as circuit
boards and printheads.
Important • The text here indicates information that is important for the user to know. EXAMPLE: Run the setup.exe
file for the product BEFORE connecting the product to your printer.
Note • The text here indicates information that is supplemental for the user to know and that is not required to complete
a task. EXAMPLE: Refer to zebra.com for complete information on product warranties.

5
Contents
Terms of Use . . . . . . . . . . . . . . . . . . . . . . . . . . . . . . . . . . . . . . . . . . . . . . . . . . . . . . . . .2
Proprietary Statement . . . . . . . . . . . . . . . . . . . . . . . . . . . . . . . . . . . . . . . . . . . . . . .2
Product Improvements . . . . . . . . . . . . . . . . . . . . . . . . . . . . . . . . . . . . . . . . . . . . . . .2
Liability Disclaimer . . . . . . . . . . . . . . . . . . . . . . . . . . . . . . . . . . . . . . . . . . . . . . . . . .2
Limitation of Liability . . . . . . . . . . . . . . . . . . . . . . . . . . . . . . . . . . . . . . . . . . . . . . . . .2
Publication Date . . . . . . . . . . . . . . . . . . . . . . . . . . . . . . . . . . . . . . . . . . . . . . . . . . . . . . .2
• About . . . . . . . . . . . . . . . . . . . . . . . . . . . . . . . . . . . . . . . . . . . . . . . . . . . . . . . . 3
Zebra OneCare Printer Service and Support . . . . . . . . . . . . . . . . . . . . . . . . . . . . . .3
Document Conventions . . . . . . . . . . . . . . . . . . . . . . . . . . . . . . . . . . . . . . . . . . . . . . . . .4
• Contents . . . . . . . . . . . . . . . . . . . . . . . . . . . . . . . . . . . . . . . . . . . . . . . . . . . . . 5
• Introduction . . . . . . . . . . . . . . . . . . . . . . . . . . . . . . . . . . . . . . . . . . . . . . . . . . . 9
4-inch Desktop Thermal Printers . . . . . . . . . . . . . . . . . . . . . . . . . . . . . . . . . . . . . . . . . .9
Common Desktop Printer Features:. . . . . . . . . . . . . . . . . . . . . . . . . . . . . . . . . . . . .9
4-inch Desktop Printer Options: . . . . . . . . . . . . . . . . . . . . . . . . . . . . . . . . . . . . . . .10
Zebra Label Printing Solution . . . . . . . . . . . . . . . . . . . . . . . . . . . . . . . . . . . . . . . . . . . .11
Modes of Printing . . . . . . . . . . . . . . . . . . . . . . . . . . . . . . . . . . . . . . . . . . . . . . . . . .11
What’s in the Box? . . . . . . . . . . . . . . . . . . . . . . . . . . . . . . . . . . . . . . . . . . . . . . . . . . . .12
Unpack and Inspect the Printer . . . . . . . . . . . . . . . . . . . . . . . . . . . . . . . . . . . . . . .13
• Printer Features . . . . . . . . . . . . . . . . . . . . . . . . . . . . . . . . . . . . . . . . . . . . . . 14
Printer Features . . . . . . . . . . . . . . . . . . . . . . . . . . . . . . . . . . . . . . . . . . . . . . . . . . . . . .14
Inside the Dual Capacity Ribbon Roll Printer . . . . . . . . . . . . . . . . . . . . . . . . . . . . .15
Label Dispenser Option (factory installed) . . . . . . . . . . . . . . . . . . . . . . . . . . . . . . .17
Cutter Option (factory installed only) . . . . . . . . . . . . . . . . . . . . . . . . . . . . . . . . . . .17
• Controls and Indicators . . . . . . . . . . . . . . . . . . . . . . . . . . . . . . . . . . . . . . . . 18
User Interface . . . . . . . . . . . . . . . . . . . . . . . . . . . . . . . . . . . . . . . . . . . . . . . . . . . . . . . .18
User Interface Controls . . . . . . . . . . . . . . . . . . . . . . . . . . . . . . . . . . . . . . . . . . . . .19
FEED Button Modes. . . . . . . . . . . . . . . . . . . . . . . . . . . . . . . . . . . . . . . . . . . . . . . . . . .20
FEED Button Modes - Power ON. . . . . . . . . . . . . . . . . . . . . . . . . . . . . . . . . . . . . .20
FEED Button Modes - Power OFF . . . . . . . . . . . . . . . . . . . . . . . . . . . . . . . . . . . . .21

Contents
6
• Setup . . . . . . . . . . . . . . . . . . . . . . . . . . . . . . . . . . . . . . . . . . . . . . . . . . . . . . . 22
Printer Setup Overview. . . . . . . . . . . . . . . . . . . . . . . . . . . . . . . . . . . . . . . . . . . . . . . . .22
Select a Location for the Printer . . . . . . . . . . . . . . . . . . . . . . . . . . . . . . . . . . . . . . . . . .23
Attaching Power . . . . . . . . . . . . . . . . . . . . . . . . . . . . . . . . . . . . . . . . . . . . . . . . . . . . . .24
Getting Ready to Print . . . . . . . . . . . . . . . . . . . . . . . . . . . . . . . . . . . . . . . . . . . . . . . . .25
Preparing and Handling Media. . . . . . . . . . . . . . . . . . . . . . . . . . . . . . . . . . . . . . . .25
Media Storage Tips . . . . . . . . . . . . . . . . . . . . . . . . . . . . . . . . . . . . . . . . . . . . . . . .25
Loading Roll Media. . . . . . . . . . . . . . . . . . . . . . . . . . . . . . . . . . . . . . . . . . . . . . . . . . . .26
Setting Media Sensing by Media type . . . . . . . . . . . . . . . . . . . . . . . . . . . . . . . . . .26
Instructions for media loading: . . . . . . . . . . . . . . . . . . . . . . . . . . . . . . . . . . . . . . . .27
Loading Thermal Transfer Roll Ribbon. . . . . . . . . . . . . . . . . . . . . . . . . . . . . . . . . . . . .32
Loading Zebra Transfer Roll Ribbon . . . . . . . . . . . . . . . . . . . . . . . . . . . . . . . . . . .33
Run a SmartCal Media Calibration . . . . . . . . . . . . . . . . . . . . . . . . . . . . . . . . . . . . . . . .42
SmartCal Procedure. . . . . . . . . . . . . . . . . . . . . . . . . . . . . . . . . . . . . . . . . . . . . . . .42
Test Printing with the Configuration Report . . . . . . . . . . . . . . . . . . . . . . . . . . . . . . . . .43
Detecting a Media Out Condition . . . . . . . . . . . . . . . . . . . . . . . . . . . . . . . . . . . . . . . . .44
Detecting a Ribbon Out Condition . . . . . . . . . . . . . . . . . . . . . . . . . . . . . . . . . . . . . . . .45
Connecting your Printer to a Computer . . . . . . . . . . . . . . . . . . . . . . . . . . . . . . . . . . . .46
Interface Cable Requirements . . . . . . . . . . . . . . . . . . . . . . . . . . . . . . . . . . . . . . . .46
Wi-Fi and Bluetooth Classic Wireless Connectivity Option . . . . . . . . . . . . . . . . . . . . .49
• Setup for Windows
®
OS . . . . . . . . . . . . . . . . . . . . . . . . . . . . . . . . . . . . . . . . 50
Windows to Printer Communication Setup (Overview). . . . . . . . . . . . . . . . . . . . . . . . .50
install Windows
®
Printer Drivers. . . . . . . . . . . . . . . . . . . . . . . . . . . . . . . . . . . . . . . . . .51
Setting Up the Wi-Fi Print Server Option . . . . . . . . . . . . . . . . . . . . . . . . . . . . . . . . . . .51
Configure Using the ZebraNet Bridge’s Connectivity Wizard . . . . . . . . . . . . . . . . . . . .52
Using a Configuration Script. . . . . . . . . . . . . . . . . . . . . . . . . . . . . . . . . . . . . . . . . .58
Bluetooth Option Configuration . . . . . . . . . . . . . . . . . . . . . . . . . . . . . . . . . . . . . . . . . .60
Connecting to a Windows Vista
®
SP2 or Windows 7
®
Master Device. . . . . . . . . .62
Connecting the Printer to a Windows 8 OS . . . . . . . . . . . . . . . . . . . . . . . . . . . . . .65
Connecting the Printer to a Windows 10 OS . . . . . . . . . . . . . . . . . . . . . . . . . . . . .66
After Your Printer is Connected . . . . . . . . . . . . . . . . . . . . . . . . . . . . . . . . . . . . . . . . . .69
• Print Operations . . . . . . . . . . . . . . . . . . . . . . . . . . . . . . . . . . . . . . . . . . . . . . 71
Thermal Printing . . . . . . . . . . . . . . . . . . . . . . . . . . . . . . . . . . . . . . . . . . . . . . . . . . . . . .71
Replacing Supplies while Using the Printer . . . . . . . . . . . . . . . . . . . . . . . . . . . . . .71
Sending Files to the Printer . . . . . . . . . . . . . . . . . . . . . . . . . . . . . . . . . . . . . . . . . . . . .71
Determining Your Printer’s Configuration Settings. . . . . . . . . . . . . . . . . . . . . . . . .72
Select a Print Mode . . . . . . . . . . . . . . . . . . . . . . . . . . . . . . . . . . . . . . . . . . . . . . . .72
Adjusting the Print Quality . . . . . . . . . . . . . . . . . . . . . . . . . . . . . . . . . . . . . . . . . . .72
Adjusting the Print Width . . . . . . . . . . . . . . . . . . . . . . . . . . . . . . . . . . . . . . . . . . . .73
Replacing Supplies while Using the Printer . . . . . . . . . . . . . . . . . . . . . . . . . . . . . .73
Printing on Fan-Fold Media . . . . . . . . . . . . . . . . . . . . . . . . . . . . . . . . . . . . . . . . . . . . .74

Contents
7
Printing with Externally Mounted Roll Media . . . . . . . . . . . . . . . . . . . . . . . . . . . . . . . .76
Externally Mounted Roll Media Considerations:. . . . . . . . . . . . . . . . . . . . . . . . . . .76
Using the Label Dispenser Option . . . . . . . . . . . . . . . . . . . . . . . . . . . . . . . . . . . . . . . .77
Printer Fonts . . . . . . . . . . . . . . . . . . . . . . . . . . . . . . . . . . . . . . . . . . . . . . . . . . . . . . . . .81
Identifying Fonts in Your Printer . . . . . . . . . . . . . . . . . . . . . . . . . . . . . . . . . . . . . . .81
Localizing the Printer with Code Pages . . . . . . . . . . . . . . . . . . . . . . . . . . . . . . . . .81
Asian fonts and Other Large Font Sets . . . . . . . . . . . . . . . . . . . . . . . . . . . . . . . . .82
Media Roll Adapters . . . . . . . . . . . . . . . . . . . . . . . . . . . . . . . . . . . . . . . . . . . . . . . . . . .83
• Maintenance . . . . . . . . . . . . . . . . . . . . . . . . . . . . . . . . . . . . . . . . . . . . . . . . . 84
Cleaning . . . . . . . . . . . . . . . . . . . . . . . . . . . . . . . . . . . . . . . . . . . . . . . . . . . . . . . . . . . .84
Cleaning Supplies . . . . . . . . . . . . . . . . . . . . . . . . . . . . . . . . . . . . . . . . . . . . . . . . .84
Recommended Cleaning Schedule . . . . . . . . . . . . . . . . . . . . . . . . . . . . . . . . . . . .85
Cleaning the Printhead. . . . . . . . . . . . . . . . . . . . . . . . . . . . . . . . . . . . . . . . . . . . . .87
Media Path Cleaning . . . . . . . . . . . . . . . . . . . . . . . . . . . . . . . . . . . . . . . . . . . . . . .89
Sensor Cleaning. . . . . . . . . . . . . . . . . . . . . . . . . . . . . . . . . . . . . . . . . . . . . . . . . . .92
Platen Cleaning and Replacement. . . . . . . . . . . . . . . . . . . . . . . . . . . . . . . . . . . . .93
Updating Printer Firmware . . . . . . . . . . . . . . . . . . . . . . . . . . . . . . . . . . . . . . . . . . . . . .97
Other Printer Maintenance . . . . . . . . . . . . . . . . . . . . . . . . . . . . . . . . . . . . . . . . . . . . . .97
Fuses . . . . . . . . . . . . . . . . . . . . . . . . . . . . . . . . . . . . . . . . . . . . . . . . . . . . . . . . . . . . . .97
• Troubleshooting . . . . . . . . . . . . . . . . . . . . . . . . . . . . . . . . . . . . . . . . . . . . . . 98
Resolving Alerts and Errors . . . . . . . . . . . . . . . . . . . . . . . . . . . . . . . . . . . . . . . . . . . . .98
Alert: Media Path . . . . . . . . . . . . . . . . . . . . . . . . . . . . . . . . . . . . . . . . . . . . . . . . . .98
Alert: PRINTHEAD OVER TEMP . . . . . . . . . . . . . . . . . . . . . . . . . . . . . . . . . . . . .100
Alert: PRINTHEAD SHUTDOWN . . . . . . . . . . . . . . . . . . . . . . . . . . . . . . . . . . . . .101
Alert: PRINTHEAD UNDER TEMP . . . . . . . . . . . . . . . . . . . . . . . . . . . . . . . . . . .101
Resolving Print Issues . . . . . . . . . . . . . . . . . . . . . . . . . . . . . . . . . . . . . . . . . . . . . . . .102
Issue: No Print on the Label . . . . . . . . . . . . . . . . . . . . . . . . . . . . . . . . . . . . . . . . .103
Issue: Labels Are Distorted in Size or Print Area Start Position Varies . . . . . . . .104
Communication Issues . . . . . . . . . . . . . . . . . . . . . . . . . . . . . . . . . . . . . . . . . . . . . . . .105
Issue: Label Job Sent, Data Transfers, But No Print . . . . . . . . . . . . . . . . . . . . . .105
Miscellaneous Issues . . . . . . . . . . . . . . . . . . . . . . . . . . . . . . . . . . . . . . . . . . . . . . . . .106
Issue: Settings are Lost or Ignored . . . . . . . . . . . . . . . . . . . . . . . . . . . . . . . . . . .106
Issue: Non-continuous labels act as Continuous labels. . . . . . . . . . . . . . . . . . . .107
Issue: Printer Locks-Up . . . . . . . . . . . . . . . . . . . . . . . . . . . . . . . . . . . . . . . . . . . .107
Printer Diagnostics . . . . . . . . . . . . . . . . . . . . . . . . . . . . . . . . . . . . . . . . . . . . . . . . . . .108
Printer Network (and Bluetooth) Configuration Report. . . . . . . . . . . . . . . . . . . . .109
Manual Calibration . . . . . . . . . . . . . . . . . . . . . . . . . . . . . . . . . . . . . . . . . . . . . . . . . . .110
Communications Diagnostics . . . . . . . . . . . . . . . . . . . . . . . . . . . . . . . . . . . . . . . . . . .111
• Interface Connector Wiring . . . . . . . . . . . . . . . . . . . . . . . . . . . . . . . . . . . . 113
Universal Serial Bus (USB) Interface . . . . . . . . . . . . . . . . . . . . . . . . . . . . . . . . . . . . .113

Contents
8
• Dimensions . . . . . . . . . . . . . . . . . . . . . . . . . . . . . . . . . . . . . . . . . . . . . . . . . 114
• Media . . . . . . . . . . . . . . . . . . . . . . . . . . . . . . . . . . . . . . . . . . . . . . . . . . . . . . 123
Types of Thermal Media. . . . . . . . . . . . . . . . . . . . . . . . . . . . . . . . . . . . . . . . . . . . . . .124
Determining Thermal Media Types . . . . . . . . . . . . . . . . . . . . . . . . . . . . . . . . . . .124
General Media and Print Specifications . . . . . . . . . . . . . . . . . . . . . . . . . . . . . . . .125
• ZPL Configuration . . . . . . . . . . . . . . . . . . . . . . . . . . . . . . . . . . . . . . . . . . . 128
Managing the ZPL Printer Configuration . . . . . . . . . . . . . . . . . . . . . . . . . . . . . . . . . .128
Configuration Setting to Command Cross-reference . . . . . . . . . . . . . . . . . . . . . . . . .130
Printer Memory Management and Related Status Reports . . . . . . . . . . . . . . . . . . . .133
ZPL Programming for Memory Management . . . . . . . . . . . . . . . . . . . . . . . . . . . .133

9
Introduction
This section introduces the Zebra® ZD200 4-inch desktop thermal transfer label printers. The overview
includes the printer’s features and options, and what ships with your new printer.
This document covers the following ZD-series desktop printer models: ZD220 and ZD230
• ZD200 Series Thermal Transfer Printer — www.zebra.com/zd200t-info
4-inch Desktop Thermal Printers
The Zebra® 4-inch Desktop printers are compact label printers with essential features and options.
The ZD200 Series thermal transfer printers can support:
• Printing speeds up to 152.4 mm/s (6 ips - inches per second) at 203 dpi (dots per inch print density).
• ZPL ™ and EPL Zebra printer programming languages.
Common Desktop Printer Features:
• OpenAccess ™ design for simplified media loading.
• Color-coded “touch points” for operator controls and media guides.
• Simple single control button and single multi colored status indicator.
• Zebra’s printer operating system — an open platform with software tools needed to integrate,
manage, and maintain the printer.
• Media roll support:
• Outer Diameter (O.D.): Up to 127 mm (5 inch) and
• Inner Diameter (I.D.) roll cores:12.7 mm (0.5 inch), 25.4 mm (1 inch), and an optional
1.5 inch (38.1 mm) media core adapter set.
• Half width Movable Media Sensor provides compatibility with a wide range of media types:
• Compatible with full or partial width black mark media - center to left side of media.
• Compatible with notched or slotted media - center to left side of media.
• Center position transmissivity sensor for use with label gap/web media.
• On–the–fly OpenType and TrueType font scaling and import, Unicode, resident scalable font (Swiss
721 Latin 1 font), and a selection of resident bitmap fonts.

Introduction
10
• Backwards compatibility focused technology eases printer replacement:
• Drop in replacement of legacy Zebra desktop printers. The printer accepts both EPL and ZPL
programming languages.
• Universal Serial Bus (USB) 2.0 interface
• Factory installed network models support printer configuration via a setup utility running on mobile
devices.
• XML-Enabled printing—allows XML communications for barcode label printing, eliminating license
fees and print server hardware and lowering customization and programming costs.
• Zebra ™ Global Printing Solution – supports Microsoft Windows keyboard encoding (and ANSI),
Unicode UTF-8 and UTF 16 (Unicode Transformation Formats), XML, ASCII (7 and 8 bit used by
legacy programs and systems), basic single and double byte font encoding, JIS and Shift-JIS
(Japanese International Standards), Hexadecimal encoding, and custom character mapping (DAT
table creation, font linking, and character remapping).
• Printers have the Simplified Chinese SimSun font pre-installed (China only).
• A minimum of 50 MB of internal (E:\) printer memory for storing forms, fonts, and graphics.
4-inch Desktop Printer Options:
• Factory Installed Wired and Wireless options:
• Wi-Fi (802.11ac – includes a/b/g/n), Bluetooth Classic 4.X (3.X compatible).
• Factory installed Internal Ethernet Print Server (LAN, RJ-45 connector) — supports 10Base-T,
100Base-TX and fast Ethernet 10/100 auto-switching networks for wired connectivity.
• Media Core Adapter kit include adapters for media rolls with Outer Diameters (O.D.) up to 127 mm
(5 inches):
• 38.1 mm (1.5 inch) I.D. media cores.
• Asian Language support with printer configuration options for the large Simplified and Traditional
Chinese, Japanese, or Korean character sets.

Introduction
11
Zebra Label Printing Solution
The printer is just one of three (3) parts of a printing solution. To print; you need a printer (ZD200 Series),
compatible media (thermal transfer ribbon rolls, and thermal transfer media; or just direct thermal media),
and software (driver, applications or programming) to tell the printer what to do and print. The printer can
print without being connected to other devices or systems.
The media may be labels, tags, tickets, receipt paper, fan-fold stacks, tamper proof labels, etc.
Zebra assists you with label design and print with the free label and form design software: ZebraDesigner
for Windows PC operating systems.
The Zebra web site or your reseller will be able to help you identify media for your desired use case.
Modes of Printing
You can operate this printer in many different modes and media configurations:
• Direct thermal printing (which uses heat sensitive media to print).
• Thermal transfer printing with ribbon rolls (heat and pressure transfers ink from the ribbon to media).
• Standard Tear-Off mode allows you to tear off each label/receipt or batch print a strip of labels and
tear them off after it is printed.
• Label Dispense Mode: If an factory optional dispenser is installed, the backing material can be
peeled away from the label as it is printed. After this label is removed, the next one is printed.
• Media Cutting: If a factory optional media cutter is installed, the printer can cut the label liner
between labels, receipt paper or tag stock.
• Stand-alone: The printer can print without being directly connected to a computer. An auto running
label format/form (programming based).
• Shared network printing: Printers configured with factory installed Ethernet (LAN) and Wi-Fi
interface options include an internal print server.

Introduction
12
What’s in the Box?
After unpacking, make sure you have all parts shown below. Follow the procedures for inspecting the
printer to familiarize yourself with printer parts so you can follow the instructions in this book.
What is Not Included in the Box
USB CablePrinter
Non-Zebra 300 Meter Ribbon Adapters
Printer Documentation
Included with ZD230 Thermal Transfer Printer
Empty Starter 300 Meter Ribbon Core
Empty 74 Meter Starter
Ribbon Core
Power Supply
Power Cord varies by
locale or region
Print Media
(Labels, Paper, etc.)
Transfer Ribbon

Introduction
13
Unpack and Inspect the Printer
When you receive the printer, immediately unpack it and inspect for shipping damage.
• Save all packing materials.
• Check all exterior surfaces for damage.
• Open the printer and inspect the media compartment for damage to components.
If you discover shipping damage upon inspection:
• Immediately notify the shipping company and file a damage report. Zebra Technologies Corporation
is not responsible for any damage to the printer incurred during shipment, and will not cover the
repair of this damage under its warranty policy.
• Keep all packaging material for shipping company inspection.
• Notify your authorized Zebra
®
reseller.
See the Zebra Web site for ‘How To’ videos on packing and unpacking your printer. Use this link to get to
your Online printer support resources:
ZD200 Series Thermal Transfer Printer — www.zebra.com/zd200t-info
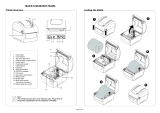
Opening and Closing the Printer
Open: To access the media compartment, pull the release latches towards you and lift the cover. Check
the media compartment for loose or damaged components.
Close: Lower the top cover. Press down in the middle of the cover in front until the cover snaps closed.
ESD Caution • The discharge of electrostatic energy that accumulates on the surface of the human body or other
surfaces can damage or destroy the printhead and other electronic components used in this device. You must observe
static-safe procedures when working with the printhead or the electronic components under the top cover.
Opening Closing

14
Printer Features
This section will help you identify features of these Zebra® ZD200 Series 4-inch desktop thermal label
printers. ‘How to’ videos on the Zebra Web site include a Printer Features video; as well as; other printer
setup and task specific videos. Links to these printers are:
• ZD200 Series Thermal Transfer Printer — www.zebra.com/zd200t-info
Printer Features
Interface Access
Release Latch
DC Power Receptacle
Power
Button
Release Latch
Fan-Fold Media
Entry Slot
FEED Button
STATUS Indicator

Printer Features
15
Inside the Dual Capacity Ribbon Roll Printer
Movable Sensor
(Black Mark and Lower Web/Gap)
Media Guides
Head-Up Sensor
(inside)
Media Guide Stop
Platen (Drive) Roller
Roll Holders
Upper Web (Gap)
Sensor
(other side)
Ribbon Carriage
Printhead

Printer Features
16
Dual Capacity Ribbon Chassis - Ribbon Roll Holders
Take Up Spindles (Empty Roll Core for Used Ribbon)
Supply Spindles (New Ribbon Rolls Go Here)

Printer Features
17
Label Dispenser Option (factory installed)
Cutter Option (factory installed only)
Door Latch
Label Taken
Sensor
Label Peel Bar
Peel Roll
Dispenser Door
Label Liner
Exit Area
Media Exit Slot
Cutter Module

18
Controls and Indicators
User Interface
The user controls are found on the front on top of the printer. This interface provides basic control and
status needed by an operator.
The interface consists of a Power button, a multi-function FEED button, and a single tri-color STATUS
Indicator. The buttons are modal and change behaviors depending upon what the print is doing. Using the
buttons and STATUS Indicator light, an operator can perform a variety of functions, such as:
• Calibration of media (labels, paper, tags, etc.)
• Print a Configuration Report
• Reset the Printer Settings to Default Configuration
• Enter a ‘Forced’ firmware download mode.
• Enter and exit Diagnostic (Dump) Mode used to debug programming and printer communications.
Printer operating status is reported by a single indicator light. The STATUS Indicator light provides a range
of printer status.
• This interface supports operator tasks of replacing printing supplies (labels, receipt paper, transfer
ribbon, etc.).
• Status indicator lights typically use color to show the operator the functional status of the printer.
The STATUS Indicator light may be Off (not lit), it can Flash (blink), or be ON.
• Red is ‘needs attention’.
• Green is for ‘ready’ or ‘functioning’.
• Amber (orange/yellow) is for busy or active process (boot-up, over-temperature cooling cycle,
etc.).
• The STATUS Indicator can be blinking (off and on) and alternate between colors in a variety of
patterns that denote various printer activities, and operational status.

Controls and Indicators
19
User Interface Controls
1. Power Button — Turns power ON and OFF in the printer.
•
Power ON — Press the Power button once for less than two (2) seconds and the printer turns on.
The STATUS Indicator light will turn on Amber while the printer does self diagnostics, configuration
checks, and integrate optional components which will take several seconds to complete.
The STATUS Indicator will turn solid GREEN (or Flashing Green) indicating the printer is ready
for normal print operations.
•
Power OFF / Shutdown — Press and Hold the button for 4-9 seconds. The printer will turn
OFF.
2. STATUS Indicator — The STATUS Indicator for provides the operator basic printer health and
operational status. This indicator is also serves as a power indicator. These are STATUS Indicator light
behaviors for normal printer operation.
• Green — Printer Ready for print and data activity.
• Flashing Green — Normal Operation. Printer may be communicating or processing data.
• Double Flashing Green (2 short flashes of green followed by a long green) — Printer is Paused.
• Flashing Red — Media Alert. The printer is out of media (ribbon, paper, labels, tags, etc.), media
sensing failure, printer is open, or a cut error.
• Flashing Amber — Over Temp. The printhead is over temperature and must cool to resume
printing.
• Flashing Red, Red, Green — Critical Over Temp (temperature) — The printhead or motor has
failed.
ZD220
2
1
3
6HF 6HF 6HF 6HF
6HF 6HF 6HF 6HF
6HF 6HF 6HF 6HF
6HF 6HF 6HF 6HF
6HF 6HF 6HF 6HF
6HF 6HF 6HF 6HF

Controls and Indicators
20
3. FEED (Advance) Button — The FEED button is a multi-function button. With the printer ON,
pressing the FEED button longer than two (2) seconds initializes the Power On FEED Button modes
• Feed One Label — Pressing the FEED button [and releasing before two (2) seconds] when the
printer is not printing, causes the printer to advance media one (1) blank form/format length (label,
receipt, tag, ticket, etc.).
• Reprint Last Label (activated via a SGD command: ezpl.reprint_mode or ZPL ^JJ command
parameters D and E use the FEED button as the ‘applicator signal’) - The intended purpose of this
feature is to allow reprint of a failed media print. If the printer runs out of media (paper, labels, etc.),
then the printer can re-print the last label (print form/format). The print buffer that stores the print
image available for reprint is cleared when the printer gets turned off or is reset.
• Pressing the FEED button while printing will stop print activities and place the printer into a
‘Pause’ state. The printer will complete printing a label that is printing before it pauses.
• Pressing the FEED button while in Pause state will return the printer to normal operation of the
first three. If printing a multi label (form/format) job or another print job is waiting to print in the print
queue, then the printer will resume printing.
FEED Button Modes
The printer includes some advanced features that are accessed via the FEED button. The operator
observes the STATUS Indicator light pattern changes to select each Advanced mode.
FEED Button Modes - Power ON
The Power ON advanced modes are designed to help with printer configuration and print setup. By
pressing and holding the FEED button when the printer is ON and Ready (green STATUS Indicator) for
two (2) seconds, the printer enters Advanced mode. These Advanced modes are:
• Printing a Configuration Report (One Single Flash)
The STATUS Indicator flashes once. If you release the FEED button here, a Configuration Report
prints and exits Advanced mode.
• Media Calibration (Two Flash) - Calibrates the printer for the installed media (labels, paper, tags,
etc.) using Smart Cal routine to set media (label) sensing parameters
Continue holding the FEED button, the STATUS Indicator will flash twice. If you release the FEED
button here, the printer begins measuring media and then setting the start of the media position and
exits Advanced mode.
• Reset Factory Defaults (Three Flash) - Resets the printer to the factory default settings.
Continue holding the FEED button, the STATUS Indicator will flash three times. If you release the
FEED button here, the printer Resets to Factory Defaults (the equivalent of the ZPL ^JUN command)
and exits Advanced mode.
• Return to normal operating mode. Release the FEED Button two (2) or more seconds after the
third flash sequence.
6HF 6HF 6HF 6HF
6HF 6HF 6HF 6HF
6HF 6HF 6HF 6HF
/