Page is loading ...

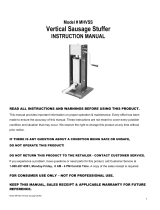
3 L / 7 lb Double Speed Sausage Stuffer
Scan the QR code with your mobile device or follow the link
for helpful videos and specifications related to this product.
Instruction Manual
https://vivo-us.com/products/stufr-v203
SKU: STUFR-V203
Chat live with an agent!
GET IN TOUCH | Monday-Friday from 7:00am-7:00pm CST

2
If you do not understand these directions, or if you have any doubts about the safety
of the installation, please call a qualified technician. Check carefully to make sure
there are no missing or defective parts. Improper installation may cause damage or
serious injury. Do not use this product for any purpose that is not explicitly specified
in this manual and do not exceed weight capacity. We cannot be liable for damage
or injury caused by improper mounting, incorrect assembly or inappropriate use.
WARNING: IMPORTANT SAFETY INFORMATION
READ AND FOLLOW ALL SAFETY REQUIREMENTS
• ALL MINORS MUST BE SUPERVISED WHILE MACHINE IS IN OPERATION.
• THIS APPLIANCE IS NOT INTENDED FOR USE BY PERSONS (INCLUDING
CHILDREN) WHOSE PHYSICAL, SENSORY OR MENTAL CAPABILITIES MAY
BE DIFFERENT OR REDUCED, OR WHO LACK EXPERIENCE OR KNOWLEDGE,
UNLESS SUCH PERSONS RECEIVE SUPERVISION OR TRAINING TO OPERATE THE
APPLIANCE BY A PERSON RESPONSIBLE FOR THEIR SAFETY.
• DO NOT OPERATE MACHINE WITH MISSING OR BROKEN PARTS
• BEFORE USING MACHINE, CHECK MOVING PARTS FOR ANY BINDING OR
MISALIGNMENT. TAKE NOTE OF ANY OTHER CONDITIONS THAT MAY AFFECT
THE OPERATION OF THE PRODUCT.
KEEP THIS MANUAL IN A SAFE AND DRY PLACE FOR FUTURE REFERENCE
WARNING: DO NOT USE PRODUCT FOR ANYTHING OTHER THAN ITS INTENDED
USE; FAILURE TO DO SO MAY RESULT IN INJURY OR PRODUCT DAMAGE
PRODUCT SPECIFICATIONS
MODEL STUFR-V203
TYPE Double Speed Sausage Stuer/Filler
VOLUME (L) (lbs) 3L/7lbs
CYLINDER (Dia*L) mm 140*200
WEIGHT (kg) 6
SIZE (mm) 230*310*500*
NOZZLE DIAMETER (QTY: 4) 10/20/30/40 mm
NOTE: TECHNICAL PARAMETER SUBJECT TO CHANGE WITHOUT NOTICE.

3
MACHINE STRUCTURE
PREPARATION
Aer carefully removing the machine from the packing carton, clean
appliance thoroughly before using. Clean all parts that contact food directly
such as the cylinder, nozzle, plunger, etc. (see Care and Maintenance for
cleaning instructions)
Please note that the machine is lubricated to allow smooth operation.
NOTE: All parts that contact food directly meet SGS food safety standards.
1 - Nozzle
2 - Trefoil Nut
(Locking Nut)
3 - Cylinder
4- Plunger
5 - Rack/Thread-Rod
6 - Base
7 - Handcrank
(with Wing Nut)

4
PACKAGE CONTENTS
1 (x1) Le Side Shelf
2 (x4) Nut
3 (x4) Inner Hexagon Bolt
4 (x4) S/S Hexagon Nut
5 (x1) Nozzle
6 (x1) Trefoil Nut (Locking Nut)
7 (x1) Bottom Plate
8 (x4) S/S Hexagon Nut
9 (x1) Right Side Shelf
10 (x1) S/S Cylinder
Two Speed Gears:
Fast= Upper Right Gear
Slow= Lower Le Gear
ASSEMBLY DIAGRAM

5
PACKAGE CONTENTS (CONT.)
11 (x1) Rack
12 (x1) Gear Cover
13 (x13) Screw
14 (x8) S/S Crossing Screw
15 (x1) Gear
16 (x1) Small Gear Sha
17 (x1) Hand Crank
18 (x1) Big Gear Sha
19 (x1) Gear Support
20 (x1) Bottom Gear Cover
21 (x1) Plunger
22 (x1) Gasket
23 (x1) Spring
24 (x1) Exhaust Pin
25 (x2) Spring Round Pin
26 (x4) Rubber Foot
OPERATING INSTRUCTIONS
STEP 1
Put hand crank (7) on gear sha, twist wing nut to secure, and rotate counter
clockwise until plunger (4) is all the way up and released from the thread rod (5).
Tilt the cylinder (3) back and li to remove. Clean both cylinder and plunger.
NOTE: The two speed gears rotate in opposite directions. For this reason, the
following instructions are accurate only when using the fast gear. To use the slow
gear, simply rotate hand crank in opposite direction of fast gear.
5
4
3
6
7

6
STEP 2
Aer cleaning, put the plunger and cylinder back on making sure that they are
locked in place. Fit nozzle (1) on the outlet of the stuer using the locking nut
(2), load meat into cylinder (3), and then put the sausage casing on nozzle.
CARE & MAINTENANCE
STEP 3
Put the hand crank on the gear system,
twist wing nut to secure, and rotate it
clockwise to bring down the plunger. Meat
will then come out from the nozzle to the
casing. Tie sausage.
WARNING: KEEP HANDS CLEAR OF MOVING PARTS
TO REDUCE RISK OF INJURY
CLEANING
Aer use, remove equipment that had contact with meat to clean. Use grease
cutting dish detergent in warm to hot water. Allow equipment to soak for at least 15
minutes to break down fats and oils before scrubbing and rinsing. To sterilize, use
bleach. Ensure all parts are dry before reassembly.
2
1
3

7
MAINTENANCE
• Use strictly according to the instructions to operate the equipment. This will
greatly prolong the machine’s service life.
• It is recommended to add food grade lubrication oil to the rack and gear system
every six months, or on a case-by case basis depending on how much you use
the machine.
• It is recommended to replace the gasket every six months, or on a case-by case
basis, depending on how much you use the machine.
STORAGE
This equipment should be stored in a clean and dry area. DO NOT expose this
equipment to rain or moisture.
PROBLEM CAUSE/POSSIBLE SOLUTION
Gasket becomes sti
when environment
temperature is
below 15 degrees.
DO NOT use equipment if this has happened. Take the
gasket o from plunger and soak It in hot water to soen.
Aer that, put the gasket on plunger and add proper food
grade lubrication oil. The equipment should then operate
smoothly. Please check before using.
Minced meat does
not come out from
nozzle to casing
even though there is
pressure on plunger.
DO NOT continue. Check if the outlet or nozzle of stuer
is blocked by meat. If so, clean out the meat. Please
consider the size of minced meat and whether it is
suitable for nozzle you chose in case blocking happens.
TROUBLESHOOTING
WARRANTY
We oer a ONE YEAR warranty for this product. If you have any problems with the
machine, please contact us directly. We have a 90 Day Return Policy.

LAST UPDATED: 03/06/2020
Open Monday - Friday 7:00am - 7:00pm CST,
our dedicated support team can oer immediate assistance with rapid response times. If any
parts are received damaged or defective, please contact us. We are happy to replace parts to
ensure you have a fully functioning product.
FOR MORE VIVO PRODUCTS, CHECK OUT OUR WEBSITE AT: www.vivo-us.com
AVG. RESPONSE TIME (within oice hrs): 1HR 8M
- 23% within < 15m
- 38% within < 30m
- 61% within < 1hr
- 83% within < 2hr
- 92% within < 3hr
Love your new VIVO setup and want to share?
Tag us in your photo! @vivo_us
AVG. RESOLUTION TIME (within oice hrs): < 15 M
www.vivo-us.com
Chat live with an agent!
AVG. RESOLUTION TIME (within oice hrs): 5M 4S
309-278-5303
/