Page is loading ...

Summit SB-1150
Wheelchair Scale
Version 11439
Technical Manual
PN 158041 Rev H

An ISO 9001 registered company
© Rice Lake Weighing Systems. All rights reserved.
Rice Lake Weighing Systems® is a registered trademark of
Rice Lake Weighing Systems.
All other brand or product names within this publication are trademarks or
registered trademarks of their respective companies.
All information contained within this publication is, to the best of our knowledge, complete
and accurate at the time of publication. Rice Lake Weighing Systems reserves the right to
make changes to the technology, features, specifications and design of the equipment
without notice.
The most current version of this publication, software, firmware and all other product
updates can be found on our website:
www.ricelake.com

Contents
Contents 1
© Rice Lake Weighing Systems. All rights reserved. Printed in the United States of America.
Specifications subject to change without notice.
Rice Lake Weighing Systems is an ISO 9001 registered company.
May 23, 2017
Technical training seminars are available through Rice Lake Weighing Systems.
Course descriptions and dates can be viewed at www.ricelake.com/training
or obtained by calling 715-234-9171 and asking for the training department.
1.0 Introduction..................................................................................................................................... 1
1.1 Safety . . . . . . . . . . . . . . . . . . . . . . . . . . . . . . . . . . . . . . . . . . . . . . . . . . . . . . . . . . . . . . . . . . . . . . . . . . 2
2.0 Installation ...................................................................................................................................... 3
2.1 Scale . . . . . . . . . . . . . . . . . . . . . . . . . . . . . . . . . . . . . . . . . . . . . . . . . . . . . . . . . . . . . . . . . . . . . . . . . . . 3
2.1.1 Site Preparation . . . . . . . . . . . . . . . . . . . . . . . . . . . . . . . . . . . . . . . . . . . . . . . . . . . . . . . . . . . . . . . . . . . . 3
2.1.2 Unpacking . . . . . . . . . . . . . . . . . . . . . . . . . . . . . . . . . . . . . . . . . . . . . . . . . . . . . . . . . . . . . . . . . . . . . . . . 3
2.1.3 Assembly . . . . . . . . . . . . . . . . . . . . . . . . . . . . . . . . . . . . . . . . . . . . . . . . . . . . . . . . . . . . . . . . . . . . . . . . . 4
2.1.4 Electrical Interface to the Indicator . . . . . . . . . . . . . . . . . . . . . . . . . . . . . . . . . . . . . . . . . . . . . . . . . . . . . . 4
2.2 Indicator . . . . . . . . . . . . . . . . . . . . . . . . . . . . . . . . . . . . . . . . . . . . . . . . . . . . . . . . . . . . . . . . . . . . . . . . 6
2.2.1 Load Cell Connections . . . . . . . . . . . . . . . . . . . . . . . . . . . . . . . . . . . . . . . . . . . . . . . . . . . . . . . . . . . . . . . 6
2.2.2 Inserting Batteries . . . . . . . . . . . . . . . . . . . . . . . . . . . . . . . . . . . . . . . . . . . . . . . . . . . . . . . . . . . . . . . . . . . 8
2.3 Optional Power Connections . . . . . . . . . . . . . . . . . . . . . . . . . . . . . . . . . . . . . . . . . . . . . . . . . . . . . . . . . 8
3.0 Operation......................................................................................................................................... 9
3.1 Powering the Scale . . . . . . . . . . . . . . . . . . . . . . . . . . . . . . . . . . . . . . . . . . . . . . . . . . . . . . . . . . . . . . . 10
3.2 Weigh Mode . . . . . . . . . . . . . . . . . . . . . . . . . . . . . . . . . . . . . . . . . . . . . . . . . . . . . . . . . . . . . . . . . . . . 10
3.3 Hold Release . . . . . . . . . . . . . . . . . . . . . . . . . . . . . . . . . . . . . . . . . . . . . . . . . . . . . . . . . . . . . . . . . . . . 10
3.4 Preset Tare . . . . . . . . . . . . . . . . . . . . . . . . . . . . . . . . . . . . . . . . . . . . . . . . . . . . . . . . . . . . . . . . . . . . . 10
3.5 Toggle Tare . . . . . . . . . . . . . . . . . . . . . . . . . . . . . . . . . . . . . . . . . . . . . . . . . . . . . . . . . . . . . . . . . . . . . 10
3.6 Body Mass Index. . . . . . . . . . . . . . . . . . . . . . . . . . . . . . . . . . . . . . . . . . . . . . . . . . . . . . . . . . . . . . . . . 11
3.6.1 LB Mode. . . . . . . . . . . . . . . . . . . . . . . . . . . . . . . . . . . . . . . . . . . . . . . . . . . . . . . . . . . . . . . . . . . . . . . . . 11
3.6.2 KG Mode . . . . . . . . . . . . . . . . . . . . . . . . . . . . . . . . . . . . . . . . . . . . . . . . . . . . . . . . . . . . . . . . . . . . . . . . 11
4.0 Configuration ................................................................................................................................ 12
4.1 Scale Navigation . . . . . . . . . . . . . . . . . . . . . . . . . . . . . . . . . . . . . . . . . . . . . . . . . . . . . . . . . . . . . . . . . 12
4.1.1 Change Parameters . . . . . . . . . . . . . . . . . . . . . . . . . . . . . . . . . . . . . . . . . . . . . . . . . . . . . . . . . . . . . . . . 12
4.1.2 Enter Numbers . . . . . . . . . . . . . . . . . . . . . . . . . . . . . . . . . . . . . . . . . . . . . . . . . . . . . . . . . . . . . . . . . . . . 12
4.1.3 Save and Return to Main Menu. . . . . . . . . . . . . . . . . . . . . . . . . . . . . . . . . . . . . . . . . . . . . . . . . . . . . . . . 12
4.2 Programming Mode Menu . . . . . . . . . . . . . . . . . . . . . . . . . . . . . . . . . . . . . . . . . . . . . . . . . . . . . . . . . . 13
4.3 Default Menu . . . . . . . . . . . . . . . . . . . . . . . . . . . . . . . . . . . . . . . . . . . . . . . . . . . . . . . . . . . . . . . . . . . 14
4.4 Scale Calibration . . . . . . . . . . . . . . . . . . . . . . . . . . . . . . . . . . . . . . . . . . . . . . . . . . . . . . . . . . . . . . . . . 15
4.5 Test Menu . . . . . . . . . . . . . . . . . . . . . . . . . . . . . . . . . . . . . . . . . . . . . . . . . . . . . . . . . . . . . . . . . . . . . . 16
5.0 Communication............................................................................................................................. 17
5.1 Pushbutton Keypad Print. . . . . . . . . . . . . . . . . . . . . . . . . . . . . . . . . . . . . . . . . . . . . . . . . . . . . . . . . . . 17
5.2 Escape Protocol . . . . . . . . . . . . . . . . . . . . . . . . . . . . . . . . . . . . . . . . . . . . . . . . . . . . . . . . . . . . . . . . . 18
5.3 Maintenance Protocol . . . . . . . . . . . . . . . . . . . . . . . . . . . . . . . . . . . . . . . . . . . . . . . . . . . . . . . . . . . . . 19
5.4 USB Connection . . . . . . . . . . . . . . . . . . . . . . . . . . . . . . . . . . . . . . . . . . . . . . . . . . . . . . . . . . . . . . . . . 20
6.0 Maintenance and Troubleshooting............................................................................................... 23
6.1 Maintenance . . . . . . . . . . . . . . . . . . . . . . . . . . . . . . . . . . . . . . . . . . . . . . . . . . . . . . . . . . . . . . . . . . . . 23
6.1.1 Basic Maintenance . . . . . . . . . . . . . . . . . . . . . . . . . . . . . . . . . . . . . . . . . . . . . . . . . . . . . . . . . . . . . . . . . 23
6.1.2 Cleaning . . . . . . . . . . . . . . . . . . . . . . . . . . . . . . . . . . . . . . . . . . . . . . . . . . . . . . . . . . . . . . . . . . . . . . . . . 23
6.2 Troubleshooting. . . . . . . . . . . . . . . . . . . . . . . . . . . . . . . . . . . . . . . . . . . . . . . . . . . . . . . . . . . . . . . . . . 23
6.3 Load Cell Replacement . . . . . . . . . . . . . . . . . . . . . . . . . . . . . . . . . . . . . . . . . . . . . . . . . . . . . . . . . . . . 24
6.3.1 Wiring Load Cell to Junction Box . . . . . . . . . . . . . . . . . . . . . . . . . . . . . . . . . . . . . . . . . . . . . . . . . . . . . . 25

2Summit SB-1150
Contents
Rice Lake continually offers web-based video training on a growing selection
of product-related topics at no cost. Visit www.ricelake.com/webinars
7.0 Specifications............................................................................................................................... 27
8.0 SD-1150-WP Scale Warranty........................................................................................................ 28

Introduction 1
1.0 Introduction
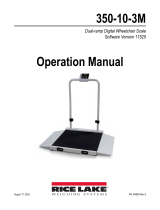
The Summit SB-1150 is a heavy-duty scale that offers exceptional performance in clinics and hospitals. Patients
walk or can be wheeled onto the weighing platform to be weighed.
The Summit SB-1150 Bariatric Wheelchair Scale is a fully electronic, low profile floor scale that measures 36 in x
36 in (.91 m x .91 m), and has a capacity up to 1000 lb (500 kg). The SB-1150 uses four corner-mounted, alloy steel
shear beam load cells, with the cells recessed into the frame channels for protection.
The Summit SB-1150 comes equipped with a large 1" LCD indicator display and 6 AA batteries for use when
power is not readily available. There is an optional 120/230V AC adapter which can be purchased.
Load cell cables run through the main channels and are held down with replaceable cable ties near each corner to
eliminate the possibility of cable damage. One threaded hole, located in the center of the deck, allows for
placement of a removable eyebolt for lifting the scale from above with chains. The scale must always be lifted from
above with chains through the eyebolt to avoid the possibility of foot and load cell damage from forklift tines. See
Figure 2-1 on page 3.
The adjustable feet allow for leveling the scale in the event of minor floor irregularities.
The Summit SB-1150 comes equipped with a large 1" LCD indicator. The indicator can be powered by 6 AA
batteries, also included. An optional 120/230V AC adapter can be purchased.
This manual can be viewed and downloaded from the Rice Lake Weighing Systems website at:
www.ricelake.com

2Summit SB-1150 Scale
1.1 Saf et y
Safety Signal Definitions:
Indicates an imminently hazardous situation that, if not avoided, will result in death or serious injury.
Includes hazards that are exposed when guards are removed.
Indicates a potentially hazardous situation that, if not avoided could result in serious injury or death.
Includes hazards that are exposed when guards are removed.
Indicates a potentially hazardous situation that, if not avoided, could result in minor or moderate injury.
Indicates information about procedures that, if not observed, could result in damage to equipment or
corruption to and loss of data.
General Safety
Do not operate or work on this equipment unless this manual has been read and all instructions are
understood. Failure to follow the instructions or heed the warnings could result in injury or death.
Contact any Rice Lake Weighing Systems dealer for replacement manuals.
Failure to heed may result in serious injury or death.
People with disabilities, or who are physically frail, should always be assisted by another person when using this scale.
Do not allow minors (children) or inexperienced persons to operate this scale.
Do not use this scale when your body/feet are wet, such as after taking a bath.
Do not use the scale on slippery surfaces, such as a wet floor. Avoid contact with excessive moisture.
Do not jump on the scale.Do no operated without all shields and guards in place.
Do not place fingers into slots or possible pinch points.
Do not remove or obscure warning labels.
A minimum of two people should transport, unpack and assemble the scale for their own personal safety and to ensure
the integrity of the scale.
Do not use any load bearing components worn beyond 5% of the original dimension.
Do not use this product if any components are cracked, broken, frayed or cut.
Do not exceed the weight limit of the scale. Weight exceeding the maximum capacity (1000 lb/500 kg) may damage the scale.
Operating at voltages and frequencies other than specified could damage the equipment.
Do not drop the scale or subject it to violent shocks.
Do not use in the presence of flammable materials.
Do not make alterations or modifications to the scale.
Do not use for purposes other than weight taking.
Always use medical grade isolators for USB and RJ45 when connected to non-medical equipment, or when other medical
equipment is connected to patient during procedure.
DANGER
WARNING
CAUTION
Important
WARNING
Important

Installation 3
2.0 Installation
2.1 Scale
Standard installation of the scale consists of the following:
• Select a site
• Adjust the four leveling feet on the scale
• Connect cable to the indicator
• Calibrate the scale
2.1.1 Site Preparation
Consider the following when choosing a site for the scale:
• Select a site where overweight loads can maneuver easily without crossing the platform
• Avoid areas where damage could occur from side impacts of wheels or forklift tines
• Avoid areas where falling objects could cause shock damage
• Avoid areas where water may damage a scale not meant for a washdown environment
• The scale must be level within 1/4'' of horizontal
• The interface cable between the scale and the indicator must be protected against crushing, cutting and
moisture damage
The scale must not be loaded beyond capacity, even momentarily.
Choose a site where the floor is level to 1/4'' to avoid excessive shimming. The floor may require
modification if unable to select an area up to this standard.
If the chosen site has potential dangers to cable integrity, some method of protection, such as running the
cable in conduit, is required.
2.1.2 Unpacking
Remove all packing material and inspect the contents for damage possibly caused during shipment. Contact Rice
Lake Weighing Systems and the shipper immediately if there is damage to the scale. The shipping container should
contain the scale, scale feet, the indicator, and a 10-ft length of load cell cable.
The Summit SB-1150 has one threaded hole located in the center of the deck to allow for the installation of an
eyebolt. An eyebolt hook and chains can then be used to lift the scale. It is recommended to use a 1/2 in-20NF
eyebolt for lifting the scale.
Figure 2-1. Proper Lifting Technique
Important

4Summit SB-1150 Scale
2.1.3 Assembly
The scale feet are shipped detached from the scale for load cell protection during shipment.
1. Unpack all parts.
2. Ensure each foot is screwed in until the foot touches either the load cell or the underside of the deck.
3. Unscrew each foot three complete turns.
4. Place a spirit level on the deck.
5. Adjust corners not contacting the floor by unscrewing the feet on those corners until they just contact the
floor surface.
6. When all the feet are in contact with the floor, check the deck with the spirit level to ensure the scale is
within 1/4'' of level.
2.1.4 Electrical Interface to the Indicator
Ten feet of 4-wire cable for connecting the scale to the weight indicator is supplied with each scale. The junction
box is easily accessible through an access plate located on the side of the scale. Use the following steps to wire the
junction box.
1. Remove the two #10 x 3/8" screws.
2. Slide the junction box assembly out of the deck.
3. Open and remove the top of junction box.
4. Push the cable end into the junction box through a cord grip.
5. Connect the wires to the indicator terminal (Figure 2-2) as shown in Table 2-1.
6. Pull out excess and tighten the cord grip to hold the cable snugly.
Table 2-1. Junction Box Connections
Figure 2-2. Junction Box Wiring
7. The cable must be routed to the indicator in a manner that will protect the cable from damage. The method
of cable protection in non-washdown applications is shown in Figure 2-3 on page 5. Leave a loose coil of
excess cable under the scale to facilitate lifting of the scale for servicing and cleaning
Cable Color Code Junction Box
White + Excitation
Green - Excitation
Black + Signal
Red - Signal
Bare Shield
Indicator
Te rm in al
Location

Installation 5
Figure 2-3. Cable Protection
8. Complete the connections to the indicator once the cable is protected and in its final position.
9. Trim corners, if necessary. See Figure 6.3 on page 24.
10. Ensure all strain relief fittings are tight.
11. Replace the junction box cover and slide the junction box back into the scale deck.
12. Replace the access plate and secure with the screw removed in Step 1.
SCALE FLOOR
LOAD CELL CABLE

6Summit SB-1150 Scale
2.2 Indicator
The connection ports on the back of indicator include:
Figure 2-4. Indicator Connection Ports
2.2.1 Load Cell Connections
The scale comes with 10' of load cell cable; this cable must be connected to the indicator.
To gain access to the load cell connection on the indicator:
1. Unscrew and remove the tilt stand bracket from the indicator.
Figure 2-5. Remove Tilt Stand
2. Remove the four back retaining screws to remove the back cover to the indicator.
USB2
Connection
RS-232
Connection
AC adapter
connection
Load cell connection
(remove cover)
Unscrew tilt stand
knobs and remove tilt
stand from indicator

Installation 7
Figure 2-6. Remove Back Cover of Indicator
3. Plug the end of the load cell cable into the load cell connection. When it clicks the load cell cable is
properly seated into the connection.
Figure 2-7. Load Cell Connection Point
4. Reinstall the backplate and re-attach to the tilt stand.
Load Cell
Connection

8Summit SB-1150 Scale
2.2.2 Inserting Batteries
The six AA batteries that come with the scale offer an average of 25 hours of continuous use.
To install the batteries:
1. Open the battery chamber cover by loosening the thumbscrew.
2. Insert batteries into the battery chamber as illustrated in the back of the chamber.
Figure 2-8. Battery Chamber
3. Close the battery chamber.
Batteries must be removed from the unit prior to long periods of disuse or long term storage.
2.3 Optional Power Connections
Rice Lake Weighing Systems offers optional AC adapters to use when power is available. USB power can also be
used.
Using adapters not supplied by Rice Lake Weighing Systems voids all warranties.
Figure 2-9. Power Connection Site
If an external power supply or USB power supply is connected, the battery flag on the display is turned off.
When using battery or USB power supply, the back-light power is deducted to 60%.
Thumb Screw
Note
Important
AC power connection for
optional AC adapter.
USB Power Connection
Note

Operation 9
3.0 Operation
This section describes the indicator, functionality of each button and basic scale operations.
Figure 3-1. Indicator Front Panel
Table 3-1. Indicator Key Functions
The front panel keys are sensitive, press gently.
Item
No. Function
1 Access the BMI (Body Mass Index) function. The BMI function must be enabled in configuration and a sta-
ble weight must be displayed.
2 Subtract weight off the scale. For example: oxygen unit or other equipment.
3 Return to weigh mode after displaying BMI value.
4 Print — long key press sends data out from the RS-232 port.
LB/KG — short key press toggles between kilograms and pounds (must be enabled in configuration mode).
Toggle is disabled in the BMI mode.
5 Clears the weight value and displays zero after three seconds.
The weight must be stable and less than 2% of capacity.
6 Hold & Release — First press holds the current weight value displayed. A second press releases the weight
value.This key is disabled in the BMI mode.
7 Turns the scale on and off.
8 Accepts the value of the parameter last entered and moves to the next stage.
For example, accept the input height value in the BMI mode.
A long press of the ENTER key during start up enters the ID display (pre-parameter mode).
9 Adjust the value of the flashing digit/number.
For example, adjust height input (0.5 in/0.5 cm) in the BMI mode.
1234
5
6
7
98
Important

10 Summit SB-1150 Scale
3.1 Powering the Scale
1. Press to turn the scale on. 0.0 displays.
2. Press and hold until OFF displays to turn the scale off.
3.2 Weigh Mode
1. Step onto the scale. The weight value displays, the LOCK annunciator turns on in the upper display and an
audible tone indicates the end of the weighing process.
2. Short press to toggle the display from kg to lb, if desired.
3.3 Hold Release
1. Step onto the scale. The weight value displays, the LOCK annunciator turns on in the upper display and an
audible tone indicates the end of the weighing process.
2. Press to hold the weight value on the display.
3. Step off the scale. The weight continues to display and the HOLD LOCK annunciator turns on in the upper
display. The does not work at this stage.
4. Press to return to zero. 0.0 is displayed and the ZERO annunciator is on.
Pressing prior to stepping on the scale will also hold the weight display.
3.4 Preset Tare
1. With the weight at 0.0 and the ZERO annunciator on, place the additional items (e.g. oxygen unit or other
equipment) onto the scale. Wait for the weight to stabilize.
2. Press until
0.0 is displayed and the NET annunciator is on.
3. Remove the additional items from the scale. The weight is displayed with a negative symbol to the left of it
and the NET annunciator remains on.
4. Step on the scale with the additional items. The weight is displayed and the NET annunciator remains on.
The weight of the additional items remain stored in memory.
5. To cancel the tare weight, press and hold until the NET annunciator is no longer displayed. The
weight returns to 0.0 and the GROSS annunciator displays.
The tare weight is also canceled when the scale is turned off.
3.5 Toggle Tare
Toggle tare is used to set a tare value when the weight of the additional items is known.
1. With the weight at
0.0
and the
ZERO
annunciator on, press . The default tare value (33.0 lb/15.0 kg) is
displayed.
2. Press and/or to adjust the tare weight value.
3. Press to accept the entered value and start the tare function. The weight is displayed with a negative
symbol to the left of it and the NET annunciator is displayed.
Note
TARE
T
TARE
T
Note
TARE
T
ENTER

Operation 11
4. Step on the scale with the additional items. The weight is displayed and the NET annunciator remains on.
The weight of the additional items remain stored in memory.
5. To cancel the tare weight, press and hold until the NET annunciator is no longer displayed. The
weight returns to 0.0 and the GROSS annunciator displays.
3.6 Body Mass Index
3.6.1 LB Mode
1. With the weight at 0.0 and the ZERO annunciator on, step onto the scale. The weight value displays, the
LOCK annunciator is on and an audible tone indicates the end of the weighing process.
2. Press . The
BMI and FT/IN annunciators display and a default value of 5' and 7.5'' (5-0.75) is flashing.
3. Press and/or to adjust the height value.
4. Press to accept the entered height value. The BMI value is displayed and the BMI annunciator is on.
5. Press to return to turn off the BMI function and return to the weigh mode.
3.6.2 KG Mode
1. With the weight at 0.0 and the ZERO annunciator on, step onto the scale. The weight value displays, the
LOCK annunciator is on and an audible tone indicates the end of the weighing process.
2. Press . The
BMI and FT/IN annunciators display and a default value of 170.0 cm (170.0) is flashing.
3. Press and/or to adjust the height value.
4. Press to accept the entered height value. The BMI value is displayed and the BMI annunciator is on.
5. Press to return to turn off the BMI function and return to the weigh mode.
TARE
T
BMI
ENTER
CLEAR
BMI
ENTER
CLEAR

12 Summit SB-1150 Scale
4.0 Configuration
The scale configuration is used to set parameters and their values that are essential for the functioning of the scale.
Figure 4-1. Setup Switch Location
Use the following steps to enter into configuration mode.
1. Ensure the scale is off.
2. Press and hold the On/Off key and the ENTER key until Id displays. The unit continues to power on.
3. Remove the tilt stand cover by loosening the screws securing it to the indicator.
4. Use a small non-conductive tool to press the setup switch. PROG displays.
4.1 Scale Navigation
The scale is configured using a series of menus accessed through the front panel when the scale is in setup mode.
Figure 4-2. Top Level Menu
To scroll through the parameters of each menu, press the BMI key.
4.1.1 Change Parameters
• Press the ENTER key to enter a menu/parameter
• Press the Up/Down arrow keys to scroll through the available selections
• Press the ENTER key to save the selection and move to the next parameter
4.1.2 Enter Numbers
• Press the ENTER key to enter parameter value
• Use the Up/Down arrow keys to increment/decrement numbers
• Press the BMI key to move to the next digit
• Press the ENTER key to save value and move to the next parameter
4.1.3 Save and Return to Main Menu
• When a parameters selections/values are correct, press the ENTER key. SAVE displays.
• When all parameters selections/values are correct, press the ENTER key again. DONE displays
• Press the BMI key to cycle back to the top level menu choices
Remove screws, both sides Setup Switch
Battery
Compartment
Tilt Stand Cover
DEFCALIBPROG DONE TEST

Configuration 13
4.2 Programming Mode Menu
Figure 4-3. Programming Mode Menu Structure
Table 4-1 lists the various display messages and sequence when setting up the scale.
Parameter Selections Description
FULL Value (1000 lb) Full capacity of the scale
LOAD Value (200 Lb) Amount of weight applied during calibration; can also be changed in the calibration menu
ASTART Value (2.0) Weight process start limit — Maximum (full capacity)/10; Determines when the weight algorithm
starts (when the ---- is displayed), below this value the scale displays live weight.
ARW Value (4.0 Lb) Auto Reweigh — Restarts the weight algorithm if the weight changed by more than this value.
SAL Value (0.5) Semi Auto Live — the interval between weight displays during the algorithm process.
ROUND 0.2
0.5
1
2
5
10
20
0.1
Scale Resolution — display toggles between a numeric value and ROUND.
The decimal point location is set to the DISP parameter display decimal point location.
NOTE: Default for kg is 1
DISP 0.0
0
0.0000
0.000
0.00
The display toggles between a numeric value and DISP.
Table 4-1. Configuration Mode Menu
Power Off
Power On-Off
START Kg-Lb Key
0.000
Software Version
Round xx
Full xxx
At Press and
hold
OP1=X
SAVE
T-OFFX
DONE
OP2=X
OP4=X
OP3=X
OP5=X
OP7=X
OP6=X
OP8=X
Press and
hold the
Kg-Lb key
to advance
to option
2 through
option 8.
= DEF =
A TOLXX
A LEN X
MESS
A TImE XX
BAUD XX
Drange
Software ID SET=X
OP9=X
OP10=X

14 Summit SB-1150 Scale
4.3 Default Menu
The default menu is used to return the scale back to its factory settings.
Figure 4-4. Default Menu
1. Press the ENTER key. The display shows a default value of NO.
2. Press the Up/Down arrow keys to display YES.
3. Press the ENTER key. DONE displays.
4. Press the BMI key to return to main menu.
Selecting YES and pressing the ENTER key will reset to factory defaults settings without changing the
calibration and returns the indicator to weigh mode.
BAUD 96
48
1152
576
384
288
192
144
Baud Rate – displays first two digits of baud rate only.
ATOL Value (10) Algorithm Initial Tolerance — Maximum value is 255.
Value above 255 does not allow indicator to proceed and will return to the previous value
ALEN Value (8) Algorithm Initial Exponent — Maximum value 10.
Value above 10 does not allow indicator to proceed and will return to the previous value.
ATOUT Value (10) Algorithm maximal exponent — Maximum value is 15.
Values above 15, does not allow indicator to proceed and will return to the previous value.
TOFF 5
4
3
2
1
0
9
8
7
6
Auto off timer — Measured in minutes.
0 = always on, maximum is 9 minutes.
When using an external power supply, this parameter is not used.
UNITS KG/LB
KG
LB
Units — select the unit of measure.
OP OP0
OP1
OP2
OP3
Binary options:
OP0 — Live weighing options (0=disable, 1=enable)
OP1 — Communication protocol (0=ESC, 1=maintenance)
OP2 — BMI menu (0=disable, 1=enable)
OP3 — RTC power (0=disable, 1=enable)
OP4 - Semi-Auto-Live — (0=disable, 1=enable)
OP5 - Full calculation — (0=spatial, 1=multiply by (0=disable, 1=enable
OP6 - Tare - (0=disable, 1=enable
OP7 - Bat type — (0=dry batteries, 1=rechargeable batteries)
OP8 — OIML mode - (0=disable, 1=enable
Parameter Selections Description
Table 4-1. Configuration Mode Menu (Continued)
DEFCALIBPROG DONE TEST
NO
YES
Note

15 Summit SB-1150 Scale
4.4 Scale Calibration
To calibrate the scale:
1. Ensure the scale is off.
2. Press and hold the On/Off key and the ENTER key until Id displays. The unit continues to power on.
3. Remove the tilt stand cover by loosening the screws securing it to the indicator.
4. Use a small non-conductive tool to press the setup switch. PROG displays.
Figure 4-5. Setup Switch Location on Back of Indicator
5. Press the BMI key to scroll to CALIB.
6. Press the ENTER key to enter the calibration parameters.
7. Press the ENTER key and a numeric value is displayed which represents the amount of weight that is used
for calibration. Lb flashes. Press the Up/Down arrow keys to the desired unit.
8. Press ENTER. The digit on the right flashes.
9. Use the Up/Down arrow keys to increment/decrement the flashing digit if required.
10. Use the BMI key to move to the left.
11. When the value is displayed, press the ENTER key. Clear displays.
12. Ensure the scale platform is clear of weight, then press the ENTER key. ===== displays.
13. When Put xxx.xx. displays, put the weight on the platform, then press the ENTER key. ===== and then Save
displays.
14. Press the ENTER key. Done displays.
15. Press the BMI key three times to exit to the top level Done parameter.
16. Press the ENTER key to return to weigh mode.
To exit calibration without changing zero or span existing calibration, press the CLEAR key, then the BMI key.
Setup switch location
on back of indicator.

Configuration 16
4.5 Test Menu
To access the TEST menu:
1. Ensure the scale is off.
2. Press and hold the On/Off key and the ENTER key until Id displays.
3. Press the ENTER key again.
4. Continue to press the BMI key to scroll through the various menu items.
5. Once complete, press the BMI key again and Done is displayed.
6. Press the ENTER key to start the weighing process.
Parameter Choice Description
VER Value Displays the current software version.
BAT Value Displays the current battery level.
VALUE Value Displays the actual value.
A2D Value Displays the actual raw counts of the scale.
Table 4-2. Test Menu
/