See the Important Safety and Product Information guide in the product box for product warnings and other
important information.
Turning the Unit On or Off
To turn on the unit, press and release the Power key. When the Warning
screen appears, select I Agree to view the Home screen. To turn off the
unit, press and hold the Power key.
Acquiring GPS Satellite Signals
When you turn on the unit, the GPS receiver must collect satellite data and
establish the current location. When the unit acquires satellite signals, the
signal strength bars at the top of the Home screen are green . When the
unit loses satellite signals, the green bars disappear and the position
icon displays a ashing question mark.
Please visit www.garmin.com for additional documentation and information.
Turning the Unit On and Acquiring a Signal Using Routes and Tracks
May 2009 190-01074-01 Rev. A Printed in Taiwan
Adjusting the Display Settings
To adjust the backlight:
1. Press and release the Power key.
2. Select Backlight.
3. Press left or right on the Rocker to manually adjust the backlight.
NOTE: Press the Power key repeatedly to cycle between
maximum backlight, minimum backlight, and your manual setting.
To switch between day mode and night
mode:
1. Press and release the Power key.
2. Select Color Mode.
3. Press left or right on the Rocker to switch
between modes.
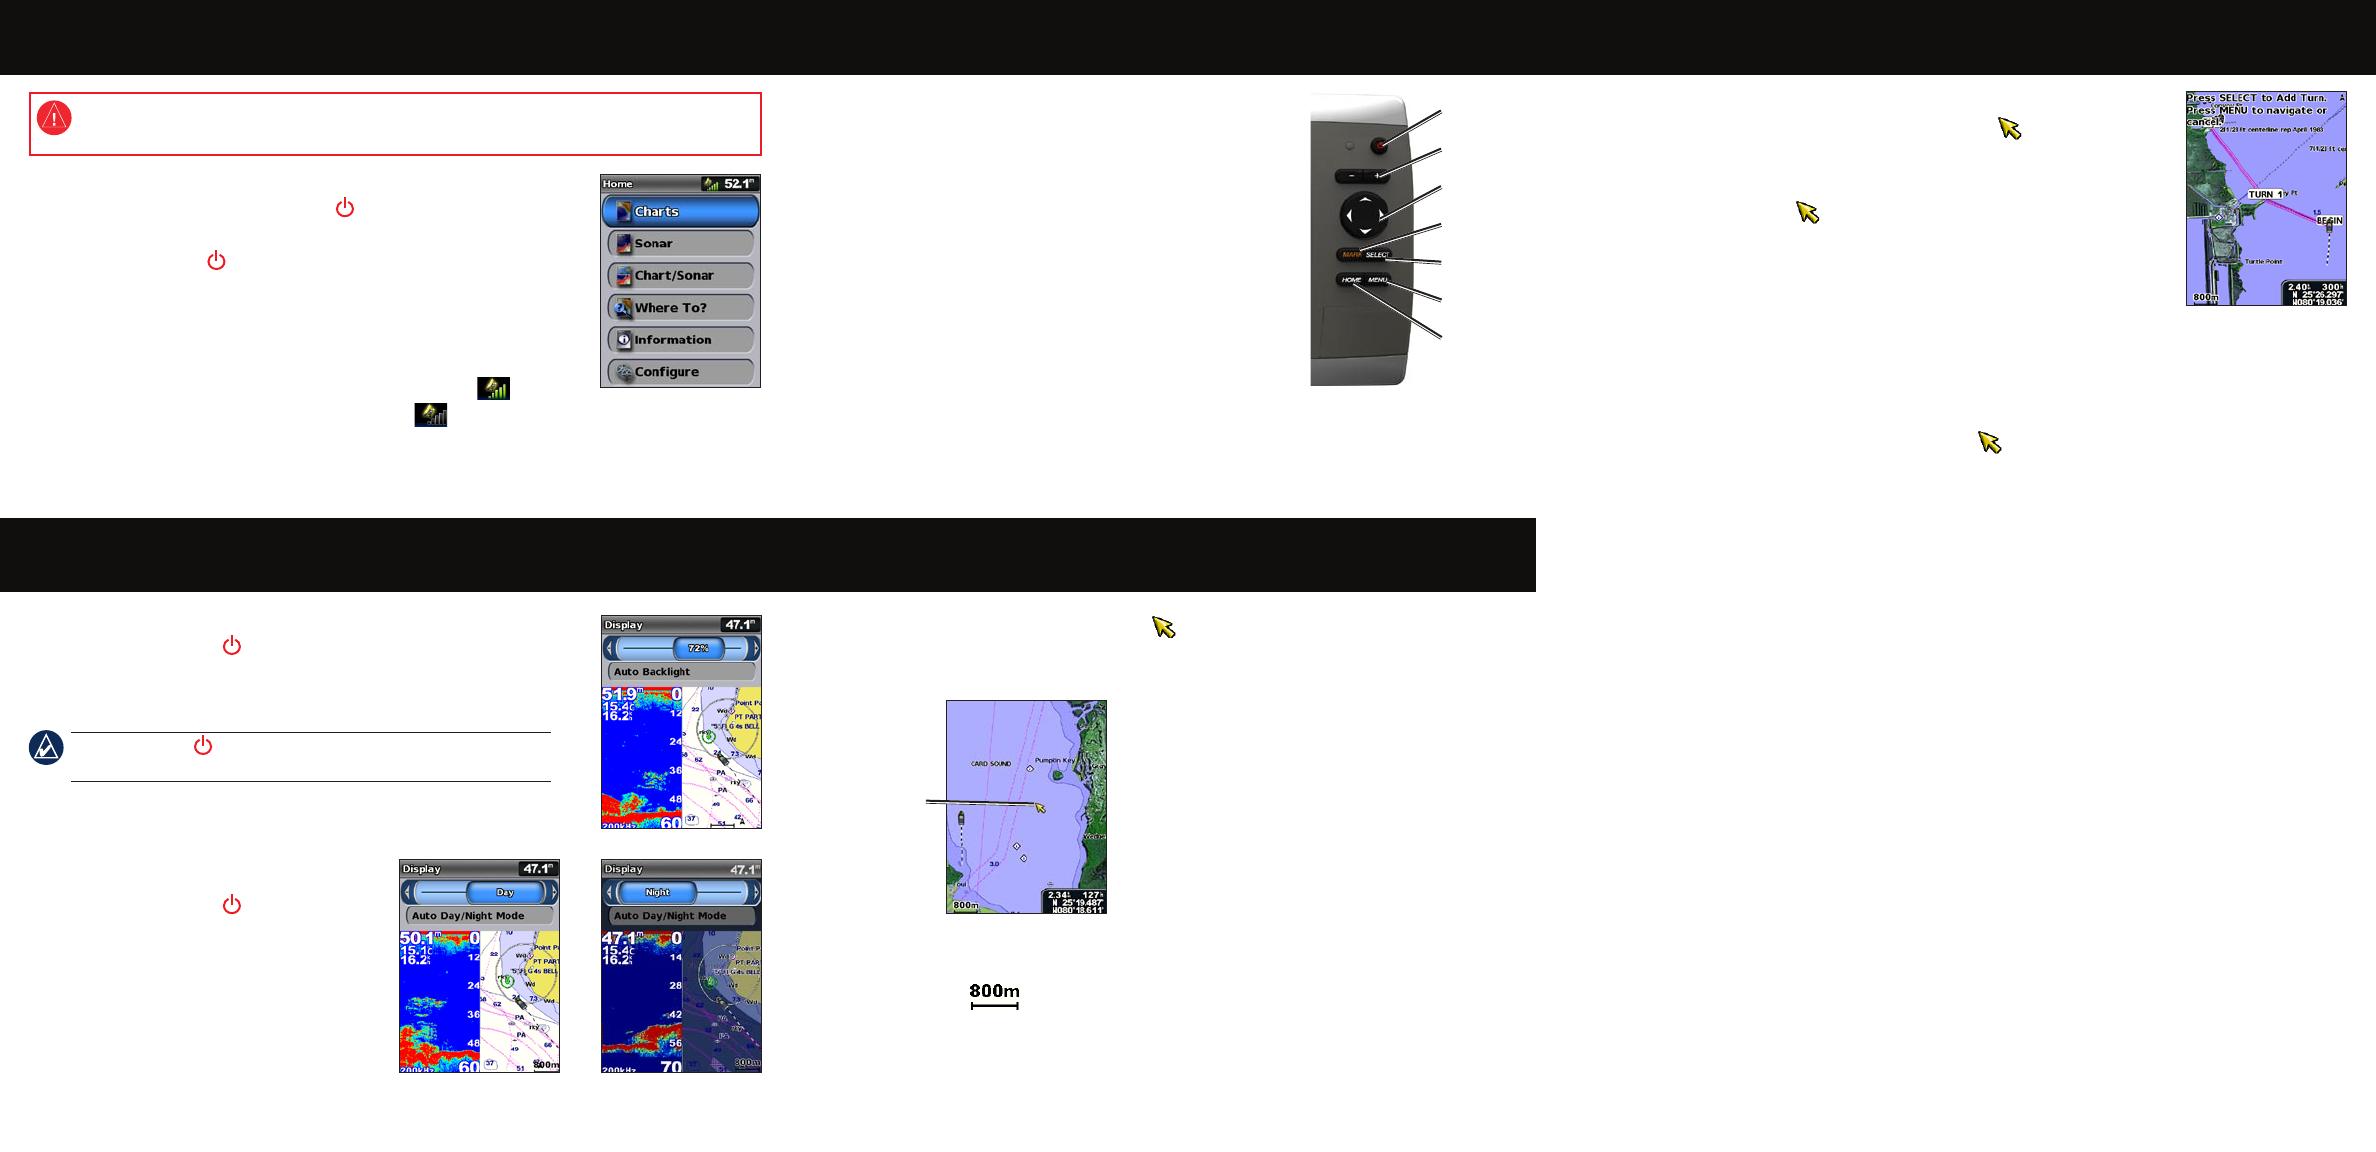
Panning and Zooming on the Navigation Chart
Use the Rocker to move the map pointer ( ) away from your current location and to scroll
to other areas on the Navigation chart. As you pan past the edge of the current map display,
the screen scrolls forward to provide continuous map coverage.
As you move the map pointer, you can view the
distance and bearing from your current location and
the map pointer location coordinates in the lower-
right corner of the map.
To pan the map, press up, down, right, or left on the
Rocker.
Zooming In and Out on the Map
The Range (-/+) keys control the zoom level, indicated by the scale at the bottom of the
Navigation chart ( ). The bar under the number represents that distance on the map.
To create a route from your present location:
1. From the Navigation chart, use the map pointer ( ) to highlight your
destination and press SELECT.
2. Select Navigate To > Route To.
3. Use the map pointer ( ) to select the location at which you want to
make the last turn toward your destination.
4. Press SELECT. Repeat this step to add additional turns.
5. Press MENU to cancel, to undo the last turn, or to begin navigating the
route.
To create a route in another location:
1. From the Home screen, select Information > User Data > Routes > New Route.
2. Select Use Chart or Use Waypoint List.
3. If you select Use Chart, use the map pointer ( ) to select the initial location at which you
want to start the new route. If you select Use Waypoint List, select the rst waypoint on the
route and press SELECT.
4. Choose the location of the rst turn and press SELECT. Repeat until the route is complete.
5. Select MENU to save the route.
6. Select the route to edit the route, delete the route, or navigate to the route.
To edit a route:
1. From the Home screen, select Information > User Data > Routes.
2. Select the route to edit.
3. Select Edit Route. You can edit the route name or use the chart or turn list to edit the route
turns.
To turn on the track log:
From any chart except the Fish Eye 3D, select MENU > Waypoints & Tracks > Tracks > On.
A trailing line on the chart indicates your track.
To clear the active track:
From any chart except the Fish Eye 3D, select MENU > Waypoints & Tracks > Active Tracks
> Clear Active Track. The track memory is cleared; the current track continues to be recorded.
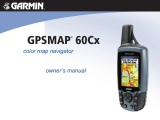
Using the Keypad
POWER/BACKLIGHT—Press and hold to turn the unit
on or off; press and release to adjust the backlight and the
day and night modes.
RANGE (-/+)
—Press to adjust the range of the sonar, to
zoom in or out on a chart, to page up or down on lists, or to
adjust the backlight level.
ROCKER
—Press up, down, left, or right to move through
menus, highlight elds, and enter data.
MARK—Press to mark a waypoint.
SELECT
—Press to select highlighted items.
HOME
—Press to return to the Home screen.
MENU
—Press to access additional settings and conguration options; press to return to the
previous screen when indicated.
Day Mode Night Mode
Map pointer
© 2009 Garmin Ltd. or its subsidiaries
Home Screen
POWER/
BACKLIGHT
ROCKER
RANGE
MARK
HOME
MENU
SELECT